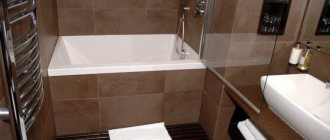
A mosaic shower tray decorates the room, giving its design originality. Special tiles are glued to the surface of the walls and floor, which do not become slippery when exposed to water or soapy water. Since installation does not require special equipment, the apartment owner can install the mosaic elements himself.
Pros and cons of mosaics in the bathroom
If you want to choose tiled mosaic as a finishing material, then you should understand that it has advantages and disadvantages.
The advantages of using it for the bathroom are as follows:
- High strength material.
- Versatility and flexibility - you can decorate bathroom walls, niches, ledges.
- Resistant to high humidity and temperature changes.
- A variety of colors and shades, allowing you to create incredibly beautiful decor.
- The material is highly resistant to fading.
- Possibility of installation on any surface: plaster, concrete, metal, wood.
Mosaic is an ideal option for cladding any surfaces, even curved ones.
When choosing a material, it is worth considering its disadvantages:
- High cost of material.
- Wall cladding is a labor-intensive and painstaking process, which explains the high cost of its installation.
At the same time, mosaic is a reliable and durable wall covering that creates its own unique design.
Mosaic is one of the most expensive materials
Briefly about the main thing
Tiles are an ideal finishing material for the bathroom due to their combination of performance characteristics and variety of designs. Ceramics are used for wall cladding; porcelain stoneware is more suitable for flooring. The design also uses quartz vinyl and mosaic.
Any tile is selected in size based on the dimensions of the room; the appearance depends on the chosen style. For finishing, the easiest way is to choose a material from one collection; the result is guaranteed to be stylish. When purchasing, you should check the ceramics for the quality of the glaze and the accuracy of the geometric parameters.
Types of materials for manufacturing
A wide range of materials for the production of mosaics allows you to create an original interior in the bathroom in accordance with the conditions of the given room.
The most common materials for its manufacture are:
- Natural stone is the most expensive material for production, which has a number of advantages:
- strength and durability;
- environmental friendliness;
- creating a chic look for your bathroom.
Natural stone mosaics create a unique design
As a rule, mosaics made of natural stone, namely granite and marble, are used for floor finishing.
- Cork is a finishing material with high moisture resistance, environmental friendliness and durability. Thanks to special manufacturing technology, cork is resistant to moisture, does not form mold and is easy to care for. A panel made of cork material will look original in the bathroom.
- Glass is a durable, moisture-resistant, waterproof and wear-resistant material. The glass version is very easy to care for; it is not susceptible to modern chemicals and sudden temperature changes. With the help of correctly selected mosaics for lighting, you can visually expand the boundaries of the room.
- Ceramics is a popular material; it is not expensive, but has high qualities. The main advantage of ceramics is the variety of colors and shapes with which you can create a colorful, unique interior.
- Shell is a unique, durable, environmentally friendly material that does not fade over time and is highly durable. A room decorated with mother-of-pearl mosaic takes on a sophisticated, luxurious look. Thanks to the multiple colors, the shell will fit into any interior.
- Smalt is a priority, affordable material for making mosaics. It is durable and highly moisture resistant, which makes it widely used for cladding bathrooms. Smalt can withstand a high degree of load, so it can be used to decorate the floor.
- Metal is an uncommon material because in conditions of high humidity in the bathroom it tends to oxidize and rust. As a rule, such material is used only imported in certain places of the room to give the interior some kind of futuristic hint.
- Plastic is a popular material that is wear-resistant, moisture-resistant, and is not susceptible to steam and temperature changes.
Natural stone is one of the most durable materials.
Cork mosaic is suitable for creating panels
Glass mosaic is recommended to be used above the sink
Ceramics are very popular when finishing the bathroom due to their low cost.
The shell gives the bathroom interior an unusual style
Smalt mosaic is mainly used for floor finishing
Metal mosaic is suitable for modern style in the bathroom
Plastic mosaic is another economical option for finishing a bathroom.
Sink above the toilet in a small toilet
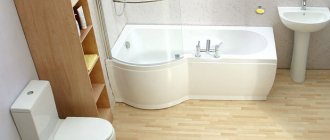
Combo toilets are becoming widespread in modern design. This is a combination of a toilet and a sink on a cistern. The sink serves as a cistern lid. This is very beneficial for owners of small toilets, as it saves space. On the other hand, there is a noticeable saving of water (up to 25%) due to the fact that the water used for washing hands enters the tank and is used for flushing.
There are various filters inside the tank to purify used water. Automation controls the overflow of the tank if too much water accumulates after washing hands. If there is not enough water, it comes from a special unit. Often the combo toilet is equipped with a shower.
A toilet combined with a washbasin to save space and water. Source resim-indir.sayt.im
The downside is the water temperature; you won’t be able to wash your hands with warm water. Additionally, access to the sink may be difficult. An important factor can be considered natural disgust, which not everyone can overcome: it is psychologically difficult to carry out hygienic procedures over the toilet - cleaning the combo toilet should be carried out in the morning and evening.
Option for combining a toilet with a sink on one wallSource tapsbathrooms.com
Use Cases
Bathroom finishing options can only be limited by your imagination. It is important to know moderation in everything; it is not necessary to cover all the walls with it. It will be enough to place the correct accents on individual areas of the room.
Let's consider common decoration options in detail.
Sink area
Decorating the sink area will allow you to focus on the work area, while protecting it from moisture. Most often, decorative frames are laid out for mirrors, shelves and window openings.
Mosaic in the sink area protects the wall from excessive moisture and dampness
Vertical surfaces
Wall cladding above the bathtub will completely transform the room. It is on this that the main attention is concentrated.
Laying a mosaic on the wall above the bathroom is the most popular option.
Laying out the partition separating the bathtub from the bathroom with metallic-colored material creates a unique effect.
Covering the floor with mosaics gives the interior a special appeal. In addition, this coating is reliable and will serve you for many years.
The main advantage of mosaic flooring is its high wear resistance.
The display in the form of a “rug” under the sink or a panel in the very center of the room looks very original. Glass mosaics of dark shades are mainly used to decorate the floor.
Cladding of individual surfaces
The mosaic looks best when it is allocated individual surfaces, such as niches and shelves.
Mosaic shelves look effective and very stylish
Selected individual elements combined with the overall interior give a special coziness.
Individual mosaic elements give the bath a special coziness
You can also highlight the shower area by creating a vertical stripe that will blur the boundaries of the space, visually increasing the height of the room.
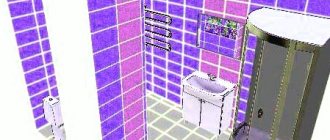
A mosaic wall in the shower erases the boundaries of space in the room
Bathroom with complex geometry
Mosaic is ideal for tiling a room with asymmetrical walls or a sloping ceiling. With its help, you can not only beat up asymmetrical walls, creating an original ornament, but also decorate plumbing items, for example, a sink or bathtub.
Complex room geometry
If you have a non-standard room design with rounded planes, curved lines, and many corners, mosaic will come in handy.
Its flexible base is capable of repeating intricate configurations, and the interior will become streamlined and holistic. If you use ceramic tiles, you will need a lot of effort and time for cutting and installation.
Mosaics can be used to decorate the outer surface of a bathing bowl, pedestal, boxes with pipes, columns, and rounded racks.
In attics and other rooms with sloping ceilings, mosaic tiles can be a successful covering. This type of finishing is also relevant for partitions that zone space - in combined bathrooms, between the shower and toilet.
Color solution
It is very important to choose the right color, because thanks to this you can visually enlarge or reduce the room, as well as create a unique atmosphere.
Mosaic in green tone is optimal for the bathroom, since the color has a calming effect on the psyche and promotes relaxation
When choosing a color scheme, it is important to be able to correctly combine colors and shades:
- white is an excellent base for experimenting with other shades. Mosaic, made in light or gray colors, creates a peaceful, calm atmosphere, while visually increasing the space of the room;
- a combination of white material with blue or light blue shades will create a seaside atmosphere. Use dark shades of blue in the interior with caution, otherwise you can make the room uncomfortable and cold.
- Black color gives a special chic to the interior, especially if you add splashes of white and golden details to it. Even mirror elements will do.
- The use of a wall panel will add unusualness and originality to the design; it is advisable that the wall on which it will be located is of a single, calm shade, for example brown.
- Red mosaic is more suitable for spacious rooms, since the red color emits strong energy. It is advisable to use in combination with white, black and metallic shades.
- Orange and yellow colors are very popular now; they give a unique, positive look to the room. Used in combination with white, cream and green.
- The green finish looks harmonious in combination with shades of yellow and cream.
- In addition to the listed color combinations, a display of peach, beige and pink shades will look very good.
A wall panel adds special sophistication to the bathroom interior.
Thanks to the right combination of colors with the overall interior and lighting, you can correct the shortcomings of the room.
A stylish toilet is a reality
Are you sure that the toilet space is too small to implement stylistic ideas? You are wrong! It is quite enough to indicate the direction of the decor.
Classic
The classic furnishings are distinguished by an abundance of decorative details, pretentious plumbing fixtures and gilded threads. Everything is elegant and discreet. The high cost of finishing the toilet room will be ensured by expensive materials and several elegant things in the interior. In terms of beauty of design, such a toilet will not yield to the luxury of living rooms. Just imagine a chocolate background with a baroque pattern, brown laminate flooring, trimmed with white baseboards to match the plumbing.
Classic style toilet interior
The interior of the toilet is filled with quite simple, but at the same time “thoroughbred” accessories. Nobility shines through in the design of the oval-shaped mirror, enclosed in a gilded frame, and in the design features of the sconces, decorated with vintage lampshades. A fascinating picture, isn't it?
A mirror in a gilded frame is a bright accent of the interior
Country
Excellent interior for a small toilet. Stylistic canons are tied to rural life. The situation may be deliberately naive or demonstratively rude. To implement the main ideas you won’t need a lot of space. The sunny atmosphere in the toilet room can be recreated using a simple color combination of white-yellow paints and ultramarine.
Country style toilet
Country style is not characterized by rationality, so there will be no restrictions on additional accessories when decorating the toilet. The only thing you need to adhere to is color harmony. The towel should match the colors of the rug or curtains hiding the shelf. Bouquets of dead wood in the decor will not be superfluous.
Minimalism
An excellent solution for the interior of a modest-sized toilet. The style saves maximum space. The external rigor of the design and asceticism of the decor are compensated by the color and texture variety of finishes. The wall surface can be painted in muted graphite and diluted with a dusty blue tint. Below it is worth putting snow-white panels in harmony with the plumbing equipment.
Minimalism style will save maximum space in the toilet
In the minimalist decoration of the toilet room, strict lines should prevail. The mirror here will not have a frame, and the plumbing elements will delight you with the simplicity of their outlines, imparted by slightly smoothed corners. Those few accessories from a series of mandatory ones that will be present in the interior of the toilet should echo the palette of the overall design. This is the easiest way to harmonize a minimalist space and give the room a sophisticated look.
Minimalism in the interior of the toilet
Eco style
The direction brings spaciousness and freshness. The interior of a small toilet will be filled with the breath of nature. Only natural materials are used in decoration. The almost complete rejection of synthetic substitutes increases the cost of finishing work. The furnishings are dominated by warm, natural tones. The emphasis is on wood tones and the color of young growth. Metal and glass elements in the room are present in minimal quantities. Accessories include wicker baskets, shelves, and vases. It is permissible to insert dried branches into the latter.
Eco-style toilet interior
The process of laying and finishing tiles
Surface tiling is a rather painstaking procedure that requires experience and skill. Laying tiles right away, even in a small room, is quite difficult.
It is worth remembering the following algorithm of actions.
Leveling surfaces. The mosaic will last for a long time only on a perfectly flat surface. If there are deviations on the walls or floor, they are eliminated using putty and primer. The floor is leveled with a cement solution, which is used to create a screed. After screeding the floor covering, a level check is carried out. The finished surface for installation must be clean, dry and perfectly flat.
Before laying the mosaic, the surface must be perfectly leveled.
Marking. After the base is leveled and primed, mark the area on which the tiled option will be laid. This can be done using a level.
The surface is marked so that all cut tiles are in the corners between the floor and the wall.
After leveling, it is necessary to mark the surface for the tiles
Slicing. After marking the base, it is necessary to cut the tiles along the marked lines. Excess pieces are cut off.
Depending on the markings, it is necessary to trim the corner tiles
Styling:
- In a clean, dry container, dilute a small amount of glue according to the instructions. This will prevent it from drying out. It is not recommended to dilute already dried glue with water.
- Using a spatula, evenly apply enough adhesive to the wall so that the total surface area covered does not exceed 9 sheets. Otherwise, the glue will dry out, which will make laying out difficult.
- Apply the prepared canvas to the marked area, check that the pattern lies flat, and then press it into the adhesive solution. Do not press the canvas too hard against the wall, otherwise the glue will protrude beyond the seams, and this should not happen.
When laying, the room temperature should be from +5 to + 30 degrees.
Gluing tiles begins from any convenient place in the bathroom
The next pieces of tile are glued close to the previous ones and smoothed out
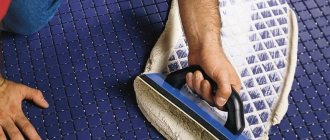
Grouting joints. A day after installation, start grouting the joints. Before doing this, remove the protective layer from the canvas according to the instructions. Make sure the seams are clean before grouting. Grouting of joints is carried out exclusively with a rubber spatula. Use it to apply grout with smooth movements to the seams in the horizontal and vertical directions until they are completely filled. Wait 30 minutes and begin cleaning the seams from excess mixture.
After installation, all seams are rubbed down
Cleaning. Upon completion of work, carry out final cleaning of the canvas from plaque using a felt glove.
Be sure to wash the tiles after grouting
Preparatory stage
In the toilet, as in any other room, careful preparation is required before finishing work. It's worth starting from the floor. Since there are risers in this room, you definitely need to think about waterproofing. Regarding the walls, I would like to say that all old paint and whitewash must be removed. To carry out this process you will need a small hatchet, water and a spatula. After removing the coating, you need to carefully remove dust and dirt and prime the surface.
To carry out further work you will need some tools. This is a container for mixing the mortar, a building level, a lath, a tape measure, a tile cutter, cords, a spatula, a drill with a mixer attachment, crosses for even laying of tiles, and a clean rag. This list is not exhaustive and can always be supplemented with something else or changed, it all depends on the scope of work and the desired result.
Design and interior design options
In small bathrooms, as a rule, separate areas of the room are decorated with mosaics: niches, ledges, bathtub. The rest of the room is decorated with tiles. This combination will visually enlarge the room and reduce repair costs.
An excellent option for decorating a small room would be to place a small mosaic panel on the accent wall.
A bathtub and shower cubicle tiled with mosaics add a special touch to the room.
The mosaic countertop under the sink with a niche for the washing machine looks convenient
Shelves and ledges can also be tiled
The mosaic wall in the shower looks very impressive
Storage rules
The undiluted mixture must be stored in dry rooms to allow for ventilation; use wooden supports. The shelf life after opening the glue is indicated by the manufacturer on the packaging; it is important to tightly close the container with the prepared solution. To purchase the required amount of material, look in advance at the average consumption of the mixture, which is indicated in kg/sq.m., and also calculate the surface area.
The shelf life after opening the glue is indicated by the manufacturer on the packaging.
The selection of adhesive for installing mosaic material should be made based on the type of room, type of tile and type of base. On sale you can easily find an adhesive composition suitable for different operating conditions that will create a strong adhesion.
Tips for caring for mosaic tiles
In order for the mosaic to maintain its original aesthetic appearance and last as long as possible, it is worth adhering to some rules of care:
- after completing the masonry, do not use the bath for 14 days to allow the material to cure;
- equip the room with ventilation that allows excess moisture to naturally escape;
- When cleaning, use only products with a soft, gentle composition;
- after bathing, wipe the finishing parts dry to prevent mold from forming in the seams;
- Once a month, treat the seams with special fungicidal agents, gently rubbing them into the tile seams.
After laying the mosaic, it is not recommended to use the room for two weeks
. By following these simple rules, you will preserve the original appearance of the mosaic for many years.
The possibilities of this modern fashionable material are limited only by your imagination. There are a lot of options for mosaic cladding. As you already understand, you can combine mosaics in a variety of options and styles, be it classic or modern.
How to use glue
The basis for small details of the mosaic pattern can be a mesh base, foil or paper. Such a base makes it easy to cut the material into the required sizes. It is recommended to apply a primer solution to the surface before installation. Glue for glass mosaic tiles on a mesh is simply applied around the perimeter and the tiles are installed on the base.
If the substrate is paper, then first attach the material with the back side facing outward so that the base softens. After installing the tiles to the wall, adjust their position by recessing it into the surface. Excess adhesive solution is removed before it dries, using a spatula. Finish the work by rubbing the seams.
After installing the tiles to the wall, adjust their position by recessing it into the surface.
Types of adhesives
Mosaic tile adhesives are divided into three types:
- Cement-based - white or gray cement is used.
- Ready dispersions.
- Two-component based on epoxy resins.
Cement-based adhesives are sold in the form of dry powders, then they are diluted with water according to the instructions. The advantage of such mixtures is high adhesion and good ductility. They are cheaper than dispersions and two-component formulations, which explains their frequent use.
Cement adhesives are divided into three subgroups:
- hard;
- elastic;
- highly elastic for possible temperature deformations.
The first type is suitable for gluing mosaic modules or individual fragments on a solid base, for example, on a plastered surface or on a concrete screed.
Mixtures with increased elasticity are recommended for laying mosaics on “warm floors”, for outdoor work, and for lining swimming pools. If the cladding will be subject to temperature changes or vibration, for example, due to the proximity of a metro or railway to the house, then use an elastic solution. The same applies to new buildings, which may still shrink.
Mosaic on mesh or paper
In order not to waste time gluing each element, block mosaic was invented. It is produced in separate squares mounted on a grid or paper. The pattern is formed from blocks, which is much faster, and the result will be the same, even more beautiful due to even laying.
The glue for such material can be anything. It is only important to carefully consider the markings, and during the gluing process, make sure that the mesh is evenly coated with the solution. Since the tiles are held together by paper at the front, you will have to lubricate the base material, subsequently removing the paper protection.