Expanded clay is expanded baked clay. Inside there is a porous formation, outside there is a sintered shell.
Expanded clay was successfully used before the advent of modern insulation materials as a high-quality and inexpensive heat insulator. In some cases it is still used in this capacity. When working on floor screed, the material is used for leveling and as a mortar filler. It consists of fired, foamed clay granules of different fractions and shapes.
Advantages:
- Thermal insulation qualities. Within 0.07 – 0.16 W/(m*K). For comparison: foam plastic 0.031 - 0.04, mineral wool 0.045 - 0.07, reinforced concrete 2.0 - 2.04;
- Mechanical load. Compressive strength from 0.6 to 5.5 MPa. For comparison: foam plastic 0.03 - 0.4 MPa, concrete 5 - 60 MPa and higher;
- Moisture resistance. Water absorption 8 – 20%. Staying in water for a long time does not destroy the material;
- The material is fireproof. Non-flammable, does not emit any toxic substances when exposed to high temperatures;
- Biologically inert. Does not rot and is not a breeding ground for microorganisms;
- Rodents do not grow in expanded expanded clay. The mobility of the backfill does not allow making moves and making nests;
- Noise absorption. Achieved only when added to a cement screed, and not when dry backfilled;
- Over a long period of time, the properties of high-quality material do not deteriorate. In many old buildings (more than 50 years old), during demolition, expanded clay is discovered, with which nothing happened;
- The properties are not affected by temperature changes in any climatic zones;
- Low cost and availability;
- The work does not require any special tools or skills. A floor screed with expanded clay is essentially no different from a standard floor screed.
Flaws:
- For insulation, a large screed thickness is required. A layer with expanded clay less than 10 cm thick is ineffective;
- Dry floor screed with expanded clay is dangerous if water gets into the expanded clay layer. The material itself will not be damaged, but moisture under the concrete will remain, which can lead to increased dampness inside the room and the formation of mold.
Pros and cons of expanded clay
The use of expanded clay in a semi-dry screed provides the following main positive qualities:
- This floor is not afraid of severe frosts, as well as high temperatures. No amount of heat will damage the base of the subfloor. Semi-dry screed with expanded clay can be done even in rooms that are not heated throughout the year.
- With the use of expanded clay, any unevenness is eliminated, no matter how high they are. It is possible to install a floor screed to a height of 150 mm. In this case, some mixtures may be powerless.
- Using expanded clay concrete, you can be sure that rotting will not occur; it resists elevated temperatures, as well as the formation of corrosion. The service life is very long.
- The basis of expanded clay is baked clay. Its weight is much less than ordinary concrete. The pressure and load on the floor is reduced to a minimum. Can even be used on a wooden base.
Advantages of expanded clay
Among the shortcomings, the instability of this material to moisture is especially alarming. For this reason, there are some limitations to its use in certain circumstances.
Expanded clay should be stored under a special canopy or even indoors. The fact is that this material absorbs moisture very well, but at the same time releases it slowly. In this case, after repairs, high humidity will remain in the room for a long time.
Expanded clay concrete screed - properties and purpose
The properties of expanded clay concrete used for screeding differ significantly from the characteristics of cement-sand compositions. This is due to the use of granulated expanded clay in the mixture. The material is granules made by firing clay rock.
Expanded clay is a material widely used in the construction industry, both in the industrial sector and in the private sector
It is characterized by:
- cellular structure;
- light weight;
- increased strength.
These properties affect the performance characteristics, as well as the purpose of the expanded clay concrete base:
- ensuring reliable thermal insulation of the floor;
- effective absorption of extraneous noise;
- forming a solid base for the final coating.
The use of inexpensive and accessible material allows you to quickly form the rough surface of the floor and, if necessary, raise its level.
In a number of situations it is difficult to choose an alternative to an expanded clay concrete base:
- when planning a floor surface that has significant differences. In this situation, it is costly and problematic to compensate for height fluctuations of 15–20 cm using concrete;
- when carrying out repair work in buildings equipped with timber beams or weakened slabs. The material allows you to reduce the forces that are absorbed by floor panels and load-bearing beams;
- with a limited cost estimate for construction activities, as well as the inability to use significant volumes of Portland cement, crushed stone and gravel to carry out the work;
Expanded clay concrete is a building material based on expanded clay.
- if it is necessary to lay utility networks and heating communications in the thickness of the expanded clay massif, the dimensions of which do not allow installation in heavy concrete;
- when ensuring the flatness of bases of complex configuration, when with different layer thicknesses it is necessary to guarantee minimal shrinkage to ensure the strength of the final coating.
Due to its performance properties, the material is used to solve a wide range of problems.
Types of backfill
The density of expanded clay varies. The range of products is presented on the construction market. All that remains is to choose a more suitable option for installing a semi-dry screed indoors. The density can vary from 250 to 600 kg per cubic meter, which meets certain circumstances of use. Depending on this, the types are distinguished:
- Crushed stone. The size of each granule is 10-14 mm. Its main application is the preparation of concrete.
- Expanded clay sand for dry screed. It is necessary when it is necessary to create a thin screed. The size of the expanded clay does not exceed 5 mm.
- Gravel. Allows you to get a very light, but at the same time quite durable floor. There are three categories of expanded clay granule sizes: 20-40 mm, 10-20 mm, 5-10 mm.
Types of expanded clay for screed
When choosing a specific backfill, you should take into account what technology for constructing the subfloor will be used, as well as the room itself where the installation work is being carried out.
Technological features
The process of preparing expanded clay mixture has some peculiarities. And its final characteristics will depend on the proportion of its constituent components. When using different volumes of water, you can prepare a liquid, semi-dry or dry solution.
Wet method
The advantage of liquid mortar is self-leveling. In this case, all the expanded clay granules float up and the heat-insulating layer is located in the upper part of the floor screed.
The disadvantage of the wet pouring method is the need to perform an additional concrete screed under the finishing coating of the base. This requires additional time and increases the cost of work.
The wet method is only suitable for insulating the floors of attics and outbuildings. Concrete mortar, which includes expanded clay, is recommended for use in reinforced concrete blocks.
Various types of floor screeds with expanded clay: mechanized, semi-dry, lightweight, floating.
Semi-dry method
The consistency of the working mixture makes it possible to distribute expanded clay evenly throughout the entire volume of the screed. The technique can be used to fill foundations of any material.
Disadvantages of semi-dry solution:
- pouring requires great physical effort from workers;
- the need to use beacons for high-quality work;
- The finished surface must additionally be sanded.
Dry screed
This technology does not involve mixing the solution. Dry expanded clay is laid directly on the floor base, and a thin layer of standard cement mortar is poured on top of it.
The advantage of this technique is the speed of construction work and the saving of materials. Disadvantage: weak strength characteristics.
Today on the construction market you can purchase ready-made dry mixtures in which the proportions of the necessary components are maintained. This greatly simplifies the preparation of solutions for filling floors.
Conditions of use
Semi-dry floor screed with expanded clay can only be performed under certain conditions. The most basic is the installation of a thick screed, the thickness of which ranges from 6-10 cm. First, a layer of expanded clay is poured to level the surface, and only then a cement-sand screed is poured.
Expanded clay is also used so as not to create a load on the floor, especially if it is an old building. The cost of such material is not high and it will significantly reduce all costs by removing a sufficient amount of cement in the solution.
Expanded clay exhibits a huge number of qualities, and the most basic of them are an excellent layer of heat and sound insulation. Due to this, it is quite popular among buyers, beginners in the construction business and professionals.
Expanded clay concrete screed - advantages and disadvantages
Expanded clay concrete screed is widely used due to a number of undeniable advantages:
- increased thermal insulation characteristics;
- high level of sound protection;
- resistance to the development of fungi and mold;
- no negative impact on people's health;
- high safety margin;
- long service life;
- absence of cracks during temperature fluctuations;
- ease of independent arrangement;
- the ability to compensate for significant base errors;
- high compatibility with various types of coatings;
- fire safety;
- light weight;
- chemical resistance;
- resistance to moisture.
Expanded clay concrete is a type of lightweight concrete designed for thermal insulation and construction of various structures
Expanded clay concrete allows you to ensure the flatness of the following types of surfaces:
- horizontal;
- inclined;
- internal;
- external;
- residential;
- production
Thanks to these advantages, expanded clay concrete screed makes it possible to guarantee the formation of a strong base intended for long-term use of various types of finishing coatings.
Despite many advantages, the material is not without disadvantages. Weak spots:
- increased thickness of expanded clay concrete base;
- the need for additional work on polishing the floor;
- increased level of labor costs during concreting.
The material based on expanded clay granules is popular among novice builders, as well as professionals.
Layers of screed
Before you start work, you should find out what layers a semi-dry screed for heated floors includes. First of all, this is a protective layer of waterproofing, which must be combined with a damper tape. You should not be afraid to make a larger layer in height, since in the future it will all be cut off after the installation work is completed. After this, expanded clay is poured to the required height, along which the beacons are placed. Options for beacons can be different. Everything will depend on imagination and possibilities.
Layers of screed with expanded clay
When all of the above has been completed, a semi-dry screed is poured, acting as a subfloor. If necessary, a reinforcing mesh is added to it, which can be replaced with fiberglass, which has recently become popular due to its large number of positive qualities.
Under what circumstances is this technology effective and in demand?
In modern construction, when arranging floors, this technology is simply irreplaceable. It is also often used in the case of:
- If there is a need to fill a space that exceeds the threshold of 15 centimeters. In such cases, you cannot pour only one cement mixture. Indeed, in most cases, building floors are designed for a certain strength, so with additional load there is a high risk of damage to the structure.
- If there is a need to reduce the weight of the concrete screed itself. This mainly applies to wooden floors. In such cases, you can use a foam screed, which will significantly lighten the weighty part of the structure.
This technology is an integral attribute of modern construction. It allows you not only to significantly save your family budget, but also to improve the quality of housing. For more successful mastery of this material, you can additionally watch the video expanded clay concrete screed.
We recommend reading an article about expanded clay concrete building blocks, their sizes and characteristics.
Necessary materials
The tool itself is prepared for screeding the floor in the room. It is very important to purchase all the necessary materials for work. You can even pre-calculate what and how much will be needed.
If the room measures 5*3 meters, that is, 15 m2, then the optimal screed layer will be 50 mm. From this it turns out that we will need a total of 0.75 m3 of screed (area multiplied by thickness). In this case, the proportions of sand and cement are usually 1 to 4 (sand 0.6 m3, and cement 0.15 m3).
Sand will be needed for backfilling under the expanded clay. If we take an approximate height of 20 mm, then it will be 0.3 m.3. Roughly speaking, such a room will require almost one ton of sand. Depending on the density of expanded clay, its quantity is calculated. With average performance and a thickness of 100 mm, it will take 1.5 m3. This option is suitable for performing “wet” screed. But the device of a semi-dry screed is not much different, where it is necessary to purchase the appropriate mixture with additives.
As for beacons, their number will, first of all, depend on the rule used and its length. With its length of one and a half meters, the above premises will require about five beacons over the entire area. The length of such beacons is selected over the entire width of the room - three meters.
The choice of expanded clay itself is focused on granules, or rather their fraction. To calculate everything correctly and independently, just open the calculation calculator, which can be found on the Internet. In this case, it would be a good idea to turn to familiar builders for help. They will tell you the exact amount of material that should be purchased. It is worth noting that the materials for underfloor heating screed do not differ in quantity.
How many days does it take for floor screed to dry? How long does it take for floor screed under tiles and laminate to dry?
Regardless of what the house will be like, what its design will be, etc., one thing remains unchanged - the foundation of the house must be strong. In this article I will tell you the main things that will be useful in these works.
Drying
In order for the floor covering to lie securely and not deteriorate, it should only be laid on a completely hardened and dry base. Filling the solution is a simple matter. But many people often make mistakes in their calculations regarding its drying. It depends on the following factors:
• Composition of the solution. The classic proportion is a combination of sand and cement 3:1. This will allow you to cover 1 square meter using three buckets of the prepared solution. m area in a layer of 5 cm. It is important to consider that if the solution is made too liquid, it will take much longer to dry.
• Quality of waterproofing under the rough coating. Vapor-waterproofing film, roofing felt and special coating materials are good for this.
• Use/non-use of fillers. A dry screed will dry in a shorter period of time, depending on what type of filler was used.
• Room temperature. It should be at the same level from the moment of laying until the very end of hardening. Ideally, the temperature should be within +20…+25 °C. It is necessary to exclude the influence of heating devices, sunlight and any other sources of strong heat, otherwise the top layer may crack.
• Number and thickness of layers. The more there are, and the thicker they are, the longer it will take to dry.
• Air humidity. Ideally, it should be in the range of 60–70%. Exceeding this indicator will make the hardening take longer, but if it’s the opposite, drying too quickly can lead to cracks.
Important details:
• There is no heating in the building where the work is being carried out; all work must begin no later than 50 days before the expected cold snap, otherwise the floor will not have time to mature, will freeze and subsequently quickly collapse.
• To prevent the rate of evaporation of water from the base from being too fast, immediately after the solution has set, the base should be covered with polyethylene.
How to distinguish complete solidification from setting of the solution?
These two concepts differ in essence and in time. Setting involves the acquisition of primary hardness by the solution. Complete hardening is a longer process and is characterized by the acquisition of final hardness with a constant moisture content in all layers. Cement can set in a couple of days, while complete hardening can take up to three months. However, you can walk on the floor (carefully) after the solution has set or shortly after.
As for placing furniture and laying flooring, this will have to wait. Even if a quick-drying mixture was used, which completely hardens in just a week or even less, this period must be maintained, and only then lay the laminate, place furniture, etc.
Otherwise, the finish coating may begin to deform, crack, swell, move away from the base and exhibit other unpleasant surprises.
How to determine complete hardening?
My colleagues and I usually check this using the old-fashioned method. We place a napkin on the covering and cover it with polyethylene, securing it tightly around the edges with tape. This is important so that air does not penetrate under the film. After a day, we remove the film and look at the napkin. If it is wet, it means the base has not yet hardened.
Important nuance:
To keep the consumption of tile adhesive to a minimum, it is advisable to sand the base for installation. But this can only be done after final hardening.
If you liked my articles:
- Subscribe to the channel and like!
How long does it take for screed with plasticizer to dry? What factors influence drying time?
Before starting any repair work, you should determine exactly how long it will take to complete it, as well as how much raw material or materials will be needed. This will allow you to properly allocate time and meet deadlines, getting a good result. Cement based flooring takes the longest to fully harden.
Preparatory activities
The same preparation is performed for both conventional screeding and semi-dry screeding. That is, it makes no difference whether the floor screed is dry or semi-dry, which will be necessary for laying the floor covering. It is very important here to level the foundations where the work will be carried out. All existing cracks and pits are eliminated, if possible, using cement mortar. Bulges may be knocked off. We must not forget about the waterproofing layer, which can be ordinary polyethylene film. The better the material is chosen, the better qualities it will be able to demonstrate during operation.
After this, sand is poured in, acting as a cushion under the expanded clay. Usually its layer is 20-30 mm. The pillow must also be leveled using the rule. As for compacting sand, it will be sufficient to simply walk along the entire plane. In this case, the weight of a person is enough.
The choice of expanded clay is made depending on the fraction (fine, medium and large fraction). It is poured throughout the room, starting from the far corner. After filling the required layer, it should be leveled. Beacons are installed along the top of the expanded clay, serving as the basis for the subfloor level.
Profiles are used as beacons, which are mounted on the base using cement-sand mortar. Subsequently, the screed is poured, slightly overlapping the beacons, and they simply “hide” in the base of the subfloor.
Let's start insulating the floor
The insulation of expanded clay floors must be divided into several stages:
- Preparing the base
- Laying and checking communications
- Arrangement of the waterproofing layer
- Installation of beacons
- Backfilling with expanded clay
- Arrangement of the final screed
To complete the work you will need:
- Expanded clay (sold in bags)
- Waterproofing material
- Edge tape
- Work tool
- Alabaster mortar
Preparing the base
Preparing the base for insulation is a fundamental stage. The quality of the work done at each step and the result are directly proportional to each other.
First, you need to completely dismantle the old floor structure until a strong and durable surface is achieved. As a rule, it is represented by a reinforced concrete slab.
Using a metal hand brush, it is recommended to clean the base from dirt and other debris. After visually inspecting the surface, it is necessary to note areas with defects (cracks, depressions or protrusions). They must be eliminated. It is recommended to use polyurethane foam along the intersection of walls and floor.
Laying and checking communications
Very often, various communications are laid in the floor surface: water, heating, etc. Pipes must be reliably protected and fixed using one of two common methods:
- Use special sleeves through which communications are routed
- Wrap each of the pipes with polyethylene film and secure it to the floor surface with tape.
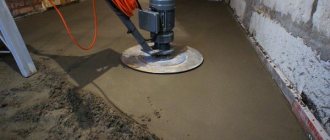
Performing a semi-dry screed
When the expanded clay is poured, you can choose two options for further actions:
- Pouring cement laitance. The solution is installed directly on the expanded clay. The granules absorb moisture very easily. If this happens after pouring a semi-dry screed, then drying may occur unevenly, which will lead to shrinkage over the area. Some people pre-wet the granules in water, and only then backfill. But even this option does not provide a 100% guarantee.
- Separation of expanded clay from a semi-dry screed with a layer of waterproofing. Moisture from the solution will not get into the bedding, even if you simply lay down plastic film. The main thing is that it is intact over the entire surface and is not torn during the installation of the semi-dry screed.
Not everyone knows how to make cement laitance. For this purpose, twice as much water is used as with the standard screed design. Depending on the result obtained, you should see whether it is necessary to add additional water or cement. In this form, after pouring the expanded clay, it is necessary to let the layer sit and dry for at least a day. Only after this can the semi-dry concrete floor screed be poured.
If the beacons are removable, then they are pulled out only after a few days. The resulting grooves are sealed with mortar, carefully compacted and sanded until a uniform layer is obtained.
How long does it take for a concrete screed to dry: conditions and duration
When performing repairs, great importance is given to floor screed. The durability of the finished floor covering depends on the quality of its execution. To avoid cracks and not have to redo the job again, it is very important to dry the floor properly. This article will help the home handyman understand how long the base of the floor must dry in order for its service to please the owners for many years.
Why is it important to dry the solution layer completely?
During renovations, many residents have to move out of their apartment and this brings considerable discomfort. I want to do the repairs not only efficiently, but also quickly, so that I can return home sooner. However, it is important to understand when the process can be accelerated and when it is not practical.
Concrete bases take the longest to dry; wet screeds take up to 25 days to dry. It is very important to allow the floor to dry completely, as a non-dry surface can cause:
- deformation;
- formation of cracks;
- shrinkage
Poor floor drying will negatively affect the floor covering and can lead to rotting and damage to parquet and laminate flooring. If you lay the tile on a dry screed, it will not be securely fixed, because the remaining moisture will affect the quality of the adhesive.
The durability and quality of the final floor covering depends on the drying of the screed.
Why you can’t artificially speed up drying
An important condition for high-quality drying is that the base mixture dries independently, without any artificial factors accelerating this process. This is due to the fact that the drying of a concrete or cement screed does not occur due to the evaporation of water from the solution, but due to the full stage of surface adhesion. Unfortunately, this takes a lot of time, but the results are worth it.
To ensure that the surface dries well, the surface of the screed is moistened with water during the first days. Self-made drafts and elevated temperatures can cause cracking of the base. Proceeding with subsequent work is strictly prohibited until the base coating has completely dried.
What conditions need to be provided?
Many people who carry out home renovations on their own are concerned with the question: “What is needed to screed the floor in an apartment?” The materials have been purchased, the screed has been poured, and what needs to be done next to ensure reliable and complete hardening of the base. At this stage, it is very important to create the right conditions in the room.
If you speed up the drying process yourself, problems with deformation and cracks may appear in the future.
Factors influencing the desired indoor microclimate:
- absence of drafts;
- lack of access to direct sunlight for the first 7-10 days;
- no sudden temperature changes;
- preventing freezing of the screed.
The drying process slows down at elevated room temperatures and also at high humidity. The room temperature should be 22-24 °C, and the humidity should be between 60-70%. If the air humidity is below 50%, cover the floor with plastic film for the first 7-10 days.
How long does it take for a layer of gypsum mortar to dry?
The advantage of gypsum floor screed is the high speed of complete drying. The gypsum surface sets within 3-4 hours after installation, and complete drying takes place within a week. However, it is worth understanding that a week is an average value that is suitable for a base with a standard thickness of 4 cm.
The number of hours for a specific gypsum screed to dry is calculated by the worker independently. Thus, a 4 cm plaster coating dries in 168 hours. For each next centimeter of solution, another 90 hours are added.
An example of calculating the complete drying of a 7 cm thick gypsum screed:
168 hours + (3 cm X 90 hours) = 168 hours + 270 hours = 438 hours.
438 hours / 24 hours = 18, 25 days = 19 days.
Complete evaporation of moisture in a 7 cm thick gypsum screed will occur 19 days after pouring.
Complete drying of a 4 cm thick gypsum screed occurs 168 hours after pouring.
How to speed up the drying process of a floor screed?
If the master is interested in a high-quality and durable floor base, it is not worth accelerating the evaporation of moisture from the surface. Create the necessary microclimate conditions for the room, which have already been mentioned. The room temperature must be at least 5°C. This is the minimum temperature that ensures the desired setting of the subfloor without losing its quality.
Expanded clay with mortar
There is also an option for making a semi-dry screed, when the solution itself is mixed with expanded clay granules. This process takes much less time than in the previous case.
Expanded clay is poured into a container that is prepared in advance, which is filled with water in the required quantity. Mixing is carried out using a mixer. The prepared dry mixture is poured into this, which must be thoroughly mixed until a homogeneous mass is obtained. You should be very careful with the amount of water. After all, semi-dry screed requires a small amount. Too much will lead to the manifestation of negative qualities.
There should be no lumps when stirring, and the granules themselves should become wet and acquire a gray tint. The mixture becomes slightly thick, with a consistency reminiscent of sour cream.
The finished solution is poured onto the prepared base to a thickness of 20-25 mm. But the thickness will depend on the evenness of the floor, as well as on the final result, which is necessary for laying the floor covering. The reduction in time occurs because there is no need to wait a day for the first layer filled with cement laitance to dry and harden.
After the initial layer of the “pie”, the second and subsequent ones are performed until the “rough” floor is formed. During the work, we do not wait for the previous layers to dry. The finishing layer is not only carefully compacted, but also leveled.
How to insulate a floor in a wooden house with expanded clay
Wooden construction is mainly country houses. Moreover, both new construction and those that were erected long ago as summer cottages. Today, these buildings are increasingly used for year-round living. Therefore, the issue of insulating all parts of the house becomes urgent.
The floor in wooden buildings is one of the coldest parts of the entire structure. According to various estimates, up to 20% of the internal heat in the premises is lost through the floors in wooden houses. It makes sense not only to design good insulation when building a new house, but also to take care of remodeling the floor in an already built one, but without floor insulation. Moreover, usually a residential wooden house is installed on a relatively high foundation. And this allows you to carry out insulation from below, without changing the level of the finished floor and without reducing the height of the room.
When constructing ancillary wooden buildings, the floors can be located close to the ground or even laid directly on the ground. In this case, an insulating layer is still necessary, but it will have to be laid deep into the ground.
Any insulation of wooden floors must be carried out in compliance with the following rules:
- Mandatory installation of waterproofing in two layers. The bottom layer protects the insulation from moisture from the ground. The top layer protects against water penetration through the finished floor boards.
- Rough and finishing wooden floor elements are treated with special anti-rotting agents.
- For insulation, a material is selected that does not change its properties when in contact with wood.
Despite the recent emergence of modern insulating materials, expanded clay insulation of wooden floors still finds its application. And there are reasons for this.