The correct sequence of work is important for any repair, regardless of its complexity. Repairing a bathroom and toilet with your own hands requires especially careful adherence to the planned order, since if stages of work are not completed in a timely manner, you can ruin what has already been done. For example, you cannot finish the walls and floors and only then think about replacing wiring and pipes.
The specificity of bathroom renovation is, firstly, the small size of the room, and secondly, the large concentration of various devices and communications. Repairs in the bathroom and toilet are done less frequently than in residential premises, but usually more thoroughly. Experts recommend starting a major renovation with the bathroom, because this is often the dirtiest part of all work. That is why the most important step, which should never be neglected, is drawing up a detailed repair plan.
Do-it-yourself toilet renovation
You can repair virtually any room in a house or apartment with your own hands. It is important to correctly draw up a preliminary project, as well as evaluate your own skills and abilities. You can find various instructions on the Internet that help you visualize the intricacies of repair work.
Before you start making toilet repairs with your own hands, you need to:
Choose a suitable design concept. It should be based not only on personal preferences, but also on the characteristics of the room itself;
Select suitable materials. Taking into account the characteristics of operation and the premises itself, you cannot choose any materials; you must focus on reliable, durable, not subject to the negative effects of moisture and chemicals;
Select suitable plumbing fixtures (if you do not plan to do major repairs, do without this item, since they leave the old plumbing fixtures).
Stage one. Creating a Project
First, you need to decide what result you are counting on and how you see your bathroom after renovation: there should be a remodel, you need to completely change all the plumbing, or just change the finish a little. For inspiration, you can look through a lot of interesting options that are posted on the Internet, and take a few ideas from ready-made examples or copy individual elements. A little imagination and inspiration, and you can create a unique design.
Once the purpose of the renovation has been determined, you can begin to measure the room in order to calculate how much facing materials will be needed. At this stage, you can go to hardware stores to get acquainted with the range and prices. After all this, you can start drawing up a project for your future bathroom. This issue needs to be taken as seriously as possible, and not just roughly imagine where everything will be located. It is better to create the most detailed and detailed project possible, which in the future will help to correctly determine the sequence of work, and ultimately ensure maximum ease of use of this room. You should not stop only at a sketch - it is better to imagine each wall of the room on a scale with the exact location of all communications and interior items there, indicate everything: from sockets and switches to the location of doors, lamps and plumbing. It's even better if these drawings also show the locations of electrical wiring, sewer and water pipes.
Based on the drafted project, you can already begin to calculate all the costs of repairs , without forgetting to include in the estimate an item with unforeseen expenses, which, as experience shows, will definitely occur. Well, then you can start choosing and purchasing all the materials and equipment. At this stage, you should also decide how all the work will be done: on your own or with the help of professionals. Even if you are able to handle almost everything on your own, it is better to call a specialist to perform plumbing and electrical work, since these are the stages that are considered the most difficult. It is worth noting that when planning a bathroom renovation, you need to clearly define its time frame.
Photos, design and ideas for toilet renovation
First, you need to clearly define the requirements. The most important thing is that the chosen design concept must comply with sanitary and hygienic standards, taking into account the specifics of the toilet room. It is also necessary to focus on space; if there is a lot of space, then there are also more options for design.
- Not enough space. When there is not enough space, you cannot waste it on designer delights. Every square cm should be used productively. We need to think through the optimal concept. It is available to view photographs from the Internet, where experienced designers demonstrate exactly how they solve the problem of limited space.
- Average area. You can put a small cabinet here to store cleaning products, toilet paper supplies, magazines and other things.
- Lots of space. When you have 2-3 sq.m. or more, then in the toilet they put a sink, a small table, and hang a towel.
The combined bathroom deserves special attention. It is the most difficult to work with, since you need to adhere to the functionality of two rooms at the same time. In this case, it is better to trust the specialists, or take ready-made projects on the Internet as a basis.
Cost of consumables
To answer the question of how much a bathroom renovation will cost, you need to know its area, what materials will be used, and whether we will do the finishing ourselves or turn to specialists. However, even with the most accurate calculations, the estimate tends to increase, so it is worth putting into the budget about 30% more funds than what is calculated.
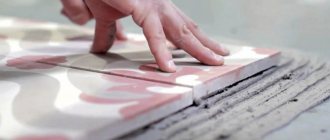
The price of tiles varies widely - from the budget segment to very expensive models
To make budgeting easier, I advise you to use a table containing approximate prices for materials used in bathroom renovations. Of course, this information is for reference only (prices in online stores were taken as a basis), but it gives a full idea of the order of numbers:
| Material | Unit | Cost, rubles |
| Waterproofing mastic | 5 kg | 1100 — 1600 |
| Tile adhesive CM 9 | 25 kg | 250 — 450 |
| Grout for tiles | 5 kg | 600 – 1200 |
| Penetrating primer with antiseptic | 5 l | 250 — 500 |
| Self-leveling floor mixture | 25 kg | 280 – 750 |
| Budget tiles for walls | m2 | 45 — 90 |
| Mid-price wall tiles | m2 | 250 -500 |
| Ceramic floor tiles | m2 | 250 – 2500 |
| Acrylic paint for interior work | 5 kg | 200 – 500 |
| Profile for drywall | panel 3 m | 50 — 150 |
| Drywall hanger | PC. | 5 — 25 |
| Wooden beam for frame | panel 6 m | 80 — 200 |
| PVC lining for ceiling cladding | m2 | 150 -250 |
| Sewer pipe for external works 110 mm | 1 linear m | 125 — 200 |
| Sewer pipe for interior work 50 mm | 1 linear m | 75 — 150 |
| Metal-plastic water pipe 16 mm | 1 linear m | 70 — 120 |
| Crimping fitting for metal-plastic pipe | PC. | 250 — 500 |
| Mixer tap with short spout | PC. | 1500 — 2200 |
| Inexpensive washbasin Santeri | PC. | 900 |
| Compact toilet Santek | PC. | 3100 — 3500 |
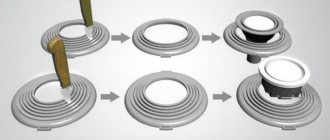
Despite their small size, water supply fittings are quite expensive
In addition, when calculating how to make repairs in the bathroom, we need to take into account that we will need other little things like fasteners, sealant, gaskets, etc. So the budget margin mentioned above will definitely not be superfluous.
Do-it-yourself toilet repair: where to start?
First, they determine how large the work will be. If you plan to simply update the renovation, then little time and money will be required. But when the decision is made to make a major overhaul, you will have to invest a lot, both time and effort.
There are a few things you need to do first:
- Determine the scope of repairs. You need to roughly calculate the estimate and the time spent, and then make a final decision.
- Create a design project. This takes into account the functionality, features and style of the room.
- Remove old plumbing fixtures. This is carried out provided that capital work is planned.
- Remove old coverings from walls, ceilings and floors.
When the room is completely clean and ready for further actions, you can begin the main work. Preparing a toilet room for renovation takes about 1-2 days. It all depends on how easy it is to remove the old decorative trim. For example, with tiles things are more complicated than with wallpaper, and several times more.
About approximate prices and selection criteria:
- The price for tiles will be from 40 to 60 rubles per piece, depending on the country of origin. On average, the quality of tiles from domestic and European manufacturers does not differ from each other, but European samples usually have a better design. The situation is the same for floor and wall tiles, the only difference is in size. Porcelain tiles will cost more, from 50 rubles per piece, however, it is recommended to use them for flooring. Unlike ordinary ceramic tiles, they have a non-slip surface and greater durability. Considering the rather high traumatic rate of bathrooms in medical statistics, this is an important circumstance. In the store you should pay attention to the condition of the tile surface. The presence of damage on it will lead to the appearance of dirt that cannot be cleaned. To ensure the integrity of the tile you choose, hold it against your face and look at it along the light source. Another factor is the size ratio. If the tiles are of different sizes, and this is quite possible, then during installation the surface will look repulsive, and even if it is not installed, you will have to waste time returning the goods to the seller. To check, take several pairs and place the edges next to each other and take a closer look. The difference in size should not exceed a millimeter. Then test the edges, they should be smooth.
- Tile adhesive. Considering that the work of installing the tiles will be carried out by you yourself, the best choice would be slow-drying glue, from half a day to a day. This will allow you to correct all possible mistakes made and give you the opportunity to work for your own pleasure. The spatula should be selected specifically for the glue, such information is contained on the packaging. If for some reason the packaging does not contain information about the pitch and depth of the teeth, and the glue itself has proven itself well, then choose a shallow depth of 3 to 6 millimeters. Using a trowel with large teeth will likely cause cavities to appear under the tiles.
- Templates for laying tiles. It is best to use plastic crosses because they are easier to work with.
- Grout for tiles. It is not necessary to purchase, since a piece of cable 5-6 millimeters in diameter may be suitable for grouting joints.
- Glass-magnesite sheet from 250 rubles per 1 sheet.
- Laminate from 300 rubles per board.
- Self-leveling floor. For a bathroom, it is preferable to use two components, this is an initial viscous pour, then a liquid one for leveling. The approximate price is from 220 rubles per 10 liters, the same with the insulation effect - from 640 rubles per square meter.
- Teak or larch floor. If you decide to have a wood floor rather than a tile floor. It will cost more, but it looks and feels nicer. Price from 500 rubles per square meter.
- Pipes. The best option is polypropylene pipes: for cold water (PPN) from 24 rubles per square meter, for hot water (PPR) from 35 rubles. The choice is due to the fact that working with steel pipes is difficult; metal-plastic tends to leak in fittings over time, while polypropylene can be welded and hidden in the wall. Sewer pipes start from 45 rubles. We will also include fittings in this category. Fittings made from solid plastic are most preferred, as this will avoid possible leaks. Switching to metal makes sense when connecting pipes to a boiler. The shut-off valves must be spherical and soldered into plastic. The cost of fittings and fittings will be 60% of the price of pipes. When purchasing, measure the outer diameter of the pipe with a caliper. To work with pipes, diamond drills are required; if the sizes do not match, you will have to buy more, and such drills are quite expensive.
- PVA emulsion - from 240 rubles per 5-liter package.
- Plumbing. It all depends only on your choice, let’s just say don’t skimp on quality - plumbing fixtures should serve for a long time and conscientiously. When considering options for heated towel rails, it is recommended to choose a stainless steel heated towel rail. Other options are either of unsuitable quality or overpriced. When choosing a faucet, consider purchasing one with an infrared sensor that automatically turns on the water when you raise your hands to a preset temperature setting. You've probably seen this at airports. The mixer, of course, is not the cheapest, but it will allow you to reduce your water costs by half and heating energy costs by 40-45%.
Prices are approximate and based on current market value. Nevertheless, you will be able to somehow navigate these prices and, taking into account the area, calculate the renovation of the bathroom with your own hands. You will not need everything listed directly when performing the work; some of the presented options are alternatives; their choice will be discussed in more detail below.
Let us repeat once again: you should not be guided by cheapness when choosing materials; their use will only complicate the work. When purchasing materials, take into account possible defects and errors in calculations: there is almost always a need for some reserve. So, with tiles it is recommended to have 3-5% of the excess amount. When renovating a small bathroom, you will do a little more - 5-7%. For other materials add 35-40%.
Now let's get down to work.
Toilet floor repair. Screed and tiles. Step-by-step instruction
Repairing the floor in any room is the most expensive. Physical/time costs are also taken into account, especially if it is necessary to carry out not only finishing, but also screeding. Although there are many different types of screeds, it is recommended to choose the cement-sand format in the toilet, as it is excellent for subsequent installation of tiles.
Work is carried out according to the instructions:
- Preparing the base. It needs to be cleaned and leveled. The cracks are filled with cement composition. It is also advisable to prepare the right conditions. It is necessary that there is no draft in the room, and a suitable temperature should not exceed 25 degrees.
- Primer. Required for waterproofing and reducing the load from the base. This allows you to extend the service life of all materials used in the repair process. But some people prefer not to carry out waterproofing, which is considered by experts to be a serious mistake.
- Installation of beacons. This is required to ensure that the floor is level, without slopes or serious defects.
- Preparing the solution. Subsequently, it must be laid on the floor to the level of the pendulums in several layers. It is advisable to fill the screed within one day, or better yet, several hours. Then the cement will dry evenly, which will have a positive effect on the quality of the work performed.
- Drying out. The upper part must be constantly sprayed with water to ensure even drying.
- Laying tiles. It can be fixed with special tile adhesive. Some people prefer to work with cement compounds, since this option is a little more economical. But the savings are felt only if the work is carried out on a large room; in small rooms the financial difference is almost not felt.
Rough wall finishing
Rough finishing of the walls is done using plaster or moisture-resistant plasterboard. The second option is a more modern method and has a number of advantages:
- Firstly, moisture-resistant drywall interacts well with any finishing materials.
- Secondly, when finishing walls with plasterboard, a frame is created under which electrical wiring can be placed.
The disadvantage of using drywall is that it takes up a large amount of usable space in the room. And if you take into account the fact that the bathroom is not particularly rich in free space, then you should especially think about the use of this material.
Repair of toilet walls. Tiles, PVC and MDF panels. Step-by-step instruction
You need to repair the walls according to almost the same instructions as the floor. You should:
- Clean the walls down to the ground.
- Level the surface. To do this, you can no longer use cement mortar, but ready-made plaster compositions. It is advisable to make a perfectly flat surface.
- Prepare the base for finishing.
Further actions depend on which finish was chosen. If you plan to lay tiles, then you should buy tile adhesive. It is most convenient to work with him. But you can also use cement mortar.
For plastic or MDF panels you need to make a lath. It is made of wood or metal. It is advisable to measure the room, since individual panels will probably need to be cut. Laying the panels is convenient; there are special grooves. After installing the first panel, all subsequent panels are placed in the grooves. Also, after the work is completed, it is necessary to secure the corners.
Finishing the bathroom
The final finishing of the bathroom is carried out in a certain sequence, in compliance with certain rules:
- First of all, we prime the walls and floor with a special solution, and make sure that all surfaces are even and smooth.
- We install floor tiles. Make sure that the seams are filled with glue efficiently without any voids formed. For the bathroom floor, it is recommended to use tiles based on porcelain stoneware or with a rough surface. This material does not slip and is less dangerous for injury.
- We carry out the finishing of walls and ceilings with selected materials.
Important! In the bathroom it is strictly forbidden to use gypsum mixtures as a roughing compound. If moisture penetrates between the tile joints, the plastered surface will absorb it and swell. As a result, the tile will fly off.
Ceiling repair. PVC panels, suspended ceiling. Step-by-step instruction
To repair the ceiling, you need:
- Clean all trim down to the base.
- Level the surface. It is better to use only special compounds, since the cement mortar does not stay well on such a surface, so the work will be done less efficiently.
- Solve issues with electrical wiring and lighting. This is thought out before the ceiling work is completed. It is necessary to bring out the wires to all lighting fixtures that are planned to be installed in the toilet room.
- Prepare the surface for the final stage.
Then again you need to act in accordance with the final coating that needs to be used. For plastic panels, a lathing is prepared, onto which they are subsequently fixed. Working with a stretch ceiling is quite difficult. This requires a special frame. Moreover, it is almost impossible to carry out all the work on installing suspended ceilings without the appropriate knowledge and at least minimal experience. Therefore, it is recommended to contact specialists if the choice was made in favor of a stretch ceiling. And PVC panels can be installed independently.
Where do you get ideas?
If we are talking exclusively about ideas, look at as many photos as possible. Before starting repairs, it is advisable to imagine the final result as accurately as possible. Although some of them will definitely change. If your toilet is ready for renovation, you can use the following plan.
- Deciding on wall decoration (plastic panels, PVC, wallpaper or tiles)
- Choosing how to hide the pipes
- Deciding whether a closet is needed and where it will be located
- Choosing a toilet
- We look at the trends in decoration of the current year
These are the main steps. Read about each of them with photo examples here - use the sign for quick navigation. And now - cool ideas as such, so that you can pick up something interesting and useful.
Installation of sewer pipes and water supply. Step-by-step instruction
To install water supply and sewerage pipes, a wiring diagram is first developed. You can watch various video instructions available on the Internet. You can choose a ready-made project or create one yourself. The following are the instructions:
- The sketch is carefully worked out in full accordance with the dimensions of the room.
- Choose the method of placing pipes (hidden or open). Recently, mainly the first option has been considered, because it allows you to maintain the aesthetics of the room.
- They purchase materials.
- Installing pipes. If modern communications are used, there will be no problems with installation, since they are installed without the use of special tools. If these are old-style metal or plastic pipes, it is better to hire specialists.
Installing a box on sewer pipes in a toilet. Hiding the pipes
To install the box, you can use ready-made options on the construction market, or make it yourself. If you plan to work independently, you must:
- Draw up a project, take measurements and draw a sketch.
- Buy the required amount of materials.
- Assemble the box. Tools may be required, but fasteners are a must.
Next, you need to install the box and secure it to the wall. If you plan to install a wall-hung toilet, then you will not need to hide the pipes separately; in this case, the tank and other plumbing communications will be initially closed behind the wall.
If you purchase a box, you need to buy a model that fits the size, then mount it on the wall.
Electrical installation
To avoid damaging the final finish, electrical wiring is first installed. If you hide the wiring in metal pipes, then in the future to replace it you will not need to open the walls; you can simply pull out the wires.
Due to high humidity conditions, wiring must be installed strictly according to the following rules:
- sockets and devices must be grounded;
- switches, lamps, sockets and cables must be protected from moisture and elevated temperatures;
- You can connect sockets and the lighting system only after the repair is complete.
USEFUL INFORMATION: How to install a bathtub under tiles
When determining the locations of future outlets, marking electrical wiring, as well as pipes, can be done directly on the walls. Afterwards, grooves are made along the marked lines using a puncher into which the cable will be laid.
Toilet installation. Step-by-step instruction
Experts do not recommend installing the toilet yourself, especially if it is a complex wall-mounted plumbing device. To do this, it is better to hire specialists who are well versed in the matter, as well as use professional tools. If you have to install it yourself, follow the instructions:
- Preparing the toilet and materials
- Removing an old toilet
- Assembling the toilet structure in the right place
- Connection to sewerage
- Water connection
Ventilation
First of all, inspect the box that was removed in preparation for the repair. Often, after cleaning and repainting, they are suitable for further use. Just install it back. It will be better if you additionally install a flapper valve in it to avoid cold air flows in winter. It is recommended to install a fan for the ventilation system; this will ensure better air circulation in the apartment and prevent fungus from appearing on the walls.
Installation of lockers. Step-by-step instruction
It is advisable to install cabinets in the toilet room. Here you can store various toilet cleaners, toilet paper, air fresheners and other household supplies. To install lockers you will need:
- Drill holes in the wall (if this is the fastening method).
- Hang cabinets (or place them on the floor).
- Adjust the location. The doors need to be easy to open. If they open with difficulty, this indicates a crooked installation.
If you plan not to buy a cabinet, but to assemble it yourself, then measurements are first taken, after which a sketch is drawn up. Then the materials and tools for installation are prepared and the guide discussed above is used.
Bathroom interior design
The design of the bathroom interior is done at the initial stage and requires special attention to every detail.
- Decide what building materials will be used for finishing. Typically, moisture-repellent products are used in this area; these can be tiles, plastic panels or porcelain stoneware.
- Inspect the plumbing fixtures for wear and tear and, if necessary, select a suitable replacement option.
- Take measurements of the bathroom to determine the free area of the room. This will allow you to draw up a detailed plan for the location of plumbing fixtures and other auxiliary equipment (bathtub, sink and household appliances).
Bathroom interior (video)
Important! When measuring a bathroom, you should take into account that after plastering the walls and finishing with facing material, the parameters of the room will decrease. This may affect the further placement of devices.