High indoor humidity, the need for frequent cleaning, and higher risks of mechanical damage place high demands on the quality of kitchen flooring. When choosing a material for a kitchen floor among traditional options, it is important to evaluate the pros and cons of each of them.
The simultaneous use of tiles and laminate is becoming a trend
What properties should a kitchen flooring have?
Special conditions in the kitchen area impose certain requirements on the choice of materials. The combination of tiles and laminate in the kitchen allows you to use the advantages of both products for comfortable and safe use. In this room, the coating will be exposed to many adverse factors, so its characteristics must meet the following requirements:
- Anti-slip properties. In the kitchen, surfaces are often wet cleaned, so you need to minimize the risk of slipping and injury. Choose only materials that remain safe in both dry and wet conditions.
- Easy to clean. Since during cooking something will inevitably crumble and spill on the floor, it is important to take care of the ability to quickly remove contamination without any special consequences. The coating must withstand exposure to household chemicals, detergents and abrasives.
- Resistant to scratches and mechanical stress. The constant presence of people in the kitchen, moving furniture, falling objects and regular cleaning negatively affect the condition of the material. When choosing a product, you must take into account its safety margin for at least 5 years.
- Antiseptic properties. The material should not be prone to the development of fungus, mold and the proliferation of pathogens.
- Pleasant appearance and versatility in use. The interior of the kitchen can be made in different styles; in any case, the flooring should fit harmoniously into the room.
Laying
- We determine the angle inside the room where the lamellas will touch with 2 spikes at once; installation should begin from here.
- Step back from the wall no less than 0.5 cm, install wedges on the spacer. If the area of the room is more than 60 m2, then increase the gap to 1 cm.
- Lay the laminate according to the instructions on the packaging from the manufacturer. If the length of the last tile in the row does not allow you to lay a whole lamella, then carefully cut off the unnecessary fragment.
- Lay the second and remaining rows following the instructions on the package.
Advantages and disadvantages of combining materials
By combining tiles with laminate in the kitchen, you can create a comfortable and safe work area, a beautiful interior and ease of cleaning. This solution results in many benefits:
- The area next to the stove and kitchen units can be tiled. This material has greater strength and stability compared to laminate, so it will last longer and will not change its appearance during use. This creates a special sanitary zone, which will be much easier to care for.
- Resistant to moisture and liquids. The kitchen is a room in which something constantly needs to be washed and cleaned, so the effects of detergents and aggressive chemicals should be easily tolerated by the materials. It is much easier to remove dirt and debris from the surface of tiles compared to wooden floors. Also, accidentally spilled liquid will not cause as much damage to tiles as laminate or parquet.
- It is easier to install a kitchen set; the legs of the furniture will not push through the coating if it is represented by tiles. In the case of laminate, over time the surface begins to sag, noticeable deformations and dents form. As a result, the furniture sways and loses stability, creaking and play appear.
- The rest of the kitchen area will look much better with a laminate flooring. This material is convenient, practical and safe. It will fit well into almost any interior and will maintain a pleasant feeling when walking barefoot.
Preparing the subfloor
Before starting work, the foundation must be prepared. When it comes to old wooden floors, it is necessary to remove rotten boards and replace them with new ones, sand them if necessary, fill cracks and crevices, and eliminate creaking floorboards.
If the DSP boards will be laid with glue, then the wooden base must be pre-primed.
If the base is made of concrete, it must be carefully checked for unevenness and cracks. All defective areas should be leveled and put in order using cement mixtures.
Components of cement bonded particle board
Finally, if the installation is carried out on an earthen floor, a sand-gravel mixture (SGM) is used to level it using a cement particle board. The bedding must be laid in a layer of 20 cm, leveled and compacted.
Joint location
When thinking about the future interior, you must immediately decide on the area where the border between tiles and laminate flooring will be placed in the kitchen. These two types of coating differ significantly in the way the base is laid, its technological characteristics and requirements. Therefore, at the stage of installation of products, care should be taken to clearly differentiate them.
There are different methods to solve the problem with the joint:
- Use an aluminum strip to secure linoleum near walls and thresholds;
- Apply vinyl overlay for masking;
- Organize a podium at the point where the two materials separate.
White tiles and laminate Source stroy-podskazka.ru
You can create a seam in any of the following ways, but the most important thing is to choose the right location. The main condition is to place the joint in such a way that it does not interfere with movement and does not pose a danger during active movement of residents and guests in the room. The border should either run parallel to the movement of people or be located in an area that is rarely visited. Otherwise, the risk of injury to occupants and damage to the coating increases.
Most often, the tiles are laid in the shape of the letter L, with most of it located under the set, and in front of the furniture a work area one and a half steps wide is formed. This arrangement will allow you to move freely around the kitchen without fear of catching a joint or hitting the podium. The rest of the space is laid out with laminate, this will give the room a more lively and cozy look.
Design of the joint between materials Source climatechange.ru
The boundary between materials is usually formed similar to what is done when laying linoleum. The seam is located parallel to the kitchen unit, its line runs along the facade. When arranging the podium, the area with tiles is placed 2-3 cm below the main surface.
How to combine tiles and laminate: designer tips
A few smart recommendations:
- When combining, it is better if the two coatings differ in the same direction of laying, thus, it is possible to achieve a smooth flow of one material into another and create a more complete composition.
- Zigzag and uneven joints are much easier to install with staggered tiles.
- To make the connection between the coatings look less noticeable, it is possible to use a podium. For example, in the kitchen space you can create a difference in the floor between the working and dining areas.
- If single-level masonry is used, it is important to choose the correct shape of the joint; a connection in the shape of a semicircle looks especially harmonious and beautiful.
- In terms of color, it is advisable to use a combination of warm shades with warm and cold ones, also only with similar tones.
- For small rooms, it is better to choose cladding in light colors, and use dark coverings in more spacious rooms with high ceilings.
Methods of joining materials
No matter how much space tiles and laminate flooring take up in the kitchen, no matter what color and shape the products are, in any case they play an important role in the perception of the interior. Designers and craftsmen always advise starting from the tile; its pattern and shade will be decisive in shaping the style of the room. This property is due to the fact that the tiles lie very close to the kitchen unit, their quantity is usually small, and therefore they attract maximum attention when looking at the room. Depending on the appearance of the tile, you can emphasize the features of the furniture and accentuate individual details.
Zoning the kitchen using a seam
The shade, pattern and overall design of tiles and laminates, as well as the method of laying them, should solve the following problems:
- Correct choice of product colors. It is best to decorate the room either in contrasting or similar colors.
- The transition between materials must be hidden in such a way that the impression of complete uniformity of the coating is created, despite the presence of two different colors and textures.
Zoning a kitchen with a podium Source opora-stroy.ru
The easiest way is to make a seam in the form of a straight line; it can also be placed near the built-in furniture set. If you need a more interesting option, try making the joint in the form of an oval, semicircle or some other shape. The tile, separated by a straight arc, protrudes deeply into the laminate flooring. The border that looks best is the one that runs next to the table, which is in the center of the room.
The arc can also have reverse curvature. In this case, the space under the tiles will be minimal, but it increases in the area of the sink or refrigerator.
Some owners prefer a uniform distribution of materials, when laminate and tile occupy approximately equal parts of the room. If it is difficult to immediately determine the layout of the coating, you can use old linoleum. This material easily leaves dents, so it can be used to track the main routes of movement of the residents of a house or apartment.
An interesting option is a combination of hexagonal tiles and laminate. This combination can result in a whimsical and very expressive border.
Combination ideas in different interior styles
In the minimalist style, a more restrained finish is assumed with rather modest and laconic color schemes, in gray, black or white colors; for the high-tech direction, choose a combination of glossy ceramic tiles with laminate boards in dark gray, black, anthracite or wenge shade.
Scandinavian design can be decorated using light tile finishes or models with imitation wood, stone or marble, which, in combination with beige, white, limestone or ivory laminate, will have a pristine and natural appearance.
The photo shows a Scandinavian-style hallway with a floor lined with patterned hexagonal tiles combined with beige laminate boards.
In rustic country, they often use laminate fabric in walnut, red, rich brown or beige shades in combination with multi-colored mosaics or patterned ceramics in the patchwork style, and for an industrial loft they prefer laminate that has a shabby and aged look in combination with dark tile cladding or products that imitate brick.
The photo shows a laminate floor combined with patchwork tiles laid in the center in a country-style kitchen interior.
Designing the border between materials
When installing tiles and laminate, a seam is formed between them, in which there must be some gap to avoid subsequent deformation. This gap must be left free and cannot be filled with any materials. Laminate tends to expand from heat, so it needs space to change size.
The joint between tiles and laminate Source 2proraba.com
Cork tape
Typically, decorative thresholds or other overhead parts are installed at the junction. If such elements are not included in the design, you can use regular cork tape. This material will serve as a kind of gasket that will fill the gap between the tile and the laminate.
The cork must be installed together with the laminate in order to immediately fix the tape at the border of the two materials. And although the strength of such a product is inferior to traditional aluminum and plastic options, it has its own advantages. The surface sealed with cork tape is not subject to squeaking or sagging, which is why it can often be found in expensive floor coverings.
Cork tape for joints Source germeteks.su
Application of grout
It is convenient to use colored silicone to fill the gap, but it must be designed for such work. It is also important that the material is abrasion resistant. A polyvinyl chloride tube is placed in the gap, and silicone mass is added on top. The last step is smoothing the surface with tools.
The advantages of this method are ease of application and effective prevention of liquid exposure to materials. Disadvantages - low durability of silicone; the layer must be frequently renewed to maintain its original properties.
Grout for tile joints Source izplitki.com
Aluminum threshold
One of the most reliable and stable options that can be used for joints between tiles and laminate. Its only drawback is that it can only be used on straight seams. The lath is produced using a cold-drawn blank; its design is similar to a mounting fungus.
For camouflage, the outer part of the aluminum slats is covered with decorative film. The shade of the coating must match the color of the laminate, and the product codes must also correspond. A special profile is used to decorate the podium.
Do you need an underlay for SPC laminate?
The substrate under the SPC tiles will compensate for differences in the base. In addition, the substrate under the SPC laminate is necessary for noise and heat insulation. Requirements for the material from which it must be made: it must be of high density, 1.5 mm thick.
Some manufacturers not only recommend the use of bedding materials in the installation instructions, but also prudently produce quartz vinyl tiles with a backing built into their structure. In this case, additional lining under the SPC laminate is not needed.
Video description
An ideal joint between laminate and tile without any consequences.
Aluminum threshold Source mada.kiev.ua
Vinyl threshold
If there are curved joints, it will not be possible to use metal thresholds. In this case, you can purchase flexible vinyl tape that can be laid in any direction. This material is affordable and easy to handle, so craftsmen often find use for it in repairs.
During installation, the first step is to prepare the seam. At the depth of the joint there is a special bridge, the width of which is cut to the tiles and laminate. The profile is fixed to the concrete base with dowels and plugs. Before laying the tape on the profile, it must be treated in a hot liquid to soften it. When the plastic has completely cooled, the vinyl product will be firmly fixed inside the joint.
Using slabs to level the floor
DSP can be used to level the floor under the finishing coating. There are several installation methods:
- On the logs. In this case, slabs with a thickness of 20-24 mm are used.
- On a flat wooden, concrete or earthen base. Thicker slabs are used here: 24-26 mm.
You can read about other options for leveling the base under the laminate in this material.
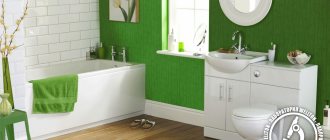
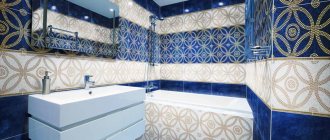
Large bathroom
A spacious room will provide more opportunities for implementing a variety of design ideas. Here you can experiment with unexpected solutions and color combinations.
In a large bathroom, wall decoration in both white and dark colors will look beneficial. And patterns and large panels will help highlight the necessary accents.
Bright contrast and the use of several colors at the same time would be appropriate here. In this case, it is desirable that the floor is darker than the walls.
However, the color of the floor should be present at least in small quantities in the decoration of the walls of the room. The mosaic cladding will also look beautiful.
Installation features
Working with OSB boards is convenient and simple, but there are certain features of the work that must be observed. So, firstly, it is important in any case to use a level and lay the slabs as evenly as possible, especially if you plan to install a laminated coating or tiles. However, almost all materials used for finishing are demanding in terms of the evenness of the base.
Do not forget that the material contains wood, which is a “living” matter, which means that the slabs may slightly change their width parameters during the process. Between them during installation you need to leave a small gap of 1-2 mm. Otherwise, they may become deformed later. But at the same time, if carpet or linoleum is laid on top, the width of the gaps should be minimal. And it is better to use sheets that are as thin as possible. Sometimes the gaps are sealed with sealant after installation is complete.
OSB floor painting
Advice! If the OSB will not be covered on top with another material, it is important to varnish it, otherwise it will quickly lose its appearance. And under it there must be waterproofing coatings.
As for the slabs, when laying ceramics on top of them, it is important to fix the slabs themselves well in order to avoid deformation of the ceramic coating in the future. The step between them should also be small.
Laying OSB on a wooden floor
OSB can be installed on the floor using either joists or screeds. In the first case, the slabs are fixed on level logs. Usually the material is installed in two layers to make the base thicker. Thermal insulation can be laid under the slabs.
Also, the slabs are placed either on a ready-made cement screed, or on an old wooden base, if the goal is not to make a new floor, but only to level it. The main thing is that the base itself is more or less even. When installing on a wooden base, you need to fasten the plates with a pitch of approximately 30 cm between the screws.
Installation of OSB boards on a wooden floor
On a note! OSB boards can also be used in conjunction with underfloor heating technology. However, they cannot be heated too much, as this may start the process of releasing harmful substances into the air.
