Savig
22774 0 12
Savig August 16, 2016Specialization: master of interior finishing works. I am well versed in power tools for repair and construction. Formerly a teacher at a radio engineering college.
Installation of a new faucet in the bathroom
Installing a faucet in the bathroom is not a difficult task, but it is very important. And during its implementation, a whole string of various difficult situations may arise. In order for you to understand what you may encounter, as examples, I will introduce you to the problems that I had the opportunity to solve.
Problem #1: choosing a new device
Before installing a faucet in the bathroom, you need to buy it. It seemed like nothing complicated, but when I went to a plumbing store, I changed my mind about this. I’ll try to make the task a little easier for you and describe the main criteria that you should pay attention to:
Three main components of the optimal choice
Material
In general, the materials for the faucet can be steel, glass, fiberglass, ceramics, plastic and even granite. But the most popular are the following two options:
- Brass . A brass device has a decent weight and a relatively high cost, but it has high strength properties and excellent resistance to various types of chemical influences. Having made such a purchase, you do not have to worry that the thread will crack during the process of tightening the nuts, and the gib will break off as a result of careless handling;
- Silumin . It is a very cheap alloy of aluminum and silicon. Models made from it are light and fragile. Such a choice cannot be called reliable; by making it, you may end up not saving, but, on the contrary, ending up with even greater costs;
Beautiful and cheap, but absolutely unreliable silumin mixer
Externally, brass and silumin models can be very similar. To distinguish them, just pick them up and try them by weight. The heavy product is brass, the light product is silumin.
Control
Here you also have to make a choice in accordance with your financial capabilities and preferred functionality:
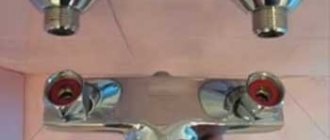
- Two valves . Just recently, this tap water mixing system had no competition at all. In it, each water pressure is provided with its own axle box, with the help of which its intensity is regulated. Replacing such parts in the event of their failure is easy to do with your own hands. Also, the advantages include lower cost and compliance with the classic style. The downside is the complexity of control, which eliminates the possibility of setting a weak flow of the desired temperature and requires the use of two hands;
Photo of a mixer with two taps
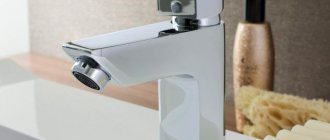
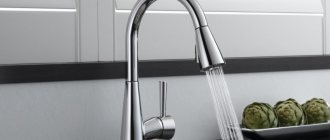
- One lever . Here, the connection of different water flows occurs using a special cartridge, which is easily controlled by just one movement of the hand. These are the models that are the most popular today due to the optimal balance between ease of use and price. By the way, I also settled on this option;
Single lever plumbing fixture
If you want to use water more economically, I recommend buying a two-stage model. In it, up to a certain moment, as long as the water pressure is not too strong, the lever moves easily; in order to open the tap completely, you will need to make a noticeable effort.
- Thermostatic control . One knob is responsible for the pressure force, the other for its temperature. Although such a system is not cheap, it completely eliminates the possibility of burns, which is of no small importance if children live in a home;
Thermostatic model
- Contactless control . In this case, to turn on the device, you just need to bring your hands to it, after which the infrared sensors will do everything necessary. But you should remember about the high cost of such equipment and the need to regularly replace batteries.
The touchless mixer is the most convenient to operate
Geometric dimensions
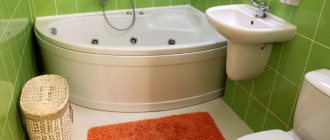
The height can be adjusted during installation, if, of course, you are doing it from scratch. If replacement occurs, then be guided by the location of the old device. But pay attention to the length of the spout so that the water flowing out of it does not hit the side of the bathroom , and at the same time, so that it itself does not interfere with your stay in it .
Faucet materials
The main requirement when choosing a mixer is the resistance of the material to corrosion. The most popular are products made of copper, brass, stainless steel, ceramics, and polymers.
Copper and zinc are more common. Less commonly, models made of glass and ceramics. They are distinguished by a high level of fragility and are used to emphasize the style of the room.
Problem #2: Having the necessary inventory
For me, this, in fact, was not a problem, since I always try to keep my workshop as complete as possible. But I advise everyone else, before installing any plumbing fixture, not just a faucet, with your own hands, check that you have the following tools and materials on hand:
| Name | Purpose |
| Adjustable and gas wrenches | Unscrewing and tightening threaded connections |
| FUM tape | Sealing of threaded connections |
| Spirit level | Maintaining the horizontal position of fittings and mixer |
| Hammer and grinder | Creating grooves for pipes |
| Pipe soldering iron | Connection of plastic pipes |
A gas wrench is the most important tool when working with plumbing.
Selection of eyeliners
The tap is connected to the water supply system using flexible and rigid connections. Rigid hoses are reliable, and flexible hoses are easy to install.
The standard length of flexible hoses is 86 cm. This is enough to prevent the hoses from breaking. They are laid in a semicircle.
If the kit comes with short eyeliners, 30 cm long, then they will have to be sharpened. Extra connections and problem areas for leaks appear. Therefore, it is recommended to immediately purchase hoses of the required length. The eyeliner should not be stretched.
The compatibility of the mixer materials and connecting hoses is taken into account so that corrosion does not appear on the elements.
Problem #3: preparing the installation site
Now, before placing the faucet in the bathroom, you need to properly prepare the place for it. There are two different possible situations here, together with the difficulties associated with them. I happened to encounter both at different times, so let's look at everything in order:
Having an old mixer
How to properly remove the old device? I did it very simply:
- Shut off the supply of cold and hot water to the apartment;
- Carefully unscrew the clamping nuts with an adjustable wrench . At this stage it is very important to act extremely carefully so as not to damage the fittings, otherwise the volume of repair work will increase significantly;
Unscrewing the clamping nuts on an old mixer
- I cleaned the threads and the inside of the connecting elements protruding from the wall from the remnants of old winding and paint .
No pipes
But here you will first need to install pipes under the mixer:
- From the point of entry into the bathroom of the cold and hot water supply I punched grooves in the wall using a grinder and a hammer drill;
- I ran plastic pipes along them , connecting the required sections using couplings by soldering. In order to find out at what height to place them, I went to read the SNiPs, and it turned out that this is 200 mm above the side of the bathtub. So I did;
The installation height above the bathtub of fittings must be at least 20 cm
In my case, the creation of the grooves took place in an empty room, but if you have all the other plumbing equipment already installed and you do not plan to take it out, then be sure to cover it with plastic film or cloth to protect it from construction debris. It is especially important to do this on an acrylic bathtub to avoid scratches on its surface.
- I also checked at what distance the output points should be from each other, this is 150 mm;
The diagram shows the installation height of the faucet in the bathroom and the distance between the fittings
- Before fastening the fittings, I accurately aligned them horizontally using a spirit level . If this moment is missed, the mixer may ultimately be installed crookedly;
- Since it was planned to tile the walls in the future, I moved the edges of the couplings out of the grooves by 20 mm so that they would eventually be flush with the finish. You will also be sure to take into account the thickness of your finishing material.
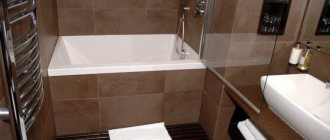
Attaching the mixer to the wall: installation process and components
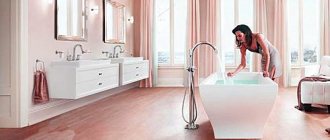
Attaching the faucet to the wall is another mandatory process that is performed during renovation or finishing work in the bathroom. When starting to install a new mixer, you need to decide on the type of product, technical characteristics and shape. The mixer can be double-valve or single-lever, made of brass or silumin, chrome-plated steel, to match the design of the bathroom.
When purchasing a wall-mounted faucet, you need to take into account that it should be located at a height of 10-18 cm above the washbasin and 25-35 cm from the bathtub level. In addition, we should not forget that for long-term, trouble-free operation of the equipment, it must be protected from low-quality tap water by installing a water filter.
Wall mounting of the mixer is carried out using the following elements:
Usually, water pipes are already installed under the faucet, but sometimes, in order to mount it to the wall, it is necessary to make additional holes in the tiles. For this purpose, a diamond drill is used, which makes smooth holes without chips or scratches. When calculating the future vertical mounting location into the wall, you need to add 10-20 cm to the height of the bathtub, depending on the length of the equipment spout. The horizontal position should be clearly in the center of the bath. The resulting figure will indicate the location of the water socket and corner fittings, the distance between which should be on average 15 cm. The strength of the mixer fastening depends on the reliability of the fittings.
Problem #4: disassembled faucet
The bathroom faucet is sold unassembled and installed assembled. It consists of the following elements:
| Element | Purpose |
| Watering can | This is a component of the soul, it is with its help that a single stream of water will be transformed into a pleasant rain of many thin streams |
| Spout | He is also a gander or spout, directs the mixed liquid into the bath |
| Hose | Another component of the shower that delivers water to the watering can |
| Main block | It is here that hot liquid is mixed with cold liquid in the required proportions and the pressure power is set |
| Decorative lampshades | Cover and decorate the connection points of the device to the pipes |
| Rubber gaskets | Responsible for the tightness of connections |
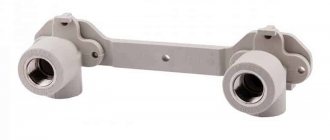
| Eccentrics | Allows you to align the position of the mixer if the fittings are installed with errors |
Mixer equipment
I assembled all the components together, except for the eccentrics, since they are exposed when connecting to the fittings. And here, by the way, you should not use FUM tape or other sealing agents; rubber gaskets are quite enough.
Varieties
The first stage of installing a faucet in the bathroom is choosing the most optimal equipment. When making a selection, it is recommended to take into account:
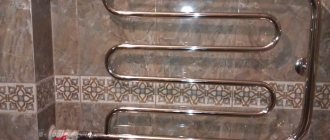
Types of bath faucets
Wall-mounted mixer with cascade and lighting
Problem #5: Installation
After finishing the finishing work, I finally got to the main problem: how to install a bathroom faucet into the wall? And now, after overcoming all the above obstacles, I set about solving it:
Step-by-step instructions for performing installation work
- I wrapped the eccentrics with FUM tape and screwed them into the protruding fittings . Tow is also suitable for sealing the connection. I adjusted the distance between the outlet holes, which, as I noted above, should be 150 mm, and also set them horizontal using a building level. Don’t forget to measure the position of the mounted elements at every step if you don’t want to end up with a skewed faucet;
Screwing eccentrics
- Now I've screwed the whole block together. Both nuts easily fit into the threads, so I removed the device back and installed decorative lampshades . If you encounter difficulties, the fixing elements are tight, then return to adjusting the eccentrics, otherwise you may damage the threaded connection;
Installed decorative lampshades
- Before finally connecting the unit, I wound the FUM tape onto the threads, after which I completed its installation completely, securely tightening the clamping nuts with a wrench until a characteristic creaking sound was achieved . You should not overtighten, as this can break the nuts; handle the tool more carefully, especially if we are talking about a silumin product;
Connecting the assembled mixer
- I turned on the water and checked the operation of the device . If water mixing occurs normally and there are no leaks, then you can consider the installation of the mixer on polypropylene pipes to be successfully completed.
How to install a mortise mixer? In this case, you will also need a drill with a special milling attachment in the form of a crown:
Example of a built-in bath mixer
- Choose the most suitable location for the faucet on the side of the bathtub and apply appropriate markings there, taking into account the dimensions of the purchased plumbing fixture;
- Insert the bit into the drill and drill a hole according to the marks;
Core cutter for drill
- Under the mixer, insert a special gasket included with it;
- Install the mixer into the created hole and secure it from below with a fastening nut, which should then be tightened tightly using an adjustable wrench. In some models, the fixation function is performed by a pin;
- Connect flexible hoses connecting the device to the water pipes;
Connecting flexible hoses supplying hot and cold water
- Turn on the water and check the system.
Installing a mortise model is similar to installing a faucet on a sink, but also requires drilling the side of the bathtub.
Final operations
How to install a faucet in the bathroom if the center-to-center distance of the supply pipes does not correspond to the dimensions of the device body? This issue arises especially acutely when pipelines are laid hidden. The solution to this problem is simple: you need to install eccentrics with a large offset.
The quality of the supplied water has a significant impact on the durability of ceramic locking elements. Therefore, faucet manufacturers recommend integrating filters into pipelines.
Installing a faucet in the bathroom with your own hands, as you can see, is not very difficult. All that is required is accuracy, attentiveness and careful preparation.