Despite the fact that modern radiators made of aluminum and metal-plastic are made according to an improved design, nevertheless, many are not satisfied with their appearance. As an option, you can purchase a product made to order, taking into account the characteristics of the interior of the room. But it will be very expensive.
Decorative screen made of wood with glass inserts
The ideal solution would be a decorative screen made by yourself. This is a fairly simple and inexpensive process, both in terms of effort and financial component.
Most people believe that the battery in the box will heat much worse and therefore refuse them. But this is a big misconception. If desired, you can make a screen for the radiator, which will improve not only its appearance, but also increase the heating efficiency. It is important to understand the heating system of the structure.
How to increase screen heat transfer
Wooden screen with carvings
Heat is supplied by radiation in the IR range and due to flows of warm air - convection. Changes in the ratios of these two indicators can be influenced by changes in the temperature of hot water in the heating system, as well as the type of construction and external conditions.
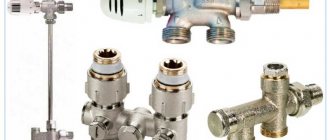
Metal screen
Metal screen for battery
In order for the battery box to have good thermal conductivity, its interior must be painted black. Then it will absorb IR from the heating device and supply it to the room. Heat transfer can be enhanced by adding additional thermal shielding on the wall side. A heat-insulating padding polyester with one-sided aluminum coating is ideal for this. Such a material promotes reflection of the IR flow from the wall and practically does not conduct heat. The thickness of the material should be at least 5 cm. You can also use aluminum-coated foam, however, it is less practical and does not bend. Therefore, it will be quite difficult to tuck it behind the heating device.
Mistakes that are often made when making a decorative screen for a battery
- Designs with minimal ventilation interfere with the normal conventional process. The resulting cushion of warm air further reduces heat transfer. With such a device there is a heat loss of at least 25%.
- Design flaws. For example, when the battery is sewn up, everything seems to be fine, but the pipe remains outside. There is an obvious design miscalculation here.
- A densely lathed screen with slats that are wider than the spaces between them is also uneconomical. In such designs, heat transfer is reduced by 7-10%.
Types of accessory
Depending on which installation method is chosen, there are three types of screens:
- three-sided box with lid (stand);
- flat panel;
- hanging screen.
If you need to completely hide the battery, use a design in the form of a closed box with a lid. A radiator in a niche or under a window sill is masked with a shield in the form of a flat panel. If the radiator protrudes from under the window sill, then use a hinged screen consisting of a lid and a flat facade.
When making a decorative shield, you can choose the following materials or combinations thereof:
- metal;
- tree;
- plastic;
- glass;
- MDF boards, chipboard, fiberboard.
A metal shield conducts heat well. A metal product can be given a very sophisticated look using perforation or welding according to the customer’s sketches. But to work with metal yourself, you need skills and equipment.
Wood screens are environmentally friendly and look noble. At the same time, wood is a malleable material, very easy to process. But wooden panels, when exposed to hot air and humidity, are prone to deformation and drying out, so you need to select high-quality, dried wood, and impregnate the finished screen with special products.
Plastic captivates with its availability, rich selection of colors, and ease of processing. But it is short-lived, deforms from high temperatures, and releases substances that are unsafe for humans. Therefore, plastic screens should not be installed where people live.
Tempered glass screens are durable, the glass itself is thick, with already processed edges. You can decorate the glass with almost any design and add LED lighting. Glass screens are classified as elite models and are not cheap.
MDF screens are the most common design option for heating devices. Plates made from the finely dispersed fraction differ little in quality from wood; they are easy to care for and easy to work with. MDF screens are distinguished by a rich color palette, variety of textures and styles.
When making decorative shields, creative craftsmen can use atypical materials, for example, thick fabric.
Selecting screen material
Before you begin the manufacturing process, you need to select the material for the cladding. The speed and ease of performing the work, as well as the efficiency of heat transfer from the battery in the screen, depends on this.
It is not recommended to use plastic because it has poor thermal conductivity, is not cheap, and is very difficult to process. In addition, such material may warp and become stained when exposed to heat, and after a few years it may lose its attractiveness.
Alternatively, you can use metal - an excellent heat conductor. It’s just that building a structure from this material requires skills and special tools.
Finished wooden screen facade
Wood is an environmentally friendly material that is easy to work with.
The only and main disadvantage is poor heat conductivity, which cannot be improved. But still, a properly made wooden screen can be quite effective. And beauty lies in the very texture of natural wood.
Some people use rattan to create this design. This is an environmentally friendly woven material made from dried calamus stems. Furniture made from rattan is especially popular. This material will also perfectly decorate the battery box.
Drywall is a good option, however, it quite often cracks and peels from overheating. But if desired, its condition can be improved and an excellent battery box can be made and finished in a variety of ways - to choose from.
Drywall battery screen
Installation
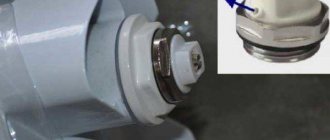
Dowel nail
Before installing the screen on the battery, a metal sheet or foil is attached to the wall. From the selected material, a part is cut out with a size of 1 cm on each side less than the parameters of the front panel, and glued to the wall. After this, they proceed to the installation of the box.
There are several ways to do this:
- Installing the screen on the battery using drive-in anchors. Having determined the optimal location of the screen and marking the corresponding points on the wall, drill holes in them. Using a hammer, hammer the anchor into the holes, and then screw the bolt into it. The box is secured to these bolts.
- Hook mounting. Having attached the screen to the wall, mark the points for the holes for the dowels on both sides. Drill and drive in dowels. Mounting hooks are installed in them. A box is hung on them.
- Installation on legs. The easiest way to solve the problem, for which you will need furniture (preferably adjustable) legs. They are attached to the bottom of the structure using metal corners. Afterwards, set the desired height of each leg and put it on the battery.
Types of battery screens
There are several types of designs that can be used to decorate a battery:
- Screen box - completely covers the heating device.
- The flat screen is designed to create an enclosure for radiators located in a niche.
- Hinged screen. This design is very suitable for cast iron raised batteries.
Hinged glass screen for protruding batteries
Recommendations
The decorative screen should not interfere with heating the room, especially if the radiators are old. Panels with mesh, lattice or canvases with a large number of holes, which do not impede the passage of air, cope well with this task.
To increase the functionality, durability and visual appeal of the screen, raw materials can be combined.
The decorative screen protects from dust, but cleaning still cannot be avoided. When choosing a screen model, take into account cases of cleaning, planned seasonal work, and accidents.
Creating a decorative shield with your own hands will not cause difficulties if you understand the technology and have at least a little experience in carpentry.
To learn how to make a screen for a battery with your own hands, see the following video.
Making a screen for a battery from plasterboard
Before making the screen, the drywall goes through a preparation procedure. We roll all cut pieces from the inside with a needle roller. The prepared parts must be soaked in PVA water emulsion. This will require about 2 liters of solution.
This procedure increases the thermal conductivity of drywall. The pits made by the roller form thermal transitions from the inside to the outside. In addition, such drywall is easier to paint: the coating is applied in an even layer. All cuts of such material will be smooth and clean.
A painted plasterboard product, treated with sandpaper, looks no worse than a factory-made plastic one.
Making a plasterboard box
Furniture and interior items
0 votes
+
Vote for!
—
Vote against!
Frequent painting and constant exposure to high temperatures worsen the appearance of heating radiators, and therefore they need periodic replacement. If, when making renovations in your apartment, you do not plan to replace the heating radiators, the problem arises of masking them with the help of decorative screens that are firmly fixed in the interior of the residential premises. When used as finishing touches, battery screens, along with traditional decorative elements, play an important role in creating a unified stylistic concept, since they not only focus attention on the advantages or hide flaws, but also expand the functionality of the interior details for which design they are used. Despite the wide selection of decorative screens presented on the construction market, experienced craftsmen advise against purchasing a ready-made design and making a screen for the heating radiator with your own hands, which will save a good amount of money and make it taking into account the size of the heating device being decorated and your individual taste preferences. To make this task easier, in this article we will look at how to make a screen for a battery with your own hands.
Content
- Operating principle of heating radiators
- Physical basis of the functioning of heat-reflecting screens
- Advantages of screens for heating radiators
- Types of screens for radiators: brief description
- What to look for when choosing a decorative screen design?
- DIY radiator screen: step-by-step instructions
- Materials and tools for installation
- Screen installation diagram for radiator
- Scheme for marking and cutting parts
- How to assemble the screen?
Operating principle of heating radiators
At first glance, it may seem that a radiator covered with a box or decorative grille will cope worse with its main functional task, which becomes the most common reason for refusing to upgrade unsightly heating devices. Despite this, the experience of using decorative screens shows that the design, made in accordance with the basic laws of thermophysics, not only does not reduce, but also increases the heating efficiency. To make an effectively functioning battery screen with your own hands, let’s consider the basic operating principle of heating radiators.
The transfer of thermal energy from the heating device to the room is carried out in two ways:
- Convection, which is based on the mixing of warm and cold air flows;
- Electromagnetic radiation of the infrared spectrum, the power of which increases as the temperature of the radiator increases.
Old-style cast iron radiators work precisely on this principle, heating the air through convection processes. As the heating intensity increases, the ratio of radiant and convection energy changes, as a result of which heat transfer begins to occur due to infrared radiation.
The operation of modern radiators is based on a similar principle, but they differ in their ability to respond to environmental conditions and, adapting to them, redistribute energy in order to maximize its transfer. If maximum heat transfer is impeded by some external conditions, for example, a curtain that impedes air circulation, heat is redistributed towards the front panels, as a result of which heat transfer begins to occur due to infrared radiation. Thanks to this property, the operating efficiency of modern radiators is significantly increased.
Important! In order for the transfer of energy through convection to be as efficient as possible, the front panel of the screen, usually represented by a grille, must be designed in such a way that an air cushion is created between it and the radiator. Otherwise, warm air, which has an obstacle in its path, will partially accumulate inside, which will lead to disruption of heat exchange and heat transfer to the adjacent room. However, for maximum heat transfer, you need to pay attention to a number of details.
Physical basis of the functioning of heat-reflecting screens
In accordance with one of the basic rules of physics, a black body has the ability to maximally absorb and emit electromagnetic waves. This rule is also relevant for effective screens on the battery, since it must absorb infrared radiation from the radiator and, having good thermal conductivity, release heat into the room. Thus, from the presented example it is clear that the inside of the screen must be painted black, while the outside can be decorated at your discretion.
Let's consider the basic rules for designing a heat-reflecting screen, taking into account the basic laws of physics.
To achieve maximum thermal effect, the surface behind the battery is covered with a heat-reflecting screen, which should not be black, but shiny, due to which infrared radiation from the back surface of the radiator will be reflected from the wall and, passing again through the radiator, will heat up even more. Using this technique, you will significantly increase the level of heat transfer and, thereby, increase the efficiency of the heating radiator.
Despite this, the metal sheet does not ensure maximum functioning of the system, since it reduces unnecessary heat transfer only by 5-6 times. The most effective solution to this problem would be to install a heat-insulating mat made of fibrous material, for example, padding polyester, coated on both sides with aluminum. This design reduces the flux of infrared radiation onto the wall by more than 40 times. Experts recommend choosing synthetic winterizer, since the 5 mm thick layer of material prevents heat conduction and is a good reflector of infrared radiation.
For other fibrous materials, heat reflective mats will require a 3cm thick layer of material, which can create additional difficulties when placing the mat behind a radiator.
Advantages of screens for heating radiators
Before we begin making a screen for the radiator, let's consider the main advantages of this design.
- Using screens for heating radiators, the advantages of which will be discussed below, you get the opportunity to effectively disguise the radiators, creating a holistic interior concept and transforming your home;
- Prevent contamination of radiators, which will facilitate their operation and maintenance;
- Properly designed radiators will ensure uniform distribution of air masses throughout the room;
- By covering the radiators with a decorative screen, you will protect your household from burns and bruises in the event of a careless collision with heating devices and, thereby, ensure their safety;
- A variety of materials, textures, shapes and colors allows you to choose a suitable decorative solution that will be an ideal complement to the main interior concept.
Types of screens for radiators: brief description
There are several main classifications of decorative screens, the first of which involves their division into several groups in accordance with design features and includes:
- Screens in the form of a closed box are used in cases where it is necessary to completely close the radiator;
- Flat screens are used to mask radiators located in niches;
- Hinged screens for radiators are a design with a lid and are used to disguise unaesthetic cast-iron radiators that protrude greatly from under the window sill.
There is another current classification of screens for radiators, which involves dividing models according to the material used. Taking into account this classification, the following varieties are distinguished:
- Metal;
- Plastic;
- Wooden;
- Screens made of MDF lattice;
- Glass.
Let's take a closer look at the characteristics of each of them.
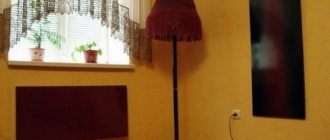
- Metal screens most often look like a box, for the manufacture of which a thin sheet of metal was used. Despite their rather laconic and somewhat primitive appearance, they fully cope with their functional task. The modern market offers more expensive screens made of stainless steel, which can be diversified by perforation. To install metal screens, you do not need to have specialized skills, since they are simply hung on the radiator;
- Plastic screens , due to the diversity of the model range and affordable pricing policy, are the most affordable options for all segments of the population. However, experts do not recommend using them in residential areas, since when heated, plastic can release harmful substances;
- Wooden models are most often made to order from valuable wood species, taking into account a previously drawn up sketch. Due to their aesthetics and noble appearance, wooden screens are an ideal complement to a variety of interior concepts, including classic, rustic and modern eco-styles. The main disadvantage of wooden screens is their tendency to dry out and deform due to changes in temperature and humidity. To protect and prolong the service life of wooden screens, only high-quality wood is used, which is the reason for the high cost of the products. Radiators, complemented with wicker decorative grilles, acquire an aesthetic appearance;
- Screens made from MDF lattice are practically no different in appearance from wooden models, but they are much cheaper. Thanks to the use of modern technologies in their production process, MDF screens are a practical and, at the same time, affordable solution for many. MDF is a material whose quality is practically no different from wood, which can be used to produce screens of various shapes, colors and stylistic designs;
- Glass screens are exclusive models for the production of which tempered (stained glass) glass is used. Often such models become an unusual decoration of exquisite interiors. Glass screens are decorated with patterns that you can choose at your discretion, and require careful use and constant care.
What to look for when choosing a decorative screen design?
We have already noted earlier that installing any type of screen helps reduce heat transfer, which in the best case will be 5%. In this regard, remember that effective decorative screens for radiators should be characterized by the presence of the maximum number of holes, which will facilitate the unhindered movement of warm air.
To increase heat transfer from the radiator, it is necessary to install a screen made of foil material behind the battery. Thanks to this, heat will be reflected from it and enter the heated room.
Important! Experts recommend paying attention to another technique that reduces heat loss. It involves painting the inner panel of the screen black, so that the screen will absorb the maximum amount of heat from the radiator and release it into the room.
Due to the fact that radiators need to be washed and the water drained at the end of the heating season, the screen design must be easily disassembled and removable. This condition must be strictly observed, since frequent dismantling of decorative elements creates additional difficulties. In addition, the design must be such that free access to the battery valves is maintained. If you purchase a ready-made design, pay attention to the screen for the Leroy Merlin radiator, the model of which meets all the requirements listed above.
Ideas for making screens for radiators with your own hands
DIY radiator screen: step-by-step instructions
First of all, decide on the type of design you want. If the battery to be decorated is located in a niche, a flat screen is suitable for its decoration. In such cases, a decorative grille is selected taking into account the size of the niche and simply installed in it.
Most often, the batteries are suspended on a section of the wall under the window, and therefore it is recommended to give preference to hanging screens for radiators.
Materials and tools for installation
Among all the options for making a screen for a radiator, the most common is mounting a screen from MDF or chipboard. To make it you will need the following materials and tools:
- Chipboard sheets, the color scheme of which is in harmony with the interior of the room;
- Mesh, supplied in sheets, which will be used for mounting the front panel and side parts;
- Sheet of metal for making a reflective element;
- Nails and wood glue;
- Fastening elements represented by construction staples and screws.
Screen installation diagram for radiator
The simplest screen design for a radiator is a box in the form of a three-sided box, which is characterized by the presence of a lid on top and legs on the bottom. To assemble the screen, you need to mark the structure, cut out the parts in accordance with the resulting diagram, connect them and secure them.
Scheme for marking and cutting parts
- The first stage is measuring the width and height of the radiator. It is necessary to add 10 cm to the resulting width, while only 5 cm to the height. Taking these dimensions into account, the front panel of the screen is made. For installation, you can use a steel mesh, which is subsequently supplemented with an MDF profile;
- Next, measure the depth of the radiator and add 2.5 cm to the resulting value. The resulting figure is the width of the side panels of the screen, the height of which corresponds to the height of the front panel;
- The dimensions of the screen cover are measured in the same way, however, its dimensions should be 1-2 cm larger than the dimensions of the side panels.
- After taking all the necessary measurements, you need to start cutting the parts. To make the front profile, sheets of chipboard or MDF are used, from which rectangular parts 11 cm wide are cut out and, using a hacksaw, an angle of 45 degrees is formed where the parts touch.
Important! After cutting out the front profile, note that it is necessary to form multidirectional angles on it. Using this diagram, it is necessary to cut out all four parts from which the internal lattice of the decorative element is made. To fix them, use wood glue and additionally secure them with wood nails.
How to assemble the screen?
After you have completed all the previous steps and cut out the required number of parts, you need to assemble the decorative screen.
- To make a facade panel, use a mesh from which you can easily cut a part of the required size using a hacksaw. To decorate the edges, use a chipboard profile, which must be placed around the entire perimeter on the inner sides of the front corners. The side parts are assembled in a similar way.
Important! If you plan to use the top of the box as a shelf, choose a solid board for its manufacture; otherwise, give preference to options with holes designed to allow warm air to escape.
- Make the frame of the future screen using the drawings widely presented on the pages of construction sites. It must be securely fastened, and holes for pipes must be cut in the side edges, the center of the radius of which should be at a distance of 7.5 cm from the height and width of the side strip;
- Before you begin assembling the screen, you need to install a metal reflector screen at the back wall, the dimensions of which must correspond to the dimensions of the decorative screen. Thanks to this, you will prevent heat loss and redirect the flow of infrared radiation from the radiator into the room.
- There are several options for attaching a decorative radiator to the wall. This can be done by installing a stable frame, as described in our case; you can also attach the screen to anchor collets. The second method, due to the need to purchase expensive parts, is quite expensive.
- The gratings can be installed on legs that are attached to the bottom of the product using construction angles. This option has some advantages, since using adjustable legs, you can adjust the height of the structure.
We looked at a fairly common method of making a screen for a radiator with your own hands, for which you only need available materials. If you are not sure that the screen you have made will cope with its functional purpose, you can purchase ready-made models, for example, screens for Leroy Merlin radiators, made at the highest level and widely presented in construction and furniture hypermarkets.
How to make a screen for a radiator video
Stages of manufacturing a decorative screen for a battery
1. We measure the battery, making a small margin in height - 50 mm, and width - 100 mm. We cut the fiberboard exactly according to the measurements taken. Now the front of the box is ready.
2. Then measure the depth of the battery and add 25 mm. We cut the slab into two equal parts of the same size. The height should match the front of the plate. The lid needs to be made 12 mm in size. larger than the side parts, and by 25 mm. wider than the front
Preparing panels
3. After this, we make a hole in the front part, drawing a line from the bottom at 110 mm. and from above by 75 mm. The diameter of the holes on the opposite side of each line should be 12 mm. We cut out a square clearly along the lines, without going beyond the holes.
4. Along the entire part, we make a 45-degree cut with a saw. The end obtained by sawing can be used as a trim. The finishing is done in such a way that it reaches the opposite corner. This needs to be repeated several times until we get 4 identical pieces for the edges inside. To ensure a tight fit, trimming should be done only after trying on.
Making a box
5. After this, you can begin making the mesh for the window obtained in the box. It is made from both wood and metal. The main thing is to understand that its size should be slightly larger around the perimeter of the window - for internal fastening. If the mesh is ready, it can be connected to the front part.
6. Then we assemble the entire screen, connecting the front part with the side panels.
7. The legs need to be secured. They are cut from fiberboard. For convenience, the legs should be adjustable. They are placed on the inner front corners. After the box is ready, the legs are installed and adjusted.
8. In order for the structure to be strong and not move, it is secured inside with slats.
9. To maximize heat transfer into the room, a piece of metal mesh is cut out to fit the front of the screen and connected to the structure.
So the decorative screen for the heating radiator is ready. The process of making it is quite simple. The main thing is to choose the right and harmless material for its construction. After all, some materials during the heating process may be unsafe for health.
Putting the box in place
Alternative option
Battery decor
If you do not have the opportunity to purchase or make a screen, you can use an alternative option - apply a drawing with oil paints to the battery.
Note!
For the best effect, the pattern is applied not only to the battery, but also to part of the wall near it in such a way as to create the effect of the absence of volume (that is, the front part of the battery and the surface of the wall are conditionally one plane).
Rattan screen
This is a very beautiful option, but quite expensive. A decorative screen with a rattan facade will be 10 times more expensive than a metal version and identical to a product made of natural wood.
Rattan fabric is brought to our country ready-made in sheets of standard width: 60, 74 and 90 cm. Recently, artificial rattan has appeared on the building materials market, which is made on a paper basis and then painted. Canvases of such material can have a width of 60 and 90 cm. Another excellent option is artificial PVC rattan. It is available only in white and yellowish colors and only in a width of 60 cm.
Artificial rattan
It is important to choose high-quality artificial rattan from a reputable manufacturer so that during the heating season your room is not filled with harmful fumes.
The technology for making the box is almost the same as described above, the only difference is that the mesh is created from rattan. And the frame is best made from wooden planks.
Artificial rattan in Provence style
Functions of the radiator grille
The use of decorative products for batteries gives their owners a number of advantages:
- The batteries are effectively disguised, which transforms the room, maintaining a single and unique interior style.
- Radiators are protected from dust, which makes them easier to care for and increases their service life.
- Household members are protected from the possibility of accidentally getting burned or hitting protruding parts of the radiator.
If you design and create a radiator shield yourself, you can give it additional functions:
- Proper screen design will help air flow more evenly distributed throughout the room.
- The top cover can be made in the form of a shelf for books, lamps, and interior items.
- The screen can be equipped with a folding table, where you can enjoy a cup of tea or read a book.
- By providing a cover with hooks, the owner of the shield will receive a clothes dryer during the heating season.
Armed with all the variety of materials on the market, their colors and textures, rich imagination and a little experience, you can create an exclusive screen that will fit perfectly into the interior and will perform all the functions assigned to it. Today, the openwork radiator model is quite popular.
Application nuances
When choosing thermal insulation, it is worth remembering that not everyone can reflect heat. In order for the indicator to be maximum, the foil must be thick enough. Most often, the insulation, its basis, is extruded polyethylene with a thick aluminum layer that retains maximum thermal energy. These include insulation materials Teplofol, Penofol, Alufol, and others.
Teplofol
Sheathing that can reflect is available in the form of mats, rolls, and pipe cylinders. If it is manufactured using testing technology, the thermal resistance characteristics must be indicated in the accompanying documents. If you foil the material, its range of applications will expand indefinitely. It's ideal for
For interior work, metallized polyethylene material, which is capable of reflecting heat, is ideal. When installing, you will need to leave a distance between the sheathing and the wall for ventilation. This will preserve the material and prevent moisture accumulation and mold growth. If this is external thermal insulation, you should choose mineral wool or polyethylene with metal
When laying, it is important that the material is joined, the cracks are taped with special tape. When the ceiling is insulated, mineral wool is used, a layer of air between it and the finish
To create such a structure, a sheathing of wooden blocks is installed, and a metal profile is also used.
For heating networks and small-diameter water mains, insulation without an air gap will be indispensable. If the pipe is large in diameter, a cushion between it and the casing is required; an exception to the rule is foiled mineral wool. When pipeline insulation is made of polyethylene, it is desirable that it be foil-coated on both sides. In order for heating radiators to operate at full capacity, they use a material that can effectively reflect heat. Cut the sheet to the size of the battery, place it between the wall and the heating device, the foil should be directed towards the room. Insulation is easy to install, but guarantees high efficiency of heaters, batteries, air heaters, increasing it by 30-35%.
Conclusion
Screens for the heating system are undoubtedly an excellent solution for giving your room, after renovation, a more finished look.
Solid fuel boilers - tips for choosing the best models and ideas for using boilers for heating (110 photos and videos)- Chimneys for gas boilers - main types and step-by-step instructions for do-it-yourself installation (video + 100 photos)
Double-circuit gas boiler: the best models, recommendations for choosing and installing a boiler with your own hands (105 photos)
The cost of the screens cannot be compared with the costs that could be incurred when replacing the heating system. The existence of a huge selection of sizes and designs allows you to choose exactly the option that is so necessary in your case.
Advantages of a plasterboard box
The range of hanging screens is wide. The design may contain metal, glass, wood, and plastic elements. But it is drywall that is in great demand. You can install it yourself.
There are other advantages:
- Environmentally friendly, even if it lasts for a long time.
- Excellent characteristics for any type of premises.
- Low price.
- Easy dismantling.
- No condensation
- Plastic, the ability to choose the desired shape.
- Additional functionality can be provided: shelves, niches.
Purpose and placement
The versatility of the material allows you to implement the most daring ideas and apply any type of finishing.
A plasterboard box for a heating radiator can be combined in the interior with a wardrobe, a niche for a TV, a sink, or an installation.
You can install it in any part of the apartment: children’s room, bedroom, living room.
Forms
Flights of fancy with a certain skill will allow you to diversify the interior in any form. Traditionally it is a rectangle. Less often, a square. The streamlined, round shape is not common; it is mounted with other materials. It is very rare to see a triangular shape. Its installation requires professionalism.
Types of profiles
Plasterboard boards are mounted on special profiles. It should be noted that they must be purchased from one seller, from one batch. A small discrepancy can create many problems.
There are main types of profiles :
- UD is the guide profile, CD is the main one.
- UD 27-28, CD 60-27 - universal for rooms up to five meters in length.
- UD 40-50, CD 50-50 – floor, wall, decorative structures in rooms more than five meters long. May be subject to stress.
- UD 40-50, CD 75-50 – not recommended for floor work.
- UD 75-40, CD 75-50, UD 100-40, CD 100-50 – more than eight meters, verandas, terraces.
We weld the structure
This process is done like this:
- The pipes are positioned with your own hands so that cut out 10 cm round tubes fit between them. The holes should “look” to the sides. The ends of the profile pipes must be in one straight line.
- Wooden strips or other objects (for example, a wrench) are placed under the round tubes so that the former fit and fit snugly into the holes made.
- They weld 25 mm tubes. In two or three places the tubes are welded to profile pipes. If two tacks are made, they should be positioned so that the line between them represents the diameter of the tube. If you plan to make three tacks, then they are evenly distributed along the length of the tube. Having chosen one of these methods, fix each end of the jumper.
- Place the structure in a vertical position and begin welding the jumpers of the profile pipe. Experts recommend first making a thin seam using low current. Thanks to this, all the cracks will be filled. Next you need to make a thick main seam. This is done by increasing the welding current. This advice is primarily addressed to beginners. Professionals can immediately make a beautiful, durable and reliable thick seam. This is how the seams are welded at each end of the jumper.
- Clean the internal space of the constructed structure from metal debris and slag.
- Apply plugs (rectangles or squares cut from sheet metal) to the ends of the profile pipes and grab them in the same way as jumpers were grabbed.
- Weld the plugs to the ends of the radiator base. At the end you will get a rough structure, in which you still need to make holes for the inlet and outlet of water.
- Welding seams are processed. Parts of the seams that protrude very much are knocked down with a hammer, which could be lying near the radiator key. A large wrench may work instead of a hammer. Next, each seam is processed with a grinder. Sanding will make them smooth.
- Holes in the almost finished radiator are drilled depending on how it will be connected. In general, it is advisable to make four holes. Anything unnecessary will be closed with a plug. Then, if necessary, it will be used. Holes can be made in the ends of the pipes or in the bottom and top sides of the created structure. Again, it all depends on the connection features. If holes should be at the ends of profile pipes, then they are not made in the center of the ends. The upper holes are placed closer to the top of the structure, the lower ones - closer to the bottom.
- 15 mm sleeves cut in half are welded to the holes made. First they are grabbed, and then the main weld is made. At the bottom, instead of muffs, you can use transition elbows. Of course, the end of each of them must have an internal thread.
- Clean all the seams, plug three holes and pour water into the radiator through the last one. Water must flow under pressure. You can pump in air. In any case, check the reliability of the seams. If there are problem areas, they are identified and then additionally boiled, draining the water first. If not, that's good.
- Clean the outer surface. they process it, or rather wash it with a degreaser and paint it with heat-resistant paint, which stood next to the tools and the radiator key.
- A Mayevsky tap is installed in one of the upper holes (the key to it is placed in a safe and at the same time accessible place). You can also fix the shut-off valves.