Almost every home craftsman has encountered this type of work such as installing a floor. And this is not necessarily a house or apartment. There is a garage and outbuildings. Therefore, craftsmen know firsthand that the greatest labor intensity and serious financial expenses occur in screeding.
The correct choice of the method of leveling it will help to minimize the cost of laying the floor, i.e. type of screed. And it can be wet, semi-dry and dry. Those who hire professional builders for repair work also need such knowledge. Otherwise, the workers will do what is most profitable for them financially.
Construction sites missed this point - at the time of preparation of the article, there are no comprehensive works on the comparative analysis of types of screeds on the Internet. You have to look for which screed is better, semi-dry or wet, or maybe dry, on various forums. And there the reviews and comments are the most contradictory, even going so far as to deny semi-dry screed as a type - well, the solution, according to some commentators, cannot gain strength with such an amount of water.
The editors of the StroyGuru website decided to fill the gap and post on their pages a complete analysis of the strengths and weaknesses of each type of screed, compare their performance characteristics, and provide recommendations for use in various situations.
Types of screeds
Before starting the analysis, let us remind you what a screed is, what types there are, and how they differ from each other.
A screed is a durable, even layer of cement-based mortar or bulk materials between the base of the floor (floor slab or subfloor) and the finishing coating (laminate, tile, linoleum, parquet, etc.). Its functions include:
- leveling the surface for the finishing floor covering;
- creating a strong, yet rigid foundation for the future floor;
- more uniform distribution of static loads, for example, furniture legs;
- improving the heat and noise protection properties of the floor.
In addition, the floor level is raised using a screed.
"Wet" screed
Wet screed technology is considered classic. To install it, you need 1 part cement, 3 parts sifted sand and water - add until the solution flows from the shovel, leaving a clear mark. To prepare CPR, no auxiliary equipment or complex tools are required - just a metal trough or a large barrel cut in half.
There is no need to strictly follow the instructions for the proportions of the components. After all, it is impossible to take into account the entire complex of factors (grade of cement, sand fraction, future strength of concrete, etc.). Therefore, both the dry part of the solution and the finished mixture are almost always prepared “by eye” when doing work on your own.
The task is simplified if you buy a ready-made mixture. It is mixed with water to the required consistency and work.
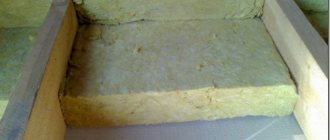
Semi-dry screed
Semi-dry screed also consists of cement, sand and water. Only the proportions are different. And not between cement and sand - they are the same as with the wet method of pouring a leveling layer, but between the dry mixture and water. The latter is added in small quantities, only 1/3 of the usual amount. Another difference is that the laid mortar must be compacted. Professional teams use special troweling machines for this; home craftsmen put boots on everyone in the household and ask them to stomp on the screed thoroughly. Then the surface is rubbed with plastering tools.
Help: curious visitors can see the technology for installing a semi-dry screed on their own here.
Dry screed
It is possible to prepare the base for a floor covering without traditional cement and the water component - they are replaced by bulk materials (expanded clay, perlite, vermiculite) and flooring made of chipboard, plywood, OSB, gypsum fiber board. The dry screed technology is described in more detail in the work “Dry floor screed with expanded clay.”
Leveling wooden floors
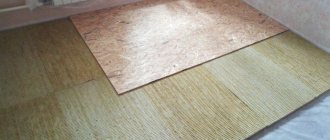
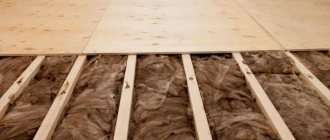
Uneven wood floors are corrected with plywood or similar sheet materials. Plywood sheets are laid on special logs, and the height of the room is reduced by 10 cm, so this technique is practiced only with strong unevenness.
The increase in the floor to a significant height is explained by the fact that:
- the base of the floor is made of wooden boards;
- logs are fixed to the rough base;
- Plywood is attached to the frame.
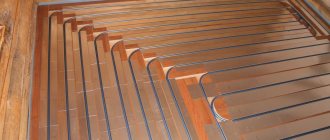
Photo: leveling the floor with plywood over joists with insulation
This flooring method is used for installing laminate flooring.
Advantages and disadvantages
Each type of screed has its own advantages and disadvantages. Their identification allows us to draw the first conclusions: which is better - a semi-dry floor screed or a regular one.
Dry screeds
Home craftsmen and specialists like the following points about dry screed technology:
- installation work can be carried out at any temperature in winter and summer;
- there is no need to use small mechanization;
- simple filling technology;
- insignificant load on the floor, but only if the layer thickness is small;
- there are no even minimal risks of water leaking down;
- you can lay the floor immediately - no need to wait for the hydration process to complete;
- the screed becomes a good insulator, however, with a backfill layer of at least 5 cm;
- Expanded clay granules dampen sound waves well. Therefore, there is no need to carry out additional soundproofing work.
Among the weaknesses:
- there are restrictions on use in wet rooms: bathroom, shower, basement, basement due to the increased hygroscopicity of the granules;
- increased requirements for waterproofing work;
- large thickness of the floor pie: waterproofing, flooring and the floor itself are added to the expanded clay layer, which is at least 4 cm;
- low resistance to dynamic loads (shocks) and vibration;
- significant cost of materials;
- unsuitability for flexible flooring materials.
Semi-dry
Semi-dry technology also has its advantages:
- after hydration is complete, the surface of the screed is smooth, thanks to grouting;
- the ability to walk on the screed immediately after pouring it is one of the important features of the semi-dry method technology;
- good strength and hardness indicators;
- no shrinkage;
- water cannot flow down - there is simply no excess moisture;
- the technology is clean - there are no traces of dirt on the floor or walls;
- high speed of work;
- flooring installation work can be completed within 72 hours;
- there are no restrictions on the base of the floor - it can be a concrete floor, soil or a wooden subfloor;
- communications can be hidden in the screed layer;
- compatible with heated floors.
Several significant disadvantages hinder the spread of the method:
- To carry out the work, it is advisable to hire professional builders, since a lack of experience, small-scale mechanization and assistants can lead to problems. If the concrete mixer and trowel (small mechanization) can also be replaced by manual work, then the remaining conditions are mandatory;
- the slightest error in the amount of water in any direction negatively affects the reduction in strength - in both cases the process of obtaining cement stone is disrupted;
- continuity of the technological process - it will not be possible to complete the work the next day, as in a wet screed, just as it will not be possible to stop the work for lunch;
- the height of the room decreases;
- strict requirements for sand: you need sifted quarry sand.
Attention: more detailed information about the technology here.
"Wet" screed
The “wet” technology for leveling the subfloor has its advantages:
- high strength and hardness of the screed;
- resistance to various vibrations;
- there are no restrictions on the scope of application;
- minimally steals the volume of the room;
- technology available for implementation on your own;
- durability - service life is estimated at several tens of years if the technology is followed;
- cheap DSP components create an insignificant burden on the family budget;
- you can change the grade of concrete by decreasing or increasing the amount of cement in the solution.
Minuses:
- long hydration period - up to 70% strength gain is achieved in a week, 28-30 days are needed for complete setting;
- significant specific gravity - 1800 kg/m3;
- shrinkage and cracking of the surface upon drying;
- the presence of unbound water, which, firstly, can flow down, and secondly, leaves caverns (cavities) in the concrete when evaporating, reducing the strength characteristics of the screed;
- dirt associated with work;
- the need to refine the poured concrete to obtain a smooth surface.
The data provided is not sufficient for an unambiguous assessment of each method of leveling the subfloor. Therefore, we will conduct a comparative analysis.
Features of floor leveling GVL
For small differences (0.5-2 mm) of a wooden floor, a sanding method is used, which is done manually or with a special sanding machine.
Before starting work, carefully inspect the floor for protruding nails and remove them by driving their heads deep. Such nails may cause equipment failure.
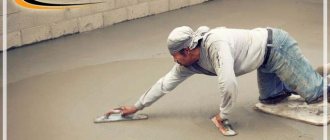
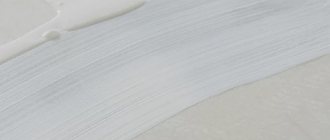
If the difference in surface differences does not exceed 20 mm, use a self-leveling mortar, which is laid in the same way as on a concrete base.
Photo: self-leveling mixture
There are some nuances:
- Before repairs, be sure to replace all worn and damaged boards;
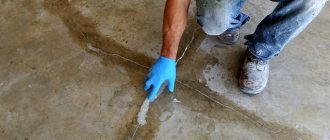
- fill cracks and eliminate other defects;
- before pouring the solution, the floor is primed, and then a waterproofing layer is installed;
- applying a reinforcing polyethylene mesh to the cement mortar that is beginning to harden improves the performance properties of the prepared surface.
This method is only suitable for craftsmen, as it requires special knowledge of device management, as well as the ability to use other professional tools.
Comparison of characteristics
A comparative analysis makes it possible to understand in more depth the issues: which is better, a semi-dry screed or a classic screed and a dry screed or a cement screed. For comparison, let's take the following criteria:
- strength;
- cost of materials per m2 of screed;
- cost of work;
- durability;
- resistance to sudden changes in temperature and humidity;
- thermal conductivity;
- floor load;
- complexity of technology;
- surface quality level;
- screed thickness;
- compatibility with heated floors;
- application area.
Strength
One of the main criteria for evaluating a screed is its ability to withstand static and dynamic loads. After all, you can’t place a fireplace or heavy furniture made of solid wood on a floor that might fall through. In this regard, classical technology is the leader - it can withstand up to 20 MPa. The semi-dry screed is slightly inferior to it. But the data here is contradictory. Some sources consider its strength to be high, others - worse than dry. Long searches in various reference books (is it really a military secret) made it possible to find some numbers: from 1.0 to 18.0 MPa. But this cannot be.
A specific figure can be found if desired, but in a “crooked” way. It is known that the strength value is directly related to the density indicator. And these indicators are in the technical conclusion of one interesting work devoted to the study of the thermal conductivity of semi-dry unbound cement-sand mortar.
It indicates the average density of such a screed - 1450 kg/m3. The density of the leveling layer poured using “wet” technology is 1800 kg/m3. Then everything is simple: divide 1450 kg/m3 by 1800 kg/m3 and multiply by 20 MPa (strength of cement screed). As a result, we obtain a semi-dry screed strength of 16.1 MPa. A figure close to real strength. Reinforcing mesh and fiberglass slightly increase the performance. But their input is also possible in the “wet” CPR.
It was also not possible to find exact strength figures for dry screed - no one knows, no one needs it. But here everything is much simpler: just as the speed of the squadron depends on the speed of the slowest ship, so the strength of the screed is determined by the strength of one pellet: 2.0 MPa - average, 4.5 MPa - maximum.
Conclusion: in terms of strength, “wet” technology is the undoubted leader. Dry screed under a fireplace, stove, frame furniture made of solid precious wood will simply crumble. It won’t even support the weight of a car in the garage.
Cost of materials per 1 m2 of screed
When carrying out repairs, one of the main criteria is the cost of materials per 1 m2 of screed. And here we observe an interesting situation: the cheapest type of material is expanded clay. For 1 m3 you will have to pay about 2000 rubles, if you take it in bulk, without packaging. And many consumers buy into this.
In fact, 1 m2 of cement screed costs from 320 rubles. up to 397 rub. (calculations can be viewed here). A dry screed will be more expensive. Expanded clay itself will cost about 90 rubles/m2 plus flooring 280-300 rubles/m2 for one layer, but you need two.
Conclusion: despite the apparent cheapness of expanded clay, a screed made from it will cost more, and significantly. Cement screeds, despite the difference in the thickness of the mortar being laid, are completely equal, because the consumption of materials is the same, and the extra 1 cm in the thickness of the bond appears due to the lower density of the semi-dry technology.
Cost of work
You can order a professional team to install the screed:
- for dry - for 200 rub./m2;
- semi-dry - 250 rub./m2;
- “wet” - from 400 rub./m2.
These are reasonable prices for proven teams. There are also smaller ones. For example, they are ready to work using wet technology for 140-160 rubles/m2. But here the question immediately arises: why does the master not value his work? Most likely, such prices are offered by guests from Central Asia. There are also mind-blowing prices - 500-600 rubles / m2, designed for people who do not understand construction at all.
Conclusion: dry screed is the cheapest option. The most expensive is the classical method.
Durability
In the absence of extreme operating conditions, all compared types of ties have approximately the same service life.
Conclusion: no one has an advantage in terms of operational life.
Resistance to temperature and humidity changes
Expanded clay actively absorbs moisture from the air and then dries for months - this is its peculiarity. Wet screed is the enemy of laminate flooring. In addition, due to the dampness of the leveling layer, there is a high probability of fungus and mold appearing on the walls. Therefore, expanded clay is not used in wet rooms.
Cement-based screeds do not absorb water, so the technology has no restrictions on humidity. Temperature changes do not affect the ceramic pellets in any way, and the screed changes its size. A damper tape around the perimeter of the walls solves the problem.
Conclusion: it is better to avoid using dry screed in wet rooms.
Thermal conductivity
When analyzing the thermal conductivity of screeds, several important points must be taken into account.
- In what quality do the owners of the home want to see the screed? If in the form of an additional insulating layer, then the advantage is given to the technology in which the screed conducts heat poorly (the thermal conductivity coefficient is lower). If in combination with a “warm floor”, then the opposite is true, good thermal conductivity is needed.
- Expanded clay is not friendly, in general, to heated floor coverings from below.
- Through a layer of expanded clay backfill up to 5 cm thick (some experts say up to 6 cm), heat escapes like sand through your fingers. This must be taken into account, especially when installing floors on the first floors of apartments and in private housing construction.
If we talk about specific numbers, the thermal conductivity coefficient is equal to:
- for a “wet” screed - 0.6-0.9 W/m*K;
- semi-dry - 0.45-0.46 W/m*K (when used in a dry state or in laboratory conditions - 0.4 W/m*K);
- dry - 0.16-0.18 W/m*K (depending on bulk density).
conclusions based on the above figures :
- for “warm floors” it is better to use “wet” technology - denser material will better transfer heat from the heating system to the floor covering. But you can’t refuse semi-dry pouring. With good thermal insulation from below, the heat will not go anywhere - it will remain in the room. The only trouble is that it takes longer to warm up the room when starting the heating system;
- Only expanded clay can really insulate a floor, but provided that the thickness of the screed is at least 5 (6) cm. Some visitors may argue that there is a contradiction: the materials on insulation say that the effect of heat preservation with expanded clay occurs only with a backfill layer of at least 20 cm. That's right. But in the case of a screed, there is another factor that insulation does not have - flooring, which prevents the circulation of cold air between the expanded clay granules.
Floor load
The weight of the leveling layer is important for weak floors: subfloors made of boards and floor slabs with a long period of operation. According to this criterion, at first glance, expanded clay is the undoubted leader with its specific gravity of 560-780 kg/m3. In second place is semi-dry screed - 1450 kg/m3. The heaviest weight of concrete is 1800 kg/m3.
But this is only at first glance. In reality, it's not that simple. So, a 1 cm thicker layer of semi-dry screed puts pressure on the ceiling in the same way as concrete. There is complete equality here. Expanded clay is lighter, even when the thickness of the screed is doubled.
Conclusion: on weak floors there is no alternative to expanded clay.
Complexity of technology
The easiest way is to fill expanded clay. Can be done well by a novice builder. A “wet” screed is more technologically complex and labor intensive.
It is believed that semi-dry screed should be done by professionals - you cannot fill it without a little mechanization. But it is not so. The work can also be done by a home handyman. How? Read here.
Conclusion: the most complex technology for screeding is the semi-dry unbound CPR method, the simplest is the dry method.
Surface quality level
According to the criterion of surface quality, there are two leaders: semi-dry technology, which, after grouting the laid mortar, has a smooth surface and a dry one, thanks to plywood or OSB flooring.
With the “wet” method, the difference in height can reach 5-7 mm due to uneven shrinkage. Therefore, an additional finishing operation is required: grinding or pouring a self-leveling mixture.
Conclusion: you can immediately get a smooth surface using dry and semi-dry screeding methods. “Wet” technology requires refinement, which means additional costs.
Screed thickness
In Khrushchev buildings, the thickness of the screed is one of the important indicators - you can take a couple of extra centimeters from a ceiling with a height of 2.3 to 2.7 m. But reducing the height of the ceiling, firstly, negatively affects the human psyche, and secondly, all interior doors will have to be cut.
The thinnest screed for the “wet” technology is 3 cm, 1 cm more for a semi-dry screed. For some reason, it is believed that dry screed is 4 cm. But this is not so. 4 cm is only the minimum thickness of poured expanded clay or vermiculite. You also need to lay flooring on top of the backfill. This is plus more than 3.5 cm. The result is 7-8 cm.
Conclusion: the thinnest screed is with the “wet” technology, the thickest with the dry one.
Compatibility with heated floors
In private construction, when choosing a technology for leveling the base of the floor, its compatibility with “warm floors” plays an increasingly important role. Here the expanded clay immediately disappears - inside the backfill, the water heating pipes or IR film will simply be crushed. Cement mortars do not have this problem. Another plus in favor of a “warm floor” inside concrete is the approximately equal expansion coefficient of most pipes and concrete screed when heated.
Conclusion: wet and semi-dry screeds are completely, without restrictions, compatible with heated floors. Dry - no.
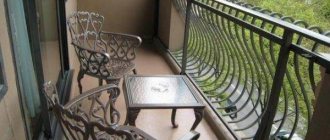
Application area
A dry screed has a weak point - moisture. Therefore, restrictions are imposed for use in the bathroom, open balcony or loggia, basement, garage. The fragility of the concrete slab does not allow it to be laid on unstable foundations (soil), and its weight does not allow it to be laid on weak floors. Semi-dry technology has practically no limitations. An exception is a weak reason. May not be able to withstand the load.
Conclusion: semi-dry technology has a wider range of applications, while backfill has the smallest range of applications.
Dry screed
The concept of dry screed can include several types of preparation for finishing the floor: loose screed, prefabricated flooring, floor on joists, adjustable floor.
The bulk screed is arranged as follows: the base is cleared of debris, markings are applied to the walls around the perimeter of the room, indicating the upper level of the coating; a waterproofing layer of polyethylene film is laid with an overlap on the walls; a special damper tape is glued around the perimeter, guides are installed; a mixture of mineral chips is poured in, which is leveled along the guides and compacted; sheets of gypsum fiber or fiberboard are laid on top of the backfill; The joints between the plates are puttied, then a moisture-resistant primer can be applied if the front layer is made of ceramic tiles.
What to prefer and in what case
The comparative analysis of screed types does not give a clear answer as to which type of screed is better. It all depends on the type of room.
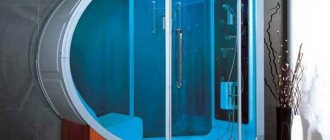
Wet areas
In the bathroom, toilet, open balcony, basement, and ancillary buildings, the use of backfill is vetoed. Here, a “wet” and a semi-dry screed will cope with the task of leveling the surface with equal success.
Garage
High requirements for the strength of the leveling layer in the garage and other rooms (for example, where a fireplace or stove will be installed) exclude the possibility of laying semi-dry mortar. Only concrete screed.
Private houses
On the second floor of wooden houses, with their light floors, it is advisable to choose a dry screed. On the first floors, dry or semi-dry screed is a priority.
No one prohibits wet technology, but, firstly, you will have to wait a long time for the hydration process to complete, and secondly, floor coverings in the middle and expensive price segment most often need a flat surface, which concrete does not have. Additional finishing operations are required, which cost money.
Apartments
Dry technology is not suitable due to the large thickness of the floor cake. It is difficult to do a semi-dry screed on your own. The classic method remains. But this is when doing the work yourself.
When hiring professionals, the semi-dry method looks better in all respects: the cost of work is cheaper, and the materials are almost equal: the more expensive cement and sand of the semi-dry technology is compensated by the need to purchase a self-leveling mixture or additional grinding of concrete. In addition, there is no dirt, you can begin further work faster.
Leveling with Knauf gypsum fiber sheets
Using Knauf gypsum fiber sheets you can quickly correct an uneven floor. To increase the strength of the material, it is recommended to dry backfill and lay GVL in two layers on top of each other in a perpendicular order.
The advantage of the method is that during installation virtually no construction waste is created, which is observed when making screeds. This leveling method is suitable for floor irregularities of any severity. Disadvantage - the bedding may shrink in the future, which leads to a deterioration in the performance of the floor.