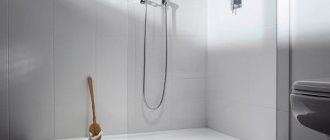
A shower stall with a “roof” looks massive, the bathroom space is perceived as cramped and uncomfortable. Showers with floor drains look spacious and modern. To protect the room from splashes, it is enough to install a transparent tempered glass partition. This makes the bathroom look spacious and bright. In order not to create an emergency situation and not flood your neighbors from below, it is important to know how to make a shower drain in the floor correctly.
How to make a shower drain in the floor?
Ladders and their main features
Gangways vary in height, appearance and equipment. The grate installed on top of the drain device usually has a round or elongated shape. Materials are selected based on price and purpose. The longest-lasting gratings are made of steel. They are also made from chrome, glass, brass, and plastic. The latter are the most common, but the least durable. Plastic grates serve their purpose well, but will not fit into the interior of some showers.
But the grate is a matter of taste and a decorative thing; we carefully approach the choice of the drain itself. The ladders are divided into:
- Spot . They are a drain covered with a grate through which water flows out. Compactness allows you to install this type of drain anywhere.
- Linear . Installed along the cabin or in the center, the water leaves evenly due to the drain in the form of an oblong tray.
Linear drain in the shower Source roomester.ru
Linear drains do their job best by distributing water throughout the drain. Accurate calculation of the drained water allows you to adjust the length during installation. Most often they are installed in common shower rooms with a high volume of water consumed.
The shower drain under the tiles consists of several parts:
- durable body;
- gratings;
- sealed drain funnel;
- siphon from unpleasant odors;
- outlet channel at the bottom for draining.
The material of the ladder depends on the nature of the purpose. Cast iron drains are used in bathhouses and swimming pools; despite their weight and complex installation, they are durable and do an excellent job of draining large amounts of water. In buildings subject to high sanitary standards, stainless steel drain holes are installed. It is not difficult to clean them from accumulated dirt and keep them in order. Anti-corrosion and durable plastic drains are perfect for home use. However, steel would be preferable.
Stainless steel drain Source metal-masters.ru
An important role in choosing a drain hole is played by its height. An acceptable value is from 45 to 190 mm. The higher the drain, the more efficiently it drains water. The heat-resistant under-tile floor shower drain copes with high temperatures up to 90 degrees Celsius.
A water seal installed in the siphon blocks odors coming from the sewer. But, if the shower is not used for a long time, the drain dries out and the siphon stops functioning. Therefore, it is important to choose whether to install a dry seal or a water one.
With a dry seal, the siphon will not allow odors to pass through due to additional seals that block the water drain with their weight. For example, it is usually installed when building baths. The sauna drain is an important element. The bathhouse drain forms a water seal and blocks the appearance of gases in the room. The dry bath ladder is manufactured in three variations: membrane, pendulum and float.
Wooden bath drain Source vagonkapol.com.ua
In production and cold rooms, drains are installed with a shutter that is resistant to sub-zero temperatures. It has a separate drainage ring through which drainage occurs if the waterproofing is broken.
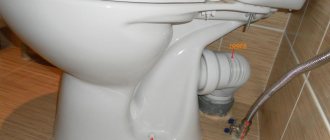
When installing a drain hole, it is important to measure the diameter of the pipe from the sewer - it must match the diameter of the outlet pipe. This part of the drain can be vertical or horizontal. In private houses, sewer pipes are usually connected from below, so a drain with a vertical channel is installed. In other cases, a horizontal connection is suitable, which is considered universal for residential buildings.
Decorating with tiles
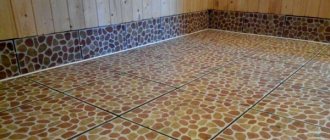
No one wants to shower in a room with cement floors. The reasons are clear to everyone. Therefore, at the final stage, ceramic tiles are laid. The choice of tiles is huge, the main condition is that they are not slippery.
There are many technologies and instructions for working with ceramics. In the shower, you should start laying tiles from the drain to the walls. If marked correctly, then you won’t have to cut anything near the walls. After the glue has hardened, you need to grout the joints using a waterproof material.
Key criteria when choosing a drain
Drainage devices have a wide range and are distinguished by their diversity, so when choosing, it is worth taking into account the parameters on which the efficiency of the drain depends.
First you need to decide on the direction of the drain. The shower drain in the floor under the tiles with a horizontal outlet element has a small height and is used if the width of the screed is limited. A vertical drain can only be installed in a low-lying sewer system.
Drain with vertical drain Source snabsanteh.ru
See also: Catalog of companies that specialize in swimming pools and equipment.
The drainage capacity must be at least 0.4 liters per second. Recommended speed is 2 l/s. The wider the outlet drain tube, the better it allows water to pass through. The choice of valve in the siphon depends on the frequency of use of the shower stall. A water seal requires a constant presence of a small amount of water in the drain to protect the room from odors, while a dry seal blocks them in any condition.
The height-adjustable shower drain allows you to adjust the size during installation and precisely match it with the tiles on the floor. Cheap models do not have an adjustment function. Lastly, having decided on the functional parameters, they focus on the appearance of the installed grille.
Laying waterproofing
You can begin protecting the floor and walls from moisture after the screed has dried - about 4 days. The membrane is cut to the size of the shower, a hole is made for the drain, it is laid and pressed against the flange using screws.
Particular attention should be paid to corners and joints: they can be additionally protected from moisture. For better adhesion, the isoplast is heated and pressed against the surface, forming reliable protection against water.
Instead of a membrane, you can use mastics:
- “Elastomix”, “Elastopaz”, “Tekhnoprok”. They are applied in a layer of 2-3 cm and perfectly protect against moisture.
- Next, the drain is assembled: a siphon is installed, a ring is put on, and a grate is installed.
- The grate can be removed to clean the siphon.
- Another layer of ligament is laid. The grate should be closed during cement work to prevent any solution from getting into the drain.
The laid solution should be periodically moistened for more durable and uniform hardening.
Step-by-step installation instructions
It is easiest to install a drain for a shower stall under the tiles during construction, since its installation is indicated in the project. In the finished room, you will have to completely remove the flooring for high-quality installation. It is desirable that the sewer pipe is completely visible on the exposed base. Most often, houses have cast iron pipes, the service life of which has long expired, so it is recommended to completely or partially replace them with plastic ones.
Diagram of the installed ladder Source www.aco.hu
Required installation tools
Installing a shower drain in the floor under the tiles involves the construction of a moisture-proof floor covering. Buckets and a mixer will be needed to mix the solution. To apply it evenly to the surface, spatulas and trowels are used. When removing the floor covering, a hammer drill is used.
Full list of recommended tools:
- ruler with a long tape measure;
- tile cutters for tile covering;
- all kinds of screwdrivers and wrenches;
- wire cutters
The most important thing is that the drain is fully equipped, along with pipes and ceramics.
Preparatory work
Before starting the task, you need to find a suitable sketch, calculate the dimensions and select facing materials. Preparatory work requires care so that the process of creating a shower does not require additional purchases of tools or cladding.
Optimal size
With your own hands you can assemble any structure in terms of volume and shape :
- rectangular;
- square;
- triangular;
- round;
- corner;
- non-standard.
Valera
The voice of the construction guru
Ask a Question
In small rooms, the size of the booth does not exceed 80*80 cm. Designs with transparent glass side walls are suitable for them, which will make them invisible when located in a corner. For large spaces, spacious products with eye-catching fittings, panels on the back wall and additional lighting are suitable.
Tools and materials for work
A shower stall with a glass door or curtains requires certain tools:
- trowel, chisel, trowel, spatula;
- plaster beacons;
- profile PN 27*28;
- building level;
- electric drill with attachments;
- brush, roller;
- glass cutting tool.
List of required building materials:
sewer and water pipes, drain ladder, mixer, watering can;- wooden slats;
- white waterproof glue for ceramics;
- bitumen mastic, waterproofing material;
- brick, sand, cement;
- floor and wall coverings, plexiglass.
Before starting work, you must make sure that all of the above tools and materials are in stock and purchase the missing ones.
Preparing the base
The stage depends on the degree of preparation of the floor for the installation of a new structure. If refurbishment is required, the process begins with the dismantling of the outdated covering. The concrete screed is created again and soundproofing material is laid. In the standard, the arrangement looks like this:
- the first layer is a concrete slab;
- the second is a layer of mineral wool or glass wool;
- the third is a waterproofing section made of polyethylene, glassine or roofing felt;
- the last step is concrete screed.
A special polymer membrane can be used to muffle the sound.
Video description
How to properly apply insulation, watch the video:
Installation of floor slope and waterproofing
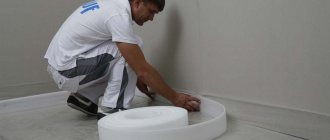
The finished insulation with the drain body is covered with a reinforcing mesh for the screed. To drain water, it is important to mark the slope for drainage. Therefore, special beacons are installed, which are sold in any hardware store. Sometimes, the ladder is already equipped with guide strips that are adjustable in length. They are assembled in the form of a frame, which simplifies the process of pouring the screed at a certain angle to the drain.
After installing the beacons and taking the necessary measurements, the floor is filled with a solution of cement and sand. The drain hole must be completely covered with solution; only the top, the flange, remains visible on the surface.
It is easiest to make a slope towards the tray drain due to its direction of drainage in one direction. To a point drain, the slope is usually made from 4 sides, which is technically more difficult. The screed is dried for 3-4 days. A waterproofing substrate is spread over the dried surface; isoplast is usually used. In this case, it is necessary to cut a hole for the outer hole and secure the material along the edges with screws.
Laying the screed
Before creating a screed, all boundaries of the floor and wall must be closed. One option is damper tape, preferably self-adhesive. It is a poor conductor of heat, does not absorb moisture and is indifferent to temperature changes.
After gluing the tape, you can begin laying the mixed cement-sand mixture. The laid mortar is leveled using a rule (large ruler). If the slats are not laid, you will have to make a slope towards the hole (1 cm per 1 m of floor is enough).
Video description
The following video shows a model of a plastic shower drain:
Final work
A siphon is placed in the mounted drain body. A rubber sealing ring is placed on top, on which a decorative grille is placed. The height of the final flooring layer in the form of tiles is taken into account. It is important to carefully cut the tiles at the joints and use special tile adhesive. The coating dries within 2 days. The installation of the shower drain in the floor under the tiles is completed by eliminating the seams between the tiles.
Installation of a drain gutter
1. The shower gutter is aligned and fixed using a level. The wall-mounted model is simply attached with two screws. | 2. The drain must be of such a size that it can accommodate a sufficient amount of water. Typically, pipes with a nominal bore of 50 mm are used. If the connected siphon is smaller, then an adapter is inserted between them. The diameter of the pipe cannot be reduced! | 3. Every shower should have a waterproof floor. The most reliable way is fleece over the entire surface. The gutter is then connected according to the manufacturer's recommendations. |
Briefly about the main thing
Shower stalls are popular for their convenience and practical design. An important element is draining the water. The drain in the bathtub flooring can be point or linear.
The ladder consists of the following elements:
- grates and funnels for draining;
- housings;
- siphon and outlet channel.
When installing a ladder, the material from which it will be made, as well as its shape, are taken into account. The throughput of the drainage device must be at least 0.4 l/s, optimally 2 l/s.
The installation process includes the following steps:
- Laying a joint pipe into a sewer pipe and pouring a screed.
- Installation of drainage and implementation of thermal insulation.
- Installation of siphon and grille.
You can do the installation of the drain yourself, although it will take more time.
Ratings 0 Read later
Self-installation steps
If you don’t want to allocate additional funds for the services of a designer and construction team, you can do it on your own. You have to solve a difficult and responsible task, but the result is worth it. If you strictly follow the instructions and follow the order of work, you will receive a comfortable system that performs its functions flawlessly.
Required materials and tools
If the installation of the drain was planned at the design stage of the apartment renovation, then installation will be easier. The screed must provide the ability to install the sewer below the final floor level.
When doing the work yourself, you can’t do without:
- tape measure and building level;
- screwdrivers and a set of keys;
- impact drill or hammer drill;
- construction mixer;
- beacons for uniform laying of the screed;
- roller with spikes for distributing the composition;
- tile cutter;
- spatulas for laying tiles;
- sealant gun.
Necessary materials:
- plastic or steel ladder;
- glass panels;
- cement mixture for preparing mortar;
- tile adhesive;
- grout for seams;
- silicone sealant.
Preparatory work
At the preparatory stage, you should decide on the type of system to be installed and the method of its placement.
The shower drain can be installed:
- in the center of the bathroom. In this case, it is necessary to provide a slope to the drain on all sides. This is the most popular option for placing a ladder, as it allows you to choose devices of any shape - square, rectangular, oval;
- along the edge of the floor - you will need to organize an imperceptible slope across the entire floor area towards the grate. This is an excellent option for installing a rectangular grate or slot tray, which has high throughput and excellent aesthetic properties;
- in the corner - a triangular lattice is optimal for this arrangement.
Laying the sewerage pipeline
The work of laying out and installing a sewer system is a rather complex process. Before you begin, you need to draw up a diagram of the placement of its elements. In this case, it is necessary to take into account the characteristics of the pipes - diameter, slope, ensure the absence of sharp turns and strong bends. To place pipes at the correct angle, which will ensure efficient drainage of waste liquids, it is necessary to take into account their diameter. If it is less than 50 mm, the slope level should be 3%; from 50-100 mm 2% will be enough.
To install a sewage system in a bathroom, it is recommended to use the following types of pipes:
- polypropylene;
- polyethylene;
- polyvinyl chloride.
To tightly fix the joints of the elements, you will need special couplings. The size of the pipe depends on the proximity of the plumbing fixture to the central riser. The closer they are to each other, the larger the pipe can be used. This rule is true even for small bathrooms. With proper installation, the sewerage system will function effectively for a long time.
Waterproofing
This is one of the most important stages of work. To prevent possible floor leakage, it is necessary to ensure good waterproofing. It is better if it is multi-layered. As a rule, coating technology is used for these purposes. You can use bitumen mastic, or a special composition for waterproofing swimming pools. We apply it with a brush in several layers not only to the floor, but also to the lower part of the wall - approximately 30 cm in height. The result is a seamless, elastic film that is impervious to water. This waterproofing has a high degree of protection.
The weakest point is the corners. It is recommended to additionally glue them with strips of rolled waterproofing after applying the first layer of mastic.
If you want to protect yourself even more thoroughly, you can make a waterproof layer even before installing the screed. In this case, roll waterproofing is used, which is glued to a layer of coating material with an overlap of 30 cm onto the wall. Sheets of material are laid overlapping at a distance of 15 cm. The joints are thoroughly coated with mastic.
Ladder installation
At the next stage, a ladder is installed. It is mounted on the selected location and connected to the entrance to the sewer. During installation, it is necessary to ensure that the pipe slopes for effective drainage.
Sequence of work execution. You will need:
- remove the decorative panel from the ladder and the waste collection container from the siphon;
- combine the drain with the siphon, observing the correct angle of connection;
- cover all decorative surfaces with construction tape;
- install the ladder fastening;
- connect a sewer pipe to the structure, forming a slope towards the riser of at least 3 cm per meter;
- install the pipe to the riser;
- if necessary, attach an additional pipe, not forgetting the slope;
- adjust the position of the ladder using legs or improvised means;
- degrease the surface of the ladder;
- fix the device with a small amount of the diluted mixture and leave until it hardens.
Thermal insulation
At the next stage, a layer of thermal insulation is formed. We lay insulation boards on the floor. We cut it in such a way as to cover the fixed ladder. We lay foam polystyrene damper tape around the entire perimeter of the room. Its function is to prevent heat loss and prevent it from escaping into the walls.
We seal the polystyrene foam joints with tape to prevent concrete from leaking out of the screed. We fill large gaps with pieces of material and only then close them with adhesive paper tape. If you want to make using the shower even more comfortable at this stage, you can install a “warm floor” system.
Filling the screed
A metal reinforcing mesh with a cell size of 10 square meters is laid on top of the insulation layer. cm and wire diameter 3 mm. It is cut exactly to the size of the floor.
The next stage is the installation of beacons. The floor in the shower area should slope towards the drain. To properly fill the screed, you need to set up special beacons. For this purpose, you can purchase special designs or use ordinary wooden planks. Beacons are installed in such a way as to set the surface to the required level of slope. The next task is to orient the drain bowl relative to the walls. A construction square will help in this matter.
After this, we begin to form the screed. We fill the floor together with the installed drain and drain with a cement-sand composition. To make the mixture you will need to mix 1 part cement with 3-4 parts sand. The grade of cement must be at least M400, and the sand must have a coarse-grained structure. To impart water-repellent qualities, the composition should be supplemented with the necessary additives.
The solution usually takes 28 days to mature. Concrete screed requires maintenance. In the room, it is necessary to ensure a stable level of humidity, prevent temperature drops of +20°C and exposure to directed sunlight. It is recommended to cover the surface of the screed with film and moisten it with water for the first few days.
It is necessary to accurately calculate the thickness of the screed. In this case, you need to take into account the thickness of the tiles and tile adhesive. If, due to the design features of the drain, it is necessary to install a flange, the concrete mixture must be laid flush with it.
Finishing
For tiling the floor in a bathroom with a shower cabin without a tray, you should choose tiles with increased resistance to moisture. Laying begins from the drain and continues to the walls. This technique will help you beautifully design the space around the grate, reduce the likelihood of mistakes, and make it possible to use tiles of any size. Trimmed parts are less noticeable near the walls than in the center of the composition. Mosaics are ideal for such projects. With its help it is much easier to perform cladding and create a local slope. The places where the mosaic is cut are absolutely invisible. The tiles are laid with glue; if necessary, crosses are installed to align the seams. After this, the gaps are erased using a fugue. The grout can be matched to the color of the tile or its pattern.
If porcelain stoneware is used for cladding, such a procedure is not necessary. This material is connected without seams and forms a flat and smooth surface.
In order to prevent water from leaking onto the screed in the area of the drain, the gap between the device body and the tile covering is sealed with silicone.
All that remains is to assemble the siphon and install the decorative grille. Your stylish shower room is ready.
Sewer slope
and provide drainage with the following parameters:
The slope of the sewer is specified by the Code of Practice SP 30.13330.2012 Internal water supply and sewerage of buildings (Updated edition of SNiP 2.04.01-85).
Clause 8.4.4, in particular, states: The slope of the floor in public shower rooms should be 0.01-0.02 towards the tray or drain. The tray must have a width of at least 200 mm and an initial depth of at least 30 mm.
Sewerage : the slope of the pipe should not exceed 0.15 (with the exception of branches from devices up to 1.5 m long), i.e.
15cm at 1 meter. Otherwise, the water will quickly go away, but everything else will remain. The dimensions and slopes of the trays should be taken from the condition of ensuring the self-cleaning speed of wastewater, the filling of the trays is no more than 0.8 of their height, the width of the trays is not less than 0.2 m. The width of the tray is assigned depending on the results of hydraulic calculations and design data; when the tray height is over 0.5 m, its width must be at least 0.7 m.
Source