Laminate is one of the most common coatings in recent years, which is explained by a number of reasons. In addition to satisfactory technical characteristics and easy installation, it is also distinguished by its aesthetic appearance and low cost. All this makes it an excellent option among all other floor coverings on the market.
But when installing it yourself, some owners of laminate flooring have a question: do they need to prime the floor before doing this? In order to find out the correct answer, you need to carefully study the rules for laying such a coating, as well as the purpose of the primer.
Do you need primer for a self-leveling floor before and after pouring?
It is especially important to apply a primer for loose mineral screeds. Without it, sand and cement dust stain the concrete, reducing the strength of the pour. Surfaces made of wood, stone, brick, concrete, when a solution is poured onto them, strongly absorb water, thereby contributing to the rapid thickening of the mixtures. This affects the hardening time and the consumption of the amount of fill.
Note! Without the adhesive properties of the primer, cracks, cavities, air bubbles, and separation from the base base may form on the self-leveling layer. Uneven spreading of the solution is also possible.
The water present in the emulsion, together with the adhesive, is able to penetrate deeply into the pores of the base before evaporation. The polymer composition together with the resins, remaining on the surface, holds the base together without interfering with the passage of air masses through them. This is of great importance for apartments and residential premises.
Base parameters for laying laminate
There are mandatory requirements for the surface being prepared for laying, failure to comply with which will reduce the efficiency of working even with the highest quality laminate.
- Before you start working with the primer, you need to completely dry the base, otherwise the floor may swell.
- The difference in height on the surface should not exceed 2 mm/2 linear meters.
- The maximum permissible surface slope is no more than 4 mm/2 m.
- Maximum surface cleaning from dust particles and contaminants that cause floors to creak during use.
Types of primers, which one is best?
The whitish translucent liquid is based on water, drying oil, synthetic resins, various chemical compounds, and a substance that speeds up the drying process. A peculiar thread-like structure remains on the surface, facilitating the bonding of the base to the fill. All soil compositions differ in their composition, characteristics, properties, protection against fungal mold, and methods of application.
According to the intended purpose, the primer can be universal, specific, deep and normal penetration, sold in dry, liquid and paste form. Dry mixtures are diluted with water before use; emulsions in liquid and paste states are ready for use immediately.
Important! To destroy pathogenic fungi and bacteria, chemicals in the form of fungicides are added to the mixture, for better adhesion to a slightly porous base - latex, for resistance to moisture - silicone.
The self-leveling composition can be based on acrylic, alkyd synthetic resin, epoxy, or glyphthalene mixture.
- Acrylic primer is one of the most versatile. It can be used on wood, concrete, brick, chipboards.
- Alkyd mixture is intended for wooden surfaces. It already contains means to combat fungi, mold, and corrosion. The drying time of alkyd resins reaches 16 hours, but the service life of the floor increases.
- Glypthal mixture is suitable for surfaces made of wood and metal. Can only be used in dry rooms, not suitable for the bathroom. Drying time 24 hours.
- The epoxy primer mixture strengthens concrete components well and levels gypsum and wooden surfaces.
The primer is applied both under self-leveling floors and on their finished surface. The composition of the soil should match the self-leveling floor, so they better complement each other.
Why is deep penetration soil needed?
Let's consider what properties soil mixtures have and whether it is necessary to prime the self-leveling floor. Priming the base for self-leveling floors requires careful preparatory work. Without thorough cleaning of varnish, paint, oil and bitumen compounds, and removal of dust, there cannot be a high-quality filling of leveling material. Using a primer:
- the remains of small particles bind;
- the base of the floor is strengthened;
- adhesion improves;
- the uniformity of spreading of the self-leveling coating increases;
- the base's ability to absorb water decreases.
The primer helps prevent air bubbles, cavities, small cracks, bumps, and other defects in the fill. It clogs microscopic pores and improves the mobility and spreadability of the solution.
Note! The primer is an integral part of the process of self-leveling floors, regardless of the basic components of the surface and its further laying with any of the coatings.
Applying primer mixtures before pouring the floor
Self-leveling floors for rough work contain binders in the form of cement or gypsum. The filler can be rounded sand, crushed rock, crushed stone, various plasticizers and modifiers.
Self-leveling compounds can serve as a base for covering with laminate, linoleum, parquet, carpet, and tiles. Priming before pouring requires knowledge of each type of surface to be treated.
Aerated concrete needs a water-repellent soil of deep penetration, with good permeability into the pores. Brick - in latex, concrete and wood - in acrylic. Highly porous surfaces require a fixing primer. In swimming pools, rooms such as saunas, baths, where there is high humidity, the soil can be replaced with soluble glass.
Dry screed
Step-by-step floor preparation for laminate flooring
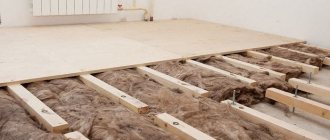
There remains an open question about how to prepare the floor for laying laminate flooring if its unevenness exceeds 10 centimeters. It will be most effective to create a dry prefabricated screed, which can reduce the load on the floor, even with a thickness of over 10 centimeters.
This construction is created as follows:
- The floor is prepared in a similar way to the previous methods.
- Beacons are also set and the zero level is found. With one difference: beacons can be attached to any substrate.
- Between the beacons, filler is poured: expanded clay, perlite, polystyrene foam is laid, etc.
- This layer is compacted to the level of the beacons and covered on top with sheet rough material of the GVL type. The beacons are removed from under such flooring, and the sheets are overlapped to create a uniform surface for further work on laying the laminate.
Applying primer over self-leveling floors
Self-leveling surfaces harden quickly, usually within 8 hours. But it gains strength only after 20-28 days. There are different covering times, it all depends on the type of binders in the composition:
- ceramic tiles and porcelain stoneware can be covered after 5 days;
- polyvinyl chloride laminate, hard fabric covering in the form of linoleum, vinyl covering - after 6 days;
- wood fiber laminate, carpeting - after 8 days;
- any type of wooden covering – after 10 days;
- laying massive parquet is possible only after 10-15 days.
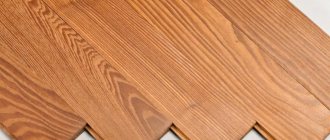
Combination with floor coverings
Before choosing a primer mixture, it is worth familiarizing yourself with the types of floor coverings. The laminate is based on recycled wood. The primer will give the laminate increased adhesion to the base, and the hydrophobic layer will protect the base from moisture. Special antiseptic compounds prevent pathogenic and mold fungi from penetrating into the substrate. An epoxy primer mixture is best suited for laminate and parquet.
Before laying ceramic tiles or tiles, the surface is treated with an acrylic or alkyd primer. They are versatile and quite durable.
Polyurethane with increased wear resistance and water-soluble soil are suitable for covering with linoleum. The advantage of water-soluble is that it is the cheapest, quick-drying, organic, with great penetration depth and strength.
It is not advisable to use alkyd, glypthal or polystyrene primers with a rough self-leveling coating. They have a narrow specialization. Reacting with floor coverings can cause damage.
Primer occupies an important place in pouring technology. For a high-quality and durable coating, you cannot do without it, otherwise all the labor-intensive work of pouring the base and covering it with the finishing material will be ruined.
Technology for pouring self-leveling flooring in an apartment
Concrete floor priming technology
Technology of pouring self-leveling floor on a wooden base
Do I need to prime the walls before laying tiles?
Source
The working process
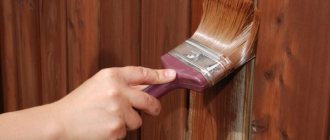
The importance of a primer lies in the versatility of the appropriate mixture. It is optimally suited for a wide variety of situations. Regardless of the chosen floor covering, such a preliminary layer will improve its subsequent qualities and extend its service life. It is very important to take the time to apply the soil mixtures. The floor surface must be completely dry before using finishing materials. Disputes about whether it is necessary to prime the floor before laying the laminate are also inappropriate, because without applying a primer, the corresponding coating may be too seriously damaged by external factors.
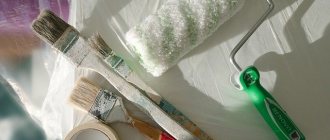
The floor should be primed using special tools that are available to any average citizen. A roller, brush or regular brush will help here. In some situations, it is possible to use a spray. It should be understood that the mixture can still have a negative effect on human skin, which is why it is better to use rubber gloves while working. Having studied all the advantages of this process, it is easy to determine whether it is necessary to prime before self-leveling floors and other types of modern coatings.
What is self-leveling floor
Before we talk directly about the arrangement of this coating and the primer mixture itself, you should find out what kind of material it is - a self-leveling floor. This is a fairly durable coating that has high decorative properties. It is made by pouring a carefully prepared surface of the rough base with a special polymer solution with certain characteristics.
The primer under the self-leveling floor ensures its reliable fixation
The composition of mixtures for self-leveling floors includes cement, polymer additives and some other components that improve the quality of the substance. Polymers are necessary to make the material more elastic, easier to level during the pouring process, stronger and better resistant to mechanical damage.
What are self-leveling floors?
Depending on what substance is the basis of the mixture for self-leveling floors, the following types of coating are distinguished:
All these types have some similarities, but still differ from each other in certain properties. Thus, some may have a very attractive appearance, while others may have high strength characteristics.
Materials for the installation of polymer floors
In general, any self-leveling floors have a number of advantages over other floor coverings. They differ:
- high strength characteristics;
- wide range of applications - can be used in premises for various purposes;
- beautiful appearance - they allow you to create a perfectly flat floor, which, at the request of the owner of the room, can be decorated with a pattern or have any solid shade;
- have good waterproofing properties.
Pouring floors is not the easiest procedure and requires careful preparation. One of the stages preceding the application of the polymer mixture to the base is priming the subfloor.
Why do you need a primer?
A primer is a mixture necessary to improve the quality of the rough surface, allowing for improved adhesion of the finishing layer and the base. Almost all types of subflooring have one drawback - they tend to absorb water excessively and often draw it out of the mixtures used to level the floor or finish it.
On a note! A floor that has absorbed water loses its strength characteristics and wears out quite quickly. Wood and concrete are especially prone to absorbing moisture. And metal surfaces when interacting with water begin to become covered with rust.
Concrete floor primer
Also, with active exposure to water, colonies of microorganisms, fungus, and mold can grow on the surface of the subfloor. They negatively affect human health, smell unpleasant, and also spoil the base material.
When applying a primer layer to the base, the adhesion of its surface to the finishing layer improves. Thus, water will no longer penetrate between the self-leveling floor and the subfloor.
Attention! If water gets between the self-leveling floor and the base, the former may rise. As a result, you will have to completely change the coating, which means additional costs and unnecessary work that can be avoided if you do not violate the installation technology.
DIY self-leveling floor
Thus, the primer ensures the closure of all, even very small, pores on the surface of the concrete, which will not allow moisture to affect the pouring surface or penetrate from the outside into the concrete screed. The primer creates a kind of film on the screed, which will also reduce the consumption of the finishing material - it will not be absorbed into the rough base.
Primer for self-leveling floors on an organic basis
To summarize, it can be noted that a primer for self-leveling floors is necessary for:
- protecting the surface from the development of mold and mildew;
- improving the adhesion of the base and finishing coating;
- protecting the base from moisture;
- improving the performance properties of the material.
The primer improves the adhesion of the base and topcoat
Recent Entries
A primer is a specific liquid material that is designed to significantly improve the adhesion of various coatings. It is easy to understand whether the floor needs to be primed, because after the appropriate procedure, you can lay various coatings with confidence in the durability. In addition to its main function, the primer can slow down the process of water absorption. As a result, the screed will maintain its uniformity for as long as possible, and will also reduce the likelihood of its subsequent cracking.
Primer for self-leveling floor. Types and applications
In general, all types of primer can be divided into two categories:
- dry , which require preparation of the mixture before use;
- liquid , can be used immediately after purchase, do not require special preparation other than mixing.
In turn, these mixtures can be divided into several more types.
Table. Types of primers for self-leveling floors.
| View | Description |
| This type of primer is based on ordinary cement. This material is used as a primary material for leveling the base; as it spreads, it carefully covers all defects and levels the floors. Used to cover surfaces made of aerated concrete, expanded clay, concrete, surfaces covered with a layer of plaster. | |
| Most often, this primer mixture is used on wooden surfaces, but can also be used on tiles, fiberglass, plastic, and metal. Ideal option for painting. Alkyd primer is not afraid of temperature changes and is stored under almost any conditions (the optimal temperature range varies from -40 to +60 degrees). This material also has restrictions regarding use: alkyd primer is not used on gypsum or plastered and other loose surfaces. This primer layer dries in about a day. | |
| Suitable for use on wood or plaster bases. Ideal for applying a finishing layer. Contains graphite, chalk, copper sulfate (the mixture has bactericidal properties and fights microorganisms well). Since the base of such a soil is watery, the surface treated with it dries very quickly - 4 hours is enough. And the material does not have a special smell. This primer should not be used on metal substrates as it may cause rust stains. |
In addition to this classification, primer mixtures can be divided into:
- strengthening , which are used for loose types of base. They have high penetrating abilities;
- regular or standard;
- deeply penetrating , which are ideal for plastered surfaces and concrete bases. Excellent increase in adhesion index.
Deep penetration acrylic primer
Important! It is worth remembering that strengthening primers used on a smooth base form too thick a film on it, due to which the adhesive properties are lost. The required effect will not be achieved.
There are several other types of primer mixtures. This is a biocidal primer, polyurethane, silicone, concrete contact and a material characterized by increased adhesive properties.
Biocidal primer has the ability to negatively affect various microorganisms, fungus and mold, and protects the floor surface from them. It penetrates deeply into the structure of the base and has a long-lasting protective effect.
Polyurethane-based primer copes well with chemical influences - the surface treated with it will be protected from oil and gasoline stains and is not afraid of solvents. This is an economical option in terms of consumption, but far from the cheapest.
Preparation of the primer mixture
There are also silicone primers that are not at all afraid of moisture. They penetrate very deeply into the surface of the base, while managing to displace excess moisture from it and block access to a new portion of liquid. Silicone primer can be applied to damp screed and also has bactericidal properties.
Concrete contact is a crystallizing primer with increased adhesion properties. But it can only be used in rooms with a certain microclimate. The material does not interfere with the penetration of water, therefore it is not used in bathrooms.
The pigment ensures high-quality treatment of the entire floor
Primers with enhanced adhesion properties (or hydrophobic primers ) have excellent adhesion properties, but are susceptible to exposure to various alkaline substances, including those contained in concrete. Because of this, they require periodic updating of the layer.
Dispersion primer Uzin PE 360
Range of primers
There are a great variety of primers on the market from different manufacturers. Let's look at some of them.
Primers from
Primers from the manufacturer Bomard of the UZIN-PE line
| Name | Properties | Purpose | Consumption (g/m2) |
| UZIN-PE 260 | White color. High level of grip and water protection. Drying time: from 2 hours to a day. | Dispersion composition. Processed: screeds - magnesite and asphalt, bases - made of wood and particle boards. Carry out interior work. Used for interior work. | 100-150 |
| UZIN-PE 260L | Black color. Electrical resistance property: 5 ohms. Drying time: 2-12 hours. | Dispersion composition. Cover for subsequent gluing of textiles and electrically conductive PVC. | 100-150 |
| UZIN-PE 317 | Red color. Frost-resistant and deeply penetrating. Drying time: from 30 to 60 minutes. | Adhesive composition. The basis was a solvent for internal use. Treat wood, gypsum, cement, concrete and moisture-sensitive screeds before laying leveling mixtures. | 100-200 |
| UZIN-PE 360 | Strengthens and improves grip. Drying time: 2-24 hours. | Dispersive type. Suitable for processing gypsum, concrete, brick and cement screed. | 100-150 |
| UZIN-PE 440 | Light blue color. Afraid of frost. Drying time: 2-12 hours. | Two-component epoxy composition. Used to cover non-absorbent substrates. Interior work. | 100-200 |
| UZIN-PE 450 | Yellowish in color. Strengthens. Resistant to chemically active substances. Drying time: 12-24 hours. | Two-component epoxy composition. Old stone, concrete and cement foundations are treated. stone, cement, terrazzo. Use indoors and outdoors. | 300-400 |
| UZIN-PE 460 | Transparent. Strengthens, protects, replaces waterproofing. Resistant to acids and alkalis. Drying time: 12-24 hours. | Two-component epoxy composition. Strengthens mineral bases and provides vapor barrier. External and internal use for coating wood, ceramics, potassium sulphate and cement screeds, concrete, wood terrazzo. | 200-400 |
| UZIN-PE 630 | Pasty, dark gray in color. Fills cracks and smoothes the surface. Apply a thin layer (no more than 1 mm). Drying time: 1-2 hours. | Two-component dispersion-cement composition. Parquet and wood floors and old ceramic coatings are treated. Internal use | 200-600 |
Which primer to choose
The floor primer should be selected depending on the type of base. It can be made of wood or concrete, metal. And for each type you will need its own type of mixture.
To process rough screeds, a deep penetration primer is most often used. It is especially important to use it in saunas, swimming pools, baths - where there is a high level of humidity. Such soil will create a reliable waterproofing layer.
On a note! In rooms where there are high levels of air or surface humidity, you can prime the base with liquid glass.
Liquid glass for floors
In ordinary living rooms and rooms not exposed to moisture, concrete contact can be used. However, this mixture does not prevent the formation of colonies of microorganisms or the development of fungus or mold. Therefore, in rooms located directly above the basement floors, it is better to use a primer containing biocidal substances. If the primer is applied to a tiled surface, it is best to use a polyurethane-based varnish.
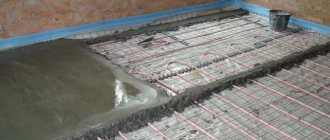
Priming the surface before pouring the self-leveling floor
In general, any type of primer can be applied to a concrete base, except for an acrylic mixture or alcohol, since the adhesion between the materials will be poor and the floor covering will “float.”
On a note! You can apply the primer in two layers - this is done if the surface of the subfloor actively absorbs moisture.
Applying primer to the floor
Preparing the floor surface before applying primer
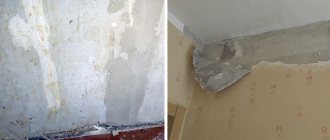
Before applying the primer mixture, the subfloor base must be carefully prepared. The result and quality of the final work will depend on this. The surface must, if necessary, be cleaned from old peeling coating to a solid base. This is done if the base was previously covered with some kind of loose material. All construction debris, down to the smallest dust, is also removed from the surface. To do this, the base is subjected to wet cleaning. If necessary, the subfloor is filled with cement screed or self-leveling mortar. All seams and irregularities are smoothed out as much as possible, the surface is sanded and additionally cleaned of dust.
The base must be well dried before applying the primer. A piece of polyethylene attached to it will help determine the humidity of the surface. If after 24 hours no condensation has collected under it, then the surface is dry. Otherwise, it is left for several days to dry further.
On a note! All joints and corners can be sealed with sealant.
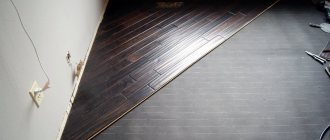
The nuances of laying on a wooden base
To ensure that you get the expected result, you need to devote time and attention to preparing the wooden surface for work.
Rotten boards should be replaced, minor distortions corrected by sanding, large differences in floor level smoothed out using OSB boards or similar materials.
The caps of the self-tapping screws used in this case must be recessed to a depth of 2-3 mm.
If your wood floor is bending and/or squeaking, this will need to be addressed before installing laminate flooring.
Laying additional joists, using thicker boards, or laying a second layer of wood covering perpendicular to the first, followed by leveling with sheet plywood, will help get rid of floor sagging.
After eliminating the defects of the base, a primer is applied to the floor surface.
How is priming done?
Table. Instructions for applying primer for self-leveling floors.
| Steps, photo | Description of actions |
| The base preparation described above is carried out. Before use, the priming mixture is prepared according to the instructions on the package (for example, mixed thoroughly). | |
| Depending on the type of mixture and its physical condition, the primer can be applied with a roller or trowel. Work begins from the corner farthest relative to the exit from the room. | |
| The primer is applied in an even layer over the entire floor surface sequentially. | |
| After application, the primer layer is dried for the required time, depending on the type of primer mixture. |
Stages of pouring self-leveling floors
Advice! If the primer mixture is applied in a room where the walls already have a finishing coating, then they are covered along the bottom with masking tape (so as not to stain them).
The self-leveling floor is poured after the primer layer has completely dried. First, damper tape is glued along the walls. It is necessary in case of thermal expansion of the coating.