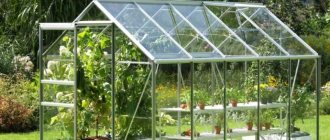
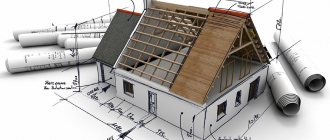
The presence of a greenhouse on a summer cottage is a common occurrence. Using different materials, you can build greenhouses of a wide variety of shapes and sizes. Work in them begins in early spring and ends in autumn. Having your own vegetables is not only economical, but also safe, since you can be confident in their quality. That is why many people have a desire to equip a winter greenhouse. You can grow vegetables and fruits in it all year round, even if it’s frosty outside.
Can an amateur summer resident build such a structure? In fact, the construction and arrangement of a winter greenhouse does not require much time and money, so you can handle the tasks yourself. In this article we will tell you how to build a winter greenhouse with your own hands, demonstrate the necessary drawings, as well as photo and video instructions.
Features and differences from a summer greenhouse
Features and differences
During the construction of a winter greenhouse, unlike a summer greenhouse, a strong and reliable structure is made. It stands on the foundation. In addition, the winter greenhouse has a heating system. The quality and consistency of the temperature inside will depend on the latter. Every winter greenhouse must contain:
- lighting;
- heating;
- ventilation;
- watering.
The size of the greenhouse must be selected in accordance with the number of crops that will be grown. The coating material must be reliable. A simple film will not protect crops from frost and snow. It is also important to provide for the possibility of additional wall insulation.
When developing a winter greenhouse, several conditions must be met for good plant growth: light and temperature conditions, as well as air humidity.
Project development
Before erecting a heated structure, it is necessary to draw up its design and sketch out a drawing with the expected dimensions . Project development stages:
- Decide on the type of construction, quality of the foundation, type of heating, thickness of polycarbonate for the ceiling and walls, location of the vents, and what profile will be used.
- The drawing marks the connection points of the elements and how they will be attached.
- A drawing of the heating system is made separately. Having decided what type it will be, you should draw a plan for its placement.
Which polycarbonate is better for greenhouses: tips for choosing
To make it easier to carry out construction with your own hands, it is recommended to make drawings in several projections:
- foundation - top, side and front;
- view of the greenhouse - top, side and front;
- heating system and boiler - from different sides.
If you plan to build a structure with an area of more than 10 square meters. meters, then when designing it, one should take into account the regulations specified in SNiP on work with metal profiles, as well as on wind and snow loads.
Main types of winter greenhouses
Main types
A modern winter greenhouse can be built from various materials. Today, the construction market is filled with innovative materials. They are distinguished by increased strength, lightness and affordable price. This allows you to choose everything you need within even a small planned budget. At the preparatory stage it is necessary to plan the design. Her choice will depend solely on the plants that are planned to be grown.
The types of winter greenhouses are distinguished not only by the materials used, but also by their external forms.
- Single-pitched - wall-mounted and with an earthen fill.
- Gable - with main walls and a glazed roof.
- Polycarbonate arched.
Device principle
The protective shelter, which is created using a frame and film, is used only for growing seeds and seedlings of garden crops. It absorbs the sun's rays and converts them into thermal energy. Inside the greenhouse it is always several degrees warmer than outside, even without additional heating. Its installation helps to create a microclimate favorable for the growth of garden crops. The shelter reliably protects crops from precipitation, strong winds, and prevents the penetration of insects that can harm seedlings or adult plants.
In order for the greenhouse to work efficiently, during its installation it is necessary to correctly calculate the amount of covering material. To do this, you need to make calculations and take correct measurements. It is easier to solve the problems when the length of the frame and the width of the covering material are known.
The calculation requires the length of the greenhouse and the width of the film Source greentalk.ru
See also: Catalog of country house projects
If the structure of the greenhouse is arched, the length of the canvas should be equal to the length of the arc. When the greenhouse has a frame with a “pitched roof”, the film is calculated taking into account the height of the walls and the length of the slopes. The resulting figure should be equal to the length of the film. To find out how many of these pieces are needed to completely cover the shelter, you need to divide the length of the greenhouse by the width of the film. Since individual pieces are then overlapped, it is important to add 25 cm to the width of each piece (for allowances).
In order for the greenhouse coating to ensure the performance of its functions, it is important to pay attention to the following nuances:
- It is better to cut the covering material on site. It will be much easier to do this if you lay the roll next to the frame in width, and then throw it across the structure, stretch it well on both sides, add 25 cm to the right and left for allowances, and only then cut off the first piece.
- The second strip is cut in the same way. It is laid over the first one with an overlap (25 cm) and secured with construction tape.
- As many pieces are cut as needed to cover the greenhouse from start to finish.
- The ends are cut in the same way and also with allowances of 25 cm.
- Doors and windows are cut out after installing and attaching the film.
Film strips are laid overlapping Source 9dach.ru
Note! It is better to cut the film in calm weather; if the covering material sways and bends under gusts of wind, it will not be possible to stretch it properly.
Knowing how to cover a greenhouse with film, it is not difficult to calculate the amount of covering material. But when buying it, it is important to look at the form in which it is sold. Polyethylene film has a standard width. It is equal to 150 cm. But some manufacturers sell rolls in the form of a sleeve. Before covering the greenhouse, it will have to be cut along one edge of the bend and unfolded.
See also: Catalog of companies that specialize in the installation of metal structures
Criteria for choosing a greenhouse type
- First of all, the parameters are calculated, since further calculations will depend on this.
- It is also necessary to take into account functionality, that is, to know in advance the features of growing crops. In modern and modernized winter greenhouses, you can grow not only vegetables and fruits, but also mushrooms, herbs, and flowers.
- The microclimate inside the structure will depend on the correct location of the greenhouse at ground level. If desired, the structure can be deepened inside and get the effect of a thermos, or construction can begin on the surface. Some people prefer to set up greenhouses in old buildings (garage or barn).
- A wide variety of architectural solutions allows you to realize any ideas and plans. You can build the structure yourself or buy a ready-made structure. You can also seek help from specialists.
Many people grow flowers of various crops for sale. When choosing exotic plants, it is necessary to calculate all costs, as well as study the requirements for the structure.
Film fastening elements
When cutting the film, its initial fastening is done using tape. You cannot leave the greenhouse like this: the first strong gust of wind will tear the covering. The correct choice of fastening type will help prevent this. It depends on what type of frame is used to create the shelter.
Clamps for film on a greenhouse Source semopt.ru
Properly selected material is the key to protection from the cold
When developing a project, it is necessary to take into account the material with which the frame will be sheathed. The winter greenhouse must be durable and airtight, so for arranging the frame choose:
- tree;
- metal.
Both materials are very durable, so it is quite difficult to choose one or the other. Metal is strong and reliable, but wood is much easier to work with. In addition, the wood will not heat up in high summer temperatures. To support the weight of the entire structure, as well as the load of snow on the roof, it is necessary to use strong and thick racks.
Frame covering material:
- film;
- glass;
- cellular polycarbonate.
When choosing a film, it is necessary to sheathe the frame not in one layer, but in several. In addition, you should not use it to arrange the entire structure. Glass also has many disadvantages: heavy weight, fragility and difficulty in installation. The most suitable material for a winter greenhouse is cellular polycarbonate. The advantages include: light weight, light transmission, and ease of installation.
According to experts, the microclimate in a greenhouse made of wood is several times better than one made of metal. When choosing a tree, it must be treated with modern antiseptics and protective agents.
Drawing up diagrams and drawings
On the diagram you need to indicate the length, width and height that were calculated earlier.
A competent drawing is based on the shape and dimensions of the structure, and the construction diagram should be based on the requirements for this structure and the purpose of its use. It is recommended to take photos and dimensions of finished greenhouse frames as a basis or draw up a greenhouse project yourself.
An example of a competent drawing
Ready-made structures, which are manufactured at the factory, imply full compliance of the material and frame used with the main load and conditions of use. The design of a product that is built by hand should be based on similar rules.
The technology for drawing up a design diagram implies compliance with the following features:
- The frame in most cases is made of pipes or metal profiles. This is the best option for such structures.
- Lumber absorbs moisture, so it is not recommended to use it for making frames.
- If for some reason it was decided to use wood, then it is necessary to treat it with an antiseptic and apply a layer of varnish, which can extend the service life of the structure.
- The product diagram must be drawn up in accordance with the calculation of the characteristics of possible loads on the frame structure and coating. It is important to take into account the loads from wind and snow.
- If the design does not involve the manufacture of a durable frame, then the product must be cleared of snow from time to time in winter. Such a frame structure is cheaper, but it is less practical.
The frame of the building can be made of the following materials:
- aluminum;
- steel;
- wood;
- plastic.
Frame diagram of a small greenhouse
It is important to carefully consider how the heating system will be placed.
Greenhouse water heating scheme
Most often, modern greenhouses use water heating, which involves heating the plants being grown during the cold period by means of hot water that circulates in pipes.
If the greenhouse is installed near a private house, then you can connect it to the building’s heating system. In this case, the heating diagram will make it possible to correctly correlate the heating system of the greenhouse with a similar system in a private house. However, in most cases, an independent system is built for a greenhouse.
Selecting a location for a winter greenhouse
When choosing a site for the construction of a winter greenhouse, it is necessary to take into account three main factors:
- Light. The winter greenhouse should receive the maximum amount of sunlight. The greenhouse is best placed lengthwise from west to east.
- Wind. If the chosen location often experiences gusty and cold winds, it is necessary to consider protection. This will save on heating costs and constantly maintain an acceptable temperature and microclimate.
- Convenience. Access or passage to the greenhouse should be wide and convenient. Thanks to this, it will be very convenient to use the greenhouse for its intended purpose.
When organizing protection from strong winds, you can plant a hedge. It must be remembered that the fence must be placed at a distance of at least 10 m. The distance is calculated depending on the height of the ridge.
Mesh fastening
Some gardeners use another simple method of attaching rolled material. They cut the film, connect the individual parts together with double-sided tape, stretch the covering material onto the greenhouse, fix it at the bottom with clips or bars, and lay a coarse mesh over the top area. It is attached to the frame of the greenhouse using wire. This method has its pros and cons. The practice of using such structures shows that they cannot withstand strong winds. Every time after another bad weather, the greenhouse has to be re-tightened.
Selecting a heating system
The most important thing in a winter greenhouse is heating. This process is the most labor-intensive and complex. To organize it, the help of specialists is required. But you can do everything yourself. It is necessary to choose the right type of heating, on which the productivity of the greenhouse will depend. Today there are many ways to heat even a large area. Each of them has its own advantages and disadvantages:
- Sun. Affordable and cheap option. But it is not suitable for winter, since the sun's rays are not so strong and will not be able to heat. It can be combined with other heat sources.
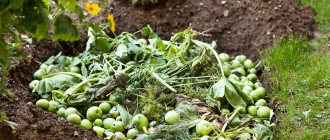
- Biological heating. Biologically active substances decompose, resulting in the release of heat. The simplest biological substance is manure. As with the sun, this method will not be able to completely heat even a small area.
- Electricity. An affordable and popular heating method. It can be installed in any area away from home. You can use different electrical appliances for it: convectors, air heaters, infrared radiation, cable heating, heat pump and water heating.
- Air heating. It is organized at the initial stage of construction of a winter greenhouse, in particular, when pouring the foundation. With the help of heating and ventilation units, warm air is supplied to the middle and upper part of the greenhouse.
- Gas. Gas heaters are installed in the greenhouse, in which direct combustion occurs. To avoid oxygen burnout, it is necessary to provide a good ventilation system.
- Bake. An affordable and economical option involves installing a stove and heating the entire area of the winter greenhouse. Gas, wood and coal can be used as fuel. Among the disadvantages is the heating of the walls, so planting plants next to the stove is not recommended.
It is necessary to choose the type of heating individually for each specific case. You must be guided by such criteria as local climate, planned budget and plant type.
Passive solar greenhouse, Invermere, Canada
The design of this greenhouse is very atypical: it has an insulated back wall and roof. There is also a complex of high- and low-tech systems installed here, thanks to which such a greenhouse can be used in cold, sunny climates.
The greenhouse designers decided not to build a “transparent box” and abandoned the north-facing glass wall to avoid heat loss and lack of light. Instead, they built a concrete thermal storage wall and floor, and insulated the back wall and ceiling to keep the heat in the room.
Another special feature of the greenhouse is that it has a geoinformation energy saving system installed, with the help of which heated air moves from top to bottom and is directed into the ground under the greenhouse. This air can then be returned back and used to heat the greenhouse.
Stages of construction of a winter greenhouse
Brick foundation of a greenhouse
Since the stages of construction and technology completely depend on the materials and design, there is no need to talk about standards. Using an example, we will look at the construction of a winter greenhouse, which is adjacent to the house. A brick is selected for the foundation. The frame is erected from wooden beams or profile pipes. The entire structure will be covered with polycarbonate.
To create the effect of a thermos, you don’t have to go deep into the ground, but only raise the base. The depth of the foundation is 50 cm, the width is 40 cm. For convenience, it is better to make a strip foundation. Do not forget about the sand cushion or use fine gravel. The execution steps are standard and do not require any professional skills or equipment. After pouring, it is recommended to keep the foundation for a week. On hot days, the surface is moistened with water. A layer of waterproofing should be laid between the foundation and the plinth.
You can use used bricks to build the basement. If the financial side allows, then a new brick is selected. The height of the wall should be about 1 m. The thickness of the walls can be half a brick or a brick, at your own discretion. The frame is constructed from durable and pre-treated wooden beams. Anchors and dowels act as fasteners. Thus, a skeleton is installed that will be a reliable support for heavy loads. The frame for the roof must be made at an angle of 30° from the horizon.
The frame should be sheathed with polycarbonate according to the standard scheme and technology. For a good result, several conditions must be met:
- marking;
- precision cutting;
- accuracy of installation;
- use of special fasteners;
- sealing polycarbonate seams for tightness.
Wall greenhouse
Several vents installed around the entire perimeter can serve as ventilation.
For greater savings, it is recommended to choose a location near your home. Thanks to this, one of the walls is already completely ready, so you don’t have to waste time, effort and money. In order for the main part of the greenhouse to be constantly warm, it is necessary to attach a vestibule at the front door. For high-quality sealing, you can use polyurethane foam and special sealants.
Construction sequence
There is no universal sequence for constructing a greenhouse, since in each case it is determined by many factors. Usually, a foundation for a winter greenhouse (if necessary), a frame, and then sheathing are built.
The most important stage is the cladding. Before it you need to take accurate measurements. Also, do not forget about the heating system and ventilation.
Internal arrangement of the building
After all construction and sealing work has been completed in full, you can begin arrangement. So, it is necessary to supply water and electricity for lighting to the greenhouse. It is also important to take care of the shut-off valves, which will ensure a high-quality water supply.
When choosing light scattering sources, it is necessary to take into account the characteristics of growing the selected crops. An equally important issue is the soil. The substrate is prepared, fertilizers and special additives (feeding) are added. They will ensure fast and proper growth of all vegetables and fruits that have been selected.
Winter greenhouse
Guided by the tips provided, you can build and prepare a winter greenhouse for growing various crops in the winter in just a few days. It is enough to use all available materials and purchase missing ones. You can handle all the work alone, but it is better to have an assistant, especially when it comes to installing the skeleton of a winter greenhouse.
We recommend that you read the article “Do-it-yourself greenhouse made of profiles and polycarbonate.”
Rail fastening
Not everyone knows how to attach film to greenhouse arches made of wood. The method of fixing rolled material is actually extremely simple:
- small wooden blocks 10 cm long are cut;
- processed with sandpaper;
- then wrapped in several layers of polyethylene film;
- the first layer, the one that will come into contact with the frame of the greenhouse, is coated with rubber glue;
- The block is applied to the fastening point, and then fixed with a self-tapping screw for reliability.
Attaching the film to a wooden frame with slats Source fishing-caravan.ru
The presence of glue under the attachment point ensures a tight connection, which extends the service life of the shelter. When wooden slats are not available, pieces of old linoleum or plastic tape, which is used for packing boxes, can replace them. It is attached to the wooden frame using a construction stapler.
If you need to decide how to attach the film to a metal greenhouse frame made from a profile, you should use the following advice. It is better to fix the covering material with wooden blocks, but they should be fastened with self-tapping screws not to the frame arc itself, but to the ends of the greenhouse, to its metal posts. When the frame of the greenhouse is assembled from reinforcement rods, the easiest way is to attach the film to it with office clothespins (these are used to fasten sheets in a folder).
Briefly about the main thing
By understanding how and what to cover a greenhouse with, you can create shelters that can last in the garden for several years. Experts advise cutting it out right away and keeping a spare case on hand. It will help, in case of damage to the film, to replace it in time and prevent the death of plants. The method of fastening the covering material is selected taking into account what the frame is made of.
A little more attention!
What do you think - which method of attaching film to a greenhouse is more reliable? Maybe it is better to use polycarbonate or glass to cover the greenhouse?
Ratings 0
Read later
Fastening with eyelets
It can be used if a very dense film is used to cover the greenhouse. It is first cut into strips. Holes (openings) are made along the edges on one and the other side of the future canopy. They are then reinforced with a plastic or metal ring. A cord is threaded through it, with the help of which the film is attached to the frame of the greenhouse.
Film with a metal eyelet Source klen.by
The strips are connected to each other by soldering. To carry it out, an iron, blowtorch or alcohol lamp is used. First, the strip fragments are folded together, then they are covered with old newspapers, and only after that they are ironed or processed with a soldering iron. During this procedure, it is important to observe the temperature regime; you cannot hold the selected instrument over the coating material for a long time.
Technologies do not stand still; today materials are appearing on sale that make it possible to improve the design of shelters for plants and reduce their cost.