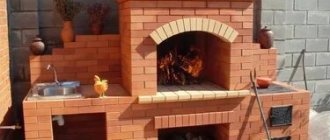
A home with a lit fire has long been considered a symbol of family well-being. You can admire the dancing flames ad infinitum, and it doesn’t matter at all where exactly the hearth is located - in the house or on the street. In garden plots, a barbecue grill, outdoor fireplace or barbecue ovens perform this function perfectly. Although they initially entered the space as a tribute to fashion and a sign of wealth, now many recognize the convenience of their use, providing functionality as part of the landscape design.
BBQ oven diagram.
Barbecues and grills, unlike open fires, can be used in rainy weather without fear of fire hazards, and smoke does not enter the recreation area.
Since barbecues and grills are primarily ovens, you can build them with your own hands. Designs can be of varying complexity, and decoration is limited only by the owner’s imagination. Natural stones, red brick or aerated concrete can be used as masonry material. The latter facilitate the laying process, but require additional external finishing. When using the listed materials, it will not be possible to assemble a barbecue without refractory bricks for the firebox.
General description of the design
Shish kebab is a national meat dish. The place where the barbecue is prepared creates a unique atmosphere that is most suitable for relaxing in the garden or at the dacha. A metal portable barbecue is good for small trips into nature, but unfortunately, it cools down quickly, due to the high temperature of the coals it can lead to burnout, and the taste of meat cooked in such a barbecue is still inferior to the taste of meat cooked on a long-lasting stationary one. Stationary can be:
- barbecue made of expanded clay concrete blocks;
- cinder block grill;
- barbecue made of foam blocks;
- barbecue made of gas silicate blocks.
Foam block
Characteristics
Photo of foam block
This type of cellular concrete appeared on the construction market quite a long time ago and immediately gained popularity. This was achieved thanks to good properties, which we will talk about later.
Foam concrete is made from simple ingredients, which are cement mortar, sand and a certain amount of water. To impart the desired qualities and structure, a foaming agent is added to the final product.
Production workshop for the production of foam blocks
Some types of foam concrete also contain additional ingredients, such as clay, fiber and even ash. These components are designed to add the characteristics of brick to the quality indicators of the foam block.
To give a competent answer to the question of which is better: foam block, building brick or aerated concrete, you need to consider the advantages and disadvantages of each of these products.
Let's start with the properties of the foam block:
Comparative characteristics of some materials
- Environmental friendliness. These products are completely safe for health, as they are made from natural ingredients.
- Moisture resistance. The foam block resists moisture quite mediocre.
- Durability. The service life is estimated at many tens of years.
- Density. This value is 700 kg/m. cube
- The thermal conductivity coefficient is equal to 0.18. This is a low indicator that allows you to retain heat in the room.
- Weight. The foam block is very light. The mass of a square meter of wall made of this material is 700 kg.
- Fire resistance. This product is classified as non-flammable.
- Price. The price of cellular concrete is reasonable and less than that of many building materials.
Application
Foam block masonry
Foam block is quite common in construction. It is used both by private developers for the construction of country houses and in urban construction. Quite often, foam concrete is used for monolithic pouring, where it is turned into blocks directly on the construction site.
The relative cheapness of this building material and good quality indicators expand the scope of its use. The only limitation on its use is basement floors and foundations. This is explained by the poor moisture resistance of foam concrete.
Advantages and disadvantages of a barbecue made of foam blocks
Making a barbecue from brick is good and reliable, but the cost of brick is very high. Easier to make from aerated concrete blocks.
Advantages of making a barbecue from aerated concrete blocks:
- natural material that does not emit harmful substances;
- convenient to process (easy to saw and mill);
- heat resistant;
- one foam block will replace several bricks;
- blocks are much lighter than bricks.
The disadvantage can be considered:
- the need for cladding to improve appearance;
- using fire bricks to protect foam blocks from too high temperatures when cooking.
Do-it-yourself gas block production
Technology at home requires the master to adhere to certain rules. This process consists of several stages.
Required set of equipment and materials
Before making aerated concrete, you need to prepare materials and tools. Concrete is made from a mixture of the following materials:
- Sand. It is recommended to give preference to quartz sand, which has previously undergone a washing and drying process.
- Cement. High-strength material is obtained by using cement, which has a grade of more than 400.
- Clean water.
- Quicklime.
- Aluminum powder, caustic soda, sodium sulfate.
Forms
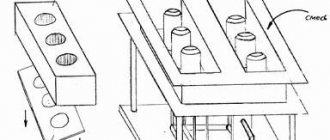
Before making aerated concrete, molds are prepared. You can buy ready-made products in construction stores. To save money, they are created independently. Initially, the pencil case is made from wooden boards. Jumpers are inserted into it, with the help of which the frame is divided into compartments. The molds can be made from moisture-proof plywood. In order to fix the boards, you first need to make cuts in them.
The dimensions of the cells must match the dimensions that, in accordance with the project, the finished block should have. In order to speed up the production process, it is recommended to construct several molds simultaneously. In order to prevent the solution from sticking to the molds, they must first be lubricated with a special product. At home, it is recommended to use used machine oil, which is diluted with water in a ratio of 1:3.
362a280294fc23226030919f75d27061.jpe
a856668b73b855a0499d84f83eca6972.jpe d4eb2ada75558c8d96359cf0454f8f6e.jpe
In order to speed up the production of aerated concrete, you can use mobile installations, which consist of a compressor, mixer and connecting hoses. Devices are pre-prepared to remove excess concrete.
Preparation of the solution
The process of making aerated concrete at home begins with preparing the solution. The number of components used depends on the density of the material the user wants to obtain. Consider the option of preparing a solution for aerated concrete with a density of 1600 kilograms per cubic meter. For this you will need 1100 kilograms of sand and 400 kilograms of cement. The components are thoroughly mixed. To them you need to add 5 kg of lime. Additives such as caustic soda, aluminum powder and sodium sulfate are also added to the solution.
After thoroughly mixing all the dry ingredients, they are filled with 189 liters of water. After mixing the composition until smooth, it can be used for pouring.
Fill
After lubricating the molds with a special composition, the solution is poured into them. In this case, you need to make sure that the molds are not filled to the brim, since when it hardens, the mixture swells and the excess will lick out. The molds need to be filled halfway. After pouring the material, gas formation occurs. At the next stage, excess mixture is removed using metal strings. The procedure is carried out 5-6 hours after pouring.
18 hours after pouring, the products can be stripped. In order for the aerated concrete blocks to move better, you need to knock a little on the forms. After a month, aerated concrete will gain technical strength. Hardening of blocks is observed not only indoors, but also in open areas.
Types of blocks, their features
There are different types of foam blocks depending on the manufacturing technology.
Gas blocks
For production are used:
- water;
- cement;
- lime (gives the product stability of characteristics);
- quartz sand;
- aluminum paste (when mixed, a chemical reaction occurs with the release of oxygen, which ensures foaming and the formation of fine pores).
Production takes place at industrial enterprises.
Advantages:
- light, homogeneous material;
- does not shrink;
- low thermal conductivity;
- frost resistance;
- environmental friendliness.
Flaws:
- the presence of microcracks requires additional surface treatment.
The properties of this material will allow you to easily make a barbecue or grill from aerated concrete with your own hands.
Foam blocks
Used to make:
- water;
- cement;
- lime;
- blast furnace slag (filler instead of quartz sand);
- sulfide or soapy lye (for foaming).
Question with masonry composition
It is very important to choose the right masonry composition for a planned project. The easiest way is to purchase a ready-made solution. But its characteristics may not correspond to those reflected on the packaging.
It is better to find the correct proportions of clay and sand through your own efforts. The formed composition, when dried in the sun, should not crack and retain its strength.
Perhaps your experiments may take longer. But, when you independently achieve the required working mixture conditions, in the future you will spend much less time searching for optimal proportions and will be able to prepare high-quality masonry mortar.
The image offers two options: with a weak and a strong composition
Tools and materials required for work
To make a barbecue out of blocks with your own hands, the first thing you need to start with is the foundation.
To create the foundation we will need the following tools:
- bayonet and shovel shovels;
- measuring and marking tools (tape measure, level, construction angle);
- hammer, nails and fastening tools;
- trowel for foam blocks;
- plane for foam blocks;
- wall chaser;
- perforator;
- Master OK;
- hammer and rubber mallet;
- carbide band saw for cutting foam blocks;
- grater;
- putty knife;
- cord;
- nozzle for mixing the solution;
- grinder with a diamond blade;
- sander;
- work clothes and work gloves.
Foundation materials:
- sand;
- crushed stone;
- reinforcing mesh 1500 x 1000 – pcs.
- cement;
- waterproofing material.
Materials for the barbecue:
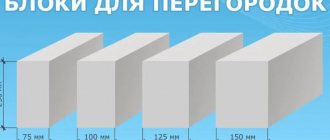
- block 625x250x150 mm – 18 pcs.;
- block 625x250x100 mm – 19 pcs.;
- blocks 625x250x50 mm – 15 pcs.;
- glue for thin-seam masonry, 25 kg – 1 pc.;
- metal barbecue grill 620x430 mm – 1 pc.;
- corner 30x30 mm, length 400 mm – 2 pcs.;
- umbrella-hood made of galvanized sheet 750x450x1000 mm – 1 pc.;
- corner 50x50 mm, length 950 mm – 1 pc.;
- fireclay stove brick ShB8 BKO solid 250x124x65 mm – 42 pcs.;
- refractory masonry clay mixture for fireclay bricks, 20 kg;
- clinker tiles for cladding – 5.5 m2;
- cement glue - 25 kg;
- grouting on cement - 25 kg;
- clamps for making a seam in the cladding - 1 pack;
- flexible tiles – 1.5 m2
Ceramic block or porous warm ceramics
This porous ceramic block is produced using the same technology as bricks and from the same materials. The whole difference is that the “body” of the material is not solid, but consists of voids and ceramic bridges. This structure is effective: for central Russia, a wall made of porous ceramics should be 50 cm. The same thickness of a wall made of aerated concrete is also needed. And additional insulation is not required with such a thickness. That is, the wall will be single-layer, which is much better than multi-layer. And the finishing can be made from facing bricks or clinker. Ceramics will “make friends” with ceramics without any problems. But not everything is so rosy.
Hollow blocks for ceramic walls could be considered the best option, if not for the high percentage of damage and difficulties with fastening
Advantages and disadvantages of ceramic blocks
The main advantages were listed - good thermal characteristics and low (compared to ordinary or even hollow brick) weight. But ceramics are fragile things. And thin partitions break and break easily. When transporting, you can get about 10% of the battle. In addition, cutting a ceramic block is not so easy. A saw won't help here. Other, more serious equipment is required. Another disadvantage is that special fasteners are required, since only this can be held in thin walls.
| Advantages of ceramic blocks | Disadvantages of hollow ceramic blocks |
| Good thermal insulation properties | Brittle material that chips and breaks easily |
| High level of sound insulation | Requires special tool for cutting blocks |
| Average water absorption | Requires special fasteners |
| Steam conductivity | The blocks are not as big compared to lightweight concrete |
| Good frost resistance | Non-ideal geometry, high cost for polished ones that have stable dimensions |
| High strength | |
| The presence of a corrugated surface, which increases the thermal resistance of the masonry. | |
| High heat absorption. It works as a large heat accumulator, but this is bad for building periodic heating houses. |
Other advantages are the same as those of brick: natural ceramics, average water absorption, frost resistance from 30 to 80 cycles, good sound insulation properties - up to 55 dB, which is a very good indicator. In addition, there is such a thing as heat capacity. It shows how much heat the material can accumulate. The more heat it “accepts” into itself, the longer it will take to release it later. For homes with permanent residence, materials with high heat capacity are more comfortable. And for ceramics it is quite big. Such a wall is a kind of heat accumulator. This is good for a permanent home, but bad for a dacha that is visited only occasionally in winter. Warming up takes a lot of fuel and time. So this building block is not the best for dachas or baths.
It is also worth adding that today the cost of a cube of porous ceramic block and the cost of autoclaved aerated concrete are almost the same. In some places, aerated concrete is even more expensive. But the sizes of aerated concrete blocks are larger, glue consumption and time consumption are less. You can argue about the time, since for ceramics the presence of armored belts is not necessary, but it will not be superfluous either. And you can’t argue with the size of the blocks. And with geometric precision. No, there are polished ceramic blocks that are adjusted to fit. They can be installed with a minimal layer of adhesive. But such blocks are much more expensive. Nevertheless, looking at all the facts, it is worth saying that we all know ceramics. So, all other things being equal, it makes more sense to choose it.
Lightweight blocks for construction made from porous ceramics have good characteristics, but may have cracks, which do not contradict GOST. Some manufacturers change this material without problems. Others don't consider it a marriage
Everything is so, but there is one problem. Ceramic block is a type of brick. And according to GOST, non-through cracks are allowed in brick if they do not affect the strength. This is true for solid brick. The presence of small cracks on one side is not considered a defect and does not affect the quality of the masonry in any way. But if there is a crack in one of the faces of the ceramic block, it will obviously not be as strong. Second. When one of the faces is broken, it diverges and the sides are no longer parallel. It is hardly worth using such a block in masonry, although technically this is not a defect.
Description of self-installation of the barbecue
Choosing a place for the barbecue.
The following requirements apply to this location:
- there should be no flammable objects near the barbecue;
- there should be no trees or bushes nearby;
- coals and sparks should not fly away from gusts of wind;
- there must be an efficient chimney and smoke must not be blown onto buildings;
- It is convenient to place a canopy next to the barbecue, under which there should be a platform for placing a table and chairs;
Installation diagram
You can draw a plan on which to estimate the location of the barbecue and the area near it, then, according to the plan, mark the area and visually make a decision. Step-by-step manufacturing instructions are provided.
Pouring the foundation
Before pouring the foundation for the cinder block grill with your own hands, let’s clear the area for the recreation area from debris. Next should be the following steps:
- remove the fertile layer;
- we uproot stumps and bushes;
- small stones and any debris are removed;
- We clean the entire area, and not just directly under the grill.
Making the foundation:
- We dig a pit 40 cm deep. The size is slightly wider than the size of the foundation slab. Since the weight of an aerated concrete barbecue is not too large, the thickness of the slab will be approximately 15 cm; Making a pillow. First a layer of gravel about 10 cm, then 10 cm of sand and another 10 cm of sand. We compact each layer separately;
- we lay the waterproofing so that it subsequently covers the ends of the slab;
- installing formwork;
- we place the reinforcement on the clamps so that after pouring it does not come into contact with air;
- mix concrete in a ratio of 1 tsp. cement x 3h. sand x 1h. crushed stone;
- fill the formwork and level the concrete surface;
- cover with film and leave for a week (it is recommended to water the concrete) so that the concrete gains strength.
Laying the body
The first row serves to equalize the thickness of the seam. Apply the glue with a notched trowel. If necessary, cut the blocks with a hacksaw.
Foundation
Let's start building the barbecue. First we do the foundation. It must be level and able to withstand the load from the grill structure. The best option is a reinforced concrete slab 1500 x 1000 mm, height 150 mm.
We are building such a slab. We remove the fertile layer of soil and make a sand cushion 200 mm thick, leveling and compacting it. We lay a waterproofing material on top of it, which will protect the slab from getting wet. We subsequently use the same material to protect the vertical part of the slab.
We install the reinforcing mesh on certain fasteners, for example, plastic ones, so that after pouring the concrete, the mesh is inside it and the metal does not have the opportunity to corrode. We install plank formwork along the perimeter of the base, and then pour concrete grades B25, M300.
Useful tips for beginners
The surface of foam blocks will quickly collapse under the influence of sunlight and moisture. They need to be protected. This is what decorative finishing is for.
The foam block must not come into contact with the ground.
For swampy areas, make the foundation higher so that puddles do not reach the blocks.
Coniferous wood should not be used for cooking meat.
Craftsmen equip a barbecue made of foam blocks with their own hands with devices for smoking and drying fruits and mushrooms.
What is better to use for construction
To decide which material is better to give preference when constructing various buildings, it is worth considering the scope of their application.
Namely:
- Autoclaved aerated blocks are most often used for the construction of load-bearing structures and internal walls and partitions in private construction. They are also actively used to fill frames when creating a monolithic house. They can be used in the construction of multi-storey buildings and the construction of high-rise structures.
- The aerated block, which was dried under natural conditions, has more limited application possibilities. It is less dense and durable, the dimensions are not as clear. It is often used to create a thermal insulation layer, as well as foam block.
- The scope of application of foam blocks is as follows: construction of internal walls and partitions, external load-bearing walls up to the 3rd floor, creation of fences. They are also used for the construction of industrial buildings, thermal insulation of walls, floors, and ceilings in non-residential premises.
For home
For the construction of buildings with 2-3 floors, private houses, guest houses and permanent residence, gas blocks are often used.
For garage
Buildings made from aerated blocks are durable and last a long time. But if you look at the cost, it is more economical to choose foam concrete. It is also actively used in the construction of non-residential buildings.
Garage walls are subject to requirements such as strength, reliability, and resistance to mechanical stress. The choice of material may depend only on the personal preferences of the owners.
ab87443c990ee04372c580c3c938c47e.jpe
It is easier for beginners to work with gas blocks, which have fixed dimensions and do not need to be adjusted.
For the bath
Unlike foam concrete, gas silicate blocks are afraid of water, easily absorb it and take a long time to dry. They provide excellent heat and sound insulation, but it is not recommended to use them for the construction of a bathhouse.
Foam blocks can be used to construct walls in places with high humidity levels. This makes it possible to build baths from them. Its advantages are also frost resistance and good thermal protection.
Project
In order for the construction of the structure to be successful and the result of the work to please the builder, it is necessary to draw up a project. It will help to take into account the nuances of construction in advance, reduce time costs, excess material consumption, and allow for rational distribution of finances.
First of all, it is necessary to determine the appearance and functional purpose of the gazebo.
Its design, size, and materials used depend on this. The full project includes:
- Drawings or sketches showing the main elements of the gazebo;
- List of basic and auxiliary materials that are necessary for work;
- Tool;
- Estimate – calculation of construction costs.
Despite the possibility of making additions and changes, the concept of the structure should be thought out in advance - this will greatly simplify the work. You can order a gazebo project from professionals, find a ready-made one on the Internet, or develop it yourself.
The photo shows an example of a project for a gazebo:
