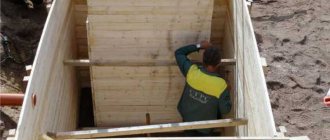
Having seen how inexperienced summer residents hold a shovel in their hands, we decided to tell everyone how to properly dig in the garden, so as to benefit the soil and not cause harm to themselves.
We are absolutely serious, and this is not a joke, but quite serious material, and even instructions for using a shovel in the country, so to speak. We were prompted to write it literally by the current warm season, when young people were spotted in many suburban areas. Naturally, this is very good, because young people work the land, which means they are busy with useful work. But this is precisely where the positive from what he saw ends, since a shovel in his hands is not yet a reason for applause. First, you need to learn how to dig correctly , and only then you can take up the tool.
How to dig soil in the garden: instructions
Now we will provide you with literally a few points that will tell you in detail how to dig in a vegetable garden or garden.
The most important thing in such a process is the correct choice of tool.
- One hand rests on the edge of the shovel handle, the second - a little further, holding the handle in the palm of your hand, the foot is placed on the top of the shovel tray and pressure is applied downward into the ground, preferably at a slight angle.
- After the blade of the shovel has sunk into the soil, you need to take a more comfortable position for lifting and dumping the soil, which means you need to take a step back, bend a little and put pressure on the handle of the shovel, grabbing one hand even closer to the tray.
- Now, you can bend your knees a little and press as much as possible on the handle, which, with a lever effect, will pull the soil out of the hole.
- Raise the shovel with the soil, turn it over and lower it into the hole, hit the largest lumps of earth with the blade of the shovel several times to break them up.
You see, digging with a shovel is very easy, it’s strange that many people don’t succeed the first time.
We remind you once again that the material on how to properly dig the soil is only for beginners in summer cottages, gardens and vegetable gardens, and in no way concerns experienced summer residents, who themselves are able to give such advice.
What you need for work
To dig a well shaft, you need to prepare the following tools and devices:
- shovels (bayonet for digging, scoop for excavating rock);
- if the surface layer above the groundwater is dense, it is destroyed with a crowbar and a pick;
- Buckets are used to lift the extracted mass; a wheelbarrow is required to remove earth from the mine;
- containers with removed soil are lifted with ropes, reinforced concrete rings are suspended and installed using slings;
- a special tripod-shaped tower with a winch or well gate facilitates the excavation of destroyed rock;
- the verticality of the penetration is controlled by plumb lines and a construction spirit level;
- water penetrating into the mine is pumped out using a drainage pump;
- To prevent accidents, it is recommended to use a safety helmet and a safety belt with a cable.
Tools needed to dig a well.
Separately, you will need to purchase materials and tools for waterproofing the structure.
To build your own wells with internal walls made of reinforced concrete rings, you will need the following materials:
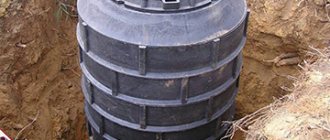
- ready-made concrete products of suitable size;
- fine and coarse gravel used as a bottom filter;
- fastening elements - brackets forming a single ring structure;
- cement mortar for finishing joints.
When starting to build a well shaft from reinforced concrete rings on a site, it is necessary to take into account the large dimensions and heavy weight of the products. Since it is impossible for one person to lift and install such a structure on his own, he will either need to involve assistants or use special equipment.
How to dig a garden without injuring your legs
It often happens that in a moment of excitement or anger, we forget about safety precautions and want to break a large earthen lump, break the root or stem of a large weed with a shovel blade, and so on. But it often happens that such an action can injure the performer of this work. To prevent this from happening, try to take the process seriously, do not be nervous while working, maintain a safe distance between the shovel and your feet during such actions, and also try to dig in closed shoes, such as boots. Of course, doing this in the summer is not particularly pleasant, but believe me, an injury from a shovel or even drying out the skin of your feet from dust (if you work in slippers) is much more unpleasant.
Purpose of a bottom filter for a well
A bottom filter is a layer-by-layer embankment made of various natural materials that are not washed away by well water. Water passing through the filter is cleaned of debris, harmful impurities and suspended particles present in the well.
The installation of a bottom filter is mandatory in the following cases when:
- it is necessary to protect the bottom of the well from erosion;
- water flows under high pressure;
- at the bottom of the well there is fine or dusty sand;
- the well is opened by quicksand;
- protection of pumping equipment sensitive to clogging is necessary;
- the water level in the well is characterized by large differences, for example, during pump operation or precipitation;
- water quality is unsatisfactory: turbidity, sediment, unpleasant odor. You can read more about the causes of unsatisfactory water quality and how to eliminate them in this material.
Installing a bottom filter is not necessary if the well has exposed hard, fractured clay or rock formation. Do not use bottom protection if the water comes from natural springs. If the dense bottom of the well is not clogged with impurities and suspended particles, additional filtration is not necessary.
In other cases, to obtain high quality water, installing a bottom filter for a well is a mandatory step.
In most cases, wells require a bottom filter to purify the incoming water and improve its taste.
How to dig a vegetable garden without calluses
To prevent unpleasant marks on your hands while digging the soil, you need to use high-quality rag gloves with rubberized inserts (these are very convenient for such work). Also, try to hold the shovel correctly, do not put too much pressure on the handle with your palm when you can use the strength of your leg for this, and also, do not hold the shovel too tightly with your hands when turning the earth into the hole.
That's all, just a couple of practical tips, and we are back to more serious topics, but we are proud that now many will be able to learn how to dig properly in the garden, without injury and unnecessary fatigue.
Monolithic well with reinforced concrete knife: knife device
Among supporters of well water supply, not everyone likes ready-made concrete rings. An alternative is a monolith, which is gradually poured into the formwork as the shaft deepens. This method was chosen by a member of our portal with the nickname Benderoid. But he preferred a reinforced concrete “knife”, not a concrete one, the width of the “blade” was 70 mm. To fill the knife I used a ready-made M300 DSP.
When to do this?
Thorough soil cultivation is usually carried out twice a season - in autumn and spring. There are certain reasons for digging.
in autumn
Basic rules for processing the site: work is carried out before heavy rains begin (late October-early November), large clods of earth are not broken, but turned over (so that the weed seeds freeze out over the winter). In what cases is it necessary to dig up the soil:
- if you plan to plant plants in an abandoned area in the spring. When digging in autumn, weeds are removed, the soil is fertilized with organic (compost, manure) or mineral additives (potassium and phosphorus mixtures, ammonium nitrate);
- to get rid of ant colonies. It is advisable to dig up a section of soil after the first frost;
- when planting green manure. In early September, the area is cleared of remnants of greenery, dug up and watered.
Autumn tillage also has its downsides. In order not to disrupt the vital activity of earthworms and microorganisms, do not dig up drained, loose soil in the fall.
in spring
It is important to properly prepare the soil for spring sowing. The soil is cultivated immediately before sowing, and its quality must be taken into account:
- heavy soil is dug up in the spring to a depth of no less than 20 cm. Work is carried out with a rotation of the layer if the beds are clogged with weed rhizomes;
- depleted sandy or turf lands are not dug to great depths. It is enough to lightly loosen the top layer to prevent the soil from drying out.
See also
Conditions and process of soil formation, what factors influence and scheme and stagesRead
If the plots were sown with green manure in the fall, in the spring the soil must be dug up along with the plants. It is advisable to simultaneously fertilize poor soils with organic matter or mineral additives.
Why are there so many types of houses?
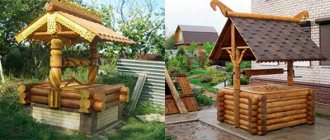
First of all, the issue of arranging a superstructure over a well should be decided based on aesthetic considerations. In the end, a well house is a pleasant and unobtrusive accessory that simply must be in harmony with the decor in the yard. From this position it is quite easy to make a choice of finishing materials - wood, stone, forged metal or more modern siding should be repeated either in the facade of the house or in the design of the fence and gate.
The other side of the issue is purely practical. Completely enclosed houses provide the well with absolute protection from the entry of leaves, dust and small animals, and allow the appearance to be reduced to a simple combination of geometric shapes. In this case, the well stands apart from other structures; a pumping station can be quite easily hidden inside.
Open and semi-open houses (sheds) look light and discreet; they are often expanded with the accompanying installation of a bench and arrangement of a resting place in the cool shade.
Closed house with door
The frame of the closed house should be built simultaneously with the frame of the base. From a block, knock down two rectangular frames, the width of which corresponds to the distance between the outer edges of the posts. Determine the height yourself, but it should not be less than 80 cm.
The frames are leaned against the vertical supports at an angle: the bottom is installed flush with the base frame, and the ends of the posts protruding from above are trimmed.
The back of the well is covered with horizontal sheathing boards with an outlet of 10–15 cm on each side. From the front part inside the frame, two vertical and horizontal jumpers from the same timber should be added to form the door opening. The boards are sewn only up to the middle of the bars, the rest is used for a tight door rebate.
Instead of sheathing, you can immediately attach boards, lining or siding vertically under the roofing; if necessary, secure additional horizontal crossbars inside the frames. The sides of the house are sewn up horizontally with tightly fitted boards.
Advantages and disadvantages
Loose, well-fertilized and structured soil is the key to active plant growth and abundant harvests.
The advantage of tilling the soil with a shovel:
- the least harm is done to the earth, since the fertile layer is not dug deep;
- easy to process hard-to-reach areas;
- low cost of inventory.
Among the disadvantages, it should be noted the low productivity compared to mechanized processing of the site. It is also quite difficult to dig up a large plot of land with a shovel - it requires a lot of effort.
