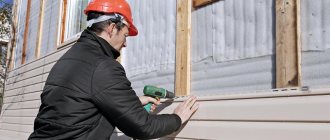
Izospan is a non-woven building material that is used for insulation of residential and non-residential premises. In addition, it is necessary for protection against moisture and water. This is especially important when creating a house plan with an attic and a garage, which must be properly insulated with water and heat.
The reader will learn in this article what types of isospan exist and what advantages this material has.
Choosing a vapor barrier for the floor in a wooden house
Today there is a large selection of materials that can be used as a vapor barrier.
Among them there are both expensive and quite budget offers, among which anyone will find the best option. Before purchasing a vapor barrier, you need to take measurements of the room using a tape measure.
For flooring in a wooden house, the following are most often used:
- Polyethylene film. One of the most affordable and widely used materials. A disadvantage can be considered the high damageability of the material, however, this factor can be easily corrected using the reinforcement procedure. In turn, the film can be perforated or non-perforated.
- Film laminated with polyethylene. The material has vapor barrier and thermal insulation properties, which are very important in a wooden house. It is best to place such a layer under kitchens, showers and saunas.
- Polypropylene film. Unlike polyethylene, polypropylene is stronger. The best option is to lay the material with an anti-condensation layer. Thanks to its use, water droplets do not form on the surface, the appearance of which often leads to disastrous consequences. Thus, you can avoid premature damage to the wooden covering.
Before choosing one option or another, it is better to consult a specialist. Having assessed the features of the room, he will select the best option that will serve faithfully for quite a long time.
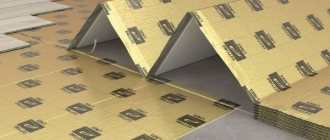
Is a layer required for ventilation?
At the bottom of the membrane vapor barrier there is a 5-centimeter ventilation gap, which helps prevent the formation of condensation on surfaces and the heat insulator.
Diffusion membranes can be attached to insulation, plywood sheets or OSB. In a membrane with an anti-condensation layer, gaps up to 6 cm wide are located on both sides.
To create a gap for ventilation when insulating the roof structure, a counter-lattice is used. In the process of fastening a ventilated facade, a technological gap is created when installing racks located perpendicular to the vapor barrier.
Features of the process: which side to lay the vapor barrier
It is very important that the vapor barrier is laid on the “correct” side, according to the technology.
If you simply don’t pay attention to this point or even neglect it altogether, the material will not work as it should.
A vapor barrier film, under favorable conditions, can even accelerate the destruction of a house. In fact, it will be laid in vain.
Vapor barrier material may vary in color and thickness
The vapor barrier installation scheme usually looks like this:
- If double-sided moisture insulation is used, then a smooth surface is laid on the inside, and a rough surface on the outside. It is the rough side that will retain steam and condensation, additionally providing reliable protection for the home.
- The manufacturer may reserve the right to change the rules for using materials, but information about this is usually located on the packaging material.
On average, the process of installing a vapor barrier takes up to one day. The only exceptions are cases when the master is faced with a significant space. If, during the work, the waterproofing film is laid incorrectly, you should not be afraid to correct the mistakes immediately. Ignoring the problem can be quite expensive: at least one more repair.
How we developed an AR application for DIY retailer Leroy Merlin
Product Director of the NULLgravity agency Dmitry Pankrushev talks about the advantages of using augmented reality in a mobile application.
Augmented reality is one of the main technological trends in retail in recent years. Retail is rapidly moving online, and success largely depends on the willingness to embrace technology. But not everyone knows which way to approach them. To make your task easier, you should study ready-made cases.
Why does a DIY retailer need an app with augmented reality functionality?
We all buy things on the Internet. The pitfall of online shopping is the inability to try on the item you like and see how the item will look in real conditions. However, if we talk about furniture and home decor elements, even buyers of physical stores cannot “try them on.”
But now we can solve this issue using augmented reality. This approach makes the shopping process more convenient and faster. It also reduces the likelihood that the customer will choose the wrong product and be disappointed with the purchase.
Using the Leroy Merlin application, users will be able to visually evaluate their choice and see how the product will look directly in their apartment. To do this, you only need an iPhone or iPad.
The application uses the device's camera and complements the image with products from the catalog. It is worth noting that all models are displayed in actual sizes, color and texture correspond to reality. Thus, the use of augmented reality technologies for “trying on” furniture provides a completely new, improved customer experience.
Technical implementation
Our task was to visualize products from the range of Leroy Merlin stores. This turned out to be a very interesting and at the same time challenging activity.
First, we needed to find a designer who specializes in rendering 3D models, then we spent a long time selecting a model format that can be used in Xcode.
The final stage was the implementation of the application functionality itself.
There were no problems with 3D modeling. The difficulty turned out to be that there are a lot of items in the Leroy Merlin assortment. Making augmented reality models for all products at once is a labor-intensive process. Therefore, at first we created about 30 models that appeared in the first release of the updated application. We received a lot of positive feedback from users and media attention.
It became clear that Leroy Merlin customers are ready for innovation, are not afraid to try new things and are happy to master technology. Therefore, we decided to expand the range of products available for trying on in 3D. But at this stage we were faced with the fact that new products could appear in the application only with a new release.
But the team works in sprints of two weeks, and not every sprint ends with the release of a new version. We didn’t want to delay adding new 3D models so much, so we implemented a solution using our middleware, which allows you to load new models without releasing an updated version.
Working with ARKit
Of course, there are many different solutions for augmented reality. These are InfinityAR, Vuforia, ARToolKit, Catchoom, Augment, Blippa and several others. But we understood the advantages of a native framework and decided to go with Apple ARKit.
After Apple presented it at WWDC, this technology became more accessible. However, let’s not lie, the task was not an easy one, because together with Leroy Merlin we were one of the first to implement ARKit in a mobile application.
Our best programmer was hired for this task. iOS developer Inna Kuts spent an entire sprint searching and studying materials on the topic of creating ARKit that were available on the Internet. In fact, at that time there were few materials: a couple of video courses and documentation. You could say we had to figure out the new technology from scratch.
But even now, after the release, the development process does not stop. For example, Apple recently released an update to ARKit that will make augmented reality work on vertical surfaces.
This means that you can not only see how a chest of drawers will look in this part of the room, but also do the same with any finishing materials, decorative elements and lighting. For example, “try on” your favorite sconce or wallpaper. Based on recent research, we created a test build and already know how to make everything work.
In addition, the NULLgravity team is now actively preparing for the release of an augmented reality library for Android, which is at the beta testing stage. So, soon we will be able to please those Leroy Merlin customers who use Android devices.
How the development went
We have been working on a mobile application for Leroy Merlin for about a year now. Those who work with corporations know how different the process is from working with a startup or developing your own product.
There are many more stakeholders involved in the process. The infrastructure of a mobile application becomes very complicated: the backend is done by one team, the application by another, the servers are in the area of responsibility of a third, and so on. This largely determines the course of mobile development. It is not always possible to implement obvious and necessary functionality immediately, in the first release.
Since Leroy Merlin is not just another building materials store, but the largest innovative company in the DIY retail segment in the world and Russia, we understood that the standard functionality of an ecommerce application would not be enough.
Innovations in any case had to create a new customer experience, and augmented reality functions turned out to be the right solution. We were lucky that the client team supported this initiative. Not all companies are ready to invest in technological solutions that are difficult to monetize immediately, but Leroy Merlin decided to undertake such an experiment.
And it turned out to be successful. Together with the team, we decided to submit the project to the “Golden Application” competition in the following categories:
Why do you need waterproofing film for floors?
A hydro-vapor barrier is installed to prevent the penetration of moisture and dampness into the room. Most often, this material is laid between the main floor covering and insulation.
Meanwhile, to provide better protection, you can put an additional layer: between the insulation and the so-called subfloor.
The subfloor is a layer over which a decorative coating is subsequently laid. This is done in order to protect the house from moisture penetration from the ground. However, sometimes this layer can be replaced with classic waterproofing or a material called a membrane.
Waterproofing film can be purchased online or at any hardware store.
The bottom layer is especially relevant for private houses that stand on unstable soils. In addition, do not forget about basements, which often “absorb” excessive moisture from the soil. Sometimes, in order to save at least a little, self-taught craftsmen even neglect polyethylene waterproofing.
The results of such experiments are:
- Constant condensation on the walls and floor;
- Fungal development;
- Damage to coatings (especially paper);
- A musty odor in the room, which is a potential health hazard to others.
Steam-waterproofing is quite inexpensive, but it is what makes the structure of the house more reliable and long-lasting.
What is the difference between anti-condensation film and “anti-condensation side”?
As we have already said, most modern manufacturers emphasize that their vapor barrier films have a so-called “anti-condensation side”: The “anti-condensation
” side differs from the usual one in the presence of a fleecy layer that absorbs a small amount of condensate and holds it until it will not evaporate.
Thanks to this, the risk of the film surface getting wet is much lower, which extends the service life of the interior finishing of the roofing cake. That is why the rough side should always be directed inside the living room or attic, and the smooth side should be leaned against the insulation. But is this really so?
Practice shows that if condensation forms inside the roofing pie, then the fleecy side of the film cannot help in this regard, and there is not much difference whether these drops adhere to the film or flow down. The fact that they exist at all is bad in itself. The anti-condensation side of the vapor barrier and the anti-condensation waterproof film on the other side of the insulation are completely two different things!
Therefore, let's summarize: the “correct” side of the vapor barrier is not equivalent in terms of the properties of the anti-condensation film: it does not remove water vapor, does not destroy drops of moisture and does not solve the problem with condensation.
But, if you are still in the process of building a roof, then for the sake of peace of mind, do as the manufacturer instructed in the attached instructions. If you have already installed a vapor barrier and are in doubt whether it is correct, forget it and don’t worry anymore. But if you hope that the “right” side of the vapor barrier will take care of all the future shortcomings of the roofing pie, don’t believe it.
Experienced roofers often declare that they consider the whole epic about which side to attach the vapor barrier to be a kind of shamanism. Allegedly, by complicating the product, they increase its positioning in the market. But in fact, as we have already said, with a well-equipped vapor barrier, there shouldn’t be any droplets on the walls, otherwise even the lining on the walls will swell and the wallpaper will fall off, since everything is so serious.
After all, this only happens when there are serious mistakes during roof construction. In addition, if the vapor barrier itself is located between the drywall and mineral wool, then there is no point in messing around with such a complex structure at all. Drywall itself absorbs moisture well, and steam will practically not be able to reach the internal vapor barrier. In this design, even simple glassine is quite acceptable!
For example, some curious roofers even conduct their own vapor barrier tests to determine whether the “wrong” side is working or not:
And those who are especially quick-witted even say that polyethylene vapor barrier with a rough side is obtained simply in the factory, when polyethylene is combined with a non-woven material: the film is glued to the rough layer, and the finished product actually has two different sides. And there is no point in modifying the second side so that it also becomes smooth by connecting it to another layer of polyethylene: the vapor barrier properties will not change, and the manufacturing process will become more expensive.
And therefore it is easier to give this meaning to the product itself. And in fact, quite a lot of people have already become convinced that, even if they mix up the sides of the vapor barrier, nothing like that happens, and the film works the same on both sides, fully performing its functions.
Therefore, in any case, just strive to implement roof steam protection correctly, think through all the necessary details and not skimp on quality!
Knowing which side to lay the vapor barrier against the insulation on the ceiling, wall or floor is very important when working on insulation. It only seems at first glance that which side to lay the vapor barrier against the wall insulation does not matter, but in reality this is not the case
In this material we will tell you why a vapor barrier is needed and its purpose. Watch the video - which side to lay the vapor barrier on, how to distinguish the inside of the vapor barrier film from the outside.
The need for high-quality thermal insulation of premises arises very often. If you plan to insulate a wooden house with your own hands, then many questions arise about how to do it correctly. And one of the important questions concerns the need to use a vapor barrier, the place of the film in the thermal insulation “pie” and which side to lay the vapor barrier against the insulation on the wall.
Secrets of professionals: how to install vapor barrier
Each type of material is usually accompanied by instructions, which every master must read, regardless of his competence in this matter. At the same time, there are also little secrets, without which the process would drag on for a long time.
These include:
- Work exclusively in sunny, warm weather, which allows premature accumulation of moisture;
- Using only high-quality materials;
- Working with solid materials.
Before laying the vapor barrier material, you need to thoroughly clean the surface of debris and dust.
In order to understand the process even more, experts recommend watching thematic video tutorials. This process takes very little time, but in the end, the master will be completely confident in his abilities. However, if you still do not have sufficient skills, it is better to enlist the support of an experienced master who will supervise the entire process.
General installation principles
Regardless of what type of vapor barrier is used and what structures it is mounted on, the general operating principles are followed:
- it is necessary to ensure the unity of the barrier, so the film or membrane is laid overlapping and glued with a special tape or tape;
- any punctures, cuts and other through defects on the surface of the vapor barrier must be repaired with mounting tape;
- for all types of barriers, except for double-sided membranes (with a smooth and rough side) and superdiffusion membranes, it is necessary to leave an air gap between the vapor barrier and the insulation;
- The location of the “dew point”, that is, the place of moisture condensation due to temperature differences, must be taken into account.
The installation process and the question of which side to lay the vapor barrier on the floor, walls and roof are discussed in more detail in the video.
Self-taught tips: laying vapor barriers
The construction of a house necessarily involves hydro- and vapor barrier of the floors and walls.
Before you start laying a vapor barrier, you should study the advice of experts and watch a training video
And here there is always a choice:
- Do the work yourself;
- Use the help of a specialist.
Only the master who is completely confident in his abilities can choose the first option! Materials can behave unpredictably, and a beginner who does not have enough knowledge will simply get confused and not cope with the task. The vapor barrier will not be implemented and contacting a specialist is inevitable.
A professional will be able to install the material and insulation in a matter of hours, however, such work will be quite expensive. Therefore, the homeowner chooses what and how to lay it on his own.
Selection of materials for creating a vapor barrier layer
The main property of a vapor barrier material that you should pay attention to when choosing is the ability to transmit a minimum of steam. This criterion is calculated by the amount of steam that passes through 1 m2 per day
Some materials have an indicator of 3-5 g/m2, but most are characterized by vapor permeability of less than one. To know which vapor barrier to choose for the ceiling in your particular case, you need to study the possible options.
The first vapor barrier material was glassine, its vapor permeability was 80 g/m2. However, modern insulation in some cases has a value of about 0.02 g/m2. The appearance of the materials used to insulate the surface from steam and atmospheric moisture is almost the same
Therefore, it is very important when choosing to carefully study the information provided by the manufacturer. Otherwise, you can purchase not a vapor barrier, but a waterproofing material, the use of which will lead to damage and mandatory replacement of the thermal insulation layer.
To protect the ceiling, it is recommended to use the following types of vapor barrier for the ceiling:
- The vapor barrier polymer membrane refers to rolled materials, one side of which is completely smooth, the other is rough. When laying, the rough side should be directed downward so that a minimum amount of evaporation penetrates to the cake. The presence of roughness prevents condensation from accumulating on the surface.
- Film polypropylene and polyethylene materials can be reinforced or non-reinforced. This type of insulation requires the creation of a ventilation gap between the vapor barrier and the insulation. Ceiling vapor barrier film is used when the construction budget is limited; installation can be done by both parties.
- A foil membrane on the ceiling is recommended for use to create a barrier against moist warm air, as well as to reflect heat rays and direct them back into the room. In both cases, installation is carried out with foil towards the steam and the flow of warm air.
In most cases, vapor barrier materials have accompanying documentation, which, along with technical and operational characteristics, describes which side to attach the vapor barrier to the ceiling, and the mounting technology itself.
To avoid unpleasant moments during operation, when choosing a material, you should pay attention to the possibility of direct contact of the vapor barrier and insulation. The formation of rolls of vapor barrier polymer film is carried out in accordance with how the material will be rolled out to create a vapor barrier layer
Along the long edge of the strip there is a mark for the recommended overlap so that the insulating carpet on building structures is continuous.
The formation of rolls of vapor barrier polymer film is carried out in accordance with how the material will be rolled out to create a vapor barrier layer. Along the long edge of the strip there is a mark for the recommended overlap so that the insulating carpet on building structures is continuous.
The direction of the strips of insulating material does not play a special role; the roll can be rolled out along or across the ceiling. The main condition is to create an overlap and firmly fasten the strips into a single piece using tape.
It is recommended to choose materials for gluing and vapor barrier from the same manufacturer. Otherwise, complete tightness in the gluing areas cannot be guaranteed. Due to the features that each manufacturer endows with its products, deformation of the material and even its destruction may occur.
Among the large number of manufacturers of rolled roofing materials, the TechnoNikol company should be highlighted. It produces building materials for use in the CIS countries, including polymer vapor barrier membranes, polyethylene and polypropylene films.
Vapor barrier membranes are available in several innovative self-adhesive options, as well as materials that can be installed using bitumen mastic or by fusing with a gas torch.
The company's products are no less popular. Its range of materials ranges from standard vapor barrier film to foil insulation with a layer of insulation and a self-adhesive coating on the back side.
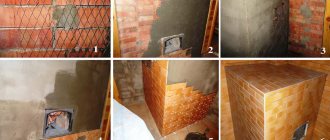
Izospan instructions for use. Izospan A, B, C, D, F
Izospan is an insulating film coating. The main purpose of the film is to ensure that the original thermal insulation characteristics are maintained throughout its entire service life. It is difficult to imagine a modern construction project without the use of various types of thermal insulation. Mineral wool, Penoplex, Izolon, Izover, various polystyrene foams and simply polystyrene foam - all these materials require their own protection.
Thermal insulation materials practically envelop our house, retain heat on frosty and rainy days, create comfort in the hot summer, preventing the penetration of heat flows. But how to protect the thermal insulation belt from negative atmospheric phenomena? Reliable protection from moisture, rain, damaging winds is designed to be provided by 100% polypropylene, with the proud name - Izospan .
To create a barrier at the stages of the construction process, to perform the function of protective insulation for thermal insulation, this is the true purpose that isospan vapor barrier successfully fulfills. Despite its apparent simplicity, the material differs by type.
We bring to your attention – Izospan instructions for use. Figure it out: which side to lay the isospan on. Consider the isospan technical characteristics, and the installation method.
Worthy competitors of isospan:
Before moving on to a detailed review, it should be clarified that the films are presented by the manufacturer in a wide variety and have different purposes. Vapor barrier films and membranes are divided into absolutely vapor- and water-tight and partially permeable to moisture only in one direction. Some of the materials successfully complement thermal insulation, enhancing its characteristics.
Waterproofing and insulation
Waterproofing is a dense layer that is not subject to water penetration.
It can be made from paint, roll or other materials whose direct purpose is to protect structures from moisture. Waterproofing and insulation are carried out in many cases. This can be thermal insulation and protection from groundwater of a foundation, basement, attic, etc. In all cases where it is necessary to protect a certain space from water ingress and balance the temperature regime.
We will consider which side to lay the waterproofing against the insulation next.
What kind of waterproofing is there for insulation?
The main purpose of a modern waterproof coating is as follows:
- External waterproofing of insulation from exposure to dampness and moisture;
- Ensuring high-quality operation of buildings, increasing durability and reliability.
This is a kind of external barrier. To carry out work in relation to insulating material, there are the following types:
- Polyethylene;
- Polypropylene;
- Non-woven breathable.
The modern market is saturated with a variety of waterproofing materials. These include membrane films, reinforced meshes, and special fabric coverings.
Many people are interested in the question: which side should the waterproofing be laid to the insulation? Often the required direction is indicated on the packaging or on the material itself. Under no circumstances should there be any confusion. Since the product is one-sided, if installed incorrectly, it may not perform its intended functions.
There are also coating options, for example bitumen-latex mastics.
Which side should the diffusion hydro-vapor barrier be laid on?
Modern film water vapor barrier for roofing is produced using a woven method from pure, 100% polypropylene. Its structure, if you look closely under a microscope, is a network of thin threads. Their interweaving forms microscopic cells. Their size is not sufficient for the unimpeded passage of water molecules in a vapor state.
High-quality diffusion hydro-vapor barrier for floors or roofs is made in two layers. Its specificity lies in its operation on the principle of a valve: passing steam from the air in only one direction (from an area of high pressure to an area of low). When there is oversaturation of moisture in the air in the room and under the influence of steam pressure (diffusion), water molecules literally seep through the film and excess moisture is removed outside.
Such material is laid when organizing a system of ventilated facades, on top of mineral insulation with the obligatory arrangement of a ventilated gap. This water vapor barrier is suitable for floors and walls.
Diffusion films usually have markings for installation, which are different for each manufacturer. Before installation, you must carefully study the instructions. Often such material is made dark and rough on the back side, lighter and smoother on the outside.
Installation is carried out with the light (water-repellent) smooth side facing away from the room in the following cases:
- for insulation when arranging the under-roof space;
- under insulation when laying the floor on concrete or soil;
- external thermal insulation when installing ventilation facades.
When installing a floor under a screed, protecting walls and ceilings in wet rooms (for example, baths, saunas), the water-repellent side should face the inside of the room:
Which side should the anti-condensation hydro-vapor barrier be laid on?
To give the material improved vapor barrier properties, one side of the diffusion film is coated with a special moisture-absorbing hydrophobic coating, polyester fabric, or an aluminum reflective layer is applied. Such membranes are called anti-condensation and superdiffusion. Due to the absorption of condensate, this hydro-vapor barrier is best suited for cold roofs: pitched type with metal decking. The absorbed moisture prevents the formation of metal corrosion. The additional layer provides better thermal protection.
Antioxidant hydro-vapor barrier is installed in the same way as diffusion barrier: with the water-repellent side facing away from the material that needs to be protected from moisture. Typically, manufacturers apply markings on the outer (water-repellent) side such as: “This side up”, a logo or brand designation.
Related Products
Vapor barrier isospan technical characteristics
- The material is waterproof;
- Elasticity is beyond praise; it is not difficult to get around the most difficult areas and bends;
- Resistance to ultraviolet radiation;
- Resistance to negative atmospheric phenomena;
- Does not emit harmful substances. Safe for human health. Does not harm the environment.
- Withstands temperature changes in the range from – 60 °C to + 80 °C
- Fireproof elements added in production determine the fire hazard group G4, which is confirmed by relevant certificates.
Izospan has various applications, taking into account the field of construction use. Isospan, a type of insulation unique in its structure, has individual technical characteristics and its own labeling.
Manufacturers classify their products by letter indices A, B, C, D, F, R. The combination of letter indices adds numerous variety, applications and installation of isospan. Each new designation assumes its own isospan application. This fact must be taken into account when building your home.
roof vapor barrier isospan
Types of materials according to vapor permeability:
To help builders correctly apply vapor barriers, various building materials are classified according to their vapor permeability.
Impermeable materials:
- Glass
- Sheet metal
- Polyethylene sheet
- Rubber membrane
- Vapor barrier paints
- Exterior plywood
- Foil Rigid Insulation Board
Semi-permeable materials:
- Foamed or extruded polystyrene
- Laminated plywood
- Bitumen coated paper
- Drywall painted with oil- or moisture-resistant latex paint
Permeable materials:
- Unpainted drywall
- Stone and glass wool insulation
- Cellulose insulation
- Lumber
- Gas silicate and foam block
- Expanded clay block
- Concrete block
- Concrete slab
- Brick
Conclusions on the use of vapor barrier materials
Impermeable materials are not always desirable, as in some situations the wall needs permeable materials in order to properly breathe and get rid of excess moisture. Most experts advise against sealing the wall on both sides, as this is an invitation for moisture to trap and create inherent problems.
Izospan A
The membrane, like a check valve, freely allows water vapor to pass through from the thermal insulation side. Does not interfere with the natural ventilation of the insulation. On the other hand, it reliably blocks the penetration of moisture from the external atmosphere, prevents the formation of condensation, and prevents the wind from destroying the structure of the insulation.
Due to the water resistance of the material on the outside, membranes are widely used in roofing structures and are widely used as protection for walls and ventilated facades of buildings and structures for any purpose.
The waterproofing property possessed by the isospan membrane prolongs the service life of the thermal insulation for a long time. Even the best insulation is destroyed over time under the influence of wind; the use of Izospan A will be the ideal solution to protect the outside of the house.
Membrane structure and operating principle
The most popular for their performance characteristics are breathable multilayer membranes, which are designed to create reliable vapor barrier protection.
They consist of three layers, each of which performs an important function. The first layer prevents the penetration of steam into the insulation, the second provides the necessary strength of the base, and the third protects against moisture from the outside.
Each individual layer has the necessary perforation for good air exchange. The first layer removes excess moisture, allowing dried air to penetrate. The reinforcing layer retains warm air masses inside thanks to a special weaving of threads. The third layer provides a sufficient level of traction inside the structure.
Some types of membranes have an additional anti-condensation layer based on viscose or cellulose. It retains excess moisture deposited on the paper fibers. To naturally remove moisture from the membrane, a technological gap of 2.5 cm is provided between the vapor barrier and the finishing surfaces.
Izospan B
As we found out, isospan A, firstly, protects from the wind, and secondly, it creates a powerful hydrobarrier for the insulation. There remains a danger in the form of condensation, wetting of the insulation - condensation, which, before passing through the membrane in the form of steam, saturates the thermal insulation with moisture.
Humidification by only 5% will reduce the thermal insulation performance by half. The further prospect is the penetration of condensation onto the metal tiles, with the subsequent transformation of the roof into a colander.
The anti-condensation surface in combination with the steam and waterproof effect will save you from such troubles. When carrying out installation work on arranging the roof, you must clearly understand that even the best insulation for the roof is gradually saturated with water vapor.
By creating a barrier to internal vapors, Izospan B will serve as a kind of vapor barrier. The material consists of two layers, a layer with a smooth structure is adjacent to the insulation during installation, the second fleecy side is designed to absorb condensation.
That is why the installation of the coating is always carried out with the fleecy side down, with a gap to the finishing materials, for ventilation and drying. Type B is laid with an overlap with an overlap of at least 10 centimeters on the insulation side and secured using a construction stapler or another method.
Vapor barrier AXTON reviews
Verified Purchase Review:
Durable, breaks with effort, but there is nothing more to say, I hope it will work as intended.
Name:
Valery
Review:
Compared to Megaizol, it’s 2 times thicker. I liked it.
I didn't check for wetness. Advantages:
price and quality
Disadvantages:
I didn’t find any, because... there is something to compare with
Name:
Julia
Review:
The price corresponds to the quality
Name:
Andrey
Review:
It’s still not clear which side to lay
Name:
Nadezhda Byldina
Review:
The markings are squares all over the surface - it’s very convenient to work, everything is even and you practically don’t need to use a tape measure or ruler.
Disadvantages:
It seems to me that it is a little thin - although 10cm of insulation keeps it at a negative slope.
Name:
Lola
Review:
Good vapor barrier, and for the money it’s a godsend!
In total, they covered 200 sq.m. ceiling. My husband and I stretched it along the lathing (150mm boards at 12-17cm intervals), shot it with an ordinary furniture stapler at the very edge of the panel, did not fix the vapor barrier in the center, I really didn’t want to seal the holes from the stapler later))) We measured it by eye, simply stretched it along the length of the room and added overlaps to the walls, then cut off the excess if necessary. Nothing sagged or stretched anywhere! The only negative is that it is thin, they accidentally pulled it several times and in some places the bracket broke through the vapor barrier, but this is not critical, they shot it on both sides from the impulse and moved on! All joints and brackets were then sealed with strips of the same vapor barrier coated with rubber glue, which was also used to glue the vapor barrier to the concrete. The vapor barrier copes with its tasks completely, it holds steam, and the insulation is dry after winter. Advantages:
Inexpensive, fully performs its task
Disadvantages:
Thin, you need to work carefully
Name:
Elena
Review:
We purchased it due to the lack of other brands, which we regretted.
Advantages:
Price
Disadvantages:
No markings, during installation it stretches and sags.,
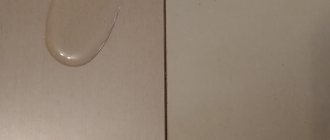
Wind and moisture insulation Axton (a) 35 m2
Name:
Mikhail
Review:
does not allow water to pass through.
I checked it personally and poured water under the tap. All the water flowed down the slope. I also checked it by filling it with water like a bag. Miracles of technology. I don’t know how it will perform in cold and heat. Advantages:
Steam passes easily, holds water.
Poured water on the outer side (where the text is) Disadvantages:
not yet identified.
Name:
Alexander
Review:
used for roofing.
As a result, without having time to cover the roof with corrugated sheets, it began to rain. as a result, the entire insulation is wet Disadvantages:
does not perform its functions
Name:
Anastasia
Review:
We bought wind protection for a cold attic to protect the insulation in the attic from weathering.
The permeability of the membrane is good, the insulation has not become damp over the winter, and the dust from the stone wool has stopped flying around the attic. We installed the film in the cold, the tape did not stick at all, heating the joints with a hairdryer also turned out to be pointless, we glued the top overlapping with reinforced tape. I know that it’s not the technology, but well... I think the membrane copes with its task. Not suitable for protection from moisture, as mentioned above, look more carefully at the markings Advantages:
The markings simplify installation
Disadvantages:
Adhesive tape does not work well, at +10 it no longer sticks at all
Name:
Stanislav
Review:
This material has one advantage - it is an excellent sieve!!!
It absolutely does not correspond to the stated characteristics. I bought it online. They delivered everything on time and didn't even damage anything. The surprises began when I opened the package and the instructions said that this is a vapor barrier and should not be used for work in the rain and should not allow water to enter. This material is absolutely not waterproof. Disadvantages:
It does not retain moisture at all; at the slightest contact of water on this “membrane” it flows through it and the insulation gets wet. The stated characteristics do not correspond to reality.
Name:
Alexey
Review:
A drawn grid is, of course, drop-dead convenient.
Those who are confused about which side is towards the insulation and which is out will have no problems with this film. Disadvantages:
180% more expensive than regular steering wheels. Considering that all my neighbors will see the axton advertisement, it turns out that I’m still paying for it.
Wind and moisture insulation membrane Axton 70 m2
Name:
Alexander
Review:
I purchased this material.
After the first rain the roof began to leak. When examining the membrane, a dark stripe 3 meters long stood out visually. Repair at my expense. I'm attaching a photo. Is there a video. Disadvantages:
marriage occurs.
Name:
Konstantin
Review:
Alexander, hello, the product was purchased in original packaging without visible damage. The situation was resolved after filing a complaint, as the sales manager refused to exchange the goods. Thank you for your trouble.
Name:
Konstantin
Review:
PS I brought it to the store, the seller was rude and accused us of doing it ourselves. I filed a claim and a few days later the money was returned.
Name:
Konstantin
Review:
I purchased the membrane, started laying it, and in the middle of the roll I found two sheets glued together and through holes.
Name:
Ivan
Review:
I want to share my review of this miracle In March, the old roof, 25 years old, began to leak. A decision was made to reconstruct the roof and the second floor as a whole. I was thinking about making two full bedrooms out of a broken roof with one room and two storage rooms. The weather was hot. , no precipitation, June Dismantled a ton of Soviet slate, the old rafter system, the old frame Erected new walls, a central partition, rafter system Layed insulation and covered AM Everything as it should be, counter-lattice, sheathing The next day, rain, thunderstorm, hurricane 6 hours in a row at night You can imagine imagine the level of fear Morning, everything is quiet I go up to the second floor Not a single leak, not even a hint I have everything Thank you
Advantages:
Performs its function with a bang
Disadvantages:
Didn’t find it
Name:
Vyacheslav
Review:
I liked it
Advantages:
Easy to use - there are markings and an applied adhesive strip for gluing overlaps. The price is reasonable. Two weeks as a temporary roof under heavy rain - not a single leak.
Name:
Ruslan
Review:
Missed the rafters - couldn’t stand it (75 kg.) Ondutis on the roof, on the vent.
axton facade (same film - difference in price and size). Birds love to make holes. Advantages:
Easy to install, satisfactory strength,
Hydro-vapor barrier Axton C, 70 m2
Name:
Sergey
Review:
We laid this material on the roof sheathing without insulation, the wind was 8-12 m/s, but this did not interfere (it was pressed against the sheathing).
When one side was covered, the wind no longer passed through on the other side and did not interfere. It rained that evening and the next day; we were pleasantly surprised that not a single drop fell. Every other day they made counter-latching and laid corrugated sheets. During installation, the material did not sag or tear. Advantages:
Does not allow moisture to pass through, protects from wind, holds a large load.
Disadvantages:
No markings.
Name:
Ivan
Verified purchase Review:
A fairly strong film applied to a fibrous base, does not stretch
Name:
Yus
Review:
Not really a review, but for reference: the smooth side should be towards the insulation and the fleecy outer side so that the steam does not flow down but lingers and evaporates!
Name:
Dmitry
Review:
I bought it for the attic floor, but I was afraid to end up laying this material.
It will be used for interfloor coverings on wooden beams. And for the attic I’ll take a normal one. Advantages:
Price, constant availability in Leroy.
Disadvantages:
There are no complete instructions and detailed characteristics.
Name:
Mikhail
Review:
It’s not clear... I bought type C, the instructions say excellent vapor permeability, the same should not happen
Advantages:
Low price
Disadvantages:
Poor instructions
Name:
Alex
Review:
The fact of the matter is that no side of this material should allow steam to pass through. This is not a vapor-permeable membrane, but just the opposite - a hydro-vapor barrier.
Name:
Efrem
Review:
Time will tell how it works in practice.
But there is one very important question: which side of this material releases steam (fuzzy or smooth)? There is no indication in this regard in the instructions. Information on the Internet and forums is contradictory. I turn to the original source for the answer. Disadvantages:
There are no marks either in the instructions or on the material itself which of its sides allows steam to pass through.
Wind and moisture insulation Axton A, 35 m2
Name:
Evgenia Employee of Leroy Merlin
Review:
Made very convenient (it is impossible to confuse the inside with the outside)
Name:
Victoria
Review:
more or less price
Disadvantages:
clearly there is a significant lack of footage. Enough for about 20 sq.m.
Name:
Andrey
Review:
Taking the roll out of the packaging, it turned out that it was all wet (not moist).
I hope it dries on the walls. The declared area of 35 sq.m. was not enough to cover walls of 32 sq.m. Shortage - 8 sq.m. Advantages:
none compared to others
Disadvantages:
The area does not correspond to the declared one. Since there are instructions, it would be possible to write about the installation side
Name:
Mikhail
Review:
smooth side to the insulation, rough side to the outside to remove condensation
Name:
Andrey
Review:
Someone explain to me.
Why is it not indicated anywhere which side this insulation should be placed on? Is it really so difficult to indicate this in the instructions? Pros:
Good price.
Disadvantages:
It is not clear which side to lay it towards the insulation.
Name:
Roman
Review:
The entire roll is ripped open with transverse cuts.
You can see it in the photo. The density is 2 times lower compared to Izospan A. In the photo in the middle is isospan A, and on the sides is this material. The instructions say that the side of installation does not matter. It is not true. Water will flow only on the glossy side, and the rough side will absorb it. If you put it on incorrectly, the insulation will get wet and everything you protect with it will rot. They supplanted the branded Izospan, removing it from sale, replacing it with this material produced specifically for Leroy. I do not recommend this product Advantages:
none
Disadvantages:
Price is on par with the best quality ISOSPAN A film Incorrect installation instructions allegedly on any side
Name:
Sergey 1
Review:
I bought it for a ventilated facade at the dacha, it’s quite dense and strong, I don’t see the point in overpaying for expensive analogues, in the context of finishing the walls.
Advantages:
Inexpensive and quite dense
Disadvantages:
didn’t notice
Hydro-vapor barrier Axton (d) 70 m2
Name:
Sergey
Review:
Excellent vapor barrier, additionally used double-sided tape for the joints
Advantages:
Excellent density, markings
Disadvantages:
joint glue, complete nonsense, we can say that there is no
Name:
Andrey
Review:
I took it under metal tiles, in general it’s not bad,
Advantages:
there are markings,
Disadvantages:
a little thin, the glue does not hold on the connecting tape, it falls off in a weak wind and gets clogged with dust, so you understand for yourself. the price is high. I took it to immediately glue the joints, it turned out to be a marketing ploy.
Name:
Evgeniy
Review:
price-quality matches.
Pros:
I liked the quality.
There are markings for even cutting, and adhesive tape on the edge to seal the overlap. Disadvantages:
the glue of the joining strip is rather weak; a thicker layer could have been applied.
Vapor barrier Axton (b) 15 m2
Name:
Dinar
Review:
The best film I've ever worked with.
Advantages:
In everything.
Disadvantages:
None.
Name:
Alexey
Review:
I recommend it.
Pros:
Easy to install, fairly durable material!
Disadvantages:
Didn't notice.
Name:
Sergey
Verified purchase Review:
Fire is a thing, convenient for installation. Everything is written where and what to put where, there is a sticky part for a paper clip
Name:
Denis
Review:
Easy to use, a big plus is the presence of an adhesive strip and the presence of markings. It’s hard to say how much steam does not leak...
Hydro-vapor barrier Axton C, 35 m2
Name:
Evgeniy
Review:
I bought a package for installation under the garage roof made of professional flooring.
When purchasing, I noticed the packaging that was wrinkled on top, but did not pay due attention. When laying 4 rows of meters (about 15 m2), it turned out that the roll was not solid. but consisting of a piece, and the second piece was somehow uneven, wrinkled, with traces of shoes... I laid it out like this, fortunately the last row was already the previous ones. The production date is 10/31/2017, judging by the piece of paper inside. Advantages:
I bought it for testing under professional flooring.
Disadvantages:
we will see during operation,
Hydro-vapor barrier Axton (d) 35 m2
Name:
Seryoga
Review:
Excellent film!
I have never left reviews - I will leave about this one. There is a line on the canvas, everything is cut smoothly and there is no need to measure the joints. And the tape that glues one film to another is absolutely fire. I made four roofs with this film - I recommend it to everyone! Advantages:
Durable There is a ruler There is a mounting tape very convenient
Disadvantages:
no,
Hydro-vapor barrier Axton (d) 15 m2
Name:
Oksana
Verified Purchase Review:
Bought to waterproof a leaking roof in a barn from the inside. Attached with a stapler, it has already withstood several rains. Satisfied!,
Wind and moisture insulation Axton (a) 15 m2
Name:
Dinar
Review:
Very good film, I haven’t seen a better one yet.
Name:
Konstantin
Review:
high-quality insulation does not tear; inscriptions, markings, arrows, strip for overlapping gluing. Putting it wrong simply won't work.
Izospan S
The structure of the material combines two layers: on one side there is a smooth surface, on the other there is a fleecy surface. The fleecy layer retains condensation followed by weathering. Izospan C creates a vapor barrier for the insulation, preventing the absorption of vapor from water particles formed inside the room.
The material is widely used in the construction of walls, installation of insulated, sloping roofs and interfloor ceilings. Paro-waterproofing using type C is installed in various cement screeds and in flat roof structures.
In a word, in structure and characteristics the material is very similar to type B. At the same time, it has an increased margin of safety and, therefore, the reliability of the super-dense panel is higher. Buying isospan C will cost the consumer about 50-60% more than type B.
Characteristics of isospan Type C:
- 100% polypropylene;
- Applicable temperature range -60 – +80 °C;
- Tensile load: longitudinal // transverse. N//5cm not less than 197/119
- Vapor-tight
- water resistance not less than: 1000 mm water column.
Application of isospan S:
- Sloping roof with an overlap of at least 15 cm
- Attic floor protection. A vapor barrier layer is spread on top of the insulation, smooth side down;
- Concrete floor. spread on a concrete surface, smooth side down;
- Wooden floors of horizontal design.
Laying the canvas on sloping roofs should be done from bottom to top. The material overlaps about 15 centimeters.
To avoid depressurization, overlapped joints are glued together with a special tape that is sticky on both sides, similar to double-sided tape.
The structure is secured with slats 5 cm thick. A gap of at least 5 centimeters is left between the roof tiles and the vapor barrier layer; it is necessary for natural ventilation.
Determining the width of the overlap when installing the membrane
There are special markings along the edge of the insulating membrane to determine the width of the overlap of the sheets, which ranges from 8 to 20 cm.
The vapor barrier strips on the roof should be laid in a horizontal plane from bottom to top, overlapping each other with a width of 15 cm. At the ridge the overlap is 18 cm, at the valley - 25 cm.
On walls, ceilings and floors, the canvases are mounted with an overlap of 10-15 cm.
Izospan D
High-strength, completely moisture-proof waterproofing material. Polypropylene sheet with one-sided laminated polypropylene coating. The versatility of the moisture-vapor-proof material implies widespread use in construction technologies for the construction of any type of structure.
Izospan D successfully withstands moderately strong mechanical loads, is resistant to tearing, withstands strong gusts of wind, and in winter copes with heavy snow loads. In comparison with other similar films, Izospan D has gained fame as the most durable and reliable option.
Izospan D Area of application
In any type of roof, as a barrier preventing the formation of under-roof condensation. Widely used in the installation of hydro- and vapor barriers during the construction of buildings and structures. Protection of wooden structures. The material largely resists negative atmospheric phenomena.
Izospan D is often used on construction sites as a temporary roof covering and installation of a protective wall in objects under construction. Such a roof or wall can last up to four months.
We repair the roof correctly. We select building materials with Leroy Merlin
Victor Smirnov, head of the Construction Materials sector of Leroy Merlin Kosino, will help you understand the wide variety of materials for roofing work and choose the ones that are right for you at an attractive price, so that you can quickly revive your roof.
Beautiful and durable
A roof without damage is reliable protection for the entire house from bad weather. Do not delay its repair, because the worse the damage, the more effort and money you will spend on restoring the roof.
When performing work, take into account the roof structure, including dimensions and key elements (slopes, pipes, windows, etc.). This will help you correctly calculate the amount of roofing material needed.
First, determine the amount of damage caused to the roof by rainstorms.
During temporary emergency roof restoration, it is enough to replace the damaged fragments or put patches of a similar material on them and secure them well (metal, slate roof).
Special bitumen mastic is perfect for spot repairs of soft roofs. You coat the area being repaired with mastic, seal it, then cover it with mastic again. In Leroy Merlin hypermarkets, bitumen mastic is presented in volumes of 3 l, 5 l, 10 l, 13 l and 15 l. The low price of mastic will make repair costs almost invisible.
In Leroy Merlin hypermarkets, bitumen mastic is presented in various volumes.
But if the roof is badly damaged and needs dismantling and a new covering, then the approach to the task should be more thorough.
Before laying down a layer of any new covering, it is necessary to replace the waterproofing and soundproofing. The waterproofing layer will protect the new coating from the formation of rot and mold, and the sound insulation will eliminate excess noise. A wide variety of insulating materials at Leroy Merlin will allow you to achieve the desired result.
To save money, choose universal materials that, in addition to sound insulation, will cope with roof insulation and waterproofing. The AXTON B vapor barrier will help you cover the roof and prevent the formation of condensation. And to protect the roof from weathering and moisture, the universal Axton A film is perfect.
If you want to cover the roof completely and forget about it for 20 years, then choose ondulin. It is recognized as one of the most durable roofing materials.
Ondulin is not afraid of gusty winds, heavy rains, sudden temperature changes, sunburn, and it also has good soundproofing characteristics.
In Leroy Merlin hypermarkets you can purchase ondulin in sheets of bright red color to cover the entire roof and without a significant loss on your wallet.
Vapor barrier: everything you need to know about protecting insulation from moisture
What is vapor barrier, why is it needed, and how is it performed? I've thought about this before. Now, having gained experience in this matter, I will accurately convey the technical aspects and describe step by step the technology for installing vapor barriers.
The vapor barrier affects not only the effectiveness of the insulation, but also the durability of the structure
Which side is the material laid on?
There is a lot of confusion and substitution of concepts on this issue. The fact is that vapor barrier materials in their pure form do not have a working side as such. The protective material is completely impervious to moisture in any form, so it makes no difference how you unfold it. The only exception is anti-condensation films with a fleecy coating. They are designed to absorb settling moisture, therefore, to obtain the full effect, you must follow the general rule - the smooth side of the film is always laid towards the heat insulator. If the canvas is the same (one-sided), it can be laid in any way. The rule is simple, but installation errors most often relate to incorrectly deployed material.
If we are talking about membranes with one-way permeability, the same rule is followed. Usually, the side facing outward has a pattern, and the side that fits against the heat insulator is smooth and without a pattern.
Why do you need moisture protection?
Vapor barrier is a set of various methods of protecting heat-insulating materials and building structures from the penetration of steam and, as a consequence, from the loss and absorption of condensate (Footnote 1).
Why do you need a vapor barrier at all? As you might guess, its purpose is to protect surfaces from steam. Moreover, we are talking not only about visible steam, but also moisture, which is always present in the air.
Inside the home, the humidity level is almost always higher than outside, which is explained by cooking, washing and taking water procedures. Since steam moves towards the cold - out, excess moisture can significantly reduce the life of building structures and the effectiveness of insulation.
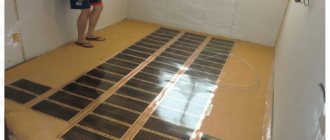
Insulation of walls from the inside with mineral wool must be done using a vapor barrier film
Protection is necessary in the following cases:
- When insulating walls from the inside with mineral wool. As is known, the level of vapor permeability and moisture absorption of mineral wool is quite high. Therefore, the absence of a vapor barrier can lead to the accumulation of moisture inside the insulation. This in turn will lead to a decrease in the efficiency of the insulation, dampness of the walls, the formation of fungus, etc.;
Frame walls insulated with foam plastic from the inside must be protected from moisture with a vapor barrier
- When insulating frame structures. Vapor barrier is necessary for frame walls, wooden floors and pitched roofs not only when using mineral wool insulation, but also polymer insulation, which has zero vapor permeability. The fact is that zero vapor permeability of thermal insulation leads to the fact that all moisture rushes into the elements of the wooden frame. As a result, the tree quickly becomes unusable;
Vapor barrier film must be used when insulating floors
- When insulating floors. In this case, vapor barrier allows you to protect the insulation from rising steam.
If mineral wool is used inside partitions, vapor barrier need not be used, since there are no temperature differences in the partitions that could lead to the formation of condensation.
Materials
As we found out, the vapor barrier should not allow air to pass through, which carries moisture. Therefore, the vapor barrier film should not be confused with waterproofing, which often has the ability to allow air to pass through.
The following materials are currently used for vapor barrier:
Types of films
Leroy Merlin
It's no secret that the site for the construction of the Leroy Merlin hypermarket in Minsk on the street. Timiryazeva was allocated by the city authorities several years ago. However, the retailer was apparently studying the market potential and was postponing a decision to build the facility.
It was previously reported that the company will enter the market not through opening a representative office, but through the Russian structure “Leroy Merlin Russia”. Those. The activities of the network in Belarus will be coordinated from Moscow. However, according to belretail.by, the final decision was still made in France, and Moscow will only supervise the issue.
In confirmation of the information already announced, we managed to look through the latest research on the DIY market of the Russian Federation, which is being conducted, and there we found the following text:
“In 2021, Leroy Merlin plans to enter the Republic of Belarus. The first hypermarket is planned to open in Minsk. The project will be handled by the Russian office (without creating a separate division at the first stage. The decision on subsequent development in the Republic of Belarus will be made based on the results of the work of the retail facility in Minsk."
The first store will appear in Minsk on the street. Timiryazev next to the car. Its total area will be 17,000 square meters. m, retail - 10,000 sq. m, the street pavilion of the “Garden” department will occupy 1000 sq. m. Nearby there will be a parking lot for 900 cars.
Leroy Merlin is scheduled to open by the end of 2021. However, vacancies for a hypermarket HR Manager, Certification Specialist, and Regional Supplier Relations Manager are already posted on obs.tut.by today.
belretail.by is already collecting comments from independent DIY market experts, which will be published later. From the first conversations it is clear that the new player will be faced with a number of issues that will not be easy to resolve.
First of all, this is the share of goods from Belarusian manufacturers, which is usually quite large for Leroy Merlin (in Russia the degree of localization reaches 55%). Are there enough material manufacturers in Belarus to provide these indicators?
The retailer also has its own private label, orders for which must also be placed with local manufacturers.
The French chain offers the lowest prices in its segment in the markets where it operates and operates under the slogan “low prices every day.” Maintaining such a positioning in Belarus will be very difficult.
In any case, the arrival of an international player will significantly revive the DIY segment and this will have an impact on all players operating in Belarus. First of all, we are talking about the OMA, Mile and Materik networks.
The largest facility of this format today is the construction hypermarket “Materik” in Brest. Its total area is 15 thousand square meters. m (2 thousand less than the planned Leroy Merlin), but the retail area is 12 thousand sq. m. m. 2 thousand more.
So it’s too early to say that the French will build the largest construction hypermarket.
Source: https://belretail.by/news/frantsuzskiy-leroy-merlin-pridast-uskorenie-i-dobavit-tonusa-belarusskomu-ryinku-diy