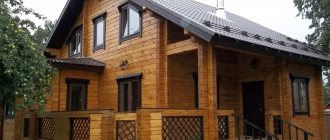
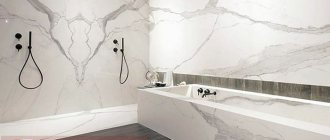
Terracotta tiles are a popular facing material for stoves, facades, and fence bases. It has good thermal properties and appearance. Stove makers recommend terracotta as a durable, heat-resistant cladding for stoves, fireplaces, barbecues, and barbecues. It is harmless to health, therefore it is often used for lining the protective screen, the area around the firebox in saunas and baths, or simply in the interior. In the photo you can see examples of cladding.
Calculation of the number of tiles
In order to determine the number of tiles, you need to measure the dimensions of the stove itself. Next, you need to find out the dimensions of one tile, which are indicated on the retailer’s website or available at the point of sale. It is also worth considering the sizes of decorative elements that will be used in the process of surface cladding.
To calculate the number of tiles, based on these data, it is necessary to calculate the area of all surfaces of the stove that will be lined.
It is also worth considering the presence of a joint gap, which averages 2-10 mm depending on the masonry method and material. This area must be subtracted. You need to add another 10-15% to the finished number for chips and undercuts, which is inevitable during installation.
Choosing terracotta
If the volumes are small, then it is important to make sure that all the tiles belong to the same batch and do not differ in shade. In case of covering a larger area, and there are several packages of different batches, mix the terracotta
Even if there is a barely noticeable difference in shade, all the tiles will be mixed together, and the composition as a whole will look decent.
In case of covering a larger area, and there are several packages of different batches, mix the terracotta. Even if there is a barely noticeable difference in shade, all the tiles will be mixed together, and the composition as a whole will look decent.
There are three grades of terracotta:
- close to ideal, no torn edges, differences in size or shade between tiles from the same batch;
- defects are extremely rare;
- Low-quality and even defective terracotta is often found.
Please note that the back side of the tile is corrugated, which will ensure better adhesion
Oven surface preparation
In order for the cladding of the stove to be successful with terracotta, it is necessary to properly prepare the surface for cladding work. It is necessary to take into account that there are 2 options for preparatory work:
- For a new stove, which has not yet had any facing materials. Preparation in this case will include such steps as: cleaning the surface from dust and dirt, and its further priming. It is also important to level it and equip it with a grid, as well as markings to further facilitate the installation of the cladding. It is important to remember that it will be possible to operate a new stove only a month after its construction, so you will need to wait to use it even after high-quality cladding with expensive tiles.
- On an operating furnace. This option involves performing much more extensive work than in the first case. To begin with, the old facing material used in this design is dismantled. Next, you need to completely remove the remaining plaster or fastening mortar from the walls, which can be done using sandpaper. To achieve a good fit between the cladding and the brickwork, you need to deepen the seams between the bricks using readily available means or using professional tools. It is worth deepening the seams by 5-10 mm, but no more. At the next stage, the walls are leveled to one level through a metal mesh.
Existing forms
Heat-resistant tiles can have not only different colors and textures, but also different shapes. Heat-resistant tiles usually come in the following shapes:
- terracotta ceramic tiles used as finishing material for floors are square in shape ;
- fireclay stove tiles , often used as a regular facing material, often imitate brickwork, so they have a rectangular shape;
- ceramic fireplace tiles and stoves can be used in various shapes in a chaotic manner to create an original design;
- When simulating a marble pattern, variable facing tiles for fireplaces and stoves are used.
DIY oven cladding technique with terracotta tiles
The stages themselves look like this:
Cladding stages
There are many tiling techniques, but we will focus on the 3 most convenient and popular.
Straight rows
In order to install the cladding in straight rows, it is imperative to carry out all the preparatory work efficiently and ensure the required number of tiles. It is also recommended to purchase tile adhesive that can withstand temperatures of more than 200 degrees. This will allow the stove to be used for many years without the need to replace the lining due to cracks.
- The installation process itself always starts from the corner and the corner elements are mounted in the first row. It is also worth considering that if the tiling work is carried out before the floor was made, you need to leave a small gap for it too. It is also worth considering the expansion of the tiles when heated and leaving 5-10 mm between it and the floor to compensate for it.
- To secure the tile you need to apply glue to it. For this, a trowel or a notched trowel is used and everything will depend on the ease of use of the tool user. The thickness of the adhesive layer is indicated by its manufacturer and averages 1-8 mm.
Applying glue - The second row of material is installed after the first has been completed. Work begins according to a similar principle, that is, from the corner. Those elements that are laid closer to the end of the structure can be pre-cut, having a ready-made template according to the previous row. This will save time during installation.
- It is also worth considering the presence of a gap between the tiles and follow the manufacturer’s recommendations in this regard, because it should expand when heated.
- After the third row of tiles, you need to “rest” the surface for a couple of hours so that the glue sets. Next, you should take breaks every 3 rows until the structure is completed. If the tiles are narrow, then 6 rows without a break are allowed.
With offset
The cladding of stoves with offset terracotta tiles is carried out according to the same principle as the previous option, but there are several important differences:
Offset installation
- Usually, in the process of such cladding, more material is wasted due to the fact that every second row the tiles have to be cut not from one, but from both sides. To prevent this from happening, you can choose small tiles and accurately calculate the spacing of the seams, although in practice this is quite difficult to do;
- It is imperative to use crosses to ensure the same distance between the tiles and then make even seams;
- The heavier the tile, the larger the gaps need to be made between its elements.
Diagonally
With this type of cladding, the first row is laid straight. This allows the cladding to be leveled relative to the floor. Then there are 2 options for the work technique:
- The triangles are laid out with their wide side down, and the upper corners in them serve to check the level;
- Laying is carried out completely diagonally thanks to the markings stretched at an angle of 45 degrees.
- The last row duplicates the first one in appearance. As a result, the design looks harmonious and holistic.
Main disadvantages and advantages
Terracotta tiles for the stove have a number of advantages that have made this material very popular. Its main advantages include:
- high strength and durability, as well as abrasion resistance;
- excellent heat resistance. At the same time, the finished ceramic stove will demonstrate more efficient heat transfer, which will improve the microclimate inside the heated room without increasing energy consumption;
- good frost resistance, as well as resistance to sudden temperature fluctuations;
- high resistance to prolonged exposure to ultraviolet sunlight and preservation of its original color without fading in the sun;
- this finishing material is produced using exclusively natural and completely safe components;
- The tiles do not have any chemical smell even when heated to high temperatures. This is explained by the fact that this finishing material is made from natural components;
- ease of care of the material;
- relatively light weight, allowing this finishing material to be used over large areas without fear of sagging.
Also on topic: Boar tiles: photos in the interior
As for the disadvantages of this tile, they include its fragility, as well as its relatively high cost in comparison with other facing materials.
Grouting joints
It can be done using a special mixture, which is sold ready-made in hardware stores, or with a sand-clay mortar. The work is best done using a flexible rubber spatula so as not to scratch the coating of the material.
If it is possible to purchase a professional tool, then you can use a special construction gun. It is great for grouting joints between textured tiles.
Grouting joints
Scope of application
Most often, such cladding is used for stoves or fireplaces, but there are different reasons for using terracotta.
- The relaxed geometry and beautiful appearance will create high aesthetics and add a touch of luxury.
- Such cladding will hide all the errors in the brickwork, even if used brick was used. The loose geometry of the terracotta cladding will hide serious problems with the plane.
- You can always update the appearance of a fireplace or stove thanks to additional cladding of this kind.
In addition, terracotta tiles are used for facades, and they look beautiful. High frost resistance will ensure the durability of the cladding. In this respect, terracotta competes with clinker.
conclusions
Furnace cladding is a simple construction job that you can do yourself. To do this you need to follow just a few simple rules:
- install the tiles in accordance with the requirements of the manufacturer of the facing material and adhesive;
- qualitatively level the surface;
- correctly calculate the number of tiles needed for cladding;
- determine the distance between the seams based on the dimensions of the tile, its material and weight (you can also follow the manufacturer’s recommendations);
- use professional tools for grouting;
- do not use a new stove for a month after construction, and an existing one cannot be heated for another week after lining;
- it is necessary to buy 10% -15% more building material than required by calculations;
- You can’t work “by eye”; markings are required everywhere.
Rules for installing facing elements on a stove wall
According to the technology, it is better to start gluing tiles on vertical surfaces from the bottom, and it is necessary to lay out the first row and allow the adhesive mixture to harden. This will allow you to set guides along which you can navigate when installing the next rows. Therefore, when installing the first row of facing elements, you need to be especially careful. The tile installation process is carried out in the following order:
- • Apply a sufficient layer of adhesive to the underside of the tile using a regular spatula.
- • The facing element is pressed against the base surface, first with the lower part, and then with the upper, after which it is installed in the desired position with light blows.
- • When installing each tile, it is imperative to check the correctness of its spatial location with a small level.
- • As you fill the row with facing elements, you must periodically make sure that you have not deviated from the specified parameters, using a longer level for this.
After the adhesive mixture of the first row has hardened, you can begin further installation of tiles, filling the next rows. The procedure for performing this task is the same as for the first row.
But now a long level will also be needed to check the vertical plane of the plane being created, which is advisable to do during the installation of each of its next elements.
A stove wall usually has certain places in its structure that should not be covered with a tiled covering, for example, firebox and ash doors, well windows for removing accumulated soot, and so on. In order to beautifully decorate such areas when installing tiles on the wall of the stove, it is necessary to change the format of the ceramic tiles, which means removing any of its fragments and, quite often, the figured ones. Tile is a rather fragile material, so if the cut line is not straight, but has any angles or turns, then you should use a grinder to form a non-standard element, after which it is mounted on the wall in the prepared space.
It is also often necessary to cut tiles when completing a row, since it is rare that there will be an even amount of tiles on the wall. Therefore, you need to measure the width of the missing piece with a tape measure, taking into account the size of the seam.
After this, you need to make an insert of the required size, separating the excess part from the whole tile using a tile cutter.
The finished part should be installed in its place using the same adhesive.
As can be seen in the photographs presented above, in order to achieve as much symmetry as possible when installing elements of the tiled covering, it is important to use limiting crosses, which are inserted into the seams between the tiles, two on each side.
This will ensure uniform spacing between the installed elements and keep them in this position until the installation mixture hardens. When the surface of the stove wall is completely covered with tiles, you will need to wait a day or two so that the hydration of the cement included in the installation mixture occurs to a sufficient extent, when you no longer need to be afraid that the stability of the elements of the tile covering will be disrupted.
General information
These tiles are made from white fireclay clay, which is highly fire-resistant. The clay is fired and a durable material with a coarse-grained structure is obtained. Externally, terracotta tiles resemble wild stone, Prague brick and, vaguely, wood.
The material has a small color palette, but there are light brown, red-brown, black and other colors. Thanks to their interesting texture and color variety, terracotta tiles fit into any interior and any style.
Kinds
The appearance of terracotta tiles depends on the method and method of production:
- First view. The tiles are made by hand. The material used is kaolin clay. After the product is given the required shape, it is dried in the sun for a very long time, and only then subjected to the firing process. As a result, the clay acquires a very beautiful, rich color and the necessary porous structure. It is handmade terracotta that is most valued on the market. Finding such terracotta is quite difficult. It will be expensive. And subsequent repairs will also be expensive.
- Second view. The tiles are made using modern machine technologies. The product takes on its shape automatically. After which it is fired in an oven at a temperature of 1000 Cº. With such a large and rapid firing, the tiles have a beautiful and rich texture. Therefore, the price for such a product is significantly lower than for handmade terracotta tiles.
- Third type. The tiles are produced using a special machine method. The top of the product is covered with glaze. Therefore, such tiles are called glazed. As a result of a special technology, the tiles acquire a sparkling shine, good moisture resistance and an interesting color unusual for terracotta. This type of tile can have almost any shade. Glazed tiles are further divided into matte and glossy. The division into subspecies depends on the properties of the glaze used.
Finishing features
- The setting time of tile adhesive is usually 30 minutes, and it cannot be restored simply by diluting it with water. Therefore, during finishing work, the mixture must be prepared in small portions, based on the area that you will have time to cover in this half hour.
- It is better to start laying from that part of the stove that is in the most visible place.
- The cut tile should be placed at the edge, with the cut being in the inner corner or against the wall, where it will be least noticeable.
Clinker tiles can be coated with a special heat-resistant varnish, which will give it shine and make it easier to remove dirt and soot. You can treat terracotta tiles in the same way, but you need to take into account that in this case the stove will lose its ability to “breathe”.
Specifications
Terracotta ceramic tiles are characterized by strength, the bending limit of which is 16 MPa. The frost resistance of the material reaches 100 cycles. The tile has high water permeability, which is more than 7%.
The material is resistant to ultraviolet light. The fine-porous structure ensures heat retention and noise insulation. The material does not accumulate static electricity, so dust does not linger on the surface of the tiles.
In this regard, it is recommended to use glazed products when cladding facades. When laying the bathroom floor, water-repellent protective products will help. Terracotta clinker tiles, made in the shape of a square, are used for flooring.
Brick-shaped tiles are used for flooring, wall cladding, and heating appliances. Variable terrakot imitates the surface of natural stone. Chaos tiles are made in the form of elements of different sizes, which allows them to be used to create decor.
Written Guide
- “Terracotta” tiles;
- heat-resistant reinforced “Terracotta” adhesive for covering the screen;
- heat-resistant mastic “Terracotta” for lining the firebox and the flood zone;
- heat-resistant grout “Terracotta” for filling tile joints;
- GKL 9.5 mm thick, cut into small squares;
- a plastic bucket and a drill with a mixer attachment for mixing;
- grinder with a diamond cutting wheel for sawing tiles;
- construction gun with a filling tube for filling tile joints;
- spatula, hammer, level, tape measure and construction gloves.
Very important: heat-resistant reinforced Terracotta adhesive can only be used on cladding areas where the heating temperature of the tiles is guaranteed not to exceed 400 degrees Celsius. Hot zones (firebox, flood area, hob area, sides closest to the firebox, etc.) must be lined using heat-resistant Terracotta mastic, which can withstand heating up to 1100 degrees. It should be noted that in practice, often all areas of stoves and fireplaces are lined with mastic, which, although somewhat more expensive, guarantees the heat resistance and durability of the structure.
Getting to know the panels
Such materials are actively used by Scotland, a number of Scandinavian and European countries, as well as Russia and the CIS. Although you can still buy terracotta panels from us in a more limited assortment.
These are panels for facades. They are clay slabs. The clay contains no harmful substances. But it contains a lot of mica and quartz. The panels are light because they remain hollow. This does not prevent them from being durable.
They have decent thermal insulation properties. They absorb moisture and also protect the building from external influences. These are non-flammable products with a high noise absorption coefficient. But they are suitable for ventilated facades with an additional layer of insulation material.
Casein based mastics
You can also tile a stove using casein mastic prepared at home.
Scheme of the furnace lining.
Simple casein mastic. Pour dry casein glue with the required amount of water and leave to swell for 25-30 minutes. Then, with constant stirring, add fillers, limestone flour, fluff lime, and sodium fluoride. Mix the solution until a homogeneous consistency is obtained.
Ingredients: dry casein glue – 1 kg, sodium fluoride – 0.1 kg, fluff lime – 0.5 kg, limestone flour – 2.5 kg, water – 2 liters. All volumes can be either increased or decreased, but in direct proportion to each other.
Casein-cement mastic is prepared in a similar way. Composition: dry casein glue – 1 kg, Portland cement – 3 kg, fine-grained construction sand – 1 kg, water – 2.5 l.
Tiling the stove is also possible using gypsum mastic. The gypsum solution for cladding is prepared in 2 stages, initially you need to prepare a 10% solution of CMC glue, for this you need to dilute 0.1 kg of CMC glue in 1 liter of water and wait for the time specified in the instructions. After which, constantly stirring the resulting emulsion, you need to add gypsum and water into it. Composition: 5 kg of gypsum, 0.4 l of CMC glue emulsion, 0.23 l of water.
The preparation of polymer-based mastics in most cases is carried out in factories, but some of them can be made at home. In order to tile a stove, the following recipe is used: 1 liter of PVA dispersion should be thoroughly mixed with 1.5-2 kg of Portland cement. Glue-based mastic is prepared in this way: CMC glue is diluted with hot water, a cement-sand mixture is added to the resulting emulsion until the mastic reaches the required consistency. Glue composition: 0.1 kg of dry CMC glue, 5 l of water. Composition of the cement-sand mass: 1 bucket of Portland cement and 3 buckets of river sand.
Various adhesives are also used for lining stoves with ceramic tiles, which can also be purchased either ready-made or made at home.
In other words, there are a huge number of recipes for preparing solutions for tiling stoves; you just need to choose the one that is more convenient for you personally!
Additional materials
When calculating costs, you need to take into account that in addition to the tile itself you will need:
- heat-resistant primer;
- reinforcing mesh with cells 50x50 mm, for plastering surfaces (stainless or galvanized);
- heat-resistant mixture for plastering stoves;
- heat-resistant adhesive for laying tiles;
- grout for processing seams;
- templates (crosses) for maintaining the thickness of the seams;
- nails or self-tapping screws for attaching reinforcing mesh.
You can save a little on plaster and glue if you prepare these solutions yourself. To prepare plaster and mortar for tiles, clay, sand and cement are used. Some craftsmen recommend adding PVA glue to them.