In this article you can find answers to the most popular questions about how to properly cultivate a plot of land using a walk-behind tractor, and you will also learn about the basic rules for preparing a walk-behind tractor.
More and more modern summer residents and owners of private houses are deciding to purchase a walk-behind tractor. And this is not surprising, because this equipment is capable of performing almost all agricultural and technical work without taking a lot of time and physical strength of its owner.
Soil cultivation is one of the most important and frequently performed land cultivation technologies. This type of work is a non-dumping soil treatment that does not destroy the humus layer too much.
It is important that cultivation is carried out correctly and without significant errors. Otherwise, the cultivation of the land will be of poor quality, and the gearbox and engine of your walk-behind tractor may be subject to very serious overload. In addition, operators who do not cultivate the soil correctly experience physical fatigue and inconvenience at work. Proper preparation of the walk-behind tractor is the key to successful and efficient work.
First of all, you need to pay attention to several key points when preparing the walk-behind tractor:
– Preparation and installation of cutters;
– Adjustment of the depth level of the coulter when cultivating the soil;
– Setting the speed mode.
In addition, we will talk about the correct movement of the walk-behind tractor when performing this type of work.
1. Preparation and installation of cutters.
The configuration of cutters for a walk-behind tractor is as follows: 16, 24 or 32 cutting plates. Which kit to choose depends entirely on the type of soil on the site, as well as the area of the cultivated area. If you have to cultivate a small area, it is not recommended to use more than 16 cutting blades for this. The optimal set is considered to have 8 plates on one side and 8 plates on the other side. If you decide to use sets of 24 or 32 plates for small areas, this will significantly increase the load on the walk-behind tractor engine, and, as a result, will greatly tire the operator.
The cutter preparation stage involves the correct assembly of sets of cutting inserts. You must be completely sure that their cutting part is located in the same direction.
Under no circumstances should the cutting parts of the cutter be sharpened. If you sharpen them, the weed roots will not rise to the surface of the treated soil. The root system will simply be cut off with a pointed cutter and remain in the ground. After some time, the weeds will grow again in the same place, and cultivation will be absolutely pointless.
It is also worth mentioning that sharpened cutters significantly increase the load on the walk-behind tractor engine.
Also, sharpening the cutters negatively affects the specified depth of processing of the area. If you sharpen the cutters, the walk-behind tractor will bury itself in the soil from time to time when moving forward. This is due to the fact that sharpened cutters do not grab the ground, but cut it. This leads to the fact that they begin to burrow deeply into the ground to a depth of more than 30 centimeters.
So, you have finished assembling the cutter set. Now you can move on to the next stage of preparing the walk-behind tractor - installing the cutters on it. You must carefully ensure that the direction of the cutting part of the plates is placed in the direction of movement of the walk-behind tractor forward. It is very important not to confuse the left-hand and right-hand cutters and install them in their places.
Manufacturing of additional accessories
Walk-behind tractors go on sale assembled and with minimal equipment. A plow and a cutter are clearly not enough to perform the entire volume of agricultural work. A factory kit for converting a walk-behind tractor can cost more than the unit itself. You can make various attachments and trailers from scrap materials, using tools that are in every pantry of a country house or cottage.
Drawing of cutters for walk-behind tractor
Drawing of a plow for a walk-behind tractor
Drawing of a trolley for a walk-behind tractor
It is worth considering some options for making additional equipment yourself:
- A converted rake for collecting grass clippings, debris, branches and fallen leaves. If you do this work manually, it will take a lot of time and effort. Trailed equipment will allow you to clean large areas within a few minutes. To work, you will need a wide strip of sheet iron and several meters of reinforcement with a cross section of 8-12 mm. The reinforcement must be cut into pieces 10 cm long and welded to the plate in several rows and at intervals of 3-4 cm. Long rods are welded to the plate for attaching to the walk-behind tractor frame. Trailed rakes can be equipped with rollers to improve maneuverability and smoothness.
- Snow plow. Most units operate much more efficiently in the cold because they do not overheat. You can mechanize snow removal in winter. The blade is made from two pieces of channel welded together. This allows you to get a gripping height of up to 40 cm. The width of the blade is selected according to the power and weight of the unit within 40-80 cm. The blade is attached rigidly to the front of the machine with bolts. Initially, it can be mobile or stationary.
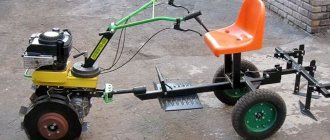
- Trolley and trailer. The walk-behind tractor cannot be driven on the road, so it does not have to be adjusted to the requirements of the traffic rules. The cart is made from a corner, a channel and old wheels from a small car, and a trailer is attached to it. It is made from metal profiles and boards. The towing clutch is made standard, like for cars or tractors.
By showing a creative approach, you can make a hiller, harrows and potato digger that are not inferior in quality to their factory counterparts.
Adjusting the depth of the coulter.
The coulter is a mechanism for adjusting the depth of soil cultivation. It has several through holes, which are located at different heights relative to each other. When installing the opener in the holder, you need to secure it through one or another hole using a cotter pin.
The choice of hole depends on the depth of cultivation you need. If you want to set the minimum depth, you should install the coulter on the holder through the lower hole. Through holes, which are located slightly higher, are intended for deeper cultivation of the land.
What other factors should you pay attention to for correct and high-quality installation of the coulter? If your plot of land has fairly heavy soil or you applied organic fertilizers shortly before cultivation, then you do not need to bury the coulter too deeply into the soil. In such cases, it is strongly recommended to install the opener through the first hole so that the tillage is not too deep. If you install it through the second and above the second hole, then when cultivating the soil, the milling cutters will be buried in it (exactly the same negative effect will occur as when sharpening the cutters).
Do-it-yourself modernization of the Cascade walk-behind tractor
Most modernization of walk-behind tractors is aimed at improving important characteristics, for example, performance, maneuverability, and expanded functionality. Modernizing the Cascade walk-behind tractor will help improve certain characteristics or correct shortcomings.
Engine replacement may be necessary to improve performance. Lifan engines have proven themselves for their quality and long service life, and in addition, they are perfect for the Cascade walk-behind tractor. It is important to consider that if you purchase an engine from an imported manufacturer, the shaft rotation may be different (clockwise), while domestic walk-behind tractors are adapted to engines in which the shaft rotates counterclockwise. The problem is easily solved - just move the walk-behind tractor pulley to the other side.
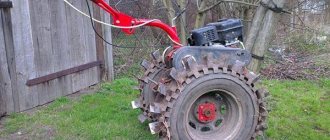
To improve cross-country ability and stability, you can install wheels of larger diameter. Pneumatic wheels perform well. Also, instead of wheels, you can install lugs, which can be easily purchased from the manufacturer or created with your own hands.
Potato planter
A very popular and indispensable piece of equipment in the garden is a homemade potato planter. It has a tuber expander with a hole at the bottom and disks for burying them in the ground. The rear wheel on the inside must be covered with a plate so that the planting material does not fall under the wheel of the walk-behind tractor. The entire structure is mounted on a steel frame. The depth of its fixation is adjustable.
The bunker can be made of plywood or galvanized thin sheet. A wooden box can be painted with waterproof paint. To prevent the tubers from being damaged, the inside of the bunker is lined with rubber.
The planting device consists of a metal tube with a diameter of 10 cm, to which a furrow opener is attached. Its height, and hence the depth of the furrow, is regulated by the vertical movement of the structure.
The furrows are sealed with discs directed towards each other at an angle. They move due to bearings. The width of the row is changed by loosening the bolts of the stepladders and moving the disks. To ensure that there are no traces left on the ground from the planter wheels, the ground can be loosened with cultivation legs welded to the frame.
The seat of a homemade sower for a walk-behind tractor is attached to a metal base frame.
Disc cultivator for walk-behind tractor
One of the most popular types of attachments for a walk-behind tractor during the summer plant care period is a cultivator. You can make a weeder for a walk-behind tractor with your own hands:
- following the example of a classic cultivator in the form of a trailed ripper;
- in the form of disk hillers used for processing root crops.
The processing technology involves passing a walk-behind tractor between two rows of crops or when using a multi-hull cultivator of three or even four rows.
The hiller ripper can have several types of tools installed in one housing:
- ripper;
- two double-moldboard flat-cutting plows;
- 2 disc harrows for forming beds;
- two disks for plant protection.
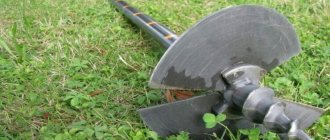
Do-it-yourself plant protection discs for walk-behind tractors are usually made of sheet steel. Depending on the purpose of the device to which they will be applied, their diameter is calculated. For cutters, the diameter is usually 5-7 cm smaller than the cutters, but for a cultivator they should be 30-35 cm in diameter.
Medium-sized disks can also be universal, with a diameter of 20-25 cm. In this case, it is necessary to provide a universal type of fastening to each type of attachment.
Moped with a walk-behind tractor engine
You can make a light moped with your own hands using an engine from a walk-behind tractor. A ready-made moped is used as a basis, or you can make the frame yourself. In the second case, ready-made or home-made parts from motorcycles, mopeds, etc. are needed - fork, wheels, sprockets, chain. It is also necessary to make a suspension to avoid rapid wear of important components. The engine is installed under the seat - this design feature must be taken into account when creating the frame.
There are many videos on the Internet with the process of assembling a homemade moped or demonstrating the finished device, one of these videos:
Universal trailer for walk-behind tractor
The presence of a trailer ensures mobility, because it is one thing to drive a walk-behind tractor with already installed units; it’s another thing when a plow, cutter or potato planter is simply loaded onto a trailer and transported by the walk-behind tractor itself.
You need to calculate the parameters of trailed equipment for a walk-behind tractor based on its power, the principle here is simple - 1 liter. With. means the ability to transport 100 kg of payload on a trolley. The simplest and most reliable design is a single-axle trailer with a load on the central axle.
The most difficult thing here is to select the necessary components. It's easiest to use ready-made parts. For example, a do-it-yourself hub for a walk-behind tractor is made from an automobile hub for passenger cars. This allows you to use standard car wheels and tires for the equipment of the unit.
For the trailer, a structure made of a rectangular pipe is mainly used, but a channel and an I-beam can be used as a frame base. It is better to provide removable sides for the trailer. It is preferable to immediately provide for the possibility of installing several types of sides on the platform:
- wooden or metal for transportation of bulk cargo;
- light, mesh for harvesting green mass for animals;
- folding, with the possibility of increasing the usable area for transporting hay.
But in order to move comfortably on the roads, it is worth making wings on the walk-behind tractor. If possible, immediately install mudguards on them. After all, not all roads have asphalt and hard surfaces.
According to the law, a walk-behind tractor with a trailer cannot be called a vehicle today, but this does not mean that the trailer should not be equipped with light signaling devices.
Be sure to install at least 4 reflective elements on the trailer - 2 red at the back and 2 white at the front. This will help the car driver identify the cart in the dark.
Engine
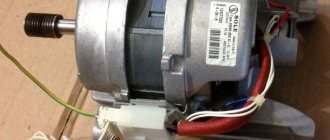
When constructing a homemade motor cultivator, some make do with a drive from a scooter or moped. But to assemble a more productive walk-behind tractor, the power of the moped engine will not be enough. It will require a powerful 16-18 horsepower diesel engine from a motorcycle. It is “customized” to the required parameters, but sometimes it needs to be modernized. The gas tank is also installed from a scooter.
First, the cooling system is rebuilt into an active air one in order to improve the technical performance of the motorcycle. This is easy to do using a 12-volt electric motor with a small iron impeller. At the same time, the valve is replaced with a reed valve, which helps facilitate starting, increase traction and reduce fuel consumption.
The prepared engine is mounted in rigid clamps. They are first welded to the front of the homemade frame, then securely bolted together (the whole process is clearly shown in the video).
Be sure to ensure that the clamps cover the journal of the output shaft of the diesel motor of the walk-behind tractor and hold it firmly.
A lever is attached to the gearbox of a homemade device, which can be easily made from an iron rod by welding a ball at the end. The length of the handle is left such that, being behind the control handles of a walk-behind tractor or cultivator, you can easily reach it.
Next, for a homemade product, an air purification filter is assembled using available materials, for example, a tin can or a metal tube. Then prepare the fuel tank of the homemade motor unit. You can make it yourself from any sealed container or take it from a broken motorized stroller.
"oka", "salute", "cascade"
Mini tractors made from the Oka walk-behind tractor are equipped with a reversible gearbox, including two speeds.
When converted, they are equipped with a frame and all-wheel drive, making all wheels driving. The engine is mounted at the front and has a factory hood to protect it. The transfer case is located in the rear. The drive of both axles with chain gearboxes is also located there. Engines from leading brands are installed in Salyut walk-behind tractors. Their power usually varies between 6–7.5 l/s. The gearbox is equipped with two main gears and an additional reduction gear. The kinematic scheme involves the use of two V-belts, due to which:
- the quality of torque transmission improves;
- the risk of dangerous slippage that can occur under active loads is reduced;
- the useful life of the machine increases.
If you make a mini tractor from a Salyut walk-behind tractor, it is advisable to increase the wheel track of the rear and front axles to 1200 mm. This manipulation will increase the stability of the vehicle. For the drive wheels, and there can be either two or all 4 of them, only standard tires are used.
When making a mini tractor yourself from “Cascade” walk-behind tractors, you can use “stockings” from old rear-wheel drive “Muscovites” or “Zhiguli” in the design of its rear axle. During operation, the “stockings” are shortened, which optimizes the wheel track parameters.
The most popular modifications to the walk-behind tractor
Surely everyone, after the first month of owning a walk-behind tractor, having learned the strengths and weaknesses of their unit, has a desire to tinker with something in it in order to improve it and make it different from everyone else. Very often, modifications concern the electrical equipment of the walk-behind tractor; among the leaders is the installation of a dashboard. The dashboard allows the farmer to find out all the necessary information about the walk-behind tractor:
- number of engine hours
- coolant temperature
- battery charge
- fuel level
- And so on
Many people decide to save on the purchase of a walk-behind tractor by purchasing the unit in the simplest configuration, but after just a few dozen revolutions of the starting handle they start thinking about installing a starter. There are two ways of development here, buy a ready-made option (if such a possibility exists), or try to adapt a car starter, for this you need to sharpen the flywheel and attach the ring gear from the car to it, this option is very long and requires special tools, but this does not The modernization process itself becomes even more exciting.
An electricity generator is often installed when there is a need to recharge the battery, which in turn makes it possible to add headlights to the equipment; such an upgrade will be especially useful if you stay at the site until late.
Another important area of tuning is improving the driving performance of the walk-behind tractor both when driving on dirt roads and when performing work on plowing, planting, sowing and caring for crops. In this case, metal lugs, which are presented in a large assortment in our store, will come to the rescue.
A more radical solution, which is not often seen, is the installation of an additional pair of wheels, which are popularly called rasparka. The walk-behind tractor is not very suitable for working in the field, but it allows you to overcome obstacles perfectly, stays stable on the road and is not afraid of deep puddles and wet grass.
For those who consider such tuning too simple, there is the next step in tuning a walk-behind tractor that improves off-road performance - this is the installation of tracks. The so-called tracks can be used for driving with a trailer into the forest, for overcoming snowdrifts and for working on the ground, because everyone knows that tracked vehicles have a larger plane of contact with the ground compared to a wheel and have less impact on the soil.
A creeper has helped a lot of two-wheel tractor owners, so we couldn’t leave it out when writing this review. There are several dozen types of such products on the market, but very often craftsmen decide to install a creeper of their own production.
Most often, this is a chain mechanism consisting of chains and stars of various sizes, which is designed to reduce the speed of movement of the walk-behind tractor for more accurate and comfortable work. A more advanced and complex device of this group is a gear reducer, which is installed between the gearbox and the engine; in fact, it is a transfer case, which can be purchased ready-made in our store (Geared speed reducer (3x5) and geared speed reducer (3x4))
The next rationalization solution for modernizing walk-behind tractors will be tuning the exhaust system. The exhaust system of the walk-behind tractor is designed in such a way that the operator has to feel the heady taste of carbon monoxide with all his lungs. Also, one of the reasons why the master decides to improve the muffler is the unbearable roar of the diesel heart of the walk-behind tractor.
It is easiest to maneuver a walk-behind tractor with an air cooling system if you have factory-made or home-made semi-differentials. They are also simply called differentials, axle shafts, and so on. Anyone who is familiar with the principle of operation of a car differential will understand the principle of operation of such useful things.
Manufacturing a field sprayer for a walk-behind tractor
A homemade sprayer for a walk-behind tractor is necessary in cases where the area of cultivated crops exceeds 20 acres. Doing this type of work manually is very difficult and can take a whole day. Mechanization of this process will save a lot of time and effort.
To make a sprayer you will need:
- welding machine;
- Bulgarian;
- level;
- electric drill;
- soldering iron for polypropylene pipes;
- profile or round water pipes;
- plastic or steel barrel with a capacity of 80-100 l;
- wide pneumatic wheels;
- plastic pipes;
- rubber hose;
- injectors or nipples from wheel tubes.
Assembling a homemade sprayer is carried out in the following sequence:
- Making the frame. Its dimensions are adjusted to the size of the container. The chassis is attached to the frame. For good cross-country ability you need at least 4 wheels. In the absence of wheels, wide skids are made of aluminum.
- The container is installed and secured on the frame. For this purpose, spacers and ties are used. Holes are made in the tank for supplying high-pressure hoses. The tank neck is sealed.
- A bracket for the pump is being manufactured. A model is selected that operates from a power take-off shaft (belt drive) or from electricity (motoblock generator).
- The irrigation system is being assembled. A durable holder is made from steel profiles. Plastic pipes are attached to it using clamps or plastic ties. A valve is being installed to bleed off excess pressure and injectors.
- All parts are connected together, the quality of the fastenings and the tightness of the joints are checked. The tank is filled with water, the unit is tested in various modes, and final adjustments and settings are performed.
A self-made sprayer will fully justify the efforts invested in the first season. Thanks to this device, spraying and watering the garden will be done quickly and efficiently.
Karakat is another device that can be made from a walk-behind tractor
This unit is of interest to those who need to cross marshy areas. It can act as a good alternative to a swamp vehicle. Currently, carakat can be made from a walk-behind tractor without any problems.
Initially, as in the case of a mini tractor and all-terrain vehicle, you should install a wide second driven axle. After this, the future carat from a walk-behind tractor must be equipped with special disks. They are unlikely to be found on the open market. Making them yourself is no problem. To do this, you will need to purchase 2 aluminum basins for each disk. Subsequently, these basins are welded together with their bottoms. After this, a hole is cut that fits the diameter of the hub. Then all that remains is to weld the fixing contour around the edges, which is necessary to hold the voluminous caracat tires.
Equipment for removing snow and hay
In the walk-behind tractor, you can additionally make a device for collecting hay. This is especially convenient for large farms. After all, with limited funds, it is almost impossible to buy a special machine for this purpose.
To do this you will need old pipes and a plate. In general, everything will somewhat resemble a large rake. The parts are connected using a welding machine. It is necessary to secure the pins and pipes to a powerful thick plate so that it looks like a rake. It is best to use thin metal pipes. The lighter and stronger they are, the better.
The resulting addition is attached to the back of the walk-behind tractor near the motor. If you have to work with the unit in large fields with significant volumes of hay, then it is advisable to make an additional axle with wheels. This will increase the efficiency of work per hour.
Some country house owners are in dire need of a good snow blower. But it costs a lot of money, and most often there is nowhere to put it. Then the question arises about improving the old walk-behind tractor for a snowmobile. This is very convenient, since you can deal with even large volumes of accumulated snow in a matter of minutes. This is especially true for the northern regions, where winters are very harsh.
Upgrading a walk-behind tractor for a snowmobile is extremely simple. It will be necessary to purchase only tracks that will allow the unit to move freely even through deep snowdrifts. Tracks can be attached temporarily instead of wheels. You can also attach them to the unit so that you don’t have to remove them later in the summer. Here everything depends on the specific model of the walk-behind tractor. And in order for the machine to not only move through the snow, but also remove it, a shovel must be secured in the front using a hook for trailers. It is best to choose a large deep shovel if you plan to remove snowdrifts. And while attaching, make sure that it stays tightly on the hooks and does not move. Otherwise, snow removal will only cause additional trouble.
Power plant modernization
Despite the fact that the Neva walk-behind tractor is equipped with reliable American and Japanese engines, they will only produce the required power if they are regularly serviced. With use, the quality of gaskets, spark plugs and cylinder rings deteriorates. A necessary operation is the periodic replacement of the oil seal on the gearbox.
You can improve engine and transmission performance in the following ways:
- Seal all gaskets using special sealant. This will help maintain high compression and prevent oil leaks.
- Clean the spark plugs regularly and adjust the gap. You need to change spark plugs regularly, without waiting for them to fail.
- Install a stainless steel manifold. A modern exhaust system almost completely dampens vibration and noise from a running engine.
