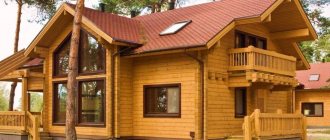
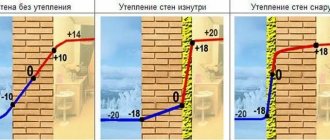
Frame walls are light and quickly erected, very heat-intensive and low-cost, but they have a complex structure. The frame is the basis of the entire building, therefore compliance with the technology of its construction is a fundamental indicator of the quality of the house. What is a pie wall of a frame house, is there a need for vapor barrier, what does dew point mean and how to calculate it? How to avoid mistakes in the construction of such a structure and how such walls differ from brick ones - more on this later.
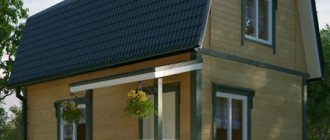
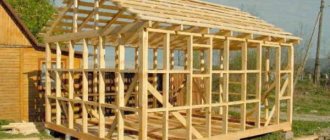
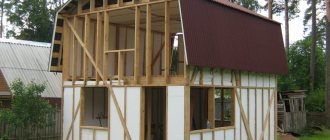
Frame house at the construction stage
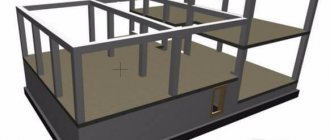
Foundation of a frame structure
The technology for insulating frame walls must be followed at all stages of construction, starting with the construction of the foundation. Proper installation of the skeleton and its fastening to the load-bearing foundation is the key to effective wind and noise protection of the room.
The basic structure of a frame wall is a vertically installed beam and horizontal lintels. Moreover, the thicker the material, the worse it conducts heat. There may also be additional diagonal struts or ties for individual structural elements. The quality of thermal insulation is determined by summing up the entire area of wood fibers in the section of the supporting structure. The amount should not exceed 1/5 of the total surface area.
You can reduce the amount of lumber used to build a wall by developing your own frame structure, the design of which depends on the shape of the building and its use.
The wood used for the walls of the frame house is of high quality, with a low percentage of humidity (about 11-12). If the moisture content of the boards is increased by just a couple of percent, such thermal protection will become twice as cold. Particularly popular for thermal insulation of frame walls is a core board with a transverse fiber direction. Depending on the type of wood and the conditions of compliance with the installation technology of the racks, their thermal conductivity can be reduced by up to 2 times.
Calibrated timber with an average degree of thermal conductivity is very durable
Solid wood species have a higher density, due to which the thermal conductivity of the material is reduced. When constructing energy-saving houses, sometimes the frame is made using a different technology. It consists not only of timber and boards, but is additionally equipped with crossbars that reduce cold bridges by several times.
Classic “pie” wall of a frame house
The external walls of the building should account for about 70% of the total volume of insulation. This should be taken into account when insulating a building.
Thanks to the structure of the frame, unique cells are created in it to place insulating material there. On the inside and outside of the house, the material is covered with other layers of the “pie”.
Basic frame wall structure
The structure of the “ right pie ” frame-type wall, from the inside of the building:
- OSB sheet, particle board, plywood sheet or plasterboard. Any sheet material that creates a base surface for further finishing.
- A vapor barrier diffusion multifunctional membrane that protects the remaining layers of the “pie” from moisture.
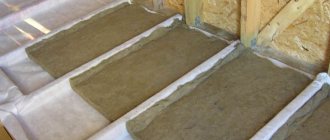
- A timber frame (material cross-section 150x150 or 150x200 mm) and a heat insulator between the racks (in the most common cases, polystyrene foam or mineral wool is used, but there are exceptions).
- The base surface of the external structure is OSB boards, fiberboard sheets or plywood, pressed onto the frame. The minimum thickness of the slabs is 150 mm. Moreover, the thicker the slab, the better and warmer the walls will be. If slabs of smaller thickness are used, such a house will not be suitable for winter living.
- A horizontal sheathing made of wooden slats or metal profiles, between which another layer of insulation is laid. For external insulation of frame walls, it is better to use polystyrene foam. In terms of characteristics, it is in no way inferior to mineral wool, but its cost is much lower, and its moisture resistance and fire resistance are at a higher level.
- Behind the insulation material there is a film membrane for insulation from moisture with wide functionality. It protects the insulation from getting wet and is windproof. The material must have high strength and be of high quality so that it can withstand weather conditions.
- Vertical sheathing made of timber or profile.
- Decorative cladding in the form of composites or siding.
Advice: for the exterior design of a frame structure, you should not use heavy slabs such as stone, porcelain stoneware or clinker. The walls of a frame structure will not withstand such loads.
The advantages of skeletal walls include ease and speed of installation, heat capacity, compact design, low cost and low weight.
Visual diagram of a frame wall pie
To get a guaranteed result when erecting a frame-type structure, you need to follow a number of rules. Taking into account the climatic and geological characteristics of the region, as well as the operating conditions of the future structure, it is important to correctly determine the thickness of the external walls and internal partitions. Otherwise, supporting structures that are too thin will make the house unsuitable for winter living, and too thick ones will lead to pointless spending on unnecessary materials.
When choosing insulation, give preference to materials with a high level of sound insulation, low thermal conductivity, good moisture resistance and low price.
Frame houses are built by those who want to save as much as possible on their budget.
To ensure that a frame structure lasts longer than conventional houses made of blocks or bricks, do not ignore the installation of moisture-proof membranes. When laying insulation material, make sure that cold bridges do not form. The difference in external and internal temperatures, as well as the need to remove moisture from inside the building and from the walls, sets certain conditions for the selection of building materials and their characteristics, the order of alternation in the wall pie.
Video - How to build a frame house with your own hands
Prices for various types of timber
timber
Frame
Unlike America, in Scandinavia there are no uniform rules (building code) governing how the frame itself should be implemented. Therefore, for a particular company, the frame can be very specific. But the main elements are performed in the same way as in American frame construction. The basis of the frame, of course, is the same as in any other civilized country - dry planed board. Wooden beams are used extremely rarely, only to solve some highly specific specific problems. And then, most likely, it will not be just timber, but the same laminated timber or LVL.
One of the interesting features of the Finnish frame is the so-called “Finnish crossbar”. A board (and most often LVL timber) embedded “on edge” into the racks under the top trim. This solution allows you to do without double top trim and window “headers”, which are mandatory for use in American frame house construction.
Another feature from the Americans. Double and especially triple racks are not always used in the area of window openings. This is probably due to the fact that in the American frame these boards are mainly used to support the same “header”, which in the Scandinavian version is replaced by crossbars embedded in the racks.
Companies that make large panels such as omatalo (finndomo), yukkatalo use something like I-beams for racks to combat “cold bridges.” Or combined composite racks, with a “thermal break” made of material with low thermal conductivity. It is already difficult to repeat such options in artisanal conditions. This is a solution for industrial production.
What do partitions look like?
Internal walls perform their functions at a constant air temperature and a uniform microclimate. For these reasons, their arrangement looks much simpler than in the case of external frame walls.
The structure of internal partitions for frame houses differs significantly from the design of external walls
Internal partitions do not require additional moisture protection, but they do need sound insulation. The comfort of residents will depend on the choice of a high-quality sound barrier. Sound-absorbing materials used in the construction of internal frame partitions simultaneously perform the function of heat protection.
For these purposes, they most often use:
- acoustic mineral wool on an adhesive base;
- isolon (foamed polyethylene with high sound insulation properties);
- isover (rolled insulation based on basalt or fiberglass);
- foamed rubber (elastic slabs of rubber foam with a closed porous structure);
- soundproofing plasterboard;
- graphite or regular felt.
To improve the quality of sound protection, the material in the internal partitions is installed without gaps or cracks
Prices for soundproofing materials
Soundproofing materials
Calculation of floor loads
The total load consists of the weight of the structure itself - a constant, and the load of the materials used in the insulation and finishing layers - a variable.
The optimal value is no more than 250 kg per 1 sq.m. Full load is a constant + variable value. How long all the necessary calculations are made depends on how long the house will serve its owners. It is easier to perform calculations using special construction calculators.
Attention! When independently calculating the maximum permissible loads, it is necessary to sum up the weight of the screed, insulation, partitions and furniture that will be in the room. All the numbers necessary for the calculation can be taken from the relevant reference books.
Materials used
Let's look at what the walls of frame houses are made of. The material is chosen not only for aesthetic reasons, but also for its ability to withstand certain loads placed on it.
An example of a frame house with exterior finishing in the form of decorative plaster
Basic set:
- Square beams made of pine needles, maple or other hardwoods with a moisture level of 11-12%. The optimal material thickness is 150x200 or 200x200 mm.
- Boards made of larch or other coniferous trees with a section of 150x50 mm.
- An I-beam made of two beams with a lintel made of OSB board. It is necessary to adjust the shelves depending on the selected insulation and the size of the base. The use of an I-beam significantly increases the thermal insulation properties of the walls and reduces the risk of deformation of the sheathing during shrinkage of the house.
- Wall finishing for external and internal work. Materials in this category include both composite panels based on plywood or OSB, and standard slabs or boards. Glass magnesite is also used. Materials for interior finishing must be well dried, treated with antiseptics and free from defects.
- Heat insulator of soft or hard type. Most often, when constructing frame walls, basalt or mineral wool, polystyrene foam or extruded polystyrene foam, and spray insulation are used.
- Wind-, moisture-proof and vapor barrier multifunctional membranes that help remove moisture from inside the walls and do not let it back in. An additional function of the film is to protect the structure from moisture and blowing.
- Materials for decorative finishing. For exterior decoration, metal or vinyl siding, edged boards with imitation timber, block house, artificial stone, acrylic or decorative plaster can be used.
Frame wall made of metal profiles in combination with foam concrete blocks
In some cases, a galvanized or aluminum profile in combination with foam concrete or its foamed analogue is used to erect the walls of a frame structure. This approach allows you to build a more reliable structure in the shortest possible time.
Moisture-proof and vapor barrier membranes, as well as materials for wind protection, are films that differ from traditional polyethylene in their internal porous structure. The structure of such a film allows moisture to seep in only in one direction, blocking all paths of reverse penetration. Foil material can be used to protect against moisture. This film is vapor-tight and can withstand high temperatures. It is advisable to use it in places where heating and heating devices are installed.
Video - Review of insulation for frame houses
Why is floor quality so important?
When building a house, they care not only about its beauty, but also about making it warm and cozy. Insulating the walls is only half the battle. The house must be protected from the cold from below. Wood is a natural material that is susceptible to rotting, so reliable insulation from moisture is also important. And finally, it should look beautiful and match the interior decoration of the room. In order for all goals to be achieved, it is not enough to lay the boards on a concrete base.
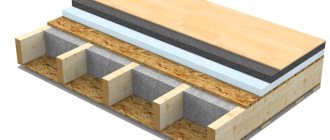
The floor in the house should be smooth, warm, beautiful and durable. All these qualities are achieved by laying the floor in several layers:
- base;
- heat and vapor barrier;
- rough floor;
- fine coating.
Concrete floor pie layer diagram
Concrete floor in a wooden house
Looks like a layer cake, doesn't it? That's why it's called floor pie. Its proper arrangement will help to avoid:
- high energy costs for heating the house;
- excessive moisture, which will inevitably lead to the appearance of mold and mildew;
- rotting of internal wooden structures.
Design
As with any building, a frame house needs its own project with exact dimensions and taking into account all the nuances. It is better to entrust this task to a professional. The specialist will coordinate with you all your wishes and technical issues, help you choose the right layout, and prepare an estimate for building materials and installation work.
At the design stage, the thickness of the walls of the frame structure is determined, which can reach a maximum of 60 cm.
To clearly establish the thickness of the frame walls, all materials used, methods of their fastening and the climatic characteristics of the region are analyzed. Also in the project, the master will take into account all contact connections, pipeline components and the laying of communications with the most convenient location.
Having a project during construction, you will clearly know where to place which element and how to attach it correctly. Everything down to the smallest details will be taken into account.
Is it possible to build in winter?
Frame houses have an important advantage - they can be built at any time of the year, incl. in winter. This is due to the lack of “wet” technologies during installation.
However, to ensure winter construction, it is important to consider the following recommendations:
- The foundation must be erected in the warm season and gain the necessary strength by winter.
- It is necessary to provide reliable approaches to the site and routes for the supply of materials.
- The construction site must have a hard surface to prevent getting stuck in mud. A possible option is geotextiles for car parks.
- All building materials must be reliably protected from moisture.
Work should be planned taking into account the short winter day. In general, the problem of winter construction of a frame house is associated only with the correct organization of the process.
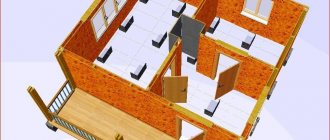
Scheme and drawing
A detailed drawing with a cross-section of the load-bearing element of a frame house will help you better understand the technology of its construction, determine for yourself the sequence of installation of each layer of the “sandwich” and the location of the materials. The diagram will also help to prevent mistakes when installing such important elements as load-bearing walls and interior partitions.
In addition to the connection nodes, the drawings clearly indicate communication layout diagrams
Today, many projects of frame-type buildings with diagrams are made in special programs for PCs, where it is enough to enter some data and the system itself will draw up a detailed drawing.
The program requires the following parameters:
- exact location of external and internal walls;
- number of interior spaces;
- the thickness of future walls and materials for their construction;
- type of soil and humidity level, climatic and geological features of the region.
Frame house diagram
The diagram of the future wall includes the following:
- area and type,
- location of openings for doors and windows,
- method of fastening and connecting modules,
- sandwich.
The last point includes the sequence of layers of the “sandwich” and the parameters of the materials used (type, thickness, method of fastening, etc.).
The disadvantage of a drawing developed on a computer is that the electronic brain will not make an estimate for the work and will not analyze the characteristics of the soil and climate to draw up the correct project.
Scandinavian windows
Windows made of metal-plastic profiles, popular in Germany and here, have not taken root in Scandinavia.
Basically, the following window design is used here
Scandinavian windows
The window is double glazed, the internal frame is wooden, with a single glazed unit. External, can be either wooden or metal, with one glass (in more energy-efficient options, also a wooden frame and double-glazed windows). The design of the windows itself is such that both sashes open inward at the same time, for which a special connector with a sliding mechanism is responsible.
This is probably the most “hard to replicate” part of a Scandinavian home. Original windows in Russia are, to put it mildly, obscenely expensive. There are many options for “analogues”, but again, either the price is significantly higher than the usual metal-plastic or the quality is lame, and on both legs.
Construction of a sandwich wall of a frame house
No matter how original the exterior of a frame-type house or the design of the rooms inside is, the sandwich of the internal and external walls remains virtually unchanged.
Finishing frame walls with foil membrane
Let us recall once again the structure of load-bearing structures:
- outer skin;
- counter-lattice (if necessary);
- sheet wood chip material;
- wind- and moisture-proof film;
- heat insulator in frame cells;
- vapor barrier membrane;
- interior decoration in the form of any sheet material and finishing design.
The structure of the internal partition looks much simpler. In addition to the frame and heat and sound insulation, the walls have sheet cladding and interior decorative finishing.
If you use piece materials attached to the sheathing (for example, a block house, lining or plastic panels) for decorative finishing of the internal partitions of a frame house, you can significantly save on installing sheet cladding
The structure of the frame wall may vary slightly depending on the material used. Let's look at the most common options.
Pie wall frame house with mineral wool
This option ideally meets the need for good sound insulation. Its structure consists of the following sequence of work. From the outside, wood-shaving material is stuffed with foliage onto the frame, and a water barrier with a windproof function is attached to the top using a stapler. The membrane joints are taped with aluminum tape. Next, the counter-lattice and decorative trim are filled. From the inside, mineral wool is placed into the cells of the frame, and a vapor barrier film is attached in the same way as on the outside. Sheet material is stuffed and then finished or decorative panels are mounted.
Construction of a frame house wall filled with mineral wool
Mineral wool is very hygroscopic, so when making such a cake it is very important to seal the cotton wool layer as much as possible.
Prices for mineral wool
Mineral wool
Application of basalt material
Basalt wool is better than mineral wool in that the material is resistant to the formation of fungus and mold, and is not afraid of moisture and vibration.
Sectional view of the wall of a frame house with basalt insulation
Sandwich materials used for frame walls in this case are no different from the previous technology.
Internal wall cladding
The materials of internal wall cladding are subject to requirements for environmental friendliness and decorativeness. To decorate the inner surface of the walls of rooms in a frame house, the following panels are used:
Finishing the attic with wooden paneling.
- Wooden and plastic lining.
- MDF.
- Plywood.
- Drywall.
- OSB.
The first two materials represent a finishing decorative coating. The walls of living rooms are covered with wooden clapboard and MDF. Plastic waterproof panels - walls of the bathroom, kitchen, toilet, utility rooms. The last three materials on the list are drafts. They are used as a basis for decorative finishing. After attaching OSB to the walls, plywood and drywall are puttied at the joints, after which they are pasted with wallpaper, covered with decorative plaster or painted.
Wall of a frame building with OSB board
Prices for OSB (oriented strand boards)
OSB (oriented strand board)
OSB sheets are used to make the structure being built more rigid and stable. They are installed as a base for further finishing, as well as as an additional sound insulator and insulation.
If a frame structure is planned for technical purposes, insulation material between the base posts does not need to be laid
The device of the pie in this case is no different from the previous options. The only thing is that the insulation itself can be chosen differently, for example, polyurethane foam or polystyrene foam.
Construction of a frame wall using Finnish technology
Assembly of a frame wall using Finnish technology
What is Finnish technology and how does it differ from other methods of frame construction? When constructing frame houses, there are two main technologies - Canadian and Finnish (Scandinavian). The main difference between them is that the first option involves the preparation of structural elements directly at the installation site, and in the second case, most of the structural elements are manufactured in a factory and arrive at the construction site in finished form.
The final stage is external and internal decorative finishing
The procedure for assembling walls using the Scandinavian method:
- A timber frame is mounted on the strip foundation and the lower floor is assembled.
- The panels are assembled from factory blanks.
- The assembled panels are installed on the prepared base and connected to each other with metal brackets.
- Any selected insulation, OSB and vapor barrier are installed.
- The subfloor is laid on the ceiling.
- Interfloor floor beams are installed.
- The attic or second floor wall panels are assembled and installed on the floors.
- The roof frame is being installed.
- The roof is being insulated and the roof is being installed.
Foam insulation
The worst option for insulating a frame house pie is foamed polystyrene, better known as polystyrene foam. This material is characterized by its rigid dimensions, low vapor permeability and the presence of harmful background fumes. It requires high-quality insulation from the living space. The thermal insulation properties of polystyrene foam are determined by its thickness.
Polystyrene foam is used in the following cases:
- In frame-panel construction, the house is assembled from ready-made wall panels. The so-called SIP panels are manufactured at the factory and insulated with polystyrene foam of a certain thickness.
- In frame construction - if two layers of insulation are installed. In this case, the first layer is made of mineral wool. The second outer one is made of foam plastic. Thus, the contact of polystyrene foam with internal living spaces is limited.
Polystyrene foam is the cheapest type of insulation. Therefore, despite a number of worse characteristics, it is often used in construction.
Mounting points
Examples of fastening points for a frame structure
The nodes of the walls of a frame house are the places where they are attached to each other and to the base.
Main connections:
- Connection of load-bearing walls with the roof. Monolithic racks are installed perpendicular to the wall, but on the pediment or on the partitions they are located parallel. The corners of the wall frame must be reinforced with additional posts.
- Interwall nodes. To ensure reliable connection of interior walls with external structures, an additional one is located in the side frame perpendicular to the corner outer post. This is necessary for the correct formation of the internal corner and simplifies the installation of OSB boards.
- Fastening partitions and walls to floors and ceilings. The racks of the supporting frame are nailed with three nails 9 cm long to the beams. If a vertical structure is erected directly on the frame of beams or lintels, the third nail is driven directly into it. When installing interior partitions, the frame posts are nailed with one fastening element.
- Assemblies of door and window openings. In Finnish and Canadian technology, openings are reinforced in different ways. For example, the Americans came up with a method using double racks mounted above and below the openings. A header made of boards is attached above the opening, and horizontal boards are placed under the opening, which subsequently support the weight of the installed structure. Finnish technology provides a crossbar instead of a header.
- Jib bars or diagonal struts are one of the most important elements of the frame design. It is these elements that prevent the house from tilting and falling, providing the frame with additional strength and rigidity. The jibs cut into the lower and upper frames of the beams. They are used without fail if it is not planned to use OSB sheets or plywood for cladding the frame. Jib bars can be wooden or metal.
- Corner connection of two load-bearing walls. In winter, corners tend to freeze, so simply connecting the corner beams will not work. A corner is made according to the 2+1 scheme, where the third post is nailed to one of the outer ones and forms a full-fledged corner. The posts are connected with five 90 mm nails.
Classic brick wall pie scheme of modern building
Foundation
In Scandinavia, two types of foundations are mainly used. The first of them, then, is actively promoted by the famous “Vladimir Tallinn”, and with my light hand, it began to be called USHP (insulated Swedish stove). Roughly speaking, this is a huge trough made of high-density foam plastic, into which a thin concrete slab with stiffening ribs is poured, and all communications are immediately laid into this slab, including a heating system with water-heated floors.
The solution is ingenious in its essence and universality of approach. Since one blow kills several birds with one stone.
True, the USP has two drawbacks, the first is associated with the difficulty of erecting in places with a significant slope, the second is the low height of the base (30cm). By the way, it is the latter that is extremely difficult to accept by the Russian mentality.
In these cases, the second type of foundation comes to the rescue. Sometimes it is called a “Finnish insulated slab,” but in essence this is not entirely true, and the type of foundation itself is well known in Russia - “floors on the ground.”
The essence is quite simple, a shallow strip foundation is made with a supporting sole (heel), then there is backfilling with soil, insulation and a reinforced thick screed on top, also with communications embedded in it and a system of water-heated floors.
True, the execution of floors on the ground also has distinctive features from Russian versions.
By the way, what’s interesting is that a very common option is when a house begins to be built as soon as the “tape” and backfill are ready. But the final finishing of the floor (insulation, reinforcement, heated floors and pouring) occurs already when the frame is “under the roof”
I will not dwell in more detail on the description of these types of foundation, since this is the subject of a separate large article.
Pile foundations, strip foundations with overlap on wooden logs are used very rarely. It happens that small “guest” houses or saunas are simply placed on blocks, but even in this case, the approach to the construction of these “support columnar foundations” is more comprehensive and correct than ours.
You can read more about the design of the USP and the Finnish foundation in another article.
Brick walls
For comparison, consider the structure of a brick wall. With modern requirements for thermal protection, hygroscopicity, thermal conductivity, fire resistance, sound insulation, etc. It is not possible to build the walls of a brick house using brick and mortar alone. In order to meet all the necessary indicators of the regions of our country, the thickness of a brick wall in a modern building must be at least 3 m. This construction scheme involves the use of excess space and the use of a large number of materials, so the pie of a brick wall that meets all standards today consists of more than just "test".
A new generation brick wall consists of several layers. Variations may vary depending on specific requirements and conditions.
Table 1. Three variations of brick wall pie
| Pie No. 1 | Pie No. 2 | Pie No. 3 |
| facing brick (1.2 cm); external plaster (1 cm); steel mesh with a diameter of up to 0.5 cm for good adhesion; foam sheets (maximum 1.2 cm); red solid brick, 25 cm; lime mortar or plaster (3 cm). | clinker tiles (1.2 cm); external plaster (1.5 cm); steel mesh for grip (0.5 cm); polystyrene foam (8 cm); red solid brick (up to 40 cm); inner layer of plaster (2.5 cm). | a centimeter layer of decorative external plaster; 2 cm layer of lime mortar; polystyrene foam layer maximum 8 cm; ceramic hollow brick (50 cm); centimeter layer of internal plaster. |
The following video will clearly show the process of insulating a brick wall:
Video - Insulating the walls of a brick house
Which plywood to choose
Plywood is a multi-layer wood-sheet material that is made by cross-gluing an odd number of layers of rotary-cut veneer. For production, birch raw materials or technical grade conifers are most often used, less often - oak, beech, linden and others.
Advantages of plywood:
- high mechanical strength to any load;
- relatively light weight;
- low thermal conductivity coefficient;
- acceptable level of humidity (8–12%), which allows the use of some types of plywood in damp and unheated rooms: kitchens, bathrooms, balconies, loggias, etc.;
- use in combination with water- and infrared-type “warm floor” systems.
The disadvantage of sheet material is that the production uses adhesives that are unsafe for human health. As a rule, products are assigned an emission class of at least E1.
Plywood products are classified according to the following criteria:
Scope of application.
The areas of application of sheet material are limitless - from construction to electrical engineering. But to form a prefabricated screed or finished floor, it is recommended to use structural and construction varieties.
Brand.
This parameter is determined by the type of adhesive used. Let's consider three basic types:
- FSF (plywood glued with phenol-formaldehyde resin glue). The product is considered moisture resistant and is used for finishing rooms with normal and high humidity levels.
- FC (plywood glued using urea-formaldehyde glue). Refers to products with average moisture resistance, recommended for use in dry rooms.
- FBA (plate on albumin - casein glue). Positioned as a material of limited moisture resistance.
Variety
According to GOST 3916.1–96, products differ in the number of permissible defects and defects of wood, as well as defects during processing. There are five degrees of quality:
- E – extra or elite. The product is made of oak, alder, birch and other species, has a perfectly flat, smooth surface, without the slightest defects. Slight deviations in the structure of random wood are allowed.
- I – pin and healthy light or dark knots are possible – no more than 3–5 pieces. for every square meter of surface. Cracks (except for closed cracks) and other types of defects are excluded.
- II – healthy, partially fused, unfused and falling out knots with a diameter of up to 6 mm, wood inserts and open cracks up to 200 mm long and no more than 2 mm wide are allowed.
- III – there are: a) wormholes and holes from fallen knots with a diameter of up to 6 mm in an amount of no more than 10 pieces. per 1 m² of area; b) diverging cracks 300–600 mm long and up to 5 mm wide (subject to sealing with putties or sealants); c) dents and scallops.
- IV – surface with all kinds of defects: from fused and fallen knots without limiting the number to defects along the edges up to 5 mm deep.
For subfloors on joists, as a rule, sheet material of quality grade 1–4 is used. Please note: Plywood is usually double marked, such as 1/2 or 2/2. Matches the grade of each side. That is, a product of class 1/3 is characterized by the fact that one surface is assigned category 1, and the second - 3.
Nature of processing.
Sanded and unsanded plywood.
Plywood boards can be sanded or unsanded. Marked:
- Ш1 – processed only on one side.
- Ш2 – polished on both sides.
- NS – unpolished.
Laying the floor along the joists is done using slabs of any type. But common sense dictates that it is better to use products that are polished on at least one side. This will allow you to create the most even and smooth floor for installation of linoleum, laminate, etc.
Dimensions.
The length of plywood sheets can reach 6 m, width 3 m, and thickness starts from 3 mm. For roughing and finishing work on horizontal bases, the following material is used:
- 1525x1525 is the most commonly used size for floor joists. The amount of waste is small and convenient to transport.
- 1210x2440 – for leveling bases in multi-storey buildings of standard series with elongated room shapes.
- 500x3000 - convenient for multi-storey or commercial new buildings, where the principle of studios or open plan is implemented.
The optimal thickness of plywood for floor joists depends on the type of prefabricated screed and the level of load. If installation is planned in two layers, then it is better to choose products with a cross-section of 8–12 mm, and for single-layer installation – 8–22 mm.
What not to do: common mistakes
When constructing the walls of a frame house, many novice builders make mistakes that seem simple at first glance, which in the end can lead to fatal consequences.
Often, when installing a vapor barrier or water barrier, the use of adhesive tape for gluing membrane joints is ignored
Incorrectly installed vapor barrier membrane. The film for removing moisture from the insulation has a porous structure, and moisture can penetrate through the membrane only in one direction. So, if the film is installed on the wrong side, the liquid, instead of coming out, will accumulate between the membranes, wet the insulation and lead to damage to the structure.
The absence of a project with a plan and dimensions will lead to unnecessary wastage of time traveling for missing building materials and to errors when assembling the house. For example, this design will significantly complicate the installation of insulation between the racks
Ignoring the use of moisture-proof films leads to wetting of the insulation and rotting of the supporting structures of the frame structure.
Violating the sequence of layers of the pie does not give the desired effect and leads to approximately the same consequences
The absence of a waterproofing layer between the bottom trim and the concrete base will lead to rapid wetting and rotting of the structure, since concrete quickly releases all the saturated moisture, so it is better to be on the safe side. Two layers of roofing material are often used as a waterproofing material.
Too large a step between the frame posts may result in insufficient stability of the base
Wrong choice of lumber. If you purchase timber with a humidity level just a couple of percent higher than permissible, this will lead to deformation of the frame and destruction of the structure.
Low-density insulation, sewn into vertical walls, shrinks over time and forms cavities in the walls
Using the wrong hardware. A common mistake is to fasten the supporting frame with self-tapping screws intended for interior decoration of a house. The hardened steel from which they are made is a rather brittle material that cannot withstand heavy loads. The supporting structure is secured only with nails.
These self-tapping screws can be used to temporarily secure the frame elements together for further, better fastening.
If you did not provide for ventilation during the planning and construction of the house, its absence, in addition to the poor health of the residents, will lead to a high level of humidity in the room and fogging of the windows.
Frame buildings require a detailed design and strict adherence to technology. Deviation from accepted standards during construction can lead to a lot of inconvenience, both during work and during operation of the building. The wall pie of a frame house is a complex structure, in which the correct selection of materials and a clear sequence of their installation in compliance with all rules are important. Happy construction!
Comments4 comments
- Konstantin:
10/19/2016 at 20:27I read a lot about insulating frame houses, but I liked your approach more. That’s why I’m turning to you for advice. 1. Almost everywhere it is proposed to insulate with “soft” (cotton wool, foam...) insulation and do not recommend “hard” (penoplex, etc.) without any explanation for this choice. Meanwhile, it is obvious that for “soft” ones you need steam and waterproofing, and a ventilation gap, but for “hard” ones this is not needed. Accordingly, the “solid” ones win in terms of labor costs and time, and, most likely, if you take into account the costs of all the insulation and gaps, then in money. If we cite fire safety as an argument, which seems to be higher for “hard” ones, then for “soft” (as you yourself write) insulation films burn for dear life and negate the non-flammability of “soft” insulation. I am asking for advice on choosing the filling for the wall and roof “pie” of a frame house. The frame is assembled from larch boards 50x180mm. Initially I thought of putting two layers of Penoplex 50mm apart at the joints, but the resulting air cavity in the wall is too large (180mm - 100mm = 80mm). And maybe Is there anything wrong with this? What do you think? Therefore, now I am inclined to install 50mm Penoplex foam closer to the inner surface of the wall, and some 100mm “cotton wool” closer to the outer surface of the wall. From the inside, in this case, it will be possible to do without a vapor barrier, the role of which will be performed by Penoplex, and immediately mount the base for the internal finishing (apparently, wooden “lining”) on the frame posts. And outside, of course, you will need to install vapor-permeable waterproofing and make a ventilation gap. How justified do you think this is? Are there simpler options for my case? 2. In the outer part of the “pie” I have two options: 2.1 the first is to do without waterproofing and sew 9mm OSB directly onto the frame posts, since OSB (as they say) itself “breathes” a little, but at the same time from wind and moisture will protect the “cotton wool” of the first layer of insulation. Then sew 30x50mm vertical bars onto the OSB for the ventilation gap, and sew metal siding on them. This option, of course, is simpler, but the ventilation of the first layer of “cotton wool” insulation raises questions. As a solution to this problem, I am considering the possibility of drilling holes in the OSB. What do you think? 2.2 second, sew waterproofing directly onto the frame posts, then sew 30x50mm vertical bars onto them, sew 9mm OSB onto these bars, and then sew metal siding directly onto the OSB. What do you think of this solution? M.b. Still, sew another row of bars between the OSB and the siding? 2.3 in general, in the case of external cladding of OSB, regarding the use of waterproofing, who draws and advises what. Do you think it is necessary to use it?
I apologize if I wrote something “clumsily”, because I am not a builder and this is my first frame construction.
Thanks in advance for your advice.
- Nikolaevich:
10/24/2016 at 15:54
Hello, Konstantin. I'll try to answer more clearly.
1. Penoplex is extruded polystyrene foam; installing it in walls is an unjustified extravagance. The frame gives your house rigidity, and ordinary PSB-S-15 has almost the same thermal conductivity coefficient (the difference is a couple of hundredths). I would not recommend combining 2 insulation materials that are so different in their properties, such as cotton wool (any kind) and polystyrene foam, especially if there is only 100 mm on the outside. For Russia you need at least 250 (in the southern regions at least 200) so as not to freeze. It froze - it thawed - it got wet, then - I hope - there is no need to explain. The boundary of materials is where dew falls. In addition, warmer material is always placed outside. You can put slab polyurethane on the outside, and PSB-S-15 or both layers of PSB on the inside. I would not leave an air gap, but fill these cavities with the same PSB. It should be at least 150 mm in the wall pie, but 200 is better. Your thickness will also be suitable, and cutting polystyrene is easier than ever. Be sure to check for self-extinguishing; the fire should be maintained for no more than 2 seconds. By the way, penoplex from some manufacturers burns, so if you decide to use it, set fire to a piece for testing. 2. I would not use OSB in your version of exterior finishing. The double space frame provides very decent shear resistance, and the proposed metal siding will radically enhance it. There is one thing: it must either be completely glued to the outer layer of PSB so that there is no air gap (if the profile is not high), or fastened through the sheathing with a gap so that the condensation that inevitably forms on it in the autumn, partly winter, and spring could drain. Savings on OSB and the cost of penoplex will more than cover the cost of foam. How to apply, read the article about making SIP panels yourself. If with OSB, then I would install plastic or basement siding. These can be sewn directly. If you decide to use cotton wool, be sure to install waterproofing on the outside - preferably a superdiffusion membrane. Of your options, 2.1 is more acceptable. but without holes in the OSB. It is better to cover its outer surface with a couple of layers of diluted bitumen primer, and make ventilation grilles in the siding from below and above (the more often the better) for active ventilation. In this case, be sure to fill the internal gap, and use cotton wool with a density of at least 90 kg/cubic meter.
- Konstantin:
29.10.2016 at 14:30
Hello, I have a few related questions after your answer, could you please answer them:
1. As far as I understand from the answers, PSB-S is ordinary polystyrene foam. I have heard and read on the Internet from many people that foam is eaten by mice. Of course, I don’t have personal experience, but I wouldn’t want to risk it, since there are plenty of mice in our area. That is why I considered the option of using penoplex and cotton wool. They say mice don't eat them. In addition, penoplex is approximately twice (according to reviews) “warmer” than polystyrene foam, and costs twice as much (in terms of cubic capacity). So it turns out that the cost and thermal conductivity of 100mm polystyrene foam are approximately equal to the cost and thermal conductivity of 200mm polystyrene foam. If I'm wrong about something, please correct me. I will be grateful.
2. Another question is related to OSB. In the answer, I did not see a substantiated opinion on whether or not it is necessary to install waterproofing before OSB sheathing, and, if necessary, whether it is necessary to make a ventilation gap between the waterproofing and OSB. And this was the most important thing for me! I didn’t have a question about whether OSB should be installed. I believe that it is necessary for the rigidity of the frame. Perhaps, of course, I’m playing it safe, but... If you follow the link in the answer, it is proposed to generally build from homemade sandwich panels, in which OSB is generally on both (!) sides. I don’t understand how this fits in with the proposal for me to do without OSB.
3. The third question is related to the following statement in the answer: “I would not recommend combining 2 insulation materials that are so different in their properties, such as cotton wool (any kind) and polystyrene foam, especially if there is only 100 mm on the outside. For Russia you need at least 250 (in the southern regions at least 200) so as not to freeze. It froze - it thawed - it got wet, then - I hope - there is no need to explain. The boundary of materials is where dew falls. In addition, warmer material is always placed outside.” The following questions arise: 1. If, for example, the entire layer of insulation is homogeneous wool (it has a dew point inside), then doesn’t its outer layer freeze in winter? Obviously it's freezing. This means, following the logic of the answer, it will then thaw and get wet. This doesn't happen in life. There is probably some inaccuracy in the answer regarding the operation of the two materials. I planned to install them without a gap between them. 2. I planned to put penoplex (50mm) inside, and cotton wool (100-120mm) outside, precisely so that the penoplex would work as a waterproofing and would not allow internal moisture into the cotton wool. At the same time, as I think and may be wrong, the thermal conductivity of 50mm thick penoplex is approximately equal to the thermal conductivity of cotton wool 100-120mm thick. In this case, talking about a “warmer” or “colder” material, in my opinion, is incorrect. Because, in addition to the thermal conductivity coefficient, the thickness of the material also plays an important role.
In any case, thanks for the help! I will be glad if my thoughts are useful to someone
- Nikolaevich:
10/31/2016 at 12:57
1. PSB-S is not ordinary, but self-extinguishing. The statements about it being 2 times warmer are unfounded. There are tables of thermal conductivity of materials on the Internet, you can look them up. For penoplex it is 0.032 at best, and for polystyrene foam it is 0.04 at worst. This means that 120 mm of regular polystyrene foam can replace about 110 mm of extruded polystyrene. If you want to pay more, you have no right to prohibit it. Flammability and devouring by mice depends only on the raw materials from which a particular type of polystyrene foam is made - ask for certificates, and test for flammability (for penoplex it is higher than for PSB-S). Mice do not eat polystyrene foam, it is not food, but a warm hole, no more preferable than in mineral wool, in which they settle no less successfully, like my partner’s in a bathhouse insulated with dense, high-quality Rockwool. They run in herds. But none of the 20 houses we built have them in the walls, roofs and ceilings - we even had to partially dismantle them for alterations at the request of the owners. No cubes, burrows, or passages were observed. And in my shell-brick house (I didn’t build it) there are a lot of them in the fall. We're poisoning. 2. If you use any (including penoplex) polystyrene foam as insulation, hydro and vapor barrier is not needed, it does not allow moisture to pass through in any form (neither steam nor water), if any wool (basalt, mineral, linen) , hemp, sheep, cotton, etc.) - definitely needed. They are all hydrophilic, and when wet they lose many of their physical properties. In this case, a ventilation gap will be useful. 3. In a homogeneous material (even in concrete, and Soviet DSK concrete high-rise buildings have a wall thickness of 180 mm) physical water is not formed. The main thing is that enough heat reaches the inner surface of the wall. If it’s not enough, the wall will get wet from the inside. Water falls out in the form of droplets at the junction of materials. There are no inaccuracies, you can install the mentioned materials as planned, but I warn you what will definitely happen: you are right that penoplex will not let internal moisture into the cotton wool, but its thickness will not be enough to hold back the heat from the house - it will inevitably fit to the cotton wool, where you will encounter frost, which neither 100 nor 120 mm of wool can cope with (thermal conductivity coefficient + - 0.05). You will get your dew point in the form of physical drops that this cotton wool will absorb. Further more.
