Wood can be called the most beautiful building material that nature has created. However, wood is not only beautiful, but also capricious. Artificial materials have a uniform structure, but wood has a heterogeneous structure. When working with timber, you need to get used to its heterogeneity and learn to work with it.
Since timber consists of many fibers that are arranged vertically, and a much smaller number of horizontal fibers, the craftsman must learn to think through sawing wood in order to carry out a quality cut. In this article we will talk about longitudinal cutting.
How to do something yourself, with your own hands - home craftsman website
And a little magic
When all verification operations are completed, it is time to begin the project itself. While rummaging through my lumber stash, I found a piece of wood with a fascinating grain pattern that I thought would look amazing as 6mm wide panels on the doors of a jewelry storage cabinet.
I set the guide 8mm from the saw blade (6mm plus 1.5mm for the next sanding) and started loosening. I chose the feeding speed taking into account the density of the workpiece (it was amber wood) and its width (approximately 18 cm). Checking the first sawn piece showed that the saw settings were correct - and I sawed off the second piece. The resulting pair of front panels (photo below) is a good example of how beautiful boards sawn in this manner can be.
After gluing the veneer to the substrate, the front side must be sanded. Multilayer plywood or MDF sheet are perfectly suitable for the substrate, since they are virtually not subject to expansion and contraction when humidity changes.
These freshly sawn pieces still needed to adjust to the humidity level in the workshop, so I stacked them with slats for a day or two to keep them from warping (photo above left). After which I glued them together and planed them to a final thickness of 6 mm.
If I needed to obtain veneer from a blank, my actions would differ in the most insignificant way. I would adjust the guide to cut sheets 3 mm wide, and before each new cut I would plan or sand the workpiece. This technique allows you to get one smooth and even side on each veneer sheet, suitable for gluing. You see, have you ever thought that a band saw is only suitable for cutting curved lines!
TOOLS FOR HOME AND GARDEN, HANDCRAFTS, ETC. PRICES VERY LOW
Take a canvas with a more brutal cut. A blade with 3 teeth per inch and larger grooves between them better removes sawdust, which can cause the cutting blade to bend and twist. Keep the workpiece firmly pressed against the guide and the table. A special pusher transmits the required pressing force to the guide and allows your hands to be at a safe distance from the canvas when it is unraveled.
Once the band saw is perfectly tuned, you need to pay extra attention to the saw blade. Sawing wide boards requires a blade that moderately passes through the entire thickness of the workpiece, while removing a huge amount of sawdust. The wider the blade, the straighter the cut, so try to use the widest blade that will fit your saw.
Place the square 6mm from the saw blade (you may need to lift the guard to position it) and press down on the middle of the blade with your finger. Using medium pressure, the blade should touch the square. In this photo, the saw blade is very much shifted backwards on the upper drive wheel: therefore, the cut deviates towards the guide. If the blade is very much shifted towards the front edge of the wheel, this leads to the opposite result.
Most band saws work very little with 12mm blades, and many with even wider ones. Typically, a wide blade with 3 teeth per inch of length (3 tpi) offers the perfect combination of brutal yet smooth cuts with active sawdust removal, which is what you want when dissolving wood. Finally, let's talk about guides. The workpiece to be cut should be less than twice the height of the guide. So, for example, a 100 mm guide is suitable for cutting a board 200 mm wide. If you require greater height, use homemade additional guides.
Recommendations
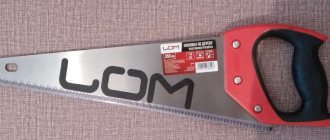
Wood saws are classified not only according to the purpose of use, they can also differ according to other criteria.
- Canvas length. The comfort of the worker depends on how many teeth are arranged on the saw blade in a row, since with a longer length fewer saws are made, and a tooth is hammered on such a saw with less intensity. There is a general law that states that the length of a hacksaw blade for wood should be twice as long as the object being sawed.
- Teeth size. The size directly affects the cutting time and is inversely proportional to its quality. A small hacksaw makes high-quality and clean cuts, but at a lower speed and with the application of greater forces. A saw with a large tooth spends less time cutting, but produces a ragged edge and a rough surface. Typically, the parameter of the teeth of hacksaws for wood from foreign manufacturers is TPI (teeth per inch or “teeth per inch”), that is, the more cutting edges are located on 1 inch of the blade, the larger the TPI value, the smaller the tooth.
It is worth paying attention to the inches to millimeters conversion table
| 1 TPI = 25.5 mm | 6 TPI = 4 mm | 14 TPI = 1.8 mm |
| 2 TPI = 12 mm | 10 TPI = 2.5 mm | 17 TPI = 1.5 mm |
| 3 TPI = 8.5 mm | 11 TPI = 2.3 mm | 19 TPI = 1.3 mm |
| 4 TPI = 6.5 mm | 12 TPI = 2 mm | 22 TPI = 1.1 mm |
| 5 TPI = 5 mm | 13 TPI = 2 mm | 25 TPI = 1 mm |
Tooth shape. This parameter determines how the cut will proceed relative to the wood fiber of the type of tree and the vectors of the applied forces (from oneself or towards oneself). In addition, there are hacksaws for universal sawing, which have different types of teeth.
Grade of steel from which the hacksaw blade is made
Steel is classified according to many parameters, but it is worth paying attention only to how the steel was processed - hardened, not hardened, or combined (not the entire hacksaw is hardened, but only its teeth).
When sharpening teeth, the hacksaw blade is clamped so that no more than a centimeter of the tooth protrudes above the vice. When sharpening, it is recommended to choose a triangular file/needle section. To ensure proper quality, when sharpening you need to follow the following sequence:
- sharpen the left edge of each even (farthest from the worker) tooth;
- reinstall the canvas by rotating it 180 degrees;
- sharpen the left edge of each even tooth again, which will again be in the far row;
- finish the cutting edge and sharpen the teeth.
It is worth paying attention that longitudinal or universal saws are fixed at an angle of 90 degrees. When sharpening, use a diamond-shaped file
Work with it must be carried out exclusively horizontally. As a result, sharpened edges sometimes become nicked. Such burrs should be smoothed with a file with the finest notch or an abrasive stone with minimal grain size.
How well the hacksaw teeth are sharpened is checked as follows:
carefully run your hand along the canvas - if the skin feels a sharp edge and there are no burrs or scuffs - everything is in order; in terms of shade - well-sharpened edges do not glare when light falls on them, they should be matte; test sawing - the hacksaw should go straight, the sawn material should have a smooth, even surface, there should be no frayed fibers; The finer the cut the tool has, the sharper the saw will be sharpened.
It is worth paying attention to the following advice from professionals:
- It is recommended for use only high-quality tool sets that are used exclusively for sharpening saw teeth;
- for each tooth there should be an equal number of movements with a file/needle file; this rule applies even if there is an impression that the passage needs to be repeated;
- during one pass, it is prohibited to change the hand and the angle at which the tool moves until one side of the hacksaw blade has been completely passed;
- It is forbidden to change the side of the file/needle, that is, each side must be passed with the same side of the tool;
- Observing the correct geometry of each cutting segment of a wood hacksaw gives significant positive effects - durability of use, wear resistance, low loss of material waste, and an even cut.
We can say that it is not so difficult to process (spread and sharpen the teeth) such a simple tool as a hacksaw at home. By following the general rules, having certain practical skills and the simplest devices, it is quite possible to give the tool a second life with your own hands and avoid additional costs by buying a new joiner's saw.
How to sharpen a hacksaw at home, see the following video.
DISSOLVING A TREE: TO THE START, ATTENTION, MARCH!
Start by assigning a rectangular shape to your workpiece and cutting wood of a similar size. With it, you can check how flat it lies on the saw table and how tightly it fits into the guide, and also adjust the band saw options. Secure the guide according to the desired cutting thickness and slowly feed the workpiece under the saw blade. At the same time, the saw motor should rotate moderately, without jamming. At the end of the cut, advance the workpiece using a pusher. Then inspect the sawn piece.
Move the guide to the angle required to align the cut. The guide adjusting bolt simplifies this problem. You can also use magnetic guides (for example, Carter Magnafence: carterproducts.com) - they significantly simplify such temporary adjustment.
If it turns out to be thicker at the top or bottom, check that the saw table is set exactly at 90° to the saw blade and adjust it as necessary.
If there is a depression or unevenness in the material, the problem may consist of insufficient saw blade tension. On many saws, the integrated tension controls are not very accurate.
Here is a perfect example of a symmetrical grain pattern. Such panels will make any furniture look even more attractive than two ordinary thick panels made from different boards.
A properly tensioned blade or blade should deviate less than 6 mm when pressed in the center (photo above left).
A very high speed of feeding material under the blade, the use of narrow blades with very frequent teeth or dull blades can also cause similar curvatures when cutting. If one end of the sawn part turns out to be thicker than the other, the problem lies in the displacement of the blade, in other words, the blade deviates from parallel relative to the guide.
If the blade is sharp, the guides are installed correctly, the feed speed is selected correctly, but the problem is still not resolved, try adjusting the tilt of the upper drive wheel so that the saw blade passes exactly in the center of both wheels (photo above right).
If this does not bring the expected result, adjust the position of the guide to compensate for the deviation of the blade. Oh, that's how it's done. Saw a block of wood into a rectangle, similar in thickness and density to the wood that you plan to saw, and draw a line on it with a pencil, parallel to the edge.
To prevent the workpieces from moving (to restore the moisture balance), it is best to lay them with slats. In this case, scraps of plywood were used as slats. They need to be positioned symmetrically, and pressed down with a weight on top to prevent the panels from bending during drying.
Without securing the fence in place, saw the block along the marked mowing line, holding it with your hands. Just before you reach the end of the cut, turn off the saw and, without moving the workpiece, run a pencil along the edge of the cut on the saw table. Set the stop exactly parallel to this mowing line (photo on the left) - as a rule, this allows you to perfectly compensate for the mixing.
In general, every time I change the saw blade, I check everything again and, if necessary, adjust the saw settings again.
READ How to Make a Table Saw
Peculiarities
Rip sawing is a cutting process that runs parallel to the natural grain pattern of the wood. In this case, circular discs are used, in which the cutters are located at an angle; their pointed edges effectively cut the fibers, they begin to flake off and form sawdust. In the process of such processing, irregularities, as well as mossy and gouges often appear on the surface of the wooden part - their appearance is explained by the properties of the fibers formed during the life of the tree.
The final surface profile is influenced by the method of expanding the cut, as well as the size of the set and the shape of the teeth. Usually the latter are sharpened like a triangle, so you can work with such a disc only in one direction.
WHY DISMISS THE WOOD?
The simplest answer is to get the most out of your workpiece. For example, instead of planing a 25 mm thick board to 10 mm, cutting it apart will allow you to get two boards of the same size from one board. As an added benefit, each of these boards will have nearly the same grain pattern, allowing them to be used on furniture (photo at right). And if you cut a 2-5 mm board of expensive wood into 3 mm thick veneer sheets, this will allow you to profit even more.
How to easily open a wide board along the width
It is not always possible to predict how symmetrical the sawn panels will be in pattern. Basically, any wood grain pattern has the potential to create a beautiful pattern, but choosing a piece with a particularly interesting pattern often produces the best results. Look what was hidden inside the nondescript board I used to test the adjustment of the bandsaw.
Note. Dissolution is the cutting of wood along the grain, parallel to the face.
The first time I saw a cabinet with a symmetrical design on the doors was in a museum, at an exhibition of furniture from the 17th-18th centuries. When I looked at these almost identical panels with a mirror grain pattern, I was blown away by them. Back in the day, I had an old Craftsman bandsaw in my small basement workshop. Its one-size-fits-all blade made acceptable curved cuts, but was not at all suitable for accurately cutting lumber along the grain, which is what I now planned to do. And, frankly, for accurate and stable operation, that saw needed more than just a new blade. I subsequently learned many lessons about how to handle any band saw. To set it up correctly, first of all, you need to set the table strictly perpendicular to the saw blade, get the maximum benefit from the guides and make sure that the cut is in the correct direction.
Jigsaw
Circular saws and chain saws cannot replace a device that uses a narrow cutting blade that moves up and down at high frequency.
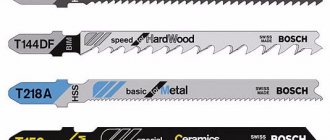
Thanks to this arrangement of the working body, the jigsaw allows you to quickly and accurately cut curved flat parts. Plywood, ceramics and plastic, OSB and soft metal - all of this can be cut with a good jigsaw with a quality file.
For each material, manufacturers make special saws that differ both in the inclination of the teeth and in their frequency.
For example, a saw with a large tooth cuts wood better. A blade with a fine toothed notch can handle sheet metal with confidence. We will not give any special recommendations on choosing saws for a jigsaw, since the manufacturer indicates the recommended type of material on each of them.
The main technical parameters of a jigsaw are engine power, saw speed and maximum cutting depth (indicated for different materials).
For household models, these parameters are within the following limits:
- Power from 400 to 900 W;
- Speed (with the possibility of smooth adjustment from 0 to 3000 rpm);
- Cutting depth (wood - 45-80 mm, steel from 4 to 20 mm).
A useful jigsaw option is a laser pointer. It helps to clearly see the direction of the cut when the marking line is hidden under a layer of sawdust. When choosing an electric jigsaw, pay special attention to the attachment in which the file is attached. It should provide the most reliable clamping possible. Otherwise, the file will regularly jump out of its weak “embrace.”
Design of various attachments for longitudinal sawing of logs
Let's start with something simple, with the design of a gas cutter. Visually, it resembles a bearing assembly, complemented by a pulley and a movable shaft (performs rotational movements). This device is driven by a belt drive. The unit is equipped with a special mechanism designed to fix the disks. The latter must be selected from an assortment designed for cutting metal, wood, and stones. With the help of such discs and attachments, transforming a gasoline saw into a multi-tool is not difficult.
An alternative version of the device for longitudinal cutting is a debarker. This is popular not only because of its ability to increase the efficiency of making boards, but also due to its ability to remove bark from logs. In addition, it can be used to cut grooves in the material being processed. These are just a few examples of the purpose for which a debarker is used. Such nozzles are found in two varieties:
They differ from each other mainly in functionality.
There are other devices for longitudinal cutting of logs. Most of them are developed by large companies, but you can also see homemade devices on the Internet. They differ from those manufactured at factories of famous brands mainly in their design features.
In this regard, homemade nozzles are much simpler. The most common version of these is a manual sawmill. The basis of such a small sawmill is a gasoline chain saw, supplemented not only with guide elements, but also with wheels designed for moving along the log (in order to reduce the resistance indicator). This device has no more than 2 wheels, one on each side of the workpiece.
A manual sawmill is a simple and convenient device. With its help, you can produce a large number of smooth and neat boards without much effort. The only essential condition is the correct installation of the chainsaw. It should be positioned horizontally (unless the operator requires an oblique cut).
Chainsaws
Often when working with wood, it is not the cleanliness and accuracy of the cut that is important, but its depth. This is exactly the problem that a chain saw solves - a powerful device with an electric or gasoline motor, designed for felling forests and cutting firewood.
It has two main interrelated technical parameters:
- Engine power;
- Tire length.
A bar is two flat plates connected to each other with a small gap for installing a saw chain. At one end it has a driven sprocket, and at the other there are cutouts for the tensioning mechanism.
Electric chain saw
The power of electric chain saws ranges from 1.5 to 4 kW. When choosing a device for household work on the site, it is better to choose a power of 1.5 to 2 kW with a saw bar length of 30 to 40 cm. This is quite enough not only for sanitary pruning of the garden, but also for preparing firewood.
If necessary, you can use this tool to dismantle a board, log or beam, although you will not get high quality and precision cutting.
There are two subtypes of electric chain saws:
- With lateral (transverse) engine placement;
- With longitudinal installation of the motor.
Chainsaw
The main thing that a chainsaw gives its owner is autonomy. With such a tool you can go into the forest and cut wood there. For such a significant advantage you will have to pay a price: chainsaws are more complex in design than electric ones. This difference is especially noticeable when purchasing a cheap “no-hire” device. Problems with starting, carburetor, rings and spark plugs are frequent companions of such a purchase. Therefore, it is better to purchase a more expensive chainsaw than to lose money when using an economy option.
How to cut a board with a chainsaw: attachments for cutting logs and methods
Until recently, gasoline chain saws were used exclusively for cross-cutting logs. Other methods of processing the material were simply not available. However, modern operators know how to cut a board with a chainsaw, a common universal tool used not only by professional builders, but also by amateurs, summer residents, and homeowners in the private sector within the city.
In order to get neat boards, just use a special attachment. There are many of these on the market. You've probably heard of at least one of them. The most popular option is a petrol cutter attachment. However, not only with its help you can turn a gasoline chain saw into an angle grinder. Just one addition can radically change the functionality of the device and significantly expand it.
Cutting technology
To cut a log into boards, it is not enough to use one attachment frame. An additional support will be required. You can’t do without it, especially in cases where you need to cut down the upper part of the material, the one that is close to the bark. In other words, a stop is needed to turn a log into a beam. The necessary device is usually made from boards in the amount of 2 pieces.
Each board must be at least 40 mm thick, but not more than 50 mm. They are fastened together by first placing both in a perpendicular plane. Afterwards, the boards are fixed to the log using self-tapping screws. Stops need to be placed on the sides, which requires the same devices made from boards.
Much attention is paid to the fastening procedure. It is extremely important that the top end of the vertical board is in relation to the top edge of the log below. The distance between these two points should correspond to the thickness of the piece of material being cut.
Upon completion of the preparatory stage, the chainsaw is installed directly. Part (only one) of its frame should rest against a board installed across it. It will then be obvious to the operator why the installed plank fixtures are called supports. The base of the frame literally rests on it, on its vertical part.
After that, just start the tool and start making longitudinal cuts, focusing on the gap between the end of the vertical board and the upper edges of the log. An important point is that you don’t need to put a lot of pressure on the gasoline saw with your hands. There is no need to push the device; the cut will be smooth and precise. Upon completion, it is enough to dismantle the device from the boards. After this, the log is turned over (90 degrees), and the supports are reinstalled in the same way as described above.
If we are talking about cutting logs into regular boards, you can do without a wooden stop. But when cutting slabs, it is necessary to install it. Once the material has been converted into timber, the plank fixture can be set aside. By “timber” we mean lumber with a rectangular cross-section (with 4 smooth outer surfaces, which themselves will serve as a support for a gasoline chain saw with an attachment). The technology for working with such a tool (with frame) is simple:
- The frame is pressed against one rectangular section.
- The operating device is advanced along the workpiece, thereby cutting the timber.
In order to change the thickness of the board being cut, it is enough to use a stop element placed perpendicular to the entire structure (it is simply moved across the cut).
Longitudinal sawing of logs
A log is a tree trunk from which all branches, twigs, as well as the thin upper part of the crown are removed. Logs can be used as an independent building material (poles, piles, masts), as well as raw materials for the production of lumber.
Sawing logs can be done in several ways:
- manually, using a saw tool
- using a sawmill
- using woodworking machines or specialized lines.
The cost of lumber largely depends on the thickness of the log and the amount of production waste. The main task of a woodworking enterprise is to obtain a high-quality product with minimal waste. The better the master cuts the log, the higher the yield of high-quality material. Smooth, large-diameter trunks produce the most valuable lumber. Before you start sawing, you need to decide on the thickness of the resulting boards. This will also make it possible to make maximum use of the available volume of logs and reduce costs. When sawing logs into thick beams, a smaller volume of waste is generated, which means that the price of the final product depends on proper cutting.
For a more rational use of available raw materials and proper sawing of logs, the woodworking industry uses special sawing schemes, which make it possible to reduce the percentage of waste and, therefore, reduce the cost of the final product. For this reason, before starting the process of sawing a log with your own hands, it is worth searching for similar diagrams on the Internet and studying them in detail.
The following longitudinal sawing machines can be used for sawing logs:
- a chainsaw and a simple hand saw help to obtain a small amount of lumber
- A sawmill is a device in which you can cut logs and beams, for which there are frame saws in the sawmill. Such devices can be used to cut workpieces with a diameter of 14 to 80 cm and a length of 3 to 7 meters.
- circular saws. In such a device, wood is cut using a circular saw. Machines with one saw are called single-saw machines, and machines with two saws are called multi-saw machines. Single-saw devices are used in small shops and workshops. Multi-saw machines are used in large enterprises for cutting large volumes of workpieces. On such devices, manual feeding of the workpiece is prohibited. Circular saws are dangerous due to the possibility of ejection of the sawn material and cuts by the saw in the direction opposite to the feed. Therefore, on such machines the control is located outside the zone of possible material ejection. In addition, circular saws have riving knives and special mechanisms that are designed to keep material from being thrown out
- Band saws are used for cutting logs, with the band blade mounted on pulleys. They allow for longitudinal and mixed cutting of wood, as well as various wood materials. Such equipment is used in carpentry shops and workshops and is characterized by a large frame overhang, significant cutting height with small dimensions
- Log sawing lines allow you to obtain high quality surfaces of the final product, precise lines, and high productivity. They are used in large enterprises.
To obtain a quality product, it is necessary to use good raw materials. If during sawing you use logs of the required and correct dimensions, then you can create high-quality materials from them.
The best materials are obtained from freshly cut wood. It is very difficult to obtain good lumber from a knotted and bent trunk. Therefore, before sawing, it is imperative to sort the logs according to their quality characteristics, and only after that use equipment for sawing timber.
There are no absolutely round logs; for this reason, it is generally accepted that a log has 4 sides, each of which consists of a quarter of a circle and occupies its full length. Neither of these faces overlaps with the other. There is a concept of a “clean edge”; the higher it is, the more valuable the wood. This edge does not have any flaws, for example, cracks, scars, branches, chips, rot.
At Russian sawmills, sawmill frames are most often used for longitudinal sawing of logs. However, in world practice there is a tendency to use machines based on dual and quad band saws, which are characterized by high productivity.
Yield of boards when sawing round timber
| Diameter, cm | Yield of premium grades, % |
| 12 — 16 | first grade yield 40% |
| 18 — 22 | on average 50% |
| 24 — 26 | about 50% |
| 28 — 40 | log timber, during the production of timber you can get indicators of about 70% |
| 42 — 60 | about 60 - 70% |
How to cut a log with your own hands
It is not necessary to purchase a device for sawing boards with a chainsaw. You can make it yourself. The simplest option is a device made of metal profiles. Such a nozzle will not only be convenient, but also stable, durable, and reliable. Are you planning to make the most functional frame possible? Use mechanical gearboxes.
With them, the device will turn into a kind of machine for longitudinal cutting of logs. Mechanical gearboxes are necessary to simplify the process of moving the chainsaw along the trunk. There is no need to exert force (pressure on the tool manually) to process the material. All you need to do is turn the gear handle. As for adjusting the thickness of the boards, it is convenient to adjust this indicator by using an attachment made of metal profiles, lifting the workpiece itself, and not moving the gasoline saw in relation to it.
READ How to Cut a Profile Pipe Along
At home, you can also make a device that will cut a log not in a horizontal, but in a vertical plane. The only significant nuance is that it is more difficult to work with compared to the previous frame (despite the fact that its design is simpler).
The difficulty lies in the fact that the operator has to put effort into moving the tool along the workpiece. In addition to the chainsaw and attachment, you will have to use an addition made of boards and metal. This kind of support is attached to a log.
Important! Only experienced operators should make this kind of attachment and support, since its operation is partly dangerous due to the fact that the board remains unfixed.
An alternative option is a carriage installation. To create such a frame structure, you will need a pair of wheels and a profile pipe. This device differs from others in its mobility (ease of movement along the workpiece). In addition, the wheels will simultaneously serve as stops for the chainsaw, which means that additional devices will not be needed. The only thing that is needed in addition to these parts and a profile pipe is an aluminum ladder (it will play the role of a guide element).
You need to select a ladder taking into account its width, which should coincide with the distance between the wheels of the frame structure, which will be placed directly at its ends. The best option is to attach it to the log being cut using self-tapping screws, clamps or nails. The created device for cutting boards with a chainsaw with your own hands is placed horizontally.
It should lie as flat as possible. You can make sure that it is placed correctly using a building level. It’s easy to level a ladder with a log, using boards (pieces) of different thicknesses. As for the tool itself with the nozzle, it is installed on the ladder, moving the working saw along the workpiece, applying pressure on it with your hands.
Saw blade design
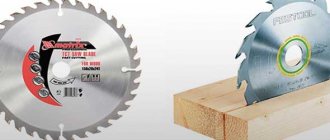
To effectively rip cut, you need to choose the right blades. It has been noted that the larger the teeth, the easier such sawing is (for comparison, when working with cross cuts, large teeth act very roughly and literally tear the wood, which leads to chips). The depressions between such teeth must also be as deep as possible - in this case, chip removal will be of better quality. The optimal number of teeth for slitting varies from 20 to 24 pieces.
If in your work you need to carry out both types of sawing, then it is better to give preference to a tool on wheels with medium-sized teeth with a total number of 46–48 pieces.
Fine-toothed discs should not be used when working with longitudinal cuts; this is fraught with a decrease in work speed, significant overheating of the device and the following unpleasant consequences:
- the saw blade begins to heat up;
- the saw often moves sideways from the cutting line;
- in areas of overheating, the material begins to “swell” and friction increases significantly;
- the saw is deformed and looks more like a propeller than a cutting surface.
In order to reduce the likelihood of rapid overheating, small slots and holes are made in the saw blade, which act as temperature compensators. They are usually placed on the edge along radii.
On some models, they are partially filled with copper compounds, which reduces noise levels and helps to quickly cool the engine. Sawing wheels are usually cast from one metal (they are called monolithic) or with the inclusion of soldering from various hard alloys. Each option has its pros and cons.
- Monolithic ones , as a rule, quickly become dull, so they have to be sharpened and corrected. However, this procedure is quite simple and uncomplicated, so it can be done independently at home. Typically, such discs are used for both longitudinal and cross cutting. The cost of such equipment is quite affordable.
- Carbide wheels are much more expensive, but at the same time, the period of their use until the very first sharpening is longer. Sharpening of this tool can only be carried out using specialized equipment. Despite this, it is these blades that are more in demand among consumers, since their cost pays off much earlier than the need for regrinding arises. Carbide blades work well not only on wood, but also on materials such as metal, laminate or pressed boards.
Special attention should be paid to several parameters of electric saws for longitudinal use.
- Radial or axial runout. For particularly precise work, one of the most important indicators is the deviation of the circle from the main cutting plane. If there is radial or axial runout, it can disrupt the clarity of the cut. The optimal permissible runout is 0.15 mm, and the highest quality models have a parameter within 0.05 mm.
- Keep in mind that longitudinal cuts should not be made with miter saw blades; they have a different path for the blade to move in the wooden part. For example, wheels for pendulum tools are usually positioned at a negative angle - this reduces the load on the motor, and the working edges cut faster and easier. As a result, efficiency increases when compared with a disk circle with teeth located at a positive angle. If such a disk is moved along the path of the pendulum, then the saw will simply cut into the fibers with not the sharpest parts of its teeth. All this leads to increased load on the motor, overheating and reduced operating efficiency. If discs with teeth sharpened at a negative angle are used for a circular slab, the wood will begin to repel, and the sawdust will not come out well - in this case, the cutting will be much slower.
Saw the boards
A circular saw is one of the basic woodworking tools. There are three main operations that are performed on a circular saw: Spread the boards into blanks in width, saw off along the length (trimming) and sawing at an angle. The latter method is used if the circular saw is adjustable not only in height, but also in the installation angle. There is another necessary, although intermediate, operation, sawing the board to thickness. For example, you have a block 70 mm thick. and it must be divided into three boards 18-20 mm thick. Or, what I have to do most often, I cut boards 45-50 mm thick into planks 18-20 mm thick, which I use in making furniture.
What you will need for this:
Firstly, it is very desirable that the circular saw has a variable saw height. Materials such as beech, oak, birch can be difficult to immediately cut to the full height of the saw. Therefore, sometimes you have to do this in two or three passes, gradually increasing the height of the cut.
Secondly, you can only work in this way with a planed board. If the workpiece is fairly even, then it is often enough to go through the face and edge of the board on the jointer once.
The third thing that also needs to be paid attention to is that the board should not be too short. If the saw jams and the board plays, you can be left without fingers. This is not a joke, I know similar cases.
We spread the boards into thin strips.
Here, a planed block 50 mm thick unfolds into three slats 12 mm thick. When calculating, do not forget the width of the cut, that is, the thickness of the saw at the extreme points of the cut. Please also note that after sawing, the finished planks will need to be planed on a jointer, or even better, on a planer. Therefore, you need a margin of at least a couple of millimeters in thickness.
In this case, we get approximately the following calculation: Set the saw to 14 mm. from the guide ruler, only three planks will turn out to be 141414 = 42 mm Plus, there are two cutting widths, here the saw spread is 3.5 mm That is, all dimensions are at the limit, so you need to work carefully.
The width of the board is 120 mm, but these dimensions refer specifically to this workpiece. We will cut on both sides on the edges. To cut a board in two passes, the height of the saw should be slightly more than half the width of the board. In this case, the height of the saw from the circular table is 65 mm
One more thing, the guide ruler must be of sufficient height, for example 70-80 mm, so that the board does not fall over when sawing.
We carefully make the first cut, while your hands should always be higher than the saw. Never push the part under the saw from the end with your hands; use wooden pushers.
Then we turn the board over in a vertical plane and make an oncoming cut. The first strip is 14 mm thick. ready.
Next, we place the rest of the board with the planed side facing the guide ruler and make the next cut. We turn the workpiece over again and saw through the depth from the reverse side.
When working, do not relax for a second, listen to the sound of the saw. If it starts to jam, reduce the feed speed. When cutting at the exit, the board may close. If the saw is not sharp enough, or the gap is small, the material will burn. When it doesn't burn very well, the saw overheats and can be driven, and the smell is extremely unpleasant. Article. how to cut plywood.
That’s why I wrote at the beginning of the article that if the material is difficult to move, then it makes sense to go through the part twice in height on each side. And never forget, a circular saw is a dangerous tool. Therefore, use all the protective and clamping devices that are available.
Characteristics and device
The chain saw is presented in the form of a device consisting of a motor that produces torque, and a removable saw part, consisting of a guide bar and a chain with a cutting edge stretched over it. The unit also includes a drive sprocket, a rear handle with a start button and a front handle equipped with a protective shield. The engine can have a longitudinal or transverse arrangement. The transverse placement ensures that the drive sprocket is on the same axis with the engine and significantly simplifies the design. However, with this arrangement the engine is placed to the side, which causes certain inconveniences when working in confined spaces. Models with a longitudinal arrangement do not have this disadvantage, however, they are somewhat more expensive. The principle of operation of the unit is as follows: the engine transmits torque to the drive sprocket, which, in turn, moves a chain closed in a ring along the guide bar.
The main technical characteristics of chain saws are engine power, operating shaft speed and bar length.
- Based on power, devices are divided into 3 categories: low-power, medium-power and high-power. The first ones have a power below 1.5 kW and are intended for trimming branches and sawing thin wooden or plastic blanks. Mid-class models are equipped with a motor with a power of 1.5 to 2 kW. They represent the largest group of devices. They are used in woodworking production, sawing firewood for stoves and fireplaces, as well as in construction and repair. High-end devices are equipped with a motor with a power of over 2 kW, thanks to which they are used in logging work and are capable of sawing logs with a diameter of 30 cm.
- The length of the tire affects the cutting depth and depends on the engine power. Thus, tires 40 cm long are used in combination with a motor with a power of over 2 kW, blades 35 cm long are used with a motor with a power of 1.8 kW, and tires measuring 30 cm are intended for low-power devices.
- The shaft rotation speed has a direct impact on the productivity of the tool: the higher it is, the more workpieces the device can cut in a certain time. However, when choosing a speed, it is necessary to take into account the engine power. A low-power motor will not make a large number of revolutions, all the advantage will come to naught.
Setting the stop
To accurately guide the board when sawing, we prefer to use a rip fence, which allows us to saw thin sheets of the same thickness over and over again. If your machine was not equipped with such a stop, you can purchase it separately, make it yourself according to the drawings, or simply attach a straight board with a height of at least 75 mm to the saw table with clamps.
By setting the stop parallel to the saw blade and perpendicular to the edge of the saw table, make sure that there is no so-called drift, when the cut deviates to one side or the other from the intended direction. To do this, run a straight line in the middle of the cutting board parallel to the left edge. Pressing the left edge against the longitudinal stop, cut the trim lengthwise , starting to cut along the mowing line.
If the saw blade tends to drift, the fence will need to be adjusted to compensate for the drift, as shown in the pictures below, to achieve clean cuts. Once you adjust the rip fence to compensate for drift, you won't have to do it again until the next saw blade change.
Five Reasons to Dissolve
Release the board. means cutting it along its thickness, cutting along the edge. Mastering this technique opens up many new opportunities for you.
Effective use of boards made from rare or expensive exotic species. You can make more parts for your project from one piece of valuable wood. For example, when making doors from bubingo, birdseye maple, or Karelian birch, instead of making panels entirely from boards, simply saw one board into several thin sheets and glue them onto an inexpensive plywood or MDF backing. The edges of the panels will be hidden in the frame, and nothing will spoil the impression of your work.
READ Making a Hand Circular Saw Table
Less material loss during thicknessing. Let's say your project requires parts that are 6mm thick. Blanks for them cannot be found on sale, and you only have 20 mm boards. Instead of turning more than 2/3 of the material into chips using a planer, simply cut the boards in two and then finish them to 6mm thickness.
Planing knives will last longer. Replacing and sharpening dull or serrated planer knives takes much longer than replacing a worn band saw blade, so it makes sense to reduce wear on expensive knives if possible. Flatten thick workpieces into plates slightly thicker than required, and then calibrate them in one or two passes to the final size on a planer.
Obtaining blanks with a symmetrical pattern. Many panel projects, from cabinet doors to box lids, can be achieved by simply unraveling the board and arranging the two panels to create a symmetrical book-like design (left photo above). In this way, you can cut boards and glue the resulting blanks into panels, which will look great as the side wall of a body or lid.
Curvilinear parts are easier to glue than to bend. Without resorting to steam bending, you can glue them together from several thin strips (usually about 3 mm thick). Such gluing, as a rule, bends less. Cut the board into strips, sharpen or sand them, and then glue them together by pressing them against the template. How this is done is described in the article “Chair with a footrest.”
To dissolve, you need to set up the machine correctly
To make this operation easy and safe, set up your bandsaw for maximum performance. Here's what it takes.
■ Cleanliness comes first. With the saw blade (and table if necessary) removed, carefully remove any sawdust, dust, or adhered resin particles from the belts, pulleys, and guide assemblies. Any contamination of these machine elements reduces operating efficiency.
■ Install a suitable and sharp saw blade. As a rule, a saw blade with sparser teeth cuts faster, as it better clears the sawdust from the cut. At the same time, it heats up less, and the teeth remain sharp longer. For best results, use the widest three or four teeth per inch (tpi) saw blade suitable for your machine. These blades cut faster, but produce a rougher cut surface than six-tooth-per-inch blades.
For slicing, we prefer Wood Slicer blades from Highland Hardware. They have variable tooth pitch and produce a finer cut than most other saw blades. With these belts, the surface is cleaner and you will have to sand the resulting workpieces less. They also have a drawback. They dull faster than most other tapes we use and cost almost twice as much as standard tapes, so we only use them for unraveling.
■ Adjustment of guide units. Lift the top guide assembly, lightly tension the saw blade to keep it from slipping off the pulleys, and rotate the top pulley. The saw blade should run in the middle of the pulley rim or slightly closer to its front edge. If not, adjust the pulleys as described in your machine manual.
■ Correct saw blade tension. Tension the tape by rotating the tensioning mechanism handwheel (right photo below on p. 62). A weak blade will produce an uneven cut, and you will have to straighten the resulting workpieces longer, losing more material. Excessive tension increases the load on the machine bearings and the saw blade itself.
■ Installation of the saw table at right angles to the blade. To ensure that the cutting plane is parallel to the edges of the board being cut, adjust the position of the table, achieving an angle of 90° with maximum accuracy.
■ Adjustment of guide units. It doesn't matter what the guiding elements are. crackers or bearings. are used in your band saw. Install them directly behind the saw blade teeth as shown in the left photo. Then adjust the rear support bearing so that the gap between it and the rear edge of the belt is minimal.
■ Lower the top guide assembly. Set it up as shown in the right photo.
■ Connect the dust extraction hose. The removal of generated sawdust and dust facilitates the operation of the band saw, improving the cooling of the saw band and extending service life, as well as reducing wear on the guide units and tires on the machine pulleys.
The best brands of chainsaw chains
Based on reviews from the owners of these units, a rating of chains for chainsaws has been compiled. Below are the manufacturers that make the best chainsaw chains.
- Stihl is a very famous Swiss brand that produces saw chains made of high-strength chromium-nickel steel. They do not stretch when heated like regular ones. This is achieved through the use of a special hot riveting method in production. In addition, this manufacturer has patented a lubrication method - “grooves”, which are supplied to all drive links.
- The company does not design chains, but manufactures them using the best patented technologies. Thanks to this, high quality products are achieved. The company also provides a wide range of services to customers, providing warranty service for its products. In addition, the company's clients have the opportunity to purchase original spare parts for mechanisms.
- Oregon is a division of Blount Inc. The company is considered one of the best among companies producing saw elements for chainsaws. Oregon also produces various accessories and spare parts for instruments of other well-known brands. The sawing elements of chainsaws are made of a special patented alloy, and a chromium alloy is applied to the teeth. To facilitate the sharpening process, marks are placed on the teeth indicating at what angle this operation must be performed. In addition, the chains have a system that reduces vibration and an original design, thanks to which the lubricant is distributed evenly.
- Carlton is a company from America. All chain elements from this manufacturer have increased hardness because they undergo shot blasting at the manufacturing stage. The cutting links have a long edge, making it possible to perform a large number of sharpenings.
- Windsor. The company has patented a super-strong alloy that is highly heat-resistant and does not stretch. Windsor saw elements use stamped links and sealed rivets to ensure high reliability.
- The chain is made of alloy steel with chrome-plated teeth. The latter are sharpened in a special way, and a hypoid lubricant is applied to the chain, facilitating the sawing process. The company also uses the shot-peening method in the manufacture of chains, which increases the strength of the links.
One of the most important elements of a chainsaw is the chain, which is the working part of the tool and takes on all the loads. It dulls quite quickly and also wears out. The duration of its operation is affected not only by the frequency of operation of the chainsaw, but also by the quality of the product itself
It is the chain that affects the efficiency of the chainsaw, so special attention should be paid to this element when choosing it
You might prefer working with a rod stop
Instead of fiddling with adjusting the rip fence to compensate for drift, some craftsmen prefer to manually guide the boards using a rip fence (top photo). This method saves time by avoiding long setup times, especially when you only need to make one or two cuts. In this case, the surfaces of the boards usually turn out to be rougher, which will require additional work to level them on planing and thicknessing machines.
Some rip fences come with a removable rod attached to the side (bottom photo) or a semicircular trim, but they are not difficult to make yourself. To use the rod stop, install it at a distance from the saw blade equal to the thickness of the future plates and adding another 1.2 mm.
Place a longitudinal line on the workpiece. Pressing the workpiece against the fence, feed it forward, making sure that the cut follows the cutting line, and manually correct the deviations.
Types of groove boards
Symmetrical groove
Many users have no idea how to choose a groove in a board, believing that the store will offer them only one connection and material option.
This is far from true; there you will be greeted by a large assortment:
1. Symmetrical groove. This is the simplest type. In it, the lengths of the upper and lower shelves are the same, and they protrude at the same distance.
Asymmetric connection
2. Asymmetrical groove. Here the upper shelves are longer than the lower ones.
3. Block house, used mainly for finishing walls and ceilings. The planks often imitate the relief of timber and have a semicircular or shaped profile on the front side.
4. Euro lining, just like block house, is often equipped with a relief pattern.
5. The decking board, made of wood and polymer, also has tongues and grooves for easy installation.
Note! If you plan to mount walls that are not level, have protrusions and dents without a groove board, do not expect good quality from the result. The cladding will not lie flat, height differences and cracks are inevitable.
Now everything is ready for dissolution
Using a planer and thicknesser, make the sides of the boards parallel and one edge straight and perpendicular. Estimate how many lamella plates you can get from one board, taking into account the width of the cut (1.5-2 mm) and the allowance for removing saw marks (1.5-3 mm). For example, from a 19 mm thick board you can only make two 6 mm plates.
Once you start sawing, press the board firmly against the fence and machine table, trying to maintain a uniform feed rate. Slow down the feed if the board gets stuck or the saw blade starts to move out of the way. If you are going to cut a board into three or more slices, plan the remainder of the board after each pass.
Then each sawn plate will have a flat base surface, necessary for final thickness calibration in a thickness planer. Finally, remove all sawing marks using a thicknesser or drum sander and give all the plates the same thickness.
Cut-off jig for circular saw
A simple template tool helps you accurately cut the boards according to the markings. The movable jaw is securely fixed with a screw so that the device does not move when sawing.
The fixture shown in the picture is made for my circular saw, which has a blade located on the left; The 38 mm dimension to the right of the guide bar indicates the distance from the edge of the power tool sole to the saw blade.
For circular saws with the blade on the right, this distance will be greater. In any case, when making the device, you should leave a small allowance, which is removed during the first pass, after which the sawn edge will begin to act as an anti-splinter pad.
To make a precise right angle cut, simply line up the right edge of the jig with the marking line and run the circular saw along the fence guide.
Sources:
https://101benzopila.ru/kak-raspilit-dosku-benzopiloj-nasadki-dlya-raspila-brevna-i-metody/ https://mastervdome.ru/instrumentyi-i-prisposobleniya/raspilit-doski/ https:// blackseaplus.com/sdelay-sam/111-uchimsya-s-pomoschyu-lentochnoy-pily-raspilivat-doski-na-tonkie-plastiny-i-shpon.html
Circular saws
The idea of replacing the back-and-forth motion of the cutting blade with a circular one can rightfully be called revolutionary. It arose after the advent of the electric motor and significantly increased the speed and productivity of work.
A typical tool that uses this principle is a circular saw. Its main advantages - mobility and high power - have overshadowed the modest capabilities of a hand hacksaw.
By design, circular electric saws are divided into geared and gearless. In the first case, the electric motor rotates a gear reducer, on the shaft of which there is a saw blade. The second option is to mount the disk directly on the rotor shaft of the electric motor. Both designs have a mechanism for adjusting the cutting depth and tilt angle.
The advantage of gear mechanisms is the ability to make deeper cuts. Gearless saws have two advantages: lighter weight and affordable price.
The second category of differences consists in the features of the saw blade. It can be active or passive. Everything here is determined by the shape of the tooth. The active disk has teeth bent in the direction of rotation.
In the passive one, they are tilted against the stroke (negative sharpening angle).
Passive discs are indispensable when sawing metal. Active ones are used for wood processing. The teeth of the disc can be tipped with carbide. They make it possible to cut harder materials, but have a negative effect on the cleanliness of the cut.
The operating capabilities of the tool depend on the power of the electric motor (from 0.65 to 2.5 kW). Manufacturers also indicate the maximum depth of cut that can be made using a circular saw (from 25 to 85 mm).
A variation of this power tool is a circular saw, which is mounted on a stationary frame. This solution allows you to cut long and wide materials with high precision.
Some manufacturers offer an interesting compromise - hand-held circular saws that can be turned over and mounted on a table, turning them into a stationary “circular saw”.
