Absolutely any concrete floor is suitable for laminate, because... The main requirement for proper installation of laminated products is a smooth and clean surface of the subfloor.
Compliance with this mandatory requirement will ensure high-quality installation of the flooring and its long-term use until the end of its warranty or even a longer period.
It’s not so difficult to make the floor clean; vacuum or sweep, wash, dry and you’re done.
It is much more difficult to level the floor under the laminate, especially if the floor is concrete.
Uneven concrete floor
Most modern buildings initially have a subfloor made of expanded clay concrete or other reinforced concrete structures with similar characteristics.
Such structures are essentially an interfloor ceiling, simultaneously performing two more joint functions: a ceiling for the lower floor and a floor for the upper floor.
The main tasks of such a floor are to separate floors from each other and to withstand the load from the weight of people, animals and things on it.
To perform these tasks, it is not at all necessary to produce a completely even interfloor floor suitable for laying laminate flooring.
In addition, the production of very even concrete slabs requires much more financial, energy and other costs.
In this regard, slabs intended for building houses are most often produced with some errors, expressed in protrusions, depressions, various inclusions, etc.
Also, during the repair work, various growths, blots, etc. may form on the surface of the subfloor, all of which interfere with the installation of the laminate.
In addition to the unevenness described above, the floor plane may have slopes.
Therefore, the floor under the laminate must be additionally leveled.
What do you need to know when choosing laminate?
Firstly, you need to arm yourself with knowledge about the types and classes of coatings that are standardized today at the global level.
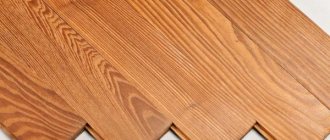
Types and classes
Class 21 includes samples of the least durable coating that can be installed in residential premises with minimal load on the floor. Class 22 laminate is a little more resistant to stress. It can be installed, for example, in a bedroom where walking activity is average. Class 23 includes products with high strength. This material can be used for the living room, hallway, and children's room.
Thirty classes of laminate are intended for commercial premises, although laying similar samples in an apartment or house is also not prohibited. The least resistant to loads is class 31, which is suitable for flooring in quiet, peaceful office spaces. Class 32 laminate is the most popular; it is used both in public institutions (schools, hospitals, etc.) and in residential buildings. In the latter case, such material shows itself flawlessly, however, with proper installation of the laminate with a chamfer. Class 33 coating is very wear-resistant, it can be used even in rooms with very intense traffic, for example, in dance halls.
There are also specialized types of laminate that are equipped with additional properties and are designed for specific purposes. Such coatings are not used at home.
Other selection criteria
So, the class and type of coverage is the first thing you should pay attention to. Next, we look at the accompanying documents and certificates
Here you can find product markings that will indicate the characteristics of the coating. It is especially worthwhile to study the instructions for those who need a moisture-resistant laminate, for example, for a kitchen or balcony. In this case, among the different icons you need to find an image with a drop of water. If there is none, then this product is not suitable for rooms with high humidity. Regular laminate is afraid of excess moisture, but moisture-resistant laminate has increased protection. It is covered with wax or other compounds. But there is another type - quartz-vinyl interlocking laminate. There are a number of positive characteristics that distinguish this laminate from other floor coverings.
The next factor of choice is the manufacturer. If you want high-quality but expensive coating, prefer products from Germany, Austria or Norway. Domestic brands are a little cheaper. Among them you can also find very good products. But it’s better not to buy Chinese-made laminate: the material, of course, is cheaper than others, but you can’t count on a long service life. In addition, the environmental safety of Chinese samples is very questionable.
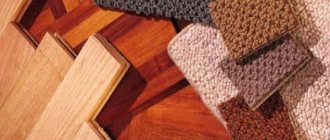
The last selection criterion is color and texture. There are no restrictions here: the range of coatings is very large. Unless it’s worth choosing a coating taking into account the overall style of the room. Also, do not forget about the thickness of the laminate.
Leveling a concrete floor
You can level a concrete floor in different ways, depending on the nature of the unevenness.
For example, large irregularities and sagging are knocked off with a chisel and hammer.
Small frozen grains and pebbles can be cut off with a regular spatula, sliding it over the surface.
Cracks and depressions in the concrete floor are covered with cement or similar mortars to prevent moisture from penetrating into them, which can destroy any concrete.
The final preparation for installing laminate flooring is leveling the base with a concrete screed.
Which laminate flooring can I choose?
Not every type of finish is suitable as a finishing decorative coating. When purchasing a material, you must select it according to the marking, which is indicated by a symbol showing the outline of the pipes. It should also indicate the maximum permissible temperature limit - this is +28 0C. There is a mark on the packaging indicating which heating system (water or electric) the laminate is suitable for.
When choosing it you need to consider:
- Environmental friendliness of building materials. It should not contain any harmful substances or impurities.
- Thermal resistance of the floor covering. The higher it is, the more the cladding will retain heat without transferring it into the room (this finish is not suitable for a heated floor system).
- Laminate class. The higher it is, the better the quality.
- Lock connection type. Only the locking connection method is suitable for installing heated floors. Laminate cannot be attached to the base with nails or self-tapping screws - fixed slabs simply deform when heated.
Attention: Not every laminate is compatible with this heating system. Products must be marked accordingly
Without screed
With a dry screed, heat consumption is considered ineffective. The only advantage of this type of installation is quick installation.
The installation process itself without screed looks like this:
- Waterproofing work is being carried out.
- The base is covered with sand or expanded clay.
- Beacons are displayed.
- Heat distribution plates are laid under the pipes.
- A damper tape is laid around the perimeter of the room.
- The base is covered with sheet materials (plywood or OSB) with overlapping seams.
- The sheets are fixed with self-tapping screws.
- Next, the surface is heated, the substrate is laid, and then the installation of the cladding can begin.
Concrete screed
Floor screed is needed, first of all, in order to hide communications passing through it, if any.
This includes underfloor heating, electrical wiring, heating, water supply pipes, and in some cases sewerage.
The second purpose of a concrete screed is to level the base of the floor for finishing with a finishing material, in our case laminate.
Also, a concrete screed is used to generally bring the floor plane in all rooms of the room to the same level, taking into account the thickness of the laminated floor covering.
The concrete screed almost perfectly levels the surface of the concrete floor, which meets the requirements in the instructions for laying laminate flooring.
To ensure that all work on leveling the concrete floor is completed correctly, everything should be done according to the instructions.
Step-by-step instructions for pouring a concrete screed:
The air temperature in the room where it is planned to make the concrete screed should be at least plus 5 (five) degrees.
1) Calculate the amount of dry mixture; 2) If there are holes, cracks, etc. leading to the lower floor, we seal them so as not to flood the neighbors. 3) Clean the floor from dust, dirt, etc.; 4) Prime the surface; 5) Install guide beacons/planks (we will use them to level the floor); 6) Mix the solution; 7) Fill the floor evenly with concrete and smooth it using the rule.
And now we will describe each step in such detail that anyone can carry out this work independently.
NOTE
Pouring a concrete screed with long breaks increases the difference in consistency between the initial and subsequent mortars, which complicates their smooth connection with each other and increases the time of the entire work.
Therefore, if it is possible to fill the screed with a continuous process, then it is better to do so.
Prefabricated decking
There are situations when it is advisable to carry out all interior work dry. For example, if you built a house from cellular concrete or wood and want to quickly do the interior and exterior decoration.
These materials are hygroscopic, and the use of wet technologies indoors creates additional, unnecessary problems. One of them is the inability to immediately begin exterior finishing.
Screeding under laminate flooring on a wooden floor is always done using a dry method. Or almost always.
When using a laminate to refresh an old plank flooring, or when the floors of the second or attic floor are being assembled over a beamed floor, you can, if desired, make a wet screed.
However, cement compositions are not suitable for this; only polymer ones can be used. But they are expensive, and no one is interested in paying more.
We have already mentioned that a prefabricated floor can be made in two versions: on a frame and on a dry backfill. Both technologies can be used on both a concrete base and a wooden one, but in the second case, preference is often given to the frame.
Calculating the amount of dry mixture
To calculate the amount of dry mixture, you need to know the thickness of the screed that we plan to make.
The main guideline for calculating the thickness of a concrete screed is the maximum difference in floor height in the plane.
In other words, you need to calculate the difference between the minimum and maximum floor heights.
To do this, using a level, draw a continuous horizontal line on the wall along the entire perimeter of the room at the same height, for example: 250mm, from the highest point of the floor base.
If you have a laser level, then use it.
Next, we measure the distance from this line to the lowest point of the base of the floor, for example, we got 350mm.
Thus, the difference in height of the base from the highest point to the lowest is 350-250 = 100 mm.
Those. In order for us to level the floor into one plane, we need to pour a 100mm thick screed at the lowest point.
In this case, at the highest point of the subfloor, the thickness of the screed will be equal to 0 (zero), i.e. there is no need to thicken the base.
To calculate the final thickness of the screed, take our 100mm and divide it in half, getting 50mm.
Those. In order to level the entire surface in one plane, the average thickness of the concrete screed, in our case, should be 50mm.
Next, we look at the consumption parameters on the packaging of the cement-sand mixture.
Let's assume that the packaging indicates the following consumption:
For 1 sq.m. with a screed thickness of 10mm, 22 kg of dry mixture is required.
Let's say our room is 20 sq.m., then we multiply 22 kg by 20 sq.m., and it turns out that to level the floor plane in the room we need 440 kg of dry mixture.
Divide 440 kg by 25 kg (the weight of each package) and we get 17.6 pieces, i.e. 18 packs of dry mix.
NOTE
If you are pouring a concrete screed for the first time in your life, then it makes sense to buy a dry mixture for floor screed with a reserve, just in case.
After we have calculated the required amount of dry mixture and purchased it, we begin to clean the surface of the base.
General description of the problem
According to SNIP requirements, laminate must be laid only on a prepared surface. The evenness of the base is assessed in terms of the permissible height difference, which is 2 mm per linear meter of laying in any direction. The standard was developed a long time ago; it laid down the requirements for old classes of laminate, sensitive to the bending of the joint zone, laid using adhesive joints.
Modern material is more affordable, and if the floor is only slightly uneven, you can lay laminate flooring without special preparation measures for the base. The height difference per meter of surface is allowed within 3-5 mm.
To evaluate how irrational it is to lay laminate flooring on an uneven floor, we will indicate what happens to the material.
- Due to sagging and the presence of air gaps under the flooring, steps will sound loud, while the surface of the laminate is constantly subject to deformation.
- There is a gradual destruction of the castle zone.
- The deck boards are coming apart.
- If the floor is uneven and the laminate gradually loses its seal at the joints, water begins to get there.
- In addition to the formation of mold and possibly unpleasant odors, moisture affects the base of the laminate board, causing swelling.
Laying laminate flooring on an uneven floor can even cause individual flooring lamella boards to split. Any of the listed troubles causes discomfort, and the cost of a complete replacement of the coating is not even worth talking about - it not only hits the budget hard, but also takes time, forces you to change your usual life schedule and deal with repairs again.
Uneven floor problem
Cleaning the floor
To prepare the floor for pouring a concrete screed, it must be carefully cleaned of all foreign irregularities, dust and dirt, etc.
To do this, use a spatula, vacuum cleaner or broom.
It is advisable to clean the floor from oil stains, paint and other foreign substances; this can be done using a special sanding machine or regular sandpaper.
If this is not done, then the adhesion of the screed to the base in contaminated areas will be very weak or will not exist at all, i.e. this is fraught with detachment and corresponding consequences.
After the initial preparation of the base, the next step is to prime the subfloor.
Joining tiles and laminate, what's the problem?
For the most part, finishing flooring work in small areas of an apartment or house is not difficult. If the subfloor is well leveled, then finishing will not be burdensome.
If you cannot do such work with your own hands, it is important to find a professional craftsman, preferably two, who will first lay the tiles and then the laminate, professionally joining them. Finding professional craftsmen for a small amount of work is now easy
For example, the “Home Trowel” service deals with minor repairs and household repairs of residential premises. With one call, the service will very quickly send professionals for any one-time or scheduled work, for example, laying laminate flooring. This is very convenient for those who renovate their apartment piece by piece.
Finding professional craftsmen for a small amount of work is now easy. For example, the “Home Trowel” service deals with minor repairs and household repairs of residential premises. With one call, the service will very quickly send professionals for any one-time or scheduled work, for example, laying laminate flooring. This is very convenient for those who renovate their apartment piece by piece.
Let's return to the joining of laminate and tiles. Of course, the craftsmen know how to properly join tiles and laminate. However, to present the result and plan the docking, you, as the customer, also need to know this.
Priming a concrete floor
Priming is a mandatory process that should not be neglected.
It is advisable to use a primer with deep penetration, because... it has more beneficial effect.
The primer should be applied with a brush, roller or brush, evenly distributing it over the entire floor area.
After treating the surface with a primer, we place beacons along which we will level the surface of the screed.
Problems joining tiles and laminate
I will highlight four problems with joining the two materials of tile and laminate on the floor.
Firstly, laminate and floor tiles often have different thicknesses. Even if the thickness of the tiles and the laminate are the same, for example 8 mm, the thickness of the tile adhesive and the backing for the laminate are different.
Therefore, if you want to join tiles and laminate, lay the tiles first, and then the laminate. Unlike tile adhesive, the thickness of the backing under the laminate can be adjusted and the levels of the tile and laminate can be leveled.
I would like to note that if it is not possible in principle to bring the level of laying tiles and laminate level, for example, laminate is 6 mm and tiles are 10 mm, then the joining of tiles and laminate is made with a threshold, including a multi-level one.
Secondly, the visible junction of tiles and laminate will require professional cutting of these materials with minimal chips, or better yet, no chips.
It is almost impossible to do this with hand tools such as an electric jigsaw for laminate and a household tile cutter for tiles.
There are two solutions to the problem of uneven edges:
- Cut laminate on a miter saw, and cut tiles on powerful stone cutting machines;
- Or, after a simple cut, process the edge of the tile with a grinder with turtle attachments. It is also suitable for laminate.
If the tiles and laminate are thin, then you can try cutting the tiles with a manual roller tile cutter, and the laminate with a sharp carpenter's knife.
The goal of all complex approaches to cutting tiles and laminate is to obtain the most even edges of the materials at the junction without visible chips.
Thirdly, laminate and tile are different materials and will expand differently under the influence of temperature fluctuations. In addition, laminate is laid using a floating method, and tiles are laid using glue, rigidly.
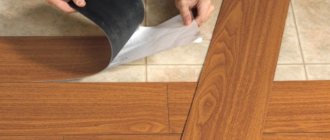
Therefore, it is impossible to join laminate and tiles without a gap. For these purposes, special cork floor expansion joints are produced (they are shown in the photo). As you can see, the texture and color are different.
Fourthly. Unlike tiles, laminate cuts absorb moisture well and cannot be left unprotected. This simplest problem of all is easily solved by coating the cut with sealant.
We install beacons
As beacons, you can use a special profile designed for plaster, drywall, etc., with a thickness of 0.4 mm, their price is about 40 rubles. a piece.
Installation of guide beacons is carried out along the length of the room over its entire area.
The profile is cut with ordinary metal scissors.
We install the first plank from the wall at a distance of 150-200mm.
We install the second, third and subsequent guides with each other at a distance of 1000-1100mm.
It is possible to install the guides at a greater distance from each other, but in this case the work will be more difficult.
The guide beacons can be secured in several ways:
- for a thick solution; - on wooden blocks; — on dowels plus dried cement mortar (dowels can be adjusted in height).
Having installed the guide beacons, we check with a level that they are horizontal in all directions.
After checking the horizontal position of the installed beacons, we fix them in place.
When attaching the guides to the solution, you should wait until it dries so that the beacons remain motionless.
The next step is to prepare the cement mortar for pouring the floor.
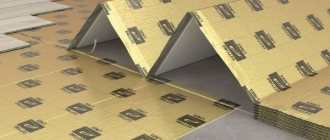
Soundproofing materials
To enhance wear resistance and maintain the impressive appearance of a laminate floor for a long time, you need to carefully select building materials for its installation, paying attention to every single detail. For example, you should choose the right thickness of soundproofing material
It should be from 0.2 – 0.7 cm. A material of this thickness insulates the room well from noise and cold, and evens out screed defects. When using it, there is no need to use expensive self-leveling mixtures or attach boards or plywood. Thicker material will cause the panels to bend and then cause the locks to break.
Mix the solution
First of all, you need to prepare a container in which the kneading will be done; for this purpose, you can use a regular bucket or basin.
In some cases, kneading is done directly on the floor; for this you need to have certain knowledge and skills.
You can mix the solution with any available device, for example: a shovel, trowel, a regular stick, etc.
But it is much easier, simpler and more convenient to work with a power tool, such as a concrete mixer or mixer.
If you do not have a special tool for kneading, you can use a regular drill by inserting the appropriate attachment into it.
The drill successfully copes with the loads that arise when mixing concrete.
The solution should be mixed strictly according to the instructions indicated on the packaging of the dry mixture, observing all proportions.
At the very beginning of mixing, low mixer speeds are needed so that everything does not fly apart in different directions; to do this, press the trigger lightly, then gradually the speed can be increased to full power.
We knead until all components are completely mixed to form a single creamy solution.
In some cases, a semi-dry screed is used, then the solution must be made thicker, reminiscent of cottage cheese.
NOTE
When pouring a thick layer of concrete screed, fiber or reinforcement is used to prevent it from cracking during the drying process and to increase strength.
Once the solution is ready, we begin pouring the screed.
Finishing
If control measurements have been made and a test run has been carried out, then you can begin laying ceramic tiles. Finishing stages:
- We are preparing special glue for heated floors.
- Place it carefully on the mat, in a layer of 10-12 mm, avoiding damage to the cable.
- Spread evenly with a notched spatula.
- We glue the ceramic tiles without leaving air voids in the places where the cable passes.
Reference! The adhesive mixture is evenly distributed over the tiles. Thickness and uniform plane are controlled by the building level
It is recommended to put the warmest floor into operation after 3-4 weeks and gradually increase the heating power. The adhesive composition must dry completely, and the tiles will not move on the facing floor.
Filling the screed
Filling the floor should begin from any corner of the room that is as far away from the entrance as possible.
Having poured the prepared mixture onto the floor, we carefully fill all the depressions and cracks with the solution to prevent the appearance of unevenness and voids.
Next, take a rule or half-rule and smooth the surface of the screed at the level of the guide strips.
The plane of the half-ter or rule should move along the guide profile as if on rails, while the leveling tool should be moved with uniform movement in three directions.
The movement of the rule should be carried out across the slats, according to the back and forth principle, i.e. to the right/left by 10-15 mm and pull towards yourself also carefully and smoothly by 5-7 mm.
Those. We carefully move the rule to the right/left, now in one direction, then in the other, at the same time shifting towards ourselves so that the excess solution moves from above to the space of the floor that is not yet filled with it, to our feet.
NOTE
Different batches of the solution may differ in consistency, which is why a wavy, convex joint sometimes forms at the places where they are connected.
To prevent this from happening, the places where different batches of the mixture come together should be smoothed out more thoroughly.
To make the floor surface as smooth as possible, we stretch the rule over one place several times to smooth out all the smallest irregularities.
If necessary, add solution to the resulting voids, and once again level everything with the rule.
When the concrete has set and you can already walk on the floor, but the screed is still somewhat damp, using a wide spatula you can easily cut off and clean up the lumps, pebbles, etc. that have formed on the surface of the floor, if you wait until the concrete has completely dried, then do this it will be very difficult.
Types of screeds
Many home-grown craftsmen believe that a laminate board can be laid on any base, and a polyethylene foam backing will level out all the unevenness. This is a big mistake, ultimately leading to a reduction in the service life of the coating.
At best, it “plays” under your feet, making unpleasant sounds when walking, and at worst, the locking joints or the boards themselves break.
Therefore, it is not recommended to lay laminate flooring on a rough screed or on an old floor, especially wood, without preparation. Surfaces must be leveled.
Floating base
To install sound insulation on a screed under a laminate floor, two technologies are used:
- “Floating screed”: soundproofing materials are placed between the screed and the subfloor. When using this technology, concrete floors and walls are isolated from the finished floor. Mineral wool, expanded clay or polystyrene are well suited as sound insulators, because they have an elastic structure, withstand heavy loads and absorb noise well.
- A “floating floor” is a soundproofing layer placed between the screed and the laminate. This is one way to level the floor. The technology for installing sound insulation is simple, but not all materials can effectively insulate an apartment from external noise.
Floating floor device
To improve sound insulation, it is not allowed to lay the material in 2 or more layers: constant dynamic loads to which the laminate is exposed during walking destroy the panel locks.
Step-by-step installation of a heated floor without screed with mesh mats
The use of heated floors without screed significantly reduces the time for installation and cable design. Although users have difficulties with laying pipes and gating walls when installing an independent electrical wiring line. So, the operations performed:
We check the package, which must include a thermostat with a temperature sensor. We make a nest on the wall after marking for the stamp and socket box. We mark the markings for the groove on the floor with a length of 600 ÷ 800 mm from the corner and a cross-section of 20 × 20 mm. Why use a grinder to cut cracks? If the walls are concrete, then we use a hammer drill. We drill horizontal and vertical grooves so that they meet at one point. We clean the resulting groove from debris and prime it. We lay a corrugated tube with a temperature sensor. We place the tube in a horizontal pipe, fix it, and install plugs. We lay a vertical groove with a turning radius of up to 15 mm to avoid creases. So, so that the groove reaches the place where the thermostat is installed. We seal the horizontal groove with tile adhesive down to the floor level. We lay out the mats according to the previously drawn up diagram so that they do not intersect anywhere and there is a distance of 50 mm between adjacent parallel strips. We lay the first strip so that the width and length of the temperature sensor is in the center of the cable loop. If necessary, we modify the laying direction without touching the cable itself. Carefully cut the fiberglass mesh. We give the mat the desired direction. We continue laying further. If the base of the mesh is self-adhesive, then it is enough to smooth it out and press it to the primed floor for temporary fixation
When installing a regular mat, it is important to point-fix the mesh and cable with a gun filled with silicone hot melt adhesive. If the cable is tightly secured with an elastic band, then additional clamps can be connected to each end and beginning. They must be supplied complete with the grid. We fix the mat itself to the elastic strips on the hooks and stretch it in the given direction. We carry out control measurements of the installed warm heating system
Does a test run. Turn it off again and move on to laying ceramic tiles.
Features of laying technology
The flooring installation technology depends on the selected floor pattern and the type of laminate. There are several most common options:
- Longitudinal along the longest wall;
- Transverse;
- Herringbone;
- Squares.
The best option for a simple design, as well as for beginner installers, is the longitudinal option from the wall perpendicular to the window. On the one hand, it’s easier to take measurements and lay down the material more economically, on the other hand, lighting is beneficial, it practically does not show up the seams.
Before starting installation, you need to take measurements and prepare the tiles. Often during this work, some laminate slabs have to be sawed. It is recommended to do this in advance.
Laying the floor always begins from the farthest corner, moving gradually towards the door. In this case, each subsequent row must be laid out with an offset of half the board - this makes it possible to create a more durable coating that is practically not subject to deformation. The technique for working with different types of laminate may differ:
- If the tiles do not have a special lock, they are sequentially glued to the floor and to each other. Then the seams of this coating are sealed with a special sealant.
- If the floor structure has special locks, the coating is assembled into a groove, and it is additionally knocked down with a hammer through a softener. Upon completion of work on the floor, the seams are also treated with sealant and rubbed down. There is no need to glue such a floor.
At the end of the work, the gaps between the laminate and the walls are closed with plinths. They nail him to the walls.
The floor is ready for use.
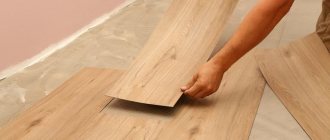
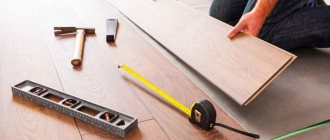
Laying laminate
Once everything is prepared, the base is level and stable, does not creak or wobble, you can begin finishing. This is done simply, especially if the method of adhesion between the parts of the laminate is tongue-and-groove, that is, with a lock without glue. This is a simple and quick installation method that allows you to do it without outside help.
Lay down the underlayment. It is available in rolls or light foam boards. They have the same properties, the difference is in the practical side. Once everything is ready, start assembling. It's worth starting from a corner, but the technique depends on the type chosen. Laminate boards can be mounted parallel, staggered, slightly offset, diagonally, or even herringbone. Panel parquet – only in blocks. During the assembly process, trim the edges with a mounting knife, adjusting them to the wall.
Assembling the drawing step by step, reach the end and trim
It is important to take into account the direction and think through the transitions between rooms so that they are in the same direction
If you are only making an entrance hall or hall, and leaving the corridor in ceramics, then install a threshold that hides the joint.
Some types of laminate require a moisture-repellent impregnation, which is applied upon completion of all work.
Finally, install skirting boards around the perimeter.
Features of seamless laminate
Seamless laminate differs from traditional laminate by a specialized locking system. It is this that makes the joints almost invisible. However, it must be taken into account that it is for this reason that seamless laminate is more demanding in terms of the evenness of the base and the quality of installation.
The structure of the laminate without seams is identical to the classic options:
Laminate composition. Laminate panels are a multilayer material.
- A protective film that protects the material from wear, exposure to ultraviolet radiation and water.
- Press processed paper, textured and tinted.
- A dense layer of wood fiber to stiffen the panel.
- Another layer of paper impregnated with special water-repellent compounds.
All this together represents an environmentally neutral, durable, decorative and lightweight material.