A necessary condition for comfort in a private home is the creation of reliable ventilation. With proper design, the main problem will only be the installation and fastening of ventilation pipes on the roof. Its methods depend on the characteristics of the air duct itself and on the external covering of the roof.
General view of ventilation pipes on the roof of a house
Functional purpose and technological features
The task of any ventilation system is to maintain a fresh atmosphere in the house, remove foreign odors and substances that do not meet sanitary standards. Forced ventilation is rarely used in residential buildings. And for the natural movement of air to work correctly, it is necessary to create good draft in the exhaust air line. It is ensured by the optimal location of the outlet pipe above the roof and the correct calculation of its height.
Complete ventilation of the house should perform the following tasks:
- ventilation of all rooms in the building;
- air removal from household appliances (gas stoves and boilers);
- sewer line ventilation.
It is optimal for each task to create a separate ventilation circuit with its own exit to the roof.
Functions of home ventilation
The importance of ventilation and indoor air circulation
A house or apartment is a sealed closed space. In the process of life, a person inhales oxygen and exhales carbon dioxide. Cooking and other processes also fill rooms with odors and waste air. Since the room is sealed, access to fresh air can be ensured by opening windows and doors. But this is the most primitive option, which has a lot of disadvantages. While the ventilation system allows you to regularly fill the house with fresh air.
There are the following types of ventilation:
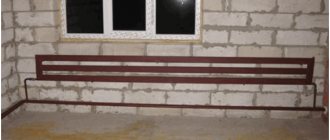
- living space ventilation;
- ventilation of the under-roof space;
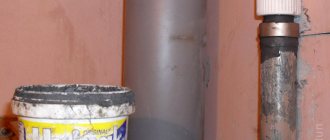
- ventilation via a drain pipe from the sewer.
No ventilation system will work if there is no draft. Through traction, air masses move. The draft can be created mechanically, through fans, or naturally. In order for everything to work naturally, the ventilation pipe is led out through the roof. Below is a diagram of how the ventilation system works in a house.
If the rules for installing ventilation ducts and shafts are violated, the following consequences are expected:
- The craving will be weak or absent altogether.
- From the bathroom, an unpleasant odor will penetrate into other living rooms.
- Walls and ceilings will become wet due to increased humidity in the rooms.
- As a result, the formation of fungus and mold, which affects health.
- Insufficient oxygen and stuffiness.
- Ventilation structures will begin to freeze.
- The kitchen will be filled with smoke and soot during the cooking process.
Advice!
Correcting problems with the ventilation system is much more difficult than spending time on accurate calculations and creating ventilation during the construction of a building. That is why the roof ventilation pipe must be selected correctly and installed in compliance with all the nuances.
Types of ventilation pipes and requirements for them
*
Air ducts located inside and outside the house are exposed to completely different influences during operation. The main requirements are for the final ventilation sections facing the roof of the building. They must meet the following conditions:
- flow area of at least 150 mm in diameter;
- smooth internal surfaces that do not impede air movement;
- structural rigidity to withstand wind loads and the weight of snow in winter;
- at the same time as being strong, have low weight to ensure ease of installation and not load the roof structure;
- corrosion resistance both externally and internally;
- fire safety.
Most of these requirements are met by ventilation pipes made from various plastics or galvanized iron. But each material has its own characteristics, pros and cons.
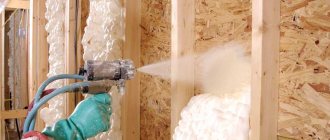
Plastic air ducts
Their main advantages:
- complete absence of a corrosive component,
- ease of processing during installation - cutting plastic of any cross-section with a regular hacksaw is allowed;
- the absence of welding seams ensures the smoothness of the entire internal surface,
- low cost.
A significant disadvantage of plastic pipelines is their low resistance to fire, which affects the fire safety of the entire structure.
Elements of plastic ventilation pipes
Galvanized air ducts
Their popularity is not inferior to polymer options due to the following advantages:
- small wall thickness (0.5 – 1.2 mm);
- mechanical strength ensures the reliability of external elements;
- high strength/weight ratio;
- variety of shapes and sections;
- availability of additional shaped elements of any configuration.
Galvanized ventilation pipe on the roof
Section shape
*
According to this parameter, ventilation pipes are:
- round;
- rectangular;
- non-standard section.
Rectangular shapes are considered more convenient when forming a passage through the roof. The original shape can provide additional strength. But for the unhindered passage of air, the best option is a circular duct.
Ventilation pipes with increased rigidity are made of galvanized steel using spiral-wound technology. With the same dimensions, they can withstand much greater loads. But their shape can only be round.
Installation diagrams and methods of fastening UP
UP installation options depend on the geometric parameters and type of building materials of the roof structure. This is explained by the fact that the air ducts are a rather massive structure operating in an area of high wind potential and snow load, so the roof must be able to withstand them. And in addition, the location of the pipe must have the best aerodynamic characteristics so that nothing interferes with the free exit of contaminated air flows. In this regard, the angle of the roof slope, the thickness of the ceiling and the characteristics of the under-roof space have the greatest influence on the choice of UP scheme. A flat roof also has an angle of inclination, albeit a small one. This must be taken into account, since it can influence the choice of configuration for the location and fixation of the air duct.
Pitched rigid roof
When installing a passage through a pitched roof, the material does not play a special role: corrugated sheets, ordinary tiles or ondulin. For this roof configuration, the preferred option is a warm UP made of a square sleeve and a low flange for the drain. Around such a sleeve, 4 aprons are installed: top, bottom and 2 side ones.
The top one is placed under the roofing material, the rest on top. Installation begins from the bottom, then the sides and, finally, the top. Often, a special tie is additionally installed - a long roofing gutter - to remove moisture from the area where the unit is located.
Aprons can be factory-made or home-made. In the latter case, galvanized sheet metal 0.5 mm is used for the roof; with larger sizes it will be difficult to bend. It is cut to the size of the wave of the sheet. For example, for metal tiles - vertical - at least 2 waves, and horizontal - 3 full waves. This creates a fairly effective overlap and will prevent rain drops from hitting the pipe.
Aprons are similarly required to overlap each other. There are fewer requirements for the intersection of aprons installed at the top and sides, since they are protected by the roof material, but the overlap of the side and bottom ones must be wide. On 3 sides of them, except for the bottom, a flange is made.
Soft roof
Roofing systems made from roll materials are distinguished by their features in the arrangement of the ventilation passage. This is due to the fact that their slopes are usually built with a slope of 12 degrees. The network is also special when using rolled or piece roofing.
A developer who plans to install flexible tiles should know that they are completely unsuitable for installing roofing systems with a low slope angle, since a large number of joints and seams will have to be made.
Conditions for installing UP air ducts on a rolled roof:
- Before starting work on arranging the UE, the side of its inclination is determined.
- Unlike a rigid roof before work begins, on a rolled roof the penetration is installed only after the base area of the roofing sheet has been rolled out.
- The part of the penetration facing the ridge of the roof is inserted under the material so that flows of atmospheric moisture do not fall into the technological cracks and damage the insulation of the roofing pie.
- Install the elements of the arrival unit in accordance with the manufacturer’s instructions and the selected form of the unitary enterprise: to install a round penetration, you will need to place only two elements, for a rectangular or square configuration - four.
- The elements are covered with thermal insulation materials.
- Instead of iron aprons, for rigid roofing material, pieces of soft fused roofing sheet are used here.
- It is fixed on the roofing platform and on the UP.
- The technological process of strengthening is carried out from the bottom, then from the center to the edges, and only after that the top of the lining is strengthened.
- In order for the connection to be strong and durable, the roofing lining is heated well and evenly and only then pressed tightly.
- Pressing is carried out in two ways - slamming with a mitten, in which a leather tab has previously been placed, or with a special roller used for rolling shingles. The latter option is more suitable for working with thin rolls.
- In multi-layer roll roofing, the installation area of large CPs is protected with two-layer overlays, and for the installation of small rectangular UPs, it is allowed to use single layer overlays.
- A passage with a circular cross-section of small diameter is closed with 2 large plates, in which a special side, the “skirt,” is bent in the horizontal direction. First of all, it is important to mount the lower element, and only then the upper one. During installation, the plate of heated roofing material must be slightly tightened in order to ensure reliable coverage of the duct walls and ensure overlap.
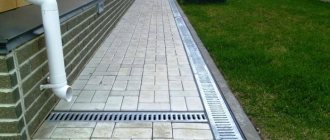
Determination of ventilation pipe outlet points
They largely depend on the location of the air ducts inside the house. If possible, the location of ventilation pipe outlets on the roof should coincide with internal duct risers. The outer final ventilation section itself should be directed vertically. But at the same time, it is advisable to design an exit close to the roof ridge. With this arrangement, a minimum height of the outer part will be required. Therefore, the main air duct will be under the roof and will be protected from frost, snow and gusts of wind. And the entire structure will become more stable. An additional condition is the location next to the rafter beam. It will become an additional support to which the air duct will be attached.
Attaching ventilation pipes to rafters
If the exit point is located away from the load-bearing roof beams, then you will have to create a sheathing in the attic area through which the pipe will pass. And on the roof itself, install additional fastening elements to the roof.
Strengthening the air duct on the roof with guys
Ventilating a Cold Attic
Ventilating a cold attic can be done easily with your own hands. This will require knowledge of a little theory and some practical skills. Providing sufficient ventilation in a cold attic will not cause any particular difficulties due to the large air volume and the absence of barriers to normal air circulation. Air exchange can be carried out through the eaves, ridge and ridge of the roof, as well as gable windows and grilles.
For gable roofs, ventilation of cold attics is done either through gables or through loosely fitting wooden lining of eaves overhangs. If the gables are made of stone, then holes can be made in them for dormer windows with ventilation grilles.
Dormers should be installed on opposite sides to ensure proper ventilation of the attic.
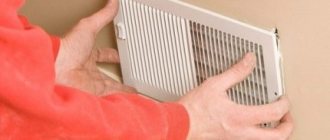
There is an alternative, more economical option. To do this, install standard ventilation grilles (pediment vents), one of which is adjustable, and the other is turned with the vents down. To protect against insects, this grille is equipped with a protective mosquito net.
Hip roofs do not have gables due to the shape of their structure, so for them there is another option for providing ventilation in the attic - using eaves overhangs. The air flow will be through the roof lining, and its exit will be from above at the ridge. If the filing is made from wood with your own hands, then small gaps are left between the bars for the passage of air. When covering the cornice with plastic soffits, such a procedure is not necessary, due to the presence of pre-made holes on the elements - perforations.
The air exits from above, through the roof ridge. Its design features depend on the type of roofing material used. As a rule, any manufacturer of roofing materials has its own ready-made and practical solutions
!
Valleys (valleys) are one of the problematic and difficult areas of the roof. To ensure normal ventilation of the attic space, point aerators are installed along the valley. However, this method is acceptable for roofs with slope angles of 45° or more.
. On flat roofs, there is a high probability of snow accumulating in the valley area and therefore such ventilation becomes ineffective in winter. You can combat this by installing forced ventilation - inertial turbines, roofing electric fans, or using high nozzles that will not be covered with snow.
Height of ventilation pipe above different roofs
*
This parameter largely determines the traction force in the entire system. The higher the top of the outdoor duct is located, the greater the efficiency of the hood. But a pipe that is too high is subject to excessive wind loads. Therefore, there are standards and recommendations to ensure the optimal balance between reliable traction and structural stability.
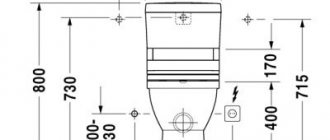
Flat roofs are not usually built over residential buildings. But such a calculation may be necessary when installing garage ventilation. In this case, it is recommended to install a pipe with a height of at least 50 cm above the roof surface.
For a sloping roof, the required size is determined depending on the distance of the outlet riser from the roof ridge.
- At a distance of less than 1.5 meters from it, the height above the roof should be at least 50 cm.
- When removed within 1.5 - 3 m, the upper edge of the pipe must be at the level of the ridge or higher.
- To calculate the height of a pipe installed at a distance of 3 meters or more, a little geometry is required. An imaginary line is drawn from the very top of the roof at an angle of 10 - 12 ° to the horizon. The top edge of the duct should be above it.
An additional factor may be the location of the ventilation riser near the chimney. In this case, the upper edge of the pipe cannot be placed below it. Otherwise, if the wind is unfavorable, smoke may enter the house through the ventilation.
Features of installation on the roof
Main installation steps:
- cutting a hole in the roof for ventilation;
- securing the sealing gasket;
- installation of a passage unit;
- bringing the pipe to the roof;
- securing it in the passage element;
- sealing the entire joint.
The set of fastening and auxiliary elements depends on the material of the pipe and roofing. If the roof is insulated, then you will have to cut through it to the entire depth of the roofing pie and install a passage element of the appropriate length.
Ventilation pipes are installed on a metal roof using a flexible sheet of the appropriate profile. Only such fastening will ensure reliable sealing.
But for any installation method a set of parts and tools is required:
- jigsaw for cutting a hole in the roof;
- metal scissors or a hacksaw for plastic pipes;
- level for determining the vertical;
- sealing gasket, sealing cover or curved sheet for metal tiles and ondulin;
- passage element fixed in the roof;
- drill;
- self-tapping screws;
- sealant.
Attaching the ventilation pipe to the roof
*
Finally, it is necessary to check the stability of the entire structure. If necessary, carry out additional strengthening. In the under-roof space - on brackets attached to a beam or sheathing. On the roof itself there are guy ropes.
Increased ventilation system performance
The best way is to create forced air flow using roof fans. But it is very expensive and difficult.
At the same time, passive additions to the pipe can lead to improved air movement. Here are some of them:
- Deflector. Special attachment for the upper part of the ventilation pipe. Its internal structure, under the influence of wind, creates an area of low pressure at the very outlet of the air duct. This leads to increased traction.
Roof deflector
* - Protective caps and droppers. They are attached to the top of the ventilation pipe and prevent precipitation from entering it. The absence of moisture in the system maintains its performance and reduces the risk of corrosion.
- Roof aerators. Devices designed to improve ventilation between the roof itself and its thermal insulation. They do not directly affect the microclimate in the house, but prevent the formation of condensation.
Practice shows that protection from moisture and installation of a deflector can increase the draft in the ventilation pipe by 10 - 30% in different weather conditions.
Dimensions
Sewer parts are available in standard sizes. This is close to typical sewer diameters, but does not allow you to immediately connect to a section of the finished network. The system can be easily assembled from the same type of components, but adapters are required to connect to a standard system.
Channel size range:
- 100 mm;
- 125 mm;
- 150 mm;
- 200 mm, etc.
Size range of sewerage elements:
- 110 mm;
- 160 mm;
- 200 mm, etc.
All components required for installation are available on the market. Special clamps or hangers are used as connectors, which can be purchased at any plumbing store. The only task that is quite difficult to solve on your own will be choosing the diameter. To do this, it is recommended to use an online calculator, of which there are many on the Internet. Before ventilating from sewer pipes, it is necessary to download a fan.
Its parameters will serve as the basis for calculating the size of the ventilation ducts. They are inserted into the calculator and we get the best option for the size and other parameters of the air ducts. All that remains is to buy plastic products of the nearest size and begin installation.
Main mistakes when installing ventilation
A typical mistake is to incorrectly determine the required stability of the entire ventilation riser. Fixing the pipe only on the top of the roof, without support on the rafters or other sheathing element, does not ensure the reliability of the structure.
You need to calculate the ventilation output on the roof immediately, taking into account additional attachments and devices. They not only increase the weight of the pipe, but also create additional windage during gusts of wind. Therefore, they require a certain margin of structural stability.
The sealing of the pipeline passage through the roof must be carried out not only on the outside, but on the inside of the roof.
A serious mistake is the unsystematic implementation of ventilation in interior spaces. Any additional turn of the line or an extra joint leads to a decrease in traction in the system and a decrease in the efficiency of its operation.
Choosing a location for the roof passage
All recommendations for choosing the location of the passage through the roof boil down to ensuring that its location allows the channel to be made with the least number of turns. In this case, the operational performance of the system will tend to maximum.
Sometimes, due to objective reasons, bends cannot be avoided. Corrugated pipes will come to the rescue. The use of corrugated pipes makes it possible to install air ducts with the necessary turns.
As noted above, the passage through the roof with the rafter system is carried out as close as possible to the ridge. Then, the largest part of the pipe will remain in the attic space, protected from temperature changes and ultraviolet radiation. The entire pipe will not be afraid of sharp winds, since only a smaller part of it will go outside.
Wind pressure indicators must be taken into account for any location of the exhaust pipe through the roof. Strong winds can cause poor air flow or direct air into the system.