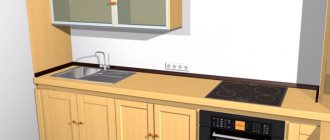
Often, when designing a kitchen set, difficulties arise due to the inconvenient location of the outlet for the electric stove. However, the issue can be resolved, you just need to figure out step by step how to move the outlet to a new location. It is extremely important to solve this problem correctly, since the frequency of use of the stove is high and the result of incorrect actions can be a breakdown of the device or even a fire in the apartment.
Dismantling
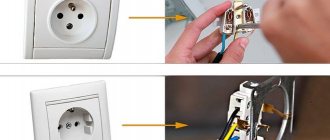
Any move begins with the installation of a new mounting box, dismantling the old outlet and its power line from the distribution box. When performing this action, it is important not to damage the system of the entire apartment.
You should start moving the electric stove socket by removing the voltage from the network you are going to work with. Pay attention even to the possibility of accidental touches, they can be very dangerous.
Usually there is a separate switch for the electric stove in the panel. But it is still strongly recommended to check the power point with a two-pole voltage indicator.
The dismantling progress looks something like this:
- After removing the old outlet, it is important to check whether all its wires are intact and undamaged, especially if you have a power point with a voltage of 380 V.
- In order for the stove to work correctly, pay special attention to the order of connecting the phase, neutral and protective wires, since their incorrect connection can lead to a short circuit.
- If initially, when installing the network, they relied on the PUE (Electrical Installation Rules), then blue should be used for the neutral wire, and yellow-green for the protective wire. If these tips are missing, you need to mark all the cable cores yourself.
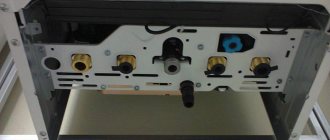
- When the socket is in your hands, carefully inspect all its parts. The presence of any visual defects is a strong argument for purchasing a new product. The only serious cause for concern is the presence of a slight burnt spot in the contact part, which can be removed independently with ordinary sandpaper.
Power socket
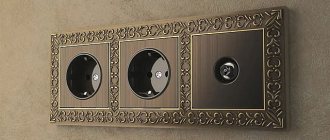
Power sockets are installed to connect powerful electrical equipment to them: oven, fryer, electric stove. They differ from conventional sockets in that they have reinforced input and output terminals designed for currents from 25 A.
The contacts of such sockets do not heat up during operation of household appliances.
Power sockets come in closed (hidden) and open (furnace) installations. Closed installation sockets are mounted into the wall (internal socket), this makes them protected from damage. Open-mounted sockets are located on the wall, they are visible, and the installation is open.
Don't buy the cheapest outlet
According to the current strength, sockets are divided into:
- 25 A;
- 32 A;
- 40 A;
- 63 A;
- 125 A.
The power of the power outlet must correspond to the household appliances. Always purchase a kit - a plug and a suitable socket.
Preparatory work
To move an outlet, you need to do the following:
- Choose a place for a new nest.
- The determining factor when choosing a location is ease of use. However, there are a number of rules that must be followed:
- To connect a new power point for an electric stove, it is recommended to use a VVGng power cable with a cross-section of at least 1.5 mm2;
- The line can only be laid vertically or horizontally. If it is more convenient for the project to route the cable horizontally, then the groove should be 200 mm from the ceiling and 100 mm from the beams and cornices. And if vertically, then you need to retreat 100 mm from doors, window openings and corners of the room;
- The distance from the floor should be at least 50 cm and no more than 80 cm. Radiators, steel pipelines and gas stoves should be at a distance of more than half a meter;
To connect or make a branch of the electrical cable, you will need the help of a special distribution box or a nearby point, from which it can subsequently be powered.
- In order to most rationally choose the location of the new point, it is recommended to first draw a diagram of its connection.
- We scratch the walls and make a recess for the “glass”.
- To install a new socket box, you need to make a groove for laying the cable and prepare the place where the “glass” will be located. To drill such a hole, you will need a special crown, and if you don’t have one, you can use a hammer drill that has an impact drill or a grinder. The work cannot be completed without certain skills in using equipment.
A special “glass” is installed in the prepared socket, through the back wall of which an electrical wire is inserted. The socket box is fixed with a gypsum solution, the excess of which must be removed after complete hardening.
Extension cord for electric stove
The easiest way to move an electric stove or hob some distance from a power outlet in the kitchen is to use an extension cord.
Everything is simple here, we plug the extension cord into the existing socket, connect the connector itself to the new installation location of the stove, and this, in fact, completes the transfer.
The main advantages of this transfer method are:
- Simplicity. Using an extension cord, any person who does not have any special knowledge and skills in electricity and electrical installation can easily move the outlet for the stove to the place they need.
- Low cost. This solution will most likely be the most cost-effective, because you will only need to buy an extension cord for the electric stove.
Unfortunately, this method also has serious disadvantages that make this method of transfer undesirable:
— Lack of extension cords for electric stoves . It is quite difficult to find an extension cord for an electric stove on sale, especially if a three-phase connection is used. Since the electric stove is the most energy-intensive device in the apartment, the extension cord uses a large cross-section cable, as well as a special power outlet designed for high current. In addition, a large variety of power connectors of various types complicates the selection task.
Most likely, you will have to assemble such an extension cord yourself by purchasing the appropriate cable, plug and socket.
— Unreliable connection . When using an extension cord, several unnecessary connections appear in the power supply circuit of the electric stove, some of them detachable, which sharply reduces the reliability of the entire system. There is a high probability of contacts loosening and heating, which often leads to fire.
— Possibility of mechanical damage to the power cable . When moving an electric stove, the electrical cable is most often laid openly, simply placed on the floor or passed through furniture, for example, across a kitchen unit. In such conditions, there is a high probability of mechanical damage to the cable under various circumstances - this could be rodents, chafing of the cable, pets or children, or simply a break as a result of careless work nearby.
- The appearance of the room is spoiled. In everyday life, we are surrounded by many electrical appliances, all of which are plugged into an outlet. The kitchen is probably one of the most loaded rooms with various equipment; if you do not organize the connection points correctly, you can simply “drown” in the wires; they will interfere not only with cleaning the room and moving around it, but also simply irritate you with their appearance. Therefore, an extension cord for an electric stove lying on the floor will not add attractiveness and practicality to your kitchen.
— Possibility of electric shock to a person . Elements of electrical wiring accessible to people, which include an extension cord, are dangerous in themselves because they can, under certain conditions, for example, if the insulation is damaged, cause harm to human health through electric shock. In addition, due to the presence of water in the kitchen, these risks increase significantly, because pipes or plumbing fixtures may burst, and, what happens even more often, your neighbors above may flood you. In such conditions, using an extension cord becomes especially dangerous.
As you can see, this method has more disadvantages than possible benefits; the extension cord should be used only as a temporary solution, until the implementation of a more reliable, complete, comprehensively safe one, such as those presented in the following paragraphs of our article.
Wire routing.
A cable is laid into the prepared “glass” along a hollowed out groove (groove in concrete), which will supply the stove with electricity.
A violation of the established norms and rules for moving sockets is the presence of connections on the line. It would be best to replace it, especially if a fairly large extension is required. It is also strongly recommended to make an installation reserve when running the cable from the junction box in order to avoid repeated work if this wire needs to be extended again. In reality, this is usually difficult to implement, so preference is given to connecting such a cable, which, according to the PUE, can be done by crimping, welding, soldering or using compression. For self-extension, clamp terminals are usually used, since the first three connection methods require special equipment.
The terminals are:
- Quick-clamping or screw with special brass tips - if you need to connect flexible copper conductors;
- Self-clamping - if you need to connect an aluminum wire.
If you need to connect rigid copper conductors, you can use any terminals.
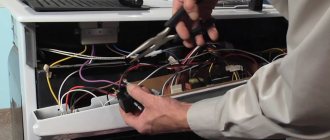
How to install it yourself?
It’s not difficult to figure out the correct wiring and installation of wiring boxes. The main operations are carried out even before the finishing of the premises.
- Having decided on the consumers and locations for installing the sockets, they move on to marking them on the walls.
- The center is outlined, after which a hole 40–60 mm deep is made with a 63 mm crown for the “socket box”. If you don’t have a special tool, you can get by with a chisel and a hammer. Many professional electricians prefer to work with a grinder and a hammer drill.
- Then you can proceed to securing the mounting box with the wire passed into it. Usually fixation is done using building gypsum or plaster mixture. It is permissible to use special glue.
- After “cementing”, all voids and cracks around the perimeter of the box are sealed with plaster.
The length of the protruding wire must be at least 150 mm so that when connecting, you can easily install a socket or switch.
Replacing electricity with gas
It is impossible to live in a house without gas. Gas stoves are not allowed in electrified houses. This reconstruction cannot be approved, since the apartment building must have a gas distribution system, and the premises must meet certain requirements. In this case, clause 7 is taken into account.
36 SNiP 01/31/2003 “Residential multi-apartment buildings”. Although earlier in clause 6.29 of SNiP 2.04.08-87* “Gas supply” it was stipulated that “the installation of gas stoves in residential buildings should be provided in kitchens with a height of at least 2.2 m, having a window with a window (transom), an exhaust ventilation channel and natural light. In this case, the internal volume of kitchen premises must be, m2, not less than:
- for gas stove with 2 burners. . . . 8,
- for gas stove with 3 burners. . . . 12,
- for gas stove with 4 burners. . . . 15".
Despite the fact that this SNiP has ceased to be valid, the requirements have remained virtually unchanged.
Expansion with a balcony
Balcony as an extension of the kitchen. Expanding the kitchen to include a balcony and loggia is a redevelopment and requires permission in accordance with Articles 25-26 of the Housing Code of the Russian Federation. The most important thing that in this case the owner of the residential premises must take into account, in order not to bear responsibility for the redevelopment, is compliance with the rights and legitimate interests of third parties during the work.
First, you need to contact the authorized body with an application and attach the following documents: a redevelopment project with positive conclusions from all services (SES, firefighters, etc.); agreement with neighbors, the organization serving the house, and other family members; technical passport for residential premises; title documents for residential premises.
Sometimes an expert’s opinion is required on the technical feasibility of carrying out such a redevelopment, since a lot of nuances need to be taken into account, including the ban on dismantling load-bearing walls (in accordance with clause 1.7.2 of the Rules and Standards for the Technical Operation of the Housing Stock, approved by Resolution of the State Construction Committee of the Russian Federation No. 170 dated September 27, 2003).
Should you contact a professional?
Today, many organizations offer their services for electrical work. Professionals are ready to perform installations of varying complexity. The quality of such actions is most often quite high. Each such company provides a guarantee for the installation of electrical equipment.
However, every homeowner knows that the services of a professional can be quite expensive. In this case, it is extremely important to comply with all safety requirements and PUE. Otherwise, an unprofessional technician risks serious injury. In this case, the operation of the electrical system will be unsafe. Faulty sockets and switches can cause fire, property damage and pose a threat to human life and health.
Useful video
Sources
- https://220.guru/electroprovodka/rozetki-vyklyuchateli/perenos-rozetok.html
- https://srtmx.ru/novoe/perenos-rozetok-i-vyklyuchatelej.html
- https://oboiman.ru/ingeneer/kak-perenesti-rozetku-v-drugoe-mesto-instruktaz-po-perenosu.html
- https://prostroiku.info/kak-perenesti-rozetku-v-drugoe-mesto-instruktazh-po-perenosu/
- https://lemzspb.ru/chto-nuzhno-dlya-perenosa-rozetki/
- https://www.asutpp.ru/kak-perenesti-rozetku.html
- https://StrojDvor.ru/elektrosnabzhenie/perenos-rozetok/
- https://ElektroKlub-nn.ru/provodka/kak-perenesti-rozetki-v-kvartire.html
- https://HouseDiz.ru/kak-perenesti-rozetku-ili-vyklyuchatel-v-kvartire/
- https://MasterpoToku.ru/full/kak-perenesti-rozetku-v-drugoe-mesto-svoimi-rukami.html
- https://kachestvolife.club/elektrika/kak-pravil-no-perenesti-rozetku
- https://SamElectric.ru/elektrika/perenos-rozetki-bez-shtrobleniya.html
- https://stroypomochnik.ru/perenos-rozetok-v-kvartire-panelnogo-doma-svoimi-rukami-poshagovaya-instruktsiya/
- https://elektrika.expert/vykljuchateli/kak-perenesti-vykljuchatel.html
Methods for transferring a connection point
There are two simple methods that allow you to transfer sockets without destroying the wall finish:
- By creating a loop - involves creating a jumper from the old “point” to the new connection point.
- By extending the wire - involves extending the electrical line in the cavity of the new groove.
If the new chosen location is much further than the previous one, you can make a complete replacement of the entire line by laying a separate wire from the distribution box located at a slight distance. But, unlike the two methods described above, laying a new line requires large-scale repair work.
When choosing a daisy chain method for connecting a new outlet, keep in mind that such a connection is very unreliable for installing three or more power points. If one section or socket is damaged, the entire sequential chain of devices will be inoperative. And, according to the rules of the PUE, it is not allowed to be used to power powerful electrical appliances: microwaves, electric stoves, refrigerators, washing machines, etc.
Another negative side is that when two sockets are connected with a single cable, the current load sequentially passes from one device to another. Therefore, when several devices are plugged into sockets connected through jumpers at the same time, there may not be enough voltage for their operation.
FAQ
Question No. 1: How can you create a reliable connection of wires when moving a socket at home? The simplest and most affordable methods are crimping and soldering. To perform crimping, special pliers and a sleeve crimped on both sides, made of the same metal as the wire, are used. Question No. 2: What can result from poor quality work? When moving an outlet, each step should be taken responsibly. Otherwise, there is a high probability of sparking, melting and ignition of parts of the housing, and a short circuit.
Daisy chain connection
There are situations when the connection does not involve the use of high-power electrical devices, and the owner wants to save money on this procedure. In this case, you can implement the transfer option with a single loop
Rice. 8: Daisy chain connection diagram
Look at the diagram, here leads are taken from the existing outlet to connect a new one. That is, the phase is powered from the phase, and the zero from the zero, and the sockets are connected in series. A distinctive feature of such a connection is the protective conductor, which must have a separate terminal for each node, in accordance with the requirements of clause 1.7.144 of the PUE. Unlike phase and neutral wires, it is prohibited to connect protected objects in series to grounding.
The advantages of this method of forming an electrical line include lower wire costs. The disadvantages include its low reliability, since if an old outlet breaks down, the ones following it will be without voltage, and the low power of electrical appliances that can be connected to them.
A loop connection can be made to a larger number of outlets, depending on local needs, but the total power of the load connected to them should not exceed the normally permissible current for the wiring available in the electrical network.
The procedure for transferring a socket with a cable is no different from the previous version of extending the wire, with the exception that the old connection point is not dismantled, but continues to perform its functions.
Selection of required materials
When using this method, material costs are minimized.
In addition to purchasing the newest outlet for work, you need to prepare:
- wire of the appropriate cross-section;
- plastic socket box;
- hammer drill with crown D70 mm;
- indicator screwdriver;
- pliers;
- hammer;
- flat screwdriver;
- braid removal tool.
The wire itself does not have to be laid in a groove, but can be laid openly using a cable channel.
The choice of socket box model depends on the base material into which it is supposed to be buried. For concrete and brick walls, ordinary plastic “glasses” are chosen, and for plasterboard bases, models equipped with spacer legs are chosen.