Sandwich panels for slopes: type of window opening finishing
In one of the articles on the site, we talked about how to finish external slopes on windows. In this article we will talk about slopes made of sandwich panels . External window finishing: photo examples and step-by-step instructions (read more)
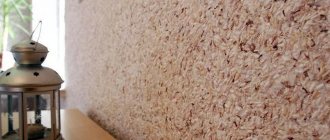
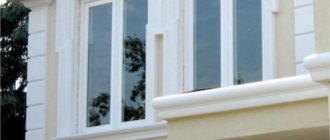
Installation of a metal-plastic system is not the final stage of the window replacement process. To prevent freezing and condensation, the walls of the window opening are finished. Today, sandwich panels for slopes have proven themselves to be the best, characterized by excellent technical and performance qualities and ease of installation. You can learn more about this building material from the article.
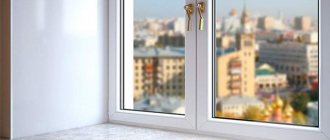
Slopes on windows protect against condensation and resist freezing.
Everything or almost everything about slopes and finishing
In this article we looked at some options for finishing window slopes. Of course, in one article it is impossible to fully cover the entire process of finishing such an important element as slopes. After all, there are slopes not only on windows but also on doors. When installing door slopes, there are also a lot of options, these are the ones we described and additions with extensions, with significant thickness of the walls, and you can also use wall panels and many other different materials. Let us repeat, it’s simply not possible to consider everything in one article. If you want to learn more about the possibilities of installing slopes for windows and doors, finishing with panels or wall panels, you can always learn about this in more detail by visiting our resource. With us you will always find answers to your questions regarding construction and finishing works. After reading articles, watching videos or photos of processes, you can find the most suitable options for yourself. Good luck!
vote
Article rating
What are window slopes: the purpose of the structural element
The first step is to understand what slopes are and what their main purpose is. This structural element of a window opening is the inner wall of a niche surrounding the window frame on both sides. Installing a window profile is not the final stage. For a presentable appearance of the window system, it is necessary to install good fittings for PVC windows. It includes not only handles, mechanisms and hinges. The range of elements also includes window slopes, which are used to design the profile.
Slopes made of sandwich panels provide additional protection of the room from atmospheric influences.
Note! It is imperative to finish the slopes to eliminate the occurrence of many negative factors that will negatively affect the appearance, service life of the window system and the microclimate of the room.
Finishing the niche will prevent the accumulation of condensation and freezing of the window frame. It can protect the seams between the frame and the window opening from destruction, so it is important to carry out both internal and external cladding of slopes. Protecting niches can improve the thermal insulation properties of a room, preventing cold outdoor masses from penetrating inside and thermal energy from escaping outside.
Note! Window slopes are also a decorative design of a window system.
To finish the slopes, you can perform plastering, covering the surface with plasterboard, plastic panels. The most popular and least labor-intensive method today is the use of sandwich panels for slopes. This material not only gives the window a finished appearance, but also, thanks to the presence of internal insulation, provides a warm temperature regime in the room.
In addition, window slopes perform a decorative function.
When covering slopes with plasterboard, a large consumption of material will be required, which is associated with its fragility. Plastering the side elements is a labor-intensive and time-consuming process that requires certain skills to ultimately achieve a smooth surface. In addition, such work is associated with significant pollution of the surrounding space.
On a note! The combination of windows and slopes made of the same material looks most harmonious.
Convenient finishing of slopes with a starting profile
- Application of products
- Finishing methods
- Features of application
- Ready solution
- Advantages
- PVC windows and slopes
- What is required for finishing
In most rooms, plastic windows are installed. When it comes to finishing, special nuances appear. For example, you can use P and F profiles for slopes .
Application of products
There are two types of slopes: one of them is located outside the building, the other is located on the inside. Both types require proper finishing. The slope is intended not only to give the windows an aesthetic appearance, it performs important protective functions.
Plastic windows are attached to the opening using mounting foam. It deteriorates under the influence of moisture and is gradually carried away by the wind, which is why it is important to install a slope profile that can protect the structure from adverse weather conditions. Otherwise, the foam may become deformed and damage the window frame.
Application of F-profile for finishing the external slope
How to finish the slopes of plastic windows with your own hands, see the link. We choose the most “correct” slopes for plastic windows. Prices for different types of slopes, consumer reviews
When replacing windows yourself, do not forget about installing sills for plastic windows.
Finishing methods
There are several ways to tidy up your window. These may be the following options:
- Finishing with plaster. This method is quite old. Its main disadvantage is the complexity of the work. Plastering is time-consuming and requires careful cleaning of the area after finishing. When a house shrinks, it may crack.
- Application of drywall. This option is not bad, but it is only suitable for interior work. The room must be dry and warm, otherwise the sheet of drywall will begin to collapse.
- PVC profile for slopes is the best option. It is not afraid of moisture, temperature changes, is easy to install, and can be used both outside and indoors. This is an excellent solution for plastic windows, as it matches them perfectly in terms of material; the PVC F profile for slopes is very easy to install. It is quite possible to do this yourself. With other materials, for example, wood, the profile may not look so harmonious, although you can order wood lamination, and the differences will not be noticeable.
PVC profiles for slopes
Features of application
Finding out the desired profile is quite simple; it looks like the Latin letter “F”. The material is fixed using special plates that are fixed in its grooves. The starting profile for slopes has two important functions:
- Decorates the ends of windows, giving them a decorative look.
- Levels the surface without the use of complex structures and plaster.
Ready solution
The F-shaped profile for slopes is a convenient solution for cladding. It creates a perfectly flat surface, free of imperfections, protects the opening from moisture and sunlight, as well as wind, dust, and other mechanical influences.
The starting profile is attached to a plastic window without the use of glue. The design not only helps to make the slopes visually attractive, but is also perfect for places where different materials meet. The starting profile is most often mounted in this way: one side of it touches the wall, the other touches the plastic structure. If the size of the material does not correspond to the required parameter, it can be cut using a stationery knife; for the same purpose, a grinder or a metal file is sometimes used.
Advantages
The starting profile for PVC windows has several obvious advantages:
- Ability to resist ultraviolet radiation. The profile does not fade even for ten years.
- The material is durable, looks good, and can fit into any interior without standing out.
- Suitable for use both indoors and from the facade.
- Moisture resistant.
- The chalk content in the composition is minimal.
- The semicircular end of the tail allows you to lay the profile on the most uneven wall.
- Hides wall imperfections, levels slopes without the use of other materials.
- The plank can be safely cut, no chips or cracks will appear on it.
- Installation is carried out independently; this does not require special skills.
- No glue is used.
PVC windows and slopes
The starting profile for a PVC window sill is ideal, but it can be used not only with it, but also if the walls are made of sandwich panels. The material will help protect the inside of the panel, easily attach to it and last a long time.
PVC fabric that is too cheap may also be excessively soft. This will make it fragile. The soft fabric does not last long and is not suitable for outdoor use. It easily deforms from any touch.
What requirements must the slope material meet?
Regardless of the technology for protective and decorative finishing of a window opening, finished slopes must meet certain requirements. The design must withstand various mechanical impacts without loss of operational and aesthetic characteristics. It is necessary that the slopes are moisture resistant. This especially applies to outdoor structures. The material must be characterized by wear resistance, immunity to ultraviolet rays and high humidity, and temperature changes.
Note! To waterproof the frame, a PVC window ebb is attached to its outer side.
Slopes must be moisture-resistant, wear-resistant, and have low thermal conductivity.
The protective structure of the window should not deform over time. It must be distinguished by a long period of operation without loss of original properties. Due to the fact that the slope panel closes the installation gap, this is the main source of heat loss. It is necessary that the material has low thermal conductivity, which will provide a good level of heat and sound insulation in the room.
The chosen finish for the slopes should be aesthetically appealing. High-quality cladding is characterized by a neat appearance. It is necessary that the finish is in harmony with the window profile and fits into the interior design of the room. Maco window fittings have proven themselves to be the best in this regard.
How to measure a plastic window.
Any replacement of windows begins with determining the size of the window unit. For this stage, it is better to call a measurer who has the necessary experience in this matter. Basically, measuring services from window manufacturers are free. But if you decide to take measurements yourself, then you need to know that there are two types of window openings. And the window is measured differently for them. Therefore, before taking measurements, you need to remove the plaster from the window opening and determine what kind of window opening you have.
Dismantling old plaster is also necessary to increase the accuracy of measurements.
The first type of window opening is a quarter window. A quarter is a special protrusion on the window opening, against which the window frame is pressed during installation. This protrusion is located closer to the street, and the window frame from the inside of the room is pressed against it.
Picture 1.
Determine the internal width of the window opening: C = B1 + A + B2
Determine the height of the window opening. To do this, you need to measure the dimension H from the ebb at the point of contact with the frame (point M) to the upper quarter. Using a feeler gauge, take several control measurements of the upper quarter (size B3) (Fig. 2).
The height of the window opening will be equal to: U = H + B3
The second type of window opening is a regular rectangular opening. It's a little easier to take measurements here. Don't forget to remove the layer of plaster before taking measurements.
Window block width = A – (2 × 20) mm, where 20 mm is the optimal installation gap (Fig. 4)
Height of the window block: = H – 25 mm (Fig. 5).
The last stage in the measurements is measuring the low tide and window sill.
Window sill length = window opening width + 200mm. In the case of an opening with quarters, this is C+200mm. In the case of a regular opening, this is A+200.
The width of the window sill should be such that its edge overlaps the heating radiator located under the window by approximately 70%. The window sill should not completely cover the battery. Warm air from the battery should rise freely along the window.
Length of ebb = maximum width of window opening on the street side +100mm.
Sandwich panels: a modern universal material
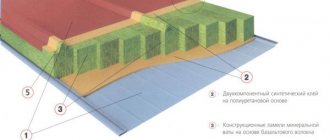
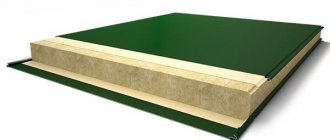
Plastic sandwich panels are sheets of extruded polystyrene foam. The thickness of the products is 9 mm. The canvases can be finished on both sides with polyvinyl chloride film 1-1.5 mm thick. The internal structure of sandwich panels is represented by the following elements: a J- and C-shaped profile for fixing the internal edge of the slope, a guiding wooden beam, insulating material and an upper decorative panel.
Polyurethane foam, free-foam plastic, and extruded polystyrene are used as insulation in sandwich panels, which fills all cavities. The latter option is characterized by the best thermal resistance indicators. The insulation blocks the flow of cold air masses from the street into the room.
Sandwich panels are a universal product, widely used in repair and construction work.
The top decorative panel can be made of laminated plastic, rigid or foamed PVC sheet. The first type of coating is made by impregnating multilayer material with resins in the form of pressed decorative or kraft paper.
Rigid PVC sheet is represented by a white sheet covering, the thickness of which is in the range of 0.8-2 mm. The special coating can be glossy or matte. The density of such a panel reaches 1.4 g/m³. The internal structure of a foamed PVC sheet has a porous composition, so this coating is less dense and has good thermal insulation.
The outer layer can be painted in any color, which makes it possible to choose a shade that matches the window and the design of the room. The most popular is the white PVC sandwich panel for slopes. You can often find a yellow tint to the panels. Products made in a natural style, imitating wood, fit harmoniously into the interior.
Installation features and types of building structures
Ready-made material can be purchased in the store. Sandwich panels are available in several types: wall, roofing and phased assembly models. Wall panels are most often used in construction. Their light weight does not put pressure on the foundation of the building. When using panels in roof roofing, specially designed roofing panels are used.
The filler between the sheets is based on a mineral slab. Sandwich panels of phased assembly are a structure designed to be mounted on a building frame. Such structures are neither durable nor have a low chance of fire.
One of the important components of the panel is durable polyurethane adhesive. It comes in two types: one-component and two-component. One-component adhesive hardens upon contact with air, while two-component adhesive hardens due to a chemical reaction between its two components. It is more durable than one-component adhesive. The life of quick-drying glue can be extended by lowering the room temperature.
The following can be used as an insulation layer for sandwich panels:
- mineral wool;
- polyurethane foam;
- expanded polystyrene;
- polypropylene;
- polyisocyanurate;
- fiberglass.
The following can be used as frame sheet material:
- aluminum and zinc alloy;
- Cink Steel;
- drywall;
- hard plastic;
- polyester;
- polydifluorionad;
- pural;
- oriented strand board;
- tree;
- fibreboard.
The panels are often used in the renovation of city apartments. They can serve as the inner walls of a window opening for new plastic windows. Such panels are extremely useful for thermal insulation and sound insulation of the apartment, and also do not allow air to blow through.
Dimensions and design options of sandwich panels for windows
Sandwich panels are available in two variations: ready-made, where the material does not require assembly and is intended to be fixed using an adhesive, and disassembled, when it requires preliminary fixation of the component elements using self-tapping screws.
Sandwich panels are available for sale in finished form or disassembled.
Plastic window sandwich panels can be manufactured in single-sided and double-sided form. In the first case, one side of the product is rough, the other is the front side, which is thicker. For a double-sided product, both sides are front.
Note! Sandwich panels can be used for both plastic and wooden windows.
The dimensions of sandwich panels for slopes are determined by the equipment on which the material is produced. Despite this, standardized parameters exist. The products have a maximum length of 12-16 m. A larger value can lead to damage to the structure of the element under its own weight during the installation process. In addition, long products are difficult to transport. The width of the sandwich panels reaches 100, 115, 199 and 120 cm. The thickness is in the range of 5-35 cm. The most popular are white sandwich panels for slopes 3000x1500x10 mm.
Products are often made to individual sizes. Some versions of sandwich panels can be used to finish the slopes of not only windows, but also doors. In this case, their length is 3 m, width - 115, 130 and 150 cm. The thickness of the products is 10, 24, 32 and 40 mm. Sandwich panels 3000x1500x10 mm used for slopes are in great demand, the cost of which starts from 900 rubles/piece.
Sandwich panels of different thicknesses, lengths and widths are available for sale.
Mounting part
When the preparation is completed, all that remains is to make the slopes themselves. This is quite easy to do with your own hands, since all the work comes down to installing plastic panels with insulation. For convenience, you should use a thin knife to guide the material exactly into the groove without crushing the edges.
But first you should cut the PVC panels to the length and width of each slope. This will only allow you to later secure the material to the frame, since the sandwiches at the windows will be held in place by the profiles. Self-tapping screws that screw into the end of the plastic panels will also help to do this.
To top it all off, you need to install PVC corners on the window slopes. They will play the role of cashing out. A plastic F-shaped profile is also used, which is inserted into the sandwich. This element is attached with glue. But the edging of the window opening can be done differently. To do this, you will need a plastic corner with a width of at least 30 mm. It is cut to length and joined at the places where it intersects with each other “at the mouth”. That is, they cut at 45 degrees.
This work can be easily done with your own hands using ordinary scissors. But these actions must be performed very carefully, since the plastic is quite fragile and can chip or crack if not handled carefully. If this happens, the part will need to be replaced, although some craftsmen try to repair the damaged area using a special sealant that completely replicates the material of the element.
Sandwich panels for slopes: advantages and disadvantages of the material
Sandwich panels for slopes have many advantages. This finish helps create good thermal and noise insulation. The sound absorption rate is 21 dB. The material has a high level of vapor permeability. This coating will not get wet from moisture, will not deform or crack. Sandwich panels exhibit increased resistance to mechanical damage, the negative effects of sunlight, and resistance to the formation of fungus and mold.
Note! To reliably connect the material to the slope, polyurethane foam is used, which at the same time serves as an additional insulation.
The design is characterized by its low weight, which is only 4 kg with a product thickness of 24 mm, so it does not have a significant impact on the elements of the window opening and does not require the use of reinforced fasteners.
Slopes finished with sandwich panels do not require constant maintenance. Any dirt can be easily removed with a sponge and soap solution, which will not damage the structure of the structure. The material is absolutely harmless to human health. During operation, no harmful components are released into the atmosphere.
Panels for window slopes have many advantages.
Slopes made from sandwich panels do not require additional decoration, since they have a pleasant texture that is similar to the surface of a plastic window. The demand for the material is also associated with the reasonable price of sandwich panels for window slopes, which can be purchased at any hardware store.
However, such multilayer panels for finishing slopes have their drawbacks. The material is susceptible to high temperatures, which can lead to deformation changes and yellowing of the surface of the product. Finishing with sandwich panels is not performed if there is a small gap between the wall and the hinge. This will lead to the structure not fitting tightly to the niche. Incorrect installation may cause cracks and gaps to form.
Material properties
Plastic slopes made of sandwich panels
The structure of standard panels looks like a sheet, the outer side of which is solid-sheet PVC, the inner side is sheet polystyrene, and there is insulation in the middle. That is why this finishing option was called the American word - sandwich panel. They differ only in the material of the facing side, and the installation remains the same for any type.
Important! People call sandwich slopes – warm slopes. This is due to the insulation that is present in the panel
Once you have already imagined what they are, I will tell you about their advantages:
- Despite their popularity, they remain accessible to everyone due to their reasonable price.
- This is not just a building element, it is also an independent device that has its own set of components.
- The interior is filled with mineral wool or foamed polystyrene - this indicates the non-flammability of the structure.
- Excellent thermal insulation performance, as well as additional sound insulation, is achieved with their help.
- This finishing method is durable and strong.
- If you do the installation yourself, you must strictly follow the installation technology. In this case, resistance to moisture and mold will be at a high level.
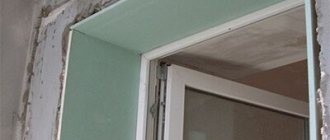
Sandwich panels for finishing slopes
For those who have decided to change the windows in their house or apartment and install the slopes with their own hands, I will give you advice: you need to wait at least 24 hours after installing the windows and only then finish the slopes with sandwich panels. The advantage of installing a sandwich over plastering is that installation by hand does not require painting skills and is a clean method.
It is important not only to correctly install the slopes, but also how to cut the panels. It is better to cut plastic elements with a circular saw on plastic or aluminum. At the same time, a fine tooth pitch can cope with the task perfectly. In addition, the material must be cut at a temperature of +5 degrees Celsius - if the temperature regime is not observed, then due to a decrease in impact strength, chips may appear on the cut line. If the slopes are finished with PVC sandwich panels, then you can cut them with many tools. But the most optimal one is a hacksaw for metal; it can also be used for wood. You need to cut face up and with a slight angular inclination. At your own peril and risk, you can cut with a grinder, but if you apply a little too much pressure, the panel may break.
Comparison of sandwich panels and double-glazed windows: which is better
The design of a balcony or loggia is often accompanied by the joint installation of metal-plastic glazing and plastic sandwich panels. The latter are often used for covering blind sections, which can be located at the bottom of the balcony door frame that reaches the floor, or for finishing side sections. This is done to limit light transmission in specific areas. In addition, due to their good strength properties, sandwich panels are considered the best option in comparison with double-glazed windows in terms of safety.
Installing sandwich panels instead of double-glazed windows allows you to make the side sections of a balcony or loggia blank, which is necessary for installing cabinets or other items that should not be visible from the outside. This design can subsequently be used as a ventilation outlet, since a number of holes can be made in it.
Sandwich panels, unlike double-glazed windows, are resistant to moisture, ultraviolet radiation and mechanical stress.
However, using panels instead of double-glazed windows has other advantages. The material is resistant to various negative influences. It is impervious to ultraviolet radiation, moisture, chemicals, and tolerates mechanical and shock loads. The panels are strong, reliable and durable. They do not require special care, which cannot be said about traditional glazing. You can also choose different colors of the material, which is clearly shown in the photo of sandwich panels.
Note! The Salamander window profile is very popular today, and it is possible to order sandwich panels with a protective film, which not only improves the decorative qualities of the material, but also increases its strength characteristics.
Since the plastic sandwich panel is represented by a multilayer material, inside of which there is a layer of insulation, such cladding is characterized by good heat-insulating and sound-absorbing properties.
How to install slopes from sandwich panels
The process of finishing window slopes with sandwich panels consists of several stages. To carry out the work you will need the following tools and materials: PVC profile, edging and starting profiles, liquid nails, sealant, primer for concrete, plaster, antifungal agent, building level, tape measure, assembly knife, screwdriver, self-tapping screws, brush, spatula, sandpaper .
Installation of panel slopes can be done in three ways.
Installation of slopes from sandwich panels is carried out in three ways: liquid nails, polyurethane foam or a frame made of wooden blocks can be used. The panels, in turn, are two- and three-layer. The last option is covered with PVC on both sides. Such panels are installed exclusively on a wooden frame, since they are characterized by increased rigidity. There is no point in attaching them to the wall using liquid nails, since the PVC back side has a low adhesion rate.
Installation of sandwich panels in a window on wooden slats consists of the following algorithm of actions. First, slope measurements are taken. The obtained data is transferred to the panels, after which blanks are made using a sharp knife. Panels can also be cut using a circular saw with a small pitch of teeth, which will eliminate the possibility of delamination or cracking of the product.
Note! The sandwich panel can be cut at a temperature not lower than 5 ºC; lower values lead to brittleness of the material.
Installation stages - the ABCs of construction work ↑
Installing plastic slopes with your own hands will take no more than 2 hours. For comparison, high-quality plastering work will take up to 3 days!
There are two types of plastic slopes:
- decorative;
- sandwich panels (insulated).
Decorative slopes are necessary in the following cases:
- For formal partitions. That is, the design of window openings located between rooms (for example, in an office).
- For finishing loggias. The external slopes of the balcony block cannot be insulated. Because the panels cannot be placed behind the frame. They are hindered by a quarter lined with brick (its purpose is to prevent the window from falling out).
In all other cases, it is better to choose sandwich panels. They consist of two sheets of PVC and a layer of insulation between them.
The standard slope thickness is 8 mm. But if installed carelessly, such a panel can easily be squeezed out with foam! Therefore, many craftsmen advise choosing thicker options (for example, 24 mm). This panel is difficult to cut, but it is much stronger.
Basic rules for selecting panels:
- Made only from virgin plastic. Such plastic slopes will not turn yellow over time, and their composition will not harm health.
- With a thick layer of plastic. Cheap panels with thin PVC sheets quickly become unusable. The plastic simply peels off the surface.
Window device
In addition to panels, you definitely need to buy profiles - internal (J-profile) and external (C-profile). Together they form a strong anchor lock that tightly holds the slopes.
Installing plastic slopes with your own hands will also require the availability of other materials:
- self-tapping screws 51 mm;
- PVC dowels;
- wooden slats;
- “summer” foam (2.6);
- gypsum mixture for plaster;
- mineral wool.
You will need the following tools:
- drill;
- screwdriver;
- electric stapler;
- putty knife;
- mounting gun with the ability to normalize and adjust foam.
The window sill must be installed at an angle of 3–5°
To install plastic slopes with your own hands, use step-by-step instructions:
- The first step is to install the guides. Wooden slats 10x40 mm, self-tapping screws 51 mm and PVC dowels are suitable for this.
- The slats must be secured around the perimeter of the window strictly parallel to the frame. Drill holes through the guides (6–12 cm).
- Insert dowels into the holes and tighten with self-tapping screws, drowning them to a depth of 5 mm.
- Strengthen the slats with summer foam.
- Select a groove in the foam joint along the window frame that is 6mm deep and 8mm wide.
Slats for slopes
Groove in the assembly seam
Attach the connecting internal J-profile to the slats using staples 10-14 mm long. For fastening, a step of 10-25 cm is sufficient.
Internal J-profileAttach plastic slopes. Form a construction seam from foam. To do this, apply a plastic panel and evenly fill the cavity by 15%. Then fill the cavity 70% with mineral wool. This will reduce heat loss and avoid mold.
Press the panels against the slats and secure them with brackets at an angle of 45°. This will further increase the pressure and allow the plastic to be pressed well.
The percentage of filling with cotton wool is from 30 to 70%
You can watch the video to see how to properly install plastic slopes with your own hands.
Video: Installation of plastic slopes
Before installing the outer profile, the walls adjacent to the window should be leveled. To do this, you need to remove the remnants of the old wallpaper and apply a quick-hardening mixture.
Then install the outer C-profile and adjust it to size. To do this, measure the profiles and file them so that the lock is at an angle of 45°.
Profile adjustment
Pressing on the profile, secure it until it clicks. Use a hacksaw to cut through both profiles at the intersection of the plastic. This way the seam will be as neat as possible. Move the corners towards each other by tapping them.
Cut it with a hacksaw
At the end, clean the room, remove all dust and debris with a brush and rag. Degrease the joints and lightly moisten them. After this, apply decorative silicone acrylic sealant.
The joints are invisible
Further installation of slopes from sandwich panels into the window
On the outside of the window frame along the edge, mounting strips should be secured to form a complete contour. The correct installation is controlled by the building level. Wooden elements must be made from dry wood. Otherwise, if they contain excess moisture, the slats will dry out, which will lead to deformation of the structure. Before fastening, they must be treated with special moisture-repellent compounds.
The gap between the frame and the panel can be filled with mineral wool or polyurethane foam.
The next step is to attach the starting profile to the plastic frame. The gap that has formed must be filled with polyurethane foam or mineral wool. Sandwich panels used for finishing slopes are inserted into the grooves of the profile. They are not glued using liquid nails or foam, but are nailed with a construction stapler. Staples can penetrate the outer side of products, so with this installation option, only three-layer products are used.
On a note! It is necessary to purchase a starting profile from the same manufacturer that produced the sandwich panels.
If the starting element is not used, the slopes are finished with sandwich panels by attaching the material with an adhesive composition. In this case, the inner corner is treated with sealant in order to hide possible defects.
Instructions on how to do it and where to start
All you need to do is know the theory and follow the instructions for everything to work out as it should! Prepare panels, tape measure, liquid plastic, knife, self-tapping screws, screwdriver, drill, profile type F and P. Let's get to work, clean the surface of old plaster and dusty surface. Profile P is the starting one; it is attached horizontally and vertically. Profile F is a platband; its shape is the same as the starting one, but it has a wide stripe in the design, which is used to cover the installation seams. The main thing is to trim correctly, without gaps or gaps.
First, the side blocks are cut and mounted in the groove, then the top. Factory components are used for joining and external decorative finishing. After the top profile is installed, the outermost starting profile is attached.
Sealing will not hurt; it will serve as a reliable additional fastening. Use polyurethane-based sealant for these purposes. All blocks for installation are cut exclusively at right angles, otherwise cracks will form in the corners, which will allow air to enter the room, which means that there will be a draft in the room.
If necessary, use thermal insulation materials, they are placed inside the structure; these can be mineral wool or polystyrene foam.
Sequence of installation of PVC sandwich panels on liquid nails
Let's consider the technology of installing slopes from sandwich panels using liquid nails. The first step is to thoroughly clean the slopes, removing old coating, dirt, and remnants of polyurethane foam. The base must be perfectly flat, so all defects should be eliminated using a plaster mixture. This material is used to seal all cracks and crevices and level the surface. The process is controlled by the construction level.
First of all, it is necessary to install the side slopes.
After the plastered surface has completely set, it should be treated with a primer intended for porous coatings. The procedure is carried out to ensure further reliable adhesion of the panels to the base. After drying, the surface is treated with a special antifungal compound. The dried base is ready for finishing with sandwich panels.
Before installing sandwich panels, measurements of each slope are taken to prepare products of appropriate dimensions. The sheathing is cut using a cutting object in the form of a mounting knife. The panel should be laid on the floor, then marked using a tape measure and pencil. Use a sharp knife blade to follow the marks several times. After trimming, the edges of the finished workpiece are processed with sandpaper to remove burrs.
The first step is to install the side slopes from sandwich panels with your own hands. The starting profile is attached to the wall near the window using self-tapping screws at 15 cm intervals. A strip of liquid nails is applied to the prepared panel in a zigzag design in the center and in straight stripes along the perimeter of the product. The workpiece is inserted with one edge into the starting profile and pressed firmly against the slope. The second side and top panels are installed in a similar manner. Components must be installed with minimal gaps between them.
Note! If the starting profile is not used when finishing slopes made of PVC panels, the sandwich element is mounted close to the window. It is inserted 1 cm deep, fixing it with polyurethane foam.
To complete this, you can putty the panel slopes.
To make the window opening look more aesthetically pleasing, it can be trimmed with an edging profile along its entire perimeter. To achieve a neat appearance, the joints in the corners must be cut at an angle of 45°. To mask butt joints, you can use liquid plastic or white sealant.
Installation instructions
After installing new windows, you need to wait a day for the final polymerization of the polyurethane foam and after that you can begin finishing. Installation of window slopes made of sandwich panels is done according to the following principle.
- Initially, you need to take the dimensions of the window openings. All parameters of the places where finishing will be carried out are measured (parameters may sometimes differ even with a fairly large scatter).
- Window openings are prepared for installation. All weak parts of old plaster and masonry are removed and replaced. All surfaces must be treated with antiseptic agents to protect against the formation of mold and mildew. Excess polyurethane foam is trimmed from the windows.
- A starting “P” profile is installed around the perimeter. It is attached to the surface of the opening with self-tapping screws, in the corner formed by the cut of the wall and the window frame. The fastening pitch is 150-200 millimeters. From above and below, sections are inserted into the installed profile to the entire depth of the opening.
- Panel blanks are prepared to the required size. The cutting of individual elements is done using a stationery knife. In this case, the protective PVC layer with part of the polystyrene foam located inside is cut through on both sides. The resulting cut ends can be trimmed with sandpaper on a grater.
- First, the upper sandwich panels for the slopes are installed, followed by the side elements. At the same time, insulation is placed in the resulting space (if the slope is “warm”). Installation without insulation occurs with the application of liquid nails to the surface of the workpiece and additional gluing to the wall.
- The corners of the window opening are completed by mounting the corners in the form of an “F” profile. To do this, measure and cut individual profile elements with a length greater than 50 millimeters on each side. They secure the free ends of the panels, and the edges are overlapped. Using a linear line, the joints are marked diagonally from the corner to the opening. Both ends are cut along the mark. The result should be a beautiful joint with an angle of 45 degrees.
- All joints must be carefully sealed with sealant.
Before installing the “F” profile, you need to fill the space between the panels and the wall well. The corner near the window is carefully foamed, the main cavity is filled with insulation. Or, as an option, completely fill all the voids with foam.
The construction of slopes from sandwich panels is a good alternative to the more labor-intensive plastering option. Their installation does not require a whole list of “dirty” work on applying plaster with further leveling and finishing painting.
To some extent, sandwich panels for window slopes and plasterboard are inferior, structures made of which are more sensitive to moisture and also require finishing plaster.
The only competitor for quick and easy installation may be plastic panels, but they do not have their own insulation. If you choose between sandwich panels and ordinary plastic, then the former win in terms of heat and sound insulation.
Do-it-yourself installation of sandwich panels on polyurethane foam
Slopes made of sandwich panels for plastic windows can be mounted using polyurethane foam. For this, a multilayer type of material with two stiffeners is selected. At the first stage, measurements are taken. The final type of finishing of the window opening depends on the accuracy of this process. Based on the results obtained, the products are marked, according to which the panels are trimmed with a sharp object.
A starting profile is mounted to the joining area between the wall and the window frame using self-tapping screws in increments of 10-15 cm. Finishing the slopes with sandwich panels begins from the top strip. It is inserted into the groove of the starting profile. The resulting gap between the wall and the PVC element is filled with polyurethane foam. The material should be applied very carefully, since during the drying process the foam can double in size.
On a note! It is better to choose a professional type of polyurethane foam, applied to the surface in a small layer.
Panels with two stiffeners are suitable for mounting on polyurethane foam.
A plastic sandwich panel is being installed, which is done using masking tape. Next, the side slopes are sheathed in the same way. After the mounting foam has completely dried, the excess material is cut off, and the structure is ready for further use.
Fastener "P" profile
A starting profile is cut according to the dimensions of the slopes, resembling the letter P in cross-section. It is attached using self-tapping screws exactly along the edge of the window profile.
The distance between the screws is approximately 10-15 cm. In this case, first of all, the profile should be installed at the top, while the side elements are brought close to the top, leaving no gaps.
A nuance: it is possible to install slopes using a sandwich panel without using a starting profile. In this case, strips of sandwich panels are placed closely behind the window profile 1 cm deep, with step-by-step foaming of the niche to fix the slope. This process is more labor-intensive than using a “P” profile, but the result is more aesthetically pleasing.
How to choose slopes: the best finishing option
There are several options for finishing slopes. Materials such as plaster, plasterboard, gypsum fiber, plastic panels and sandwich panels can be used for this. The price for window slopes of the latter type of material is the highest compared to other options.
The traditional way to finish slopes is to plaster the side and top niches of the window frame. The technology consists of leveling the surface by applying several layers of plaster, followed by priming and painting the surface. This method is characterized by a number of distinctive advantages. First of all, it is distinguished by its versatility. You can plaster the slope in a room with any humidity and temperature conditions. The mixture itself is an inexpensive material.
Plaster slopes are characterized by resistance to mechanical stress, ultraviolet radiation and moisture. This finish does not contain seams or joints. The surface is perfectly flat and smooth. In the event of a decrease in aesthetics, such slopes can easily be updated or repaired.
For slopes, plasterboard, plastic and sandwich panels, as well as gypsum fiber are used.
Despite its many advantages, this method of finishing slopes has its drawbacks. Plastering side niches is a long and labor-intensive process that requires breaks in work to dry each new layer. In addition, to get a good result you need to have the appropriate skills. Plaster slopes are characterized by low thermal insulation properties. They are prone to freezing and condensation.
Note! To perform plastering work, you will need to trim the mounting foam inward by 1-2 cm, which will weaken the thermal insulation seam.
The plaster and plastic frame do not interact well enough with each other, which will soon lead to the formation of cracks. They can be filled using sealant. However, there is no universal composition that equally exhibits good adhesion to plaster and PVC window block.
Plaster slopes
The construction of these slopes takes place in several stages.
To increase adhesion, the surface is first treated with a primer. Then several layers of plaster are applied, each of which must be allowed to dry.
Plaster is the cheapest, but ineffective way to finish slopes, since the lack of heat-insulating properties of this finish leads to hypothermia and further fogging of the windows.
The plaster is applied using a mesh, and the gap between the window and the plaster must be sealed with silicone.
Features of plasterboard slopes for window openings
Many people prefer plasterboard slopes. The method is based on gluing or screwing sheets of material of the required size to the side niches, followed by priming, puttying and painting. This option attracts with its simple and quick installation, which even a novice master can handle. The material is also characterized by an acceptable cost.
Installation of plasterboard slopes is a quick and easy finishing option.
Using strips of plasterboard, you can create perfectly smooth sides of the window. The space between the drywall and the wall is filled with mounting foam, which serves as a seal for the window. This surface is suitable for numerous paintings.
However, this method is not without drawbacks. The material is susceptible to moisture, so it can be used exclusively for finishing internal slopes. Condensation forms on the surface, which will soon lead to swelling and destruction of the structure. Such defects can be eliminated by completely redoing the slopes.
Drywall, like plaster slopes, is not able to interact firmly with the plastic frame. This contributes to the formation of cracks at the joints. The material is quite fragile, which does not exclude the possibility of it being pressed through and bending during installation.
After installing drywall, you will need to prime, putty and paint the surface to give it a finished appearance, which is not required when using sandwich panels for window slopes. It will take a few more days to complete all the work.
Installation of such slopes is carried out in two ways: frameless and frame.
On a note! To avoid finishing, you can use laminated drywall, which is mounted using special corners covering the ends of the sheet.
Varieties
When renovating an apartment in a new building or replacing windows, you will have to choose how to finish the openings after installing modern structures with double-glazed windows.
Window slopes can be finished using the following materials:
- plasters;
- drywall;
- gypsum fiber;
- plastic panels.
What materials are most often used for installing slopes?
There are three most commonly used methods of giving slopes an aesthetic appearance, each of them is good in its own way and can be used in combination with insulating material. So, PVC panels can be installed on window slopes, plasterboard can be glued or fixed to the sheathing, or the surface can be leveled with a plaster and putty mixture.
Slopes made of PVC panels
For finishing using this technology, plastic lining and auxiliary fittings are used. They help to hide the edges of the panels at the junctions of horizontal and vertical surfaces, as well as at the lines where they join the window frame and at the outer corners of the slopes.
Slopes made of plastic panels look very nice
In addition to the usual PVC lining, sandwich panels specially manufactured for this purpose are used for cladding, which consist of layers of plastic and foamed polystyrene. This material will facilitate installation, since you will not have to separately adjust and install the insulating material. In addition, this approach also often allows you to do without some elements of fittings.
Sandwich panels perform both decorative and insulating functions
Like regular lining, sandwich panels are great for decorating slopes around plastic windows, especially since, if desired, you can choose the desired PVC color that will be in full harmony with the shade of the window frame.
It is quite possible to install plastic slopes yourself, without resorting to the help of craftsmen - you just need to study the installation instructions and scrupulously follow them during the work.
Plastered slopes
This finishing method can be called traditional. High-quality surfaces will last a long time without losing their neat appearance. However, it should be noted that without a layer of insulating material, plaster cannot become an effective barrier to the cold coming from the window opening. The disadvantages of this method include the labor intensity and duration of arrangement, since the solution is applied in several layers, each of which must dry well. In addition, plastering work requires certain experience in its implementation, and without it, it is quite possible to ruin the surface, wasting time and money.
The old proven method of plastering slopes does not lose its relevance
The process of finishing slopes with plaster mixtures is quite “dirty”, and since it takes a lot of time (sometimes it takes from one and a half to two weeks), the room where the work is being carried out will need to be cleaned daily or not used at all.
Plasterboard slopes
Often, apartment and house owners prefer to decorate window slopes with plasterboard. This material is easy to install, it can be used together with insulation, the sheathing is quite durable and perfectly levels surfaces. In essence, drywall is dry plaster, but its installation is much faster than the “wet” version. This method does not cause large pollution in the room during work and does not require much experience to perform it. It is enough to follow the already tested instructions to carry out the finishing carefully and correctly.
Drywall slopes are very convenient for installation work.
Today, several types of drywall are produced, and one of them (GKLV, greenish in color) can withstand high humidity - it should be given preference for the design of slopes. Difficulties during the installation process can be caused not by the installation of the material itself, but by its subsequent finishing for applying a decorative coating - this is a primer and putty. Without these works, “dry plaster” can quickly become unusable, since it has a rather fragile structural structure and can be used for a long time only when covering the cuts and finishing the surfaces.
Sequence of installation of plasterboard slopes
Installation of plasterboard slopes can be carried out in two ways: framed and frameless. With the frame installation method, at the initial stage you should screw the starting profile using self-tapping screws, as in the case of using sandwich panels for window slopes. It is fixed on the line of joining of the plasterboard sheet and the window frame in the groove. The original frame is ready, after which you can begin installation.
A feature of plasterboard slopes is that the strips of material do not fit tightly to the window frame. A gap is formed, which negatively affects the thermal insulation properties of the opening. This space should be filled with mounting foam or mineral wool.
Note! Filling the gap with polyurethane foam is done very carefully, since the material increases in volume, which can lead to damage to the drywall.
Fastening drywall can be done using liquid nails.
At the junction of plasterboard panels, perforated corners are installed. The finished surface is primed and puttied. After the composition has completely dried, the coating is rubbed with sandpaper to obtain a smooth base, which can be painted in any color with water-based paint.
The frameless method involves installing plasterboard panels to the window opening using liquid nails or other suitable composition. The surface is first thoroughly cleaned and primed. Each slope element with applied glue is pressed tightly against the niche. To fix the elements, you can either use a wooden beam, which will give the structure evenness, or install spacers to the window sill. After complete drying, the slopes are puttied and then painted.
Let's start installation
Finishing window slopes with sandwich panels
It will be quite easy to make slopes with sandwich panels if you follow the rules and sequence of actions. Even if you don’t have experience finishing slopes with your own hands, you don’t need to be afraid of this work. Before starting installation, you need to prepare tools and materials, you will need:
- Sandwich panel – you choose what material to buy from yourself
- Start profile
- F profile
- Liquid plastic – used as desired
- Tape measure and knife
- A screwdriver with self-tapping screws, a screwdriver and a drill - probably every home has the latter.
Slopes made of sandwich panels in a panel house
I have already said that installation should be done at least 24 hours after installing new windows. Using a tape measure, you need to take measurements and cut out panels for the side and top slopes. Use a knife to remove unnecessary pieces of polyurethane foam and begin installing the starting U profile using self-tapping screws for fastening. They need to be screwed in with a gap of 10-15 cm. Do not forget that the top profile is attached first, and only then the side ones should fit tightly with the top one. Next, we proceed to install the slopes using a sandwich panel; it is inserted into the grooves of the profile. Using the same scheme, we start from the upper slope.
Finishing of plastic slopes
Then there are two options:
- The first is to insert pieces of the starting profile into the vertical bar from above and below, and then the side panels fit into these grooves.
- The second is to simply attach the panel end-to-end with the window sill and the upper slope, after which the gaps are closed using liquid plastic.
When this stage is completed, all that remains is to give the slopes a finished look. To do this, use the f profile; it needs to be secured to the edges of the sandwich fabric. For additional thermal insulation, the voids between the sandwich sheet and the wall are filled with polyurethane foam - this process does not bring any inconvenience, since it is very easy to dismantle the profile. After filling the voids, the bar is returned to its place.
Plastic slopes made of sandwich panels for a balcony block
Features of slopes for gypsum fiber windows
Gypsum fiber is often used to finish slopes. The technology for installing the material is similar to the principle of finishing niches with plasterboard. However, gypsum fiber has distinctive advantages over its analogue. The material has good strength and rigidity. There is a variety of products that are characterized by excellent moisture-proof properties. This feature makes it possible to use the material for finishing the external slopes of windows.
Slopes made of gypsum fiber are characterized by ease of installation and high speed of work. The material has excellent technical and performance qualities. It withstands mechanical stress and adverse environmental factors. Due to the presence of fibers in the structure of the material, it is an additional insulation for the window, which increases its thermal insulation properties, which makes it similar to PVC sandwich panels for slopes.
Drywall is characterized by high strength and rigidity.
Due to the good strength and rigidity of the material, it is possible to obtain an ideal design geometry that will have a long period of operation. Such slopes are characterized by maintainability. The damaged area can be puttied and tinted.
The disadvantages of the material include its higher cost compared to conventional drywall. However, it is lower than the price of sandwich panels for slopes. Cutting such material is also much more difficult. The surface needs finishing, which is carried out by priming, puttying and painting.
On a note! When painting gypsum fiber slopes with high-quality latex paint, it is possible to obtain a durable, moisture-resistant surface that can be washed.
Plastic panels for window slopes: material features
You can create reliable and aesthetic slopes using plastic panels. They are characterized by a sufficient level of rigidity, wear resistance, and moisture resistance. As a result of using the material, it will be possible to create a flat, smooth surface that does not require finishing.
Plastic panels for slopes do not require additional finishing.
Note! For slopes, you should choose panels made of virgin plastic that are resistant to ultraviolet radiation, which will not lead to yellowing over time.
The panels are installed using liquid nails, which ensures reliable, strong and durable fixation. Installation of the material is easy and quick, with a minimum amount of dust and dirt during the work process. Due to the fact that the slope and the window frame are made of the same material, it is possible to ensure that there are no gaps in the places where the elements come into contact.
Note! For additional tightness, eliminating the negative effects of temperature changes, the butt joint is treated with a sealant.
Plastic panels are attached using liquid nails, and the joints are treated with sealant.
PVC panels for slopes are completely moisture-resistant, so they can also be used for exterior decoration. The presence of an edge profile allows you to give the window a more aesthetic appearance. The element is applied to the joint between the wall trim and the window opening. The cost of the material is an order of magnitude lower than the price of sandwich panels for slopes of plastic windows.
The disadvantages include the insufficient strength of the material, which is why it is prone to mechanical damage. If a defect occurs, the strip is completely replaced. Additional elements are often of low quality, as a result of which they turn yellow, standing out unattractively against the snow-white background of the slopes. In addition, unlike sandwich panels for slopes, plastic elements do not contain insulation, which reduces the thermal insulation properties of the window.
Sandwich panels are very popular today when finishing window slopes. This is due to strength, reliability, moisture resistance and good thermal insulation qualities. The material is installed easily and simply. We are also pleased with the affordable price per m2 of sandwich panels for slopes, which averages 150-200 rubles.
Further actions
All excess gaps must be filled and leveled.
Excess acrylic must be removed with a damp cloth or sponge. This must be done carefully until the surface is completely clean. Manipulation is carried out in small areas. The acrylic should not be allowed to harden, otherwise there will be problems with its removal. It is more convenient to seal cracks immediately. The horizontal slope panel is processed first. After this there are joints, then they move downwards. First close the gaps on one side, then on the opposite. Lastly, the joints with the window sill are processed. It takes 12 to 24 hours to dry, depending on the characteristics of the sealant. If the gaps are large, the acrylic may be pulled into the seam. All these areas must be worked out again using the same method. After the second layer has dried, if there are unevenness and roughness, you can smooth out these defects with fine-grained sandpaper, folding it in half. It is recommended to carefully level the materials while they are gray, otherwise the plastic may suffer mechanical damage.
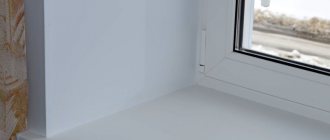
The slopes can be considered installed. They should be puttied when the final polymerization of the foam occurs. Their surface should be flat relative to the plane of the walls. After this, the protective blue film is removed.
Panels are considered the most unreliable material for installing plastic slopes. Even wall ones are easily pressed through, and their front layer is imperfect. It is enough to shine light on them, and the jumpers will be immediately visible. This is not observed in plastic window sills and sandwich panels.