An important part in the construction and decoration of a bathhouse is the arrangement of the dressing room. A dressing room is a room connecting the steam room and the entrance to the room. Accordingly, it should not allow cold air to pass through.
The dressing room can be either spacious or very small. It can serve as a relaxation area after the bath or take up very little space and be intended exclusively for changing clothes.
Regardless of what type of dressing room was chosen, it is important to take into account the fact that moisture from the steam room should not penetrate into it, since the clothes should remain dry. In addition, the dressing room should allow light to pass through, but not cold air. Therefore, small dimensions are most often preferred.
5/5 — (1 vote)
Erection of the roof for the dressing room
- We install the mauerlat and floor beams on the supporting boards of the frame.
- We install the outer rafter elements. At the base of the bathhouse we attach the truss to the pediment.
- We stretch the cord between the outer structures and fix the intermediate rafters in increments of 0.4-0.6 meters.
- We fix the vapor barrier membrane from the ridge to the mauerlat with an overlap of 15-20 cm. We glue the joints with sealing tape.
- We make transverse lathing from beams with a cross-section of 5 cm2.
- We lay the insulation tightly between the sheathing bars.
- We fix the waterproofing film on top with a construction stapler. Carefully glue the joints.
- We stuff the slats 2-3 cm thick to provide a ventilation gap.
- We lay the roofing material from top to bottom.
Please note that for a more aesthetic appearance, the dressing room must be covered with the same material as the entire bathhouse.
Exterior finishing
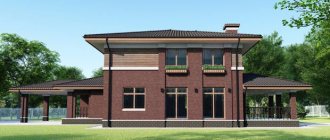
In many cases, the outside of a bathhouse-type building should also be improved. Especially if you used, for example, dull aerated concrete blocks to save money. (See also the article Peculiarities of finishing of aerated concrete.) You still have a chance to give the bathhouse the appearance of a real log house. To do this, the dressing room is finished with a blockhouse, which perfectly imitates rounded logs.
Sample of blockhouse panels
The work is carried out as follows:
- We install a sheathing made of wooden beams 40 mm thick. Since our goal is to imitate a log house, we mount the planks vertically.
Scheme of lathing and subsequent installation of a blockhouse
- We check the evenness of the frame with a building level and level it if necessary.
- We lay insulation between the slats.
- We staple a layer of plastic film on top of the insulating material to create waterproofing.
- We fasten the first panel at the bottom using clamps.
- We insert the next one with a tongue into the groove of the previous one and also fix it to the sheathing.
- In the areas of door or window openings, we trim using an electric jigsaw.
Photo of the cut panel
- So we fill the entire wall.
Outwardly indistinguishable from a real full-fledged log house
Heating system from the heating main
A private bathhouse can be directly connected to the central heating main. To organize a similar heating option for a bath, you will need to install an additional circuit.
The connection of the circuit to the heating main is carried out in accordance with the design documentation and permits obtained from the relevant authorities.
Choosing this option involves some difficulties:
- the likelihood of accumulation of groundwater in places where pipes are laid;
- the need for additional insulation of the heating main;
- the need to attract professional installers.
Requirements
Before building a dressing room, you need to study the requirements that the room must meet:
- There should be enough space in the room. One person needs 1.5 meters of free space.
- If the bathhouse will be used in winter, the rest room should be heated to make it comfortable to be inside.
- A high-quality ventilation system must be installed inside - natural or forced.
- The room should have furniture installed for a comfortable stay.
- The light in the recreation area should not be too dim or bright.
Often the furnace channel with the firebox is discharged into the dressing room. In this case, the area around the firebox door must be fenced off. This space should not be subtracted from the free space.
Lighting
When choosing bathroom fixtures, you should take care of their safety. The rest of the choice is determined by the interior style. For dressing rooms in a rustic style, bright lamps are not used. A small light bulb screwed into a socket on the wall will suffice. For spacious rooms and dressing rooms in a modern style, a chandelier under a lampshade (fabric or glass) is appropriate. It gives a cozy soft light. It is better to hang it above the table. A pair of identical wall lamps will add light.
Small iron tablet lamps look harmonious in modern interiors. For eastern recreation areas, it is better to choose exquisite floor lamps. It is logical to place the switches near the door so that it is convenient to use them as soon as you enter the dressing room.
Other materials for bath lining
Most often, owners use clapboard to cover the walls of a bathhouse, although there are other options besides it. It can be:
- planks;
- boards;
- planks;
- synthetic materials.
Sometimes, when for some reason the owner does not want or does not want to use the most popular materials, he can sheathe the internal walls of the bathhouse with foil
But if it is important for you that such an important stage as covering the internal walls is carried out according to all the rules, then you should follow the recommendations of professionals
In fact, foil has been used for lining bathhouses for decades. Owners who are supporters of this material say that they chose foil for a reason, because with its help you can reduce heat loss, and this is a serious cost savings. If you decide to simply cover the room with foil before installing the lining or other material, you will not achieve the desired effect. Therefore, even if there is a layer of foil on the walls, you will not achieve a heat-saving effect.
Also, owners who choose foil for lining a bathhouse explain their choice by the material’s ability to perfectly insulate steam. It’s impossible to argue with this, but there is a serious drawback of foil here - it blocks access to air molecules. This situation becomes dangerous for people in the steam room, who may suffocate. As a result, they deprive themselves of the opportunity to fully enjoy bath procedures.
As an additional reason that explains why you should not use foil to decorate the interior walls of a bathhouse, it is worth mentioning the presence of harmful substances in the composition:
- formaldehyde;
- phenol;
- benzene, etc.
If you wish, you can abandon foil and use synthetic substitutes that are so perfect that their properties can compete on equal terms with wood.
How to attach a bathhouse to your house: methods and methods
When presenting an extension, not everyone understands that the design can be different. Depending on the features of installation to the main house, a bathhouse extension can be:
- An extension with three full walls and one shared with the house.
- A full-fledged log house, which is located close to the house.
- The bathhouse is located at a distance of 1-1.5 m from the frame of the house. The structures are united by a warm heated vestibule corridor. It is often used as a dressing room or rest room.
The first two options can be located under a common roof with the house, the latter has a common or separate roof.
It is necessary to choose the design of the bathhouse extension at the planning stage. The choice will determine what the foundation will be.
Choosing a foundation
You can make the foundation for a bathhouse extension yourself. It is poured separately or the tape is tied to the main one under the house. The first option is preferable, since the shrinkage will be more uniform.
Columnar foundation for a bathhouse extension on a summer cottage.
You should not choose a foundation different from the main one. The most suitable option is lightweight tape. The connection to the main foundation can be done using metal brackets, and to avoid the formation of hold bridges, the joints are additionally foamed and insulated with polystyrene foam.
For a bathhouse extension to a country house, you can use pieces of reinforced concrete piles or slabs as the foundation. Since the bathhouse attached to a country house has minimal dimensions.
The transition between the bathhouse and the house, which is better?
It is important to think about what the transition between the bathhouse and the house will be like. The easiest option is to perform a pass-through, when the door directly from the house leads to a dressing room or rest room
The main advantage of the internal transition design is less heat loss.
When crossing through a separate vestibule, additional insulation is provided. The vestibule is used as an additional room or dressing room. In the vestibule you can place benches and a clothes hanger.
Features of communications
Communications to the attached bathhouse are carried out directly from the house. You can run pipes and electrical wiring through a common wall or under the bathhouse through the foundation. Wiring throughout the bathhouse is carried out in any convenient way. You can supply water to the bathhouse separately; you can dig a well or make a borehole in your garden or summer cottage.
Which tree to choose?
The steam room is a fairly humid room. It is necessary to select a moisture-resistant, strong, durable material with low thermal conductivity. The choice must be conscious and useful.
The variety of trees is responsible for the aesthetic appearance of the room. After all, each board has a different color and shade. For example, oak is darker, linden is light. The interior of the sauna depends on this.
The right type will create a relaxing atmosphere when vaping and fill the room with a pleasant aroma. There are several options for cladding products:
- Alder;
- Linden;
- Oak;
- Aspen;
- Pine;
- Cedar.
Each tree has different characteristics. We write the advantages and disadvantages below.
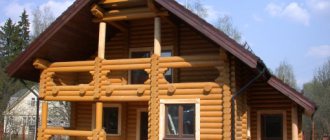
Log house
This word is understood to mean anything - buildings made of timber with corresponding cut corners, and rounded logs. Models made from wild materials are also not uncommon, but such options are too labor-intensive and it will not be possible to solve the question of how to assemble a bathhouse from a log house yourself. Let's look at the example of a rounded log.
Cutting into the bowl must be done by a qualified craftsman; the result of the heat preservation of the bath depends on this. The lower crown must be laid on an insulated and moisture-resistant foundation.
To do this, use bitumen resin or several layers of roofing material. The crowns are carried up to the rafter system according to the diagram, and then the work can be completed for a year, for thorough shrinkage.
Purpose of the dressing room
A person enters this room by opening the entrance door to the bathhouse. Despite its small size, this room traditionally performs several functions:
- first of all, this is a locker room where a person prepares for the bath procedure and can carefully hang his things;
- here the steamed visitor takes a breath between visits to the steam room;
- it can be combined with a relaxation room and used as it after all procedures are completed;
- The firebox door usually opens into the dressing room, which means it contains the firebox loading area and a place to store a portion of firewood to maintain combustion throughout the entire procedure.
In essence, the dressing room is the space between the open air and the steam room. On the one hand, cold streams rush here through the doorway, and on the other, hot steam from the steam room is periodically carried out. The following influencing factors are identified: a significant temperature difference, moisture in the form of steam condensation and carried on a wet body, as well as possible emissions from the furnace firebox. Taking into account the purpose of the dressing room, the following basic requirements are imposed on it.
- The temperature must be optimal. A person should not feel cold when undressing, and should not strive to rush outside quickly after getting dressed.
- The air in the room should allow you to relax comfortably, i.e. it is necessary to provide fresh air flow.
- Drafts and penetration of cold air into the undressing area are not allowed.
- The area of the premises must be sufficient for the installation of the necessary furniture and equipment, as well as for the movement of people. The firebox should not cause inconvenience or compromise safety.
We design ourselves: we think about the main thing, don’t forget about the little things
In this section we will focus on the most important points that will be of particular importance for the quick construction and long-term operation of your future bathhouse.
We will present the data in relative chronology of the order of work carried out:
At the initial stage. We are conducting reconnaissance of the area. We take into account the terrain, the proximity of the reservoir and the stability of its coastline and water level. We tie the future bathhouse to water sources and methods of waste disposal. Do not forget that according to fire safety rules, the construction of a bathhouse can be carried out at a distance of 8 m from residential buildings. At this time, the designer determines the functional form of the future bathhouse. Will it be made in the form of a free-standing structure or, on the contrary, integrated into a residential household or a utility, separate room such as a summer kitchen;
- At the second stage, the architectural form is determined, the type of building material for the construction of the box and the arrangement of the roof is agreed upon. At this time, the main linear dimensions of the bathhouse and the total usable area are determined. It should not be forgotten that for a family of six people to fully accept the procedures, the total usable area cannot be less than 12 square meters. m.;
- At the next stage, the internal volume of the bathhouse is divided into functional zones. A traditional modern bathhouse has a steam room, based on the calculation of at least 1 sq. m. for 1 person, washing department, useful area of at least 4 sq.m., rest room, functionally combined with a dressing room. Based on generally accepted practice, the area of the relaxation room should be 50% larger than the intended area of the steam room. The ceiling height is also designed here. Again, practical experience shows that in the steam room the ceiling should be located at a height of about 115 cm from the top edge of the heater stove, but its total height should not exceed 225 cm, based on considerations of rational ventilation and heat conservation. In order to save useful space, shelves should be attached to the wall. Shelf length is at least 650 mm, width is at least 470 mm. The top shelf of the entire stepped system of a set of shelves should be located at a height of no more than 1200 mm from the level of the flooring, which should ensure an acceptable level of temperature in its zone;
- Next, window and door openings are designed. Based on the condition that in the vast majority of cases the bathhouse is used in the afternoon, it is rational to lay the maximum number of window openings on the western side to maximize the use of natural light. Doors must open outwards. This, in the case of external doors, saves internal space, with the doors of the steam room - it will allow you to avoid accidents in the event of an emergency;
- Organization of heating and steam generation in a steam room. The best option, which produces soft, delicate steam, should be considered a full-fledged stone stove with a stone backfill. Metal stoves, although easier to install, in the vast majority of cases produce harsh, uncomfortable steam, which may be appropriate in a dry sauna. It is imperative to provide a heat-resistant cut-off in the stove corner, which will ensure that basic fire safety requirements are met. Along with the design of the heating and hot water supply system, other communication and support systems are included in the project;
- At the final stage, you can be tasked with measures to improve the appearance of the bathhouse structure, introducing details into the project that can emphasize the individual style of the bathhouse, its peculiarity, and its difference from other similar structures. Possible solutions for decorating the adjacent territory and creating a unique landscape design are also being worked out here.
Sources
- https://www.zwsoft.ru/stati/proektirovanie-bani-normy-rekomendacii-i-programmy-dlya-razrabotki-proekta-bannyh-kompleksov
- https://stroy-good.ru/proekt-bani.html
- https://rubanya.com/proectban/vazhnost-pravilnogo-rascheta-kak-sozdat-proekt-bani-samostoyatelno.html
- https://obane.info/planirovka/proektirovanie-ban.html
- https://Proekt-sam.ru/banya-bassein/programmy-dlya-proektirovaniya-bani.html
- https://baniaisauna.ru/1987-kak-sdelat-proekt-bani-samomu.html
- https://obane.info/planirovka/proekt-bani.html
- https://www.poparimsya.com/proektirovanie/programma-dlya-proektirovaniya-bani.html
- https://www.gvozdem.ru/3d/3d-dizayn-kvartiry-doma.php
- https://zen.yandex.ru/media/id/592d594b8e557de2f707c29f/5a1820dea815f164ccdde8ec
What is the purpose of foil?
To achieve effective energy saving in a bathhouse, you will need to not only insulate it, but also use reflective material in the form of a special foil film. Masters claim that it helps return up to 95% of the heat into the room.
The result is that fuel for the stove is saved and the duration of the fire is reduced.
For baths, aluminum foil with a thickness of 30–300 microns is used. It is used in combination with other insulation or is already fixed as its top layer.
Therefore, before covering, they first attach insulating material to the walls and ceiling, thanks to which the heat does not escape beyond the bathhouse. An insulated steam room heats up faster and retains heat longer.
The following are the advantages of foil:
- It acts as a vapor barrier and blocks the access of moisture to the insulation. The generated steam remains on the walls of the steam room.
- Its service life exceeds 50 years. Wooden elements will begin to rot faster than the foil layer will deteriorate.
- Excellent sound insulation. Foil can absorb up to 70% of all sounds and noise.
- Fireproof raw materials. Does not burn. It will become an obstacle to the spread of fire.
- Bathrooms warm up faster and take longer to cool down.
- If you fix the insulation with a foil layer, then the foil will prevent it from falling off.
Among the disadvantages, the following should be noted:
When there is a difference in temperature outside and indoors, condensation appears on the surface of the material. It is important to leave a gap for ventilation before covering. If this is not done, the resulting condensate will begin to be absorbed into the sheathing, which will lead to rotting of the lining. Foil has poor throughput
As users say, she is not breathing. Therefore, the rooms must have good ventilation, both forced and natural (windows, doors). Aluminum particles accumulate in the lungs, causing various respiratory diseases. But if you use the sauna periodically, the risk of harm to health is minimal.
Building a roof: the best option
In order to attach a dressing room to a finished bathhouse, a pitched roof is often used, which is easily attached to the main one, then covered with a similar material. But there is another way - they extend the main one further; this option is more preferable. Work plan:
- The Mauerlat is attached to the top frame, then the floor beams are installed.
- Trusses are made from rafters, the first two are installed at the edges. At the junction of the bathhouse with the dressing room, the truss is attached to the pediment.
- A cord is stretched between the outer trusses of the dressing room, with the help of which the intermediate elements of the roof are correctly installed. Their pitch varies depending on the size of the future room - from 40 to 60 cm.
- The vapor barrier material is laid and fixed, the overlap is 15-20 cm. The joints are glued with sealing tape.
- The counter-lattice is made from timber with a cross-section of 5x5 cm.
- Insulation is laid on it, and a waterproofing film is placed on it. The joints are glued.
- For the roof, lathing is installed, the thickness of the slats is 2 or 3 cm.
- The roof is being installed.
The roofing material should be the same as that of the bathhouse, otherwise the appearance of the new, but thoroughly “recovered” bathhouse will not be very aesthetically pleasing.
Construction stages
- Create a project. It is necessary as for another structure. The plan should consist of a list of required materials, the layout of the internal structure of the bathhouse and the transition between the two buildings.
- Pour the foundation in the same way as the main housing.
- Make low doorways with a high threshold to retain heat.
- Waterproof the internal walls with vapor-reflecting foil and cover them with linden clapboard.
- Place the chimney on the other side of the house to prevent smoke from entering it.
Foundation
The foundation for the bathhouse extension is made without the help of professionals. The base can be made separately or combined with the base of the building. The first method is better - it shrinks evenly. The raw materials for the foundation should not differ from the main one. The method of tying two bases is determined by the presence of metal fastening brackets. The foundation of the bathhouse uses reinforced concrete piles and slabs, because its frame is lighter than that of a house.
Connection to the house and construction of the roof
The main point is the transition between buildings; it must be end-to-end. To begin with, the door from the bathhouse, exit to the dressing room, and then directly to the housing. This design retains heat better. If the transition is made as a vestibule, another room will appear, a locker room will be organized in it. It is recommended to use material identical to a brick house for the construction of the structure. The raw materials will affect the shrinkage of the new building, and cracks or crevices will appear; this situation does not threaten the main structure. It is recommended to make the roof single-pitched. The top must be attached to the brick wall and located above the main structure under the roof.
Fire safety
The first priority in building a bathhouse is its fire safety. There is a special device - a spark arrester. Install such a device on top of the pipe. Sold ready-made or made by hand. All wall joints are coated with bitumen mastic and treated with polyurethane foam. This action will help ensure proper shrinkage without damaging the walls of the main building. The dressing room and vestibule are made with windows and a door that open outward. The pipe is insulated inside with foil insulation and outside with asbestos. The raw materials are adapted to high temperatures and are non-toxic. An extension should not be built near the gas pipe to avoid fire during a leak. The completed building must be registered and inspected by the fire service.
Finishing inside the dressing room
Typically, the finishing material here is lining, and both coniferous and deciduous wood can be used. But even those that successfully resist moisture require mandatory treatment with a fire retardant and antiseptic.
Covering the floor
So:
- Beams are placed on the waterproofing, their thickness is 3-4 cm, the pitch is from 30 to 40 cm.
- The floorboards are attached to the beams using the tongue-and-groove method; near the walls this is done with self-tapping screws, the heads of which must be deepened.
- Rubber mats are used as an additional covering.
We are working on the ceiling and walls
First they tackle the ceiling, then the walls. The work goes according to this scenario:
- the sheathing is installed;
- the first element is attached to the wall opposite the entrance using a nail driven in at an angle of 45°;
- after checking the level, the following parts are installed;
- beams, the thickness of which is 4 cm, are attached to the wall;
- the covering starts from the corner, the actions are similar to ceiling installation;
- The last stage is fastening the skirting boards and installing the platbands.
The dressing room is ready, now all that remains is to think about how to decorate its interior. Others believe that we should not forget the traditions of our ancestors, while others strive for novelty in everything.
It’s not difficult to build a dressing room in a bathhouse with your own hands, and if you built the bathhouse yourself, then the operation won’t even take you much time.
Design
The design of an attached bathhouse has certain features. This stage should be carried out very thoughtfully, since the comfort and practicality of the future structure depends on it.
The first thing you need to decide is the shape of the building and its location. Will the bathhouse have a common wall with the house, or will the 2 buildings be separated by a small vestibule?
Finished projects
If the owner’s plans do not include the construction of a non-standard structure, then a factory-made structure can be installed in a separate room. It does not require wood fuel, but is heated by an electric boiler.
Independent design
Drawing up a project yourself requires a thorough study of construction technology. These norms cannot be violated even in an effort to increase comfort.
It is recommended to take into account the specific construction conditions, plan the number and size of premises, their location and the transition between buildings. The design of the base depends on how exactly the extension will be made.
Features of the interior design of the dressing room
Decorating the interior of a dressing room in a bathhouse does not require any frills if we are talking about a chopped wooden bathhouse (read: “Chopped bathhouse - construction rules with examples”). The main task when finishing a log house from the inside is its thermal insulation and the treatment of wood with various impregnating compounds that extend the maximum service life of the material. If we are talking about finishing old buildings, brick buildings, etc., then the dressing room needs to not only be improved functionally, but also its decorative design needs to be updated.
It is worth saying that the amount of materials used in finishing the dressing room is limited due to the high humidity inside the bathhouse. However, this does not prevent you from creating a high-quality design for the dressing room, which will look original in the photo and upon visual inspection.
Floors in the waiting room
The process of finishing floors in dressing rooms must take into account the fact that this room is characterized by a high level of humidity, which can cause a rotting process, which can only be prevented by high-quality waterproofing and properly arranged water drainage. It is best if the flooring is made of natural materials. Perhaps even with insulation or a built-in “warm floor” system.
The design of the floor in the dressing room may be different, but regardless of the final choice, a plant layer at least fifteen centimeters deep must be cut and removed. In the event that you have to raise the floor level or level its surface, you can use the backfill method with heavy tamping - earth, slag or expanded clay. The most important thing is that in this case the floor level can be raised no higher than the level of the building’s foundation.
Perhaps the easiest way to create floors in this type of room is to go with the earthen version. Unfortunately, under constant exposure to moisture, they can become ordinary dirt, since the soil will allow water to pass through in any case. Therefore, a more optimal option is a clay floor, which allows a minimum amount of moisture to pass through.
Some important points
Many owners are concerned with the question: is it necessary to treat the wooden structures of the building and with what? Either it will be an antiseptic solution or a special varnish that will extend the life of the products. It is not advisable to do this in a steam room, because at high temperatures the chemical components will evaporate. But the wooden floors in the dressing room must be impregnated, protecting them from rotting processes, the formation of mold and fungi.
Products for coating wooden structures, in particular floors, are as follows:
- Varnishes - they contain antiseptics that prevent the spread of putrefactive bacteria. But they are also suitable for decorative finishing; Example of a varnished floor in a waiting room
- Colorless impregnations contain phytoncides that protect wood from mold, rot, etc.;
- Antiseptic solutions contain toxic fungicides. After their application, further painting of the material is expected.
A qualified approach to equipping the floor in the bathhouse and dressing room is one of the important components that can influence the amount of heat in the bathhouse and its long-term preservation.
Characteristics of wood
Linden. This type is familiar to practically everyone. Its positive qualities were already familiar to our ancestors, who made many household items from linden, etc. This wood does not absorb moisture, has a pleasant aroma and light color. Linden is one of the most popular materials and copes with the task perfectly. Does not swell or deform during use.
Aspen. Most consumers prefer aspen. It is durable, does not rot, and does not change its appearance for a long time. Does not contain resins or other substances harmful to health. Often used for interior decoration of saunas and other places with high humidity.
Pine. For rooms with a stable temperature, pine is used. Dressing rooms and rest rooms are lined with it. This wood does not crack, is durable with a pleasant aroma. Many people consider pine to be a harmful material because of the resins it produces. But that's not true.
Interesting to see:
Oak. Of course, this white wood is a more suitable option for interior decoration of baths. But not everyone can afford it. In the operational environment it has proven itself to have a long service life, high strength, and resistance to rotting. It has virtually no disadvantages. At high temperatures, they release favorable odors and substances that improve human health.
The variety of cladding materials opens up enormous possibilities for the consumer. Wood is easy to work with. It is quite easy to cut and performs health-improving functions well. Having chosen the right product, the steam room will have a fairly high attendance, having a great impact on the health of clients. Only natural substances are placed in these rooms.
Negative aspects of the layout
According to the standard, the bathhouse is represented by a structure made of foam block or wood. The bathhouse element described in the article (dressing room) plays an important role, since its incorrect layout can lead to discomfort.
In the absence of a dressing room, such an important element of the bathhouse as a room for relaxation, drinking tea or changing clothes completely disappears.
Features of the floor
It in the dressing room should be warm enough so that a person can move around it barefoot. Another mandatory condition: the floor should not be slippery even for wet feet. In addition, the necessary moisture resistance of the coating must be provided.
A wooden floor satisfies all requirements. It can be arranged in this order.
- Laying roofing felt waterproofing on a bed of sand and clay.
- Installation of a system of logs made of wooden beams measuring at least 10x10 cm. All wooden elements are thoroughly impregnated with a composition that protects against rot and mold.
- Filling with insulating material (ash, slag, expanded clay).
- Subfloor flooring. It can be made from unedged boards and even slabs with a thickness of at least 20 mm.
- Laying protective covers: thermal insulation layer of mineral wool, polyurethane foam, expanded polystyrene; waterproofing and vapor barrier with foil coating.
- Finished flooring made of boards.
Coniferous wood is quite suitable for arranging the flooring in the dressing room, but it is best to use materials with increased hardness and moisture resistance - larch, oak.
The floor in the waiting room covered with ceramic tiles is only permissible if a “warm floor” system is installed. You can use water or electric heating. The construction is made in this order.
- Applying a cushion of sand and crushed stone 35-45 cm thick.
- Laying waterproofing and reinforcing mesh.
- Pouring concrete screed.
- Laying water heating pipes or electric mats.
- Installation of a system of logs made of wooden beams.
- Laying a subfloor from unedged boards and waterproofing.
- Laying sheets of chipboard or plywood, followed by putty and primer of the surface.
Thermal insulation work
For thermal insulation, foil film is used.
When arranging a room, the correct order of laying layers of heat and vapor barrier is important. This will protect the walls and floor from the accumulation of condensation, which contributes to the destruction of wood.
A layer of vapor barrier is installed on the rough flooring, and mineral wool is placed in the empty spaces. Waterproofing strips are laid overlapping on top (they can be connected with a stapler) and finishing boards are nailed.
On the ceiling, mineral wool insulation is covered with foil film. You can arrange a decorative coating on top of the finishing boards.
The walls are covered with wooden panels and foil film is attached to them. Beams with a square cross-section (side 5 cm) are nailed on top, forming a cellular structure. Mineral wool is placed in the gaps. Another foil layer is mounted on top and a lath is filled, to which the finishing coating is attached.
Polyvinyl chloride wall panels for dressing room decoration
PVC is one of the most practical and cheapest materials, sold in a wide color palette, which allows you to decorate a beautiful dressing room with a certain style at minimal cost. Another advantage of this material is its ease of installation. The work of installing it is within the capabilities of every person with a basic set of construction skills.
Such panels can be mounted on smooth wooden walls without the use of a special frame. The work uses specialized fittings and guides that hide the joints between the panels. The material is cut to the required size using a sharply sharpened construction knife.
Insulation materials
A comfortable microclimate in the dressing room can only be achieved through high-quality insulation. The thermal insulation material for the floor can be extruded foam, mineral or basalt wool. Typically, insulation is laid out in the space between the finished and white floors. A mandatory factor is the use of vapor and waterproofing materials.
Ceiling insulation is a necessary condition for reducing heat loss in a bathhouse (especially if we are talking about buildings with a cold attic). For thermal insulation, you can use basalt wool, as well as expanded clay of different fractions. Large granules provide thermal insulation, while small ones fill the space between them. Instead of expanded clay chips, clay or sawdust is suitable.
To increase the thermal efficiency of walls, mineral wool or foil foam is usually used. They are laid between the sheathing and finishing material.
A more modern heating option is to install a heated floor system. This can be a water or electric modification.
As a rule, installing a heated floor alone is not enough to heat a room, so you can use it to organize a convection heating system. This method can only be implemented when installing a water system. The heated floor is connected to installed radiators. The heating liquid (usually water, less often antifreeze) circulates through pipes under the floor covering and radiators, this allows you to achieve a comfortable temperature in the dressing room.
The choice of underfloor heating system should be approached responsibly. Each variety has characteristic advantages and disadvantages. If we talk about electric models, then an infrared floor is preferable, as it is as safe as possible in conditions of high humidity. It is capable of warming up a medium-sized dressing room in 15-30 minutes.
Another option to heat the dressing room is to use a special design of a sauna stove. Its heating part is located in the steam room, and the combustion part is moved outside the steam room (for example, into the dressing room). The firebox is designed to resemble a fireplace (a portal and appropriate decorative elements are used).
Closed fireboxes equipped with doors with a glass window allow you to enjoy the warmth and glow of the fire. The glass in such designs is thick (up to 8-10 cm), heat-resistant. This allows us to declare its safety. The presence of a self-cleaning system prevents the appearance of soot on the surface of the glass.
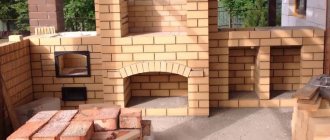
Furnace installation
The stove in the steam room can be installed in iron, brick or electric. The location for it should be chosen at the bathhouse design stage. The furnace firebox can be located both inside the steam room and outside it.
Installation procedure in a steam iron stove:
install the stove on a pre-prepared base;
#gallery-5 { margin: auto; } #gallery-5 .gallery-item { float: left; margin-top: 10px; text-align: center; width: 50%; } #gallery-5 img { border: 2px solid #cfcfcf; } #gallery-5 .gallery-caption { margin-left: 0; } /* see gallery_shortcode() in wp-includes/media.php */
Base for installing the furnace
Furnace foundation - photo
they line it with bricks along the walls and inside the partition;
#gallery-6 { margin: auto; } #gallery-6 .gallery-item { float: left; margin-top: 10px; text-align: center; width: 50%; } #gallery-6 img { border: 2px solid #cfcfcf; } #gallery-6 .gallery-caption { margin-left: 0; } /* see gallery_shortcode() in wp-includes/media.php */
Brick is laid between the walls of the furnace and the timber, the cracks are sealed with basalt cardboard
The walls near the stove are protected with refractory bricks
a metal passage for the chimney is installed in the opening on the ceiling;
Installed ceiling trim
a pipe and damper are installed on the stove, a tank is connected and a double-walled chimney is brought out through the ceiling, insulating it with non-combustible material;
Ceiling trim is fully insulated
a metal sheet with a hole through which the pipe passes is fixed on the roof.
Chimney passage through the roof
Installation of an electric heater
The electric oven is installed on a pre-prepared platform or hung on the wall using special brackets. It does not require installation of a chimney.
It is imperative to observe the distances specified in the instructions from the oven to the walls and shelves.
Construction of frame structure
Before installing a wooden structure, all elements are carefully treated with protective and antiseptic compounds for wood.
Assembly is performed in the following sequence:
- Installation of the bottom trim from bars with a cross-section of 10 × 10 cm.
- Installation of corner posts, checking the correct installation of each element using a level.
- Installation of intermediate racks in 80 cm increments.
- Making the top trim from bars with a section of 8 × 8 cm.
- Installation of bracing strips in the outer corners to increase the rigidity of the finished structure.
- Fixing floor joists from unedged boards.
- Installation of elements under openings for doors and windows.
- The internal lining of the finished structure is made of membrane material, which provides protection from the penetration of wind and moisture.
- External wall cladding.
Features of construction
The best option is the presence of a dressing room in the original building design. However, subsequent extension of the premises is allowed, which is usually carried out using a frame structure in several stages:
- construction of a foundation, usually strip or pile;
- construction of a frame with load-bearing elements made of timber;
- installation of effective thermal insulation of floors, walls and ceilings, for which modern insulation materials are used, for example, foil-coated Nanoizol in combination with mineral wool from well-known brands URSA or KNAUF;
- installation of the roof, the choice of design of which is made by the customer, taking into account how the roof of the bathhouse is made;
- installation of a ventilation system, which is a prerequisite for long-term operation of the building. Effective ventilation prevents the formation of condensation and maintains a humidity level that is favorable for wood.
When constructing a dressing room, special attention should be paid to two main issues - proper insulation and ventilation
During the work process, it is extremely important to find a balance between the operation of the two systems, which will simultaneously ensure the energy efficiency of the building, guaranteeing a comfortable stay for visitors, and maintaining an optimal humidity level indoors
Block house
There are several types of blocks:
- natural - made from deciduous and coniferous trees;
- metal - made from galvanized steel;
- acrylic - based on polymer resin;
- vinyl - made from PVC powder.
Any type of block material is suitable for finishing. You should prepare screws and 6-7 mm clamps for fastening, mineral wool as insulation, log parts for creating sheathing, a membrane with vapor barrier properties, a waterproofing agent, antiseptic impregnation and fire retardant, which are used to pre-treat the wood elements. Cladding stages:
- Secure the vapor barrier film in a horizontal position. Secure it with staples or a construction stapler.
- Install the assembled sheathing in a horizontal position. It is attached to the wooden base with self-tapping screws and nails. It is advisable to fix it to a brick wall with dowels for frames. In the latter case, it is necessary to pre-drill the recesses.
- Lay insulation in the spaces between the beams.
- Use a stapler to secure the waterproofing material.
- Build a similar sheathing on the main frame, placing it in a vertical direction.
- Cover the outer surface with block houses. The direction of installation is from bottom to top horizontally.
- Using clamps, secure the panels.
- After completing the finishing work, hide the screw heads using sawdust paste and PVA glue. You can also use special plugs and leftover block materials.
- Place plinths in the corners. Decorate windows with slopes and doors with cash.
Blockhouse cladding
External cladding
Functions of external cladding:
- Decoration of the building;
- Extending the service life of enclosing structures.
Boards
Pine and spruce lumber are used for the exterior cladding.
A frame wall can be easily recognized by the horizontal arrangement of the boards: this way they ensure the rigidity of the entire building, maintaining the correct geometry of each wall.
Before finishing a bathhouse made of timber, finishing a log bathhouse, the boards are connected over a windproof membrane:
- Butt;
- Overlapping;
- At a quarter;
- Tongue and groove connection.
The fastening of the sheathing to the frame posts is 60 mm nails.
Information. Before purchasing a cladding board, measure the area of the walls to be covered, add 15–20% to the resulting figure and obtain the calculated cladding area.
Sheathing boards are protected by impregnation with fire retardants, antiseptic, and painted.
Plaster
You can plaster not only stone, but also frame-cladding exterior walls. Then the frame is reinforced with jibs, and oblique lining made of chipped boards is stuffed onto it - this will ensure the rigidity of the frames. The lining is filled with plaster shingles (“shingles”, “shingles”, “drazga”, “splints”, “cod” - thin, plucked strips of wood).
The plaster is placed on the outside and on insulation - mineral wool of suitable strength, capable of absorbing the load from the plaster layer.
Non-asbestos slate, cement particle boards
Fiber cement sheets are flat slates that do not contain asbestos. A concrete sheet reinforced with fiberglass mesh is called an “aquapanel”.
Fiber cement sheets are dense, have a uniform structure, are not hygroscopic, and are good for external cladding of a frame house for tiling.
Non-asbestos slate and DSP are attached to the frame with galvanized self-tapping screws.
The joints of the sheets are secured with sickle tape using tile adhesive, the edges (at the corners of the bathhouse, in the openings) are reinforced with a painting profile.
The adhesion of cement products is increased with a penetrating primer.
Panels, slabs, sheets are installed strictly vertically on the bathhouse frame, otherwise the casing risks “collapsing”.
Ceramic surface
Mineral products for outdoor use:
- Facing brick, facing ceramic stones;
- Large-size ceramic slabs, glazed or unglazed;
- Facade ceramic tiles;
- Carpets made from façade ceramic tiles (up to 1.15 m2 in area) are small tiles or tiles glued to wrapping paper with bone glue.
Brick facing is created during or after the construction of the walls and rests on the foundation. Ceramic slabs have a thickness of about a centimeter, are produced in square, rectangular shapes with side lengths close to a meter, half a meter and multiples of the traditional frame strut spacing - 0.6 m.
Frost resistance of large-size facade ceramics is 50 cycles, water absorption is not higher than 1%.
Ceramic tiles for external cladding have 15 standard sizes, divided into 2 groups:
- Facade (water absorption 2–9%, frost resistance of at least 40 cycles);
- Basement (2–5%, 50).
Both wall panels and blocks are covered with tiles. In unheated, damp rooms they are also used to decorate the internal surfaces of walls.
Block house outside
If you line the bathhouse with a block house from the outside, the building will resemble a log house: a block, frame bathhouse will harmoniously fit into the system of buildings made of rounded logs or calibrated timber.
Unlike traditional lining, the block house is available in different widths - from 11 to 19 cm. Installation of wooden products on the sheathing is more durable: the gap will create conditions for ventilation of the wall and cladding. Impregnation with anti-rot compounds and fire retardants will extend the service life of the cladding board. Sheathing and lining the outside of the bathhouse, competent finishing of rooms with different operating conditions is the key to safe, long-term and efficient operation of the bathhouse.
Washing room
The washing machine may be different. If water is supplied to the bathhouse from a centralized network or a well with a pump, and there is a water heater, it is enough to install a shower stall or simply equip a shower corner.
This is impossible without running water, so benches and watering cans are needed. Often both are found, complemented by a large plunge pool or even a swimming pool. And also washing rooms combined with a steam room.
In each case, the interior decoration of a wooden bath will be different:
- For the common room, all the materials described in the previous chapter are used. This is a wood that can withstand intense heat on walls and ceilings and tiled or concrete floors with drains.
- In the washroom, which is separated from the steam room and does not have a shower, any wood can be used to decorate the walls, except birch . Including coniferous ones. Here the temperature is not so high, so the resin is unlikely to flow. But the air will be filled with a pleasant aroma.
Ladders or rubber mats are absolutely necessary here, since tiled floors in the washroom become slippery from soapy water
- Finishing a shower in a wooden bath can also be done with clapboard, but in this case you need good supply and exhaust ventilation so that the boards dry after the procedures are completed. They must be treated with a moisture-repellent agent and the coating must be renewed periodically.
The result of poor ventilation and non-compliance with finishing technology
Shower and sprinkling device in the washing room
- It will be much more durable to cover the walls with tiles or stone at least one and a half meters from the floor. If the load-bearing walls are wooden, they are waterproofed, covered with moisture-resistant plasterboard, and tiles are glued onto it.
Full height tiling in washroom
Combined finishing in a combined sink
- A very convenient option is a shower room with a door or curtain. It can be arranged in a dead end or fenced off a corner with a partition. And there will be no questions about how to decorate the walls in the washing room: with tiles. And the rest of the space, where there will be no heat, no high humidity, whatever.
Entrance to the steam room and washing room from the relaxation room
- It’s even easier to install a ready-made shower stall, and then you don’t have to worry too much about wall cladding; plastic panels will do. In this case, finishing materials are selected in the same way as for a bathroom in an apartment.
Shower stall in the bathhouse
The ceiling here can be plastered and covered with moisture-resistant paint that is resistant to washing. But if you regularly use the bathhouse, you will need to update the coating at least once every two years.
Such types of finishing as wooden and plastic lining, slatted or suspended ceilings are also quite acceptable. They are not afraid of moisture, spotlights can be built into them, and the space between the ceiling and the cladding can be filled with thermal insulation.
The suspended ceiling must have a ventilation grill to prevent condensation from accumulating on its reverse side
If the bathhouse is wooden, built from ordinary logs or timber, finishing can begin no earlier than in a year . Because it will settle as the wood shrinks, deforming the cladding.
If you don’t want to wait, you can bother with a floating frame for drywall and tiles. How to do this correctly is described in the article “Facing a wooden house with plasterboard.” And unlined walls must be treated with a natural-based antifungal antiseptic impregnation.