When arranging their home or making cosmetic repairs in the kitchen, many people wonder what they can use to make an “apron” or “screen”. This is what we call the covering for the wall near which the gas stove is located.
First of all, it should be said how the concept of “apron” differs from the concept of “screen” - solely in size. The “apron” is the part of the wall located directly behind the gas stove; the “screen” is usually the entire wall next to which the stove is located, including the space between the wall-mounted and floor-mounted kitchen cabinets. But they have the same mission - protection from burning and grease. Therefore, we offer you the best ideas and practical tips on how to close the wall behind a gas stove.
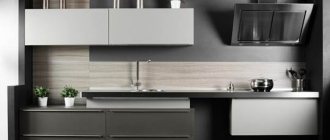
Kitchen set
When planning a kitchen set, you need to maintain the minimum permissible distances between electrical appliances and water sources.
If you are making a kitchen to order, the specialist will have to take them into account. If you are planning a purchase, for example, from IKEA and use their kitchen planner, there are text tips there. Read my personal experience of planning a kitchen at IKEA here. Basic principles: Do not place a stove and refrigerator in close proximity, or a stove and a sink. It is also recommended to make a spacer between the oven and the dishwasher.
Cabinets cannot be hung above the stove unless they contain a built-in hood. For the hood to work effectively, it must be placed at a distance of 70-75 cm (electric stove) and 75-80 cm (gas stove). It is not advisable for the corners of the hood to protrude in front of the wall cabinets; there is a risk of constantly hitting your head against them.
If you are attaching wall cabinets to modern, solid walls, use fasteners recommended by the manufacturer and no problems will arise. Old walls of Stalin and Khrushchev buildings may need additional fastening
Pay due attention to the fasteners, even if you are hanging open shelves - each of them has a maximum weight that they are ready to withstand. If overloaded or not fastened firmly enough, the shelves may collapse, and that would be good, if not on someone’s head.
The height of the wall cabinets depends on their depth and the height of the person who will cook. The optimal distance is 45-55 cm from the tabletop. A lower placement will cover part of the countertop. Deep cabinets especially need to be hung higher, but within sight, so as not to hit your head on them when bending over the work surface.
Before ordering a custom kitchen, to be on the safe side, draw out all future elements directly on the wall. When applying cardboard of the required width, see what the depth of the elements will be and whether it will be comfortable for you. Because in this case, it is comfort that ensures safety.
Communications
New and well-laid pipes and good plumbing are the key to the absence of breakthroughs. In any case, make it possible to easily and quickly access the communications under the sink and install additional valves there so that in case of emergency the water can be quickly shut off in this particular area.
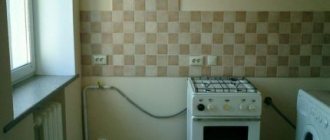
If the apartment uses gas, entrust the replacement of the hose and connection of the stove to a professional. If you decide to replace it yourself, lubricate the joints with soapy water to make sure there are no bubbles and no leaks.
Electrical is also very important. It is ideal to connect the entire kitchen to a separate machine, that is, isolate it from the rest of the wiring in the apartment. Many appliances, such as electric stoves and ovens, dishwashers, some microwaves and even kettles require a power cable. Be sure to consult with an electrician to understand which devices can be combined into one network, and which ones will lead to overload and the plugs will constantly be knocked out. Place external sockets away from the sink and stove.
Mandatory conditions for transfer approval
As mentioned above, moving a gas stove requires approval, and in some cases the transfer is not possible at all.
Thus, it is forbidden to create a kitchen in any other living room. If you do not coordinate the redevelopment, then all this can threaten with fines and litigation, as a result of which, if the court decisions are not followed, you could lose the apartment altogether. Therefore, even if you are planning to move the gas supply to the household gas stove in the apartment, this step must be agreed upon.
We recommend that you familiarize yourself with the penalties for violating safety rules when using gas equipment.
A range hood is a necessary element in a kitchen where a lot of cooking is done. But when installing it, it is necessary to comply with a number of conditions: compliance with the established distances from the stove to the hood, compliance of the hood power with the kitchen area
However, there are a couple of redevelopment options that are usually approved and can be completed.
To transfer a gas stove to another non-residential room, several conditions must be met:
- the room where the gas stove will be located must be isolated from other living spaces;
- natural light is required;
- the gas pipe leading to the stove should not be routed through residential premises;
- connecting the ventilation duct from the main house exhaust ventilation.
Thus, fulfilling these requirements will guarantee that the redevelopment project will be approved.
It is worth noting that in apartments located on the first and second floors, where there are no other living quarters below, it is possible to move a gas stove to any other room, the main thing is that the conditions written above are met.
Photo
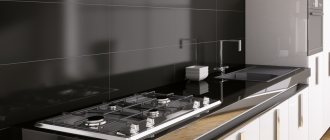
Don't be afraid to experiment. The apron can be made from decorative stone panels, marble, natural pebbles, super washable wallpaper, brick and even wooden clapboard. The main thing here is to take into account certain areas, for example, near the slab you can apply glass as a separate element, on top of wallpaper or the same brick. Natural wood materials can be additionally treated with durable varnish, and a lot of other techniques can be used that will increase practicality and durability.
The interior of your kitchen can be very whimsical and individual, the main thing is not to be afraid and take action, and practical advice will help you implement your own ideas correctly and without mistakes. There is no friend according to taste and color, and if you suddenly decide to implement an interesting idea, then go towards your goal by combining and combining various building materials.
Metal
This is truly reliable protection for walls from fire, especially if you have a gas stove. However, in all other respects, the practicality of metal screens tends to zero. Firstly, they are too thin and without a perfectly flat base they are easily pressed and deformed. Secondly, if it is an absolutely smooth surface without relief, the slightest traces of water and drops of fat will be very clearly visible, just like on glass.
As a rule, the sheets are attached directly to panels made of moisture-resistant FB plywood and hung on the wall in this form. The problem is that the bakelite substrate itself is not an environmentally friendly material and releases harmful formaldehydes into the air.
Kitchen finishing
Let's start from the very beginning: when there is no furniture in the kitchen yet, but the walls and floor are being decorated. The floor in the kitchen should not only be easy to clean and moisture-resistant, but also easy to move. When choosing flooring, choose flat surfaces with good grip. Textured tiles will be difficult to clean, and glossy tiles can cause you to slip and get injured.
Correctly decorating the walls is most important in the apron area. In addition to splashes from the stove and water, the walls in this area will be affected by temperature. If the wall is covered with tiles, glass or other heat-resistant material, everything is fine, but if the material is flammable (for example, PVC wall panels), you need to install additional protection. This is especially true for kitchens with a gas stove. Please note that the protective screen should not be adjacent to the wall so that the heat is not transferred to the surface behind it. Original ideas for kitchen aprons are here.
Insulation options
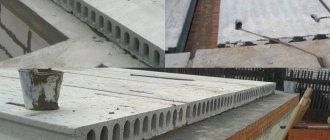
There are many non-combustible materials that can be used in this case. The easiest way to protect all surfaces from heat is to place a protective box around a red brick heat source. It is able to protect structures from heat and easily tolerates thermal effects. However, this decoration of the wall around the stove in the house looks a little unaesthetic and you can choose other materials:
- Porcelain tiles and tiles.
- Fiber cement boards.
- Factory-made protective screens.
- Metal sheets.
- Artificial or natural stone.
The easiest way to work is with a ready-made protective screen - you just need to select it according to size and install it on site. This option is also good because such finishing of walls near the stove or fireplace is done in the shortest possible time and without “dirty” or “wet” finishing work. The remaining options are more labor-intensive and have some nuances. Therefore, they need to be considered in more detail.
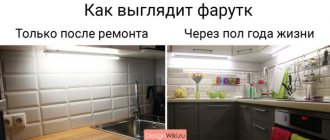
I stopped cleaning the kitchen every day. I’m sharing how to protect the stove and walls from splashes
Having moved to a new kitchen, the first thing I was concerned about was keeping it clean. In the first two days we managed to do a little work on the furniture and hob (steaks!). I had to take the time to wash the kitchen and the tiled wall. Then I went looking for ways and reviews on how to protect the stove from splashes.
The cleanliness of the stove when cooking has worried me for many years. I tried many devices, and none of them suited me 100%. Therefore, I chose to protect the stove from grease without much inspiration.
Looking ahead, I will say that this time I was able to select accessories that save surfaces from contamination. After frying, I didn’t need to wash the entire kitchen, which made me very happy.
I decided to write reviews about all the previously tested splash suppressors, protective plates and screens for stoves. And you decide for yourself what to choose. For some, my disadvantages may be insignificant, or they may be advantages.
Protective screens near or around the oven
Such a system will need to be implemented when installing a potbelly stove in the corner of the room. You can mount or lay out several screens from brick, installed at a short distance from each other. In this case:
- The first screen protects a person from touching the iron stove and getting burned. It is usually made of refractory or fireclay bricks;
- To protect walls made of flammable material, a second layer of protection is provided. It can be made of brick or covered with a barrier made of sheet steel with a mirror-like front surface. In this case, heat waves will be reflected from the mirror and spread faster throughout the room;
- if the foundation is insufficient in size or it is impossible to manufacture it, it will be necessary to lay a protective screen made of durable fire-resistant material on the wooden floor. This can be a sheet of steel or a decorative layer of heat-resistant clinker tiles or porcelain stoneware. The surface will first have to be covered with a layer of thermal insulation.
Installation of metal screens
This is the easiest way to make surface protection. It is better to use sheets with a polished front surface. Before fastening, the wall surface at the required level along the height of the screen is covered with a layer of thermal insulation. In this way, we protect the surface of the walls from the effects of heat.
You can lay a layer of thermal insulation or fasten the metal with self-tapping screws with inserted ceramic spacers. But it is better to attach the screen to strips or a metal profile treated with a layer of protection. In this option, the air gap will not allow heat to pass freely to the walls, and reliable insulation of the stove from the wooden wall is ensured.
A special gap is made at the bottom of the wall for the passage of cold air, ventilation of the wall and screen. When arranging a wall with a layer of thermal insulation, a number of longitudinal guides are installed on the surface. The space between them is filled with a layer of mineral wool or other material. Then sheets of metal are installed and screwed to the sheathing with self-tapping screws.
In this design, there is no need to leave a gap at the bottom. The air will not be able to pass through calmly, but the wall will be reliably protected from high temperatures. To protect the floor of the house, a slab made of non-flammable durable material can be used.
Brick screens
This protection option is usually installed near the stove. Thus, you can protect not only the wall, but also the person from burns. By installing a brick wall, you can reduce the distance from the stove to the wall. For laying, it is better to use ceramic or fire-resistant bricks.
The work is carried out in several stages:
- you will need to make a small foundation or remove boards from the floor along the marking lines for laying the screen and, by drilling holes in the concrete of the base of the building, insert metal rods to fasten the bottom of the wall and the foundation;
- Having leveled the floor surface, lay out a layer of mortar and lay the first row of bricks; you need to place the bricks in the same plane without distortions. This determines how level your entire wall will be. Do not forget to make small grooves for ventilation; for this you can move several bricks of the bottom row.
- checking the level and pulling the twine for laying each subsequent row, all bricks are laid on a mortar of clay and sand. Having raised the wall to the required height, the top is sealed with a layer of mortar or covered with a board. This way you can make a shelf for decorative ornaments and all sorts of little things.
The brick is laid no higher than the top of the furnace at a distance of at least 40-100 mm from it.
Using both types of protective screens, you can reduce the distance from the oven to 500 mm.
Examples of installation of protective brick screens in the photo:
Wallpapering yourself
Wallpaper is the most budget-friendly finishing option, so most often the finishing is done independently. Let's take a closer look at this process.
You will need the following set of tools:
- tape measure and wooden meter;
- calculator;
- pencil;
- construction spatula;
- perforation spatula;
- scraper;
- wallpaper scissors and knife, wallpaper cutter.
Necessary tools for wallpapering.
Almost everyone knows how to glue wallpaper, but not everyone knows how to do it correctly. Our instructions will help you avoid mistakes.
Preparing the walls
- We remove the old layer of finishing material. To make old wallpaper come off better, you need to first moisten it with a soapy solution and add wallpaper glue.
Tip: If your walls were previously covered with washable wallpaper, then you need to make slits in them. This way the base will be more likely to be saturated with the solution.
We prepare the wall for pasting, remove the old wallpaper.
- We wait until the wallpaper gets wet and remove it with a metal spatula. If necessary, repeat the procedure.
- If you have previously used vinyl two-layer wallpaper, then make horizontal cuts and remove the top layer. The bottom layer, if it holds well, is not removed, as it can serve as a good foundation for us.
- If the walls were painted with enamel or oil paint, then before wallpapering, we clean the surface with coarse sandpaper. Water-based paint is pre-soaked with a soap solution and removed with a spatula.
- We plaster and putty the walls to eliminate cracks, unevenness and other defects.
We putty the walls.
- If you are covering walls with thin paper wallpaper, it is recommended to first cover the surface with facing paper.
Let's start wallpapering
- Roll out the wallpaper face down. We measure the height of the wall on them and add 10 cm. If the pattern allows you to glue the wallpaper without joining, then you can immediately cut several strips. If docking is necessary, we add a tolerance. As a rule, the manufacturer indicates it on the packaging. Please note that the consumption of wallpaper in this case increases.
- We mark a straight vertical line on the surface using a plumb line - it will serve as a beacon for the first strip of wallpaper.
- Apply glue to the wallpaper from the middle of the strip to the edges and leave it for 5 - 10 minutes, depending on the thickness of the paper.
Apply glue to the cut piece of wallpaper.
- When using heavy wallpaper, it is necessary to coat the wall as well. If you use non-woven wallpaper or glass wallpaper, then the glue is applied not to the wallpaper, but to the walls.
Lubricate the wall with glue.
- Glue the wallpaper, aligning it along the intended line. We glue all subsequent strips end to end. Lightweight wallpaper can be glued overlapping.
We glue the wallpaper onto the wall and cut off the excess pieces.
- Press the glued strip with a dry, clean cloth or roll it from top to bottom from the middle to the edge with a roller. We cut off the excess edges at the top and bottom with a sharp knife immediately, before the glue has time to dry.
Paste over the inner corners
A common mistake that many people make is to cover a corner with a whole strip of wallpaper. As a result, folds or mismatches are formed if the angle is uneven. To prevent this from happening, measure the distance from the glued strip to the corner and add 20 mm.
Wallpapering.
We glue the wallpaper and run the blunt side of the knife along the corner so that the paper fits tightly.
Wallpapering the ceiling
- Mark the border for the first strip of wallpaper.
- Lubricate the canvas with glue. We apply it to the ceiling and align it along the drawn line (photo).
We glue the wallpaper to the ceiling.
- We press the wallpaper to the surface and straighten the folds.
Where to go when connecting a gas stove?
If, during kitchen renovations or for other reasons, you need to replace the old stove with a different model, you will have to do the following:
- purchase a device;
- call the company’s specialists, who must have permission to install gas equipment in residential buildings.
If you wish, you can call a private technician or an employee of the gas supply company. But after installation is completed, the new equipment will need to be entered into the Gosgaz register. At the same time, employees of private organizations that operate under an official license also have the right to make entries in the technical passport of the device. However, it would be advisable to call a Gosgaz employee, because this will simplify the process.
Installation of gas equipment is carried out only by qualified craftsmen
Let us note that there are government programs, thanks to which gas stoves are being gradually replaced in some regions of our country. This is necessary for the complete modernization of equipment and the safety of residents, which is why programs are often sponsored from the budget.
In what cases should you count on preferential or free replacement of gas equipment:
- if the stove does not belong to the owners of the apartment, but is owned by the relevant organization;
- when the owner of the apartment has the title of hero or is a participant in the Second World War;
- slabs are sometimes changed for pensioners who do not have additional benefits;
- can partially or fully pay for the installation of stoves for low-income families who have an income below the subsistence level;
- equipment is installed for residents of apartments that are owned by the state.
In order to receive a free stove, you must contact Gosgaz with a package of documents confirming your right to the benefit.
Prices for popular models of gas stoves
Gas stove
For each device, a special statement is compiled, which will display the following:
- breakdowns;
- period of use of the equipment.
After studying preventive inspections over the past years, the specialist begins to compile documentation. Then you will need to send an application for installation of equipment to the relevant authorities, where, after approval of the request, they will be placed in a queue.
This is what the documentation looks like, which the technician fills out after installation.
If you plan to replace the equipment yourself, you must do the following:
- Send a request to the city gas service asking for permission to replace the stove. After that, the organization’s employees will send a specialist to the address, who will assess in advance the complexity and cost of installation.
- After receiving the invoice, you need to pay for the specialist’s services and agree with him on a convenient time.
- If you plan to connect the stove yourself, then you will also need to obtain permission for such actions.
After installation, marks are left in the passport
Anti-grease sponge for dishes and barbecues will wash away the unwashable (4.2*2.5 cm)
Price: from 53.28 rub. (check price and discount)
Seller's reliability: excellent!
Delivery within Russia: free!
Customer reviews:
Review #1: I don’t know what the sponges are made of, but they are cool! carbon deposits are cleaned well, the gas stove at the dacha is generally a great success with a drop of detergent! They don’t wear out like melamine ones, I don’t know how long it will last. Worth taking!
Review No. 2: I received the parcel in 20 days. The seller sent it on the day of order. The quality of the sponges is very cool. they can clean anything and on any surface.
Review #3: Everything is exactly as described. They do their job perfectly well. Cleaned off a very dirty barbecue grate with ease. I will order more.
Screen materials
Below are the most common materials used to make slab screens. Laminated board made from MDF and chipboard materials is a budget option, but not so durable, the wear resistance of the protective film is quite low. Service life up to 5 years.
You can get out of this situation if you find a factory for the manufacture of entrance doors, where they will apply a special coating that is highly fire resistant and easy to clean even with abrasives and scrapers. It will not be as elegant, but durable. As a rule, it is just a screen of one color or a high-quality imitation of wood.
Artificial stone or porcelain stoneware
The product made from these materials is highly durable: resistant to large amounts of moisture, easy to clean, and can be used for many years. The downside is that the surface is not completely smooth, so dirt can get into the seams. Each type of composite material has its own individual properties.
- Artificial stone can be easily scratched by a metal object. However, this problem can be quickly corrected by sanding the surface with a power tool.
- Acrylic surfaces cannot withstand temperatures above + 80°C, so it must be attached as far as possible from the stove.
- It should be noted that porcelain stoneware and artificial stone will look aesthetically pleasing if the design and color of the countertop is harmoniously combined with the screen.
Metal
The metal is usually stainless steel. It perfectly protects walls from fire. However, otherwise there are more minuses than pluses. For example, such screens are thin, so they are easily deformed or pressed through. On such a surface traces of water or grease are visible. Another problem is that the metal sheets are attached to moisture-resistant plywood and secured to the wall. This substrate releases substances harmful to human health.
Tempered glass (triplex)
This is quite expensive, but a stylish and durable solution for the kitchen. If you make it as an apron, then you need to order it according to the individual dimensions of your kitchen. For the screen above the gas stove, standard versions from the store, made with fasteners, are also suitable. However, such a part will still be quite expensive in cost, but the most practical of all the materials presented above. As a rule, the standard thickness for such screens is 6-8 mm. Although these are small sizes, however, the thicker the glass, the more it begins to “green”.
If the screen does not match the planned style of the kitchen, then you can apply a beautiful design to the surface of the glass.
Porcelain tiles, artificial stone
Durable and aesthetic, porcelain stoneware has all the necessary advantages: it is resistant to moisture and cleaning agents, and durable. The only thing in which this material is a little inferior to glass is that it is impossible to achieve that ideal smoothness on its surface, which simplifies maintenance. Even on polished porcelain stoneware slabs there are very thin seams where dirt will get in every now and then. And it is quite difficult to install due to its heavy weight. But everyone can afford to buy such a finish - the cost of a square of moisture-resistant tiles can be 400 or 4000 rubles.
You should differentiate which composite material you choose for your kitchen, as each may have certain properties. For example:
- Artificial stone is easily scratched by metal objects, but it can also be easily polished with hand-held power tools.
- The acrylic composite plate does not maintain temperatures above +80 °C and therefore should be located at a decent distance from the hob.
If you have chosen artificial stone or porcelain stoneware for an apron or protective screen, it is advisable that the finish completely matches the design of the countertop, otherwise you may not get a harmonious picture in the interior.
Materials for decorating an apron
Quite high demands are placed on materials for cladding kitchen walls. After all, housewives spend a lot of time in the kitchen preparing food.
Therefore, it is very important that the environment is not only pleasing to the eye, but also practical.
Thus, materials for protecting walls from a gas stove must have the following characteristics:
Moisture resistance. Everyone knows that humidity in the kitchen is always at a high level - steam during cooking, splashes of hot and cold water. All this can negatively affect finishing materials with low moisture resistance.
Heat resistance. Near a gas stove, the walls always heat up, and quite strongly. Therefore, constant exposure to high temperatures can have a bad effect on wall coverings.
Hygiene. In conditions of high humidity, bacteria multiply at incredible speed. Therefore, for the cooking area you need to choose a coating that will not absorb anything.
Mechanical strength. This is one of the main requirements for finishing materials for the kitchen. The work area (apron) will be cleaned regularly
And it is very important to choose a material that will allow you to remove dirt without much effort.
Aesthetics. In addition to all the above requirements, the material for kitchen walls should look organically in the interior, because the kitchen is a place where every housewife spends a lot of time
You should also immediately take care of masking the gas pipes.
Having dealt with the requirements that are put forward for materials for finishing the kitchen work area, we will talk about the materials themselves that are used for this purpose.
When thinking about what can be used to cover the wall behind a gas stove, most often people opt for ceramic tiles. This material is famous for its aesthetic qualities and affordable price.
The tiles do not absorb grease and other contaminants, so cleaning them is not difficult. In addition, the material has increased resistance to temperature changes and is not afraid of household chemicals. And the variety of shades and textures allows you to create the perfect design of your dreams.
The only drawback of ceramic tiles is the complexity of their installation, but we will talk about this a little below.
PVC film. It can also be used for cladding walls behind a gas stove. This is a fairly cheap type of polyvinyl chloride coating. The film can be textured or glossy, with or without a pattern. And you can buy it at almost any hardware store.
But, in essence, this is a one-time coverage option. After all, this material has extremely low wear resistance. It is more suitable as a temporary solution. For example, when you need to cover a more expensive finish.
We looked at the best ideas for wall decoration in this photo collection.
https://stroy-podskazka.ru/plity-kuhnya/gazovye-plity/kak-vybrat-ekran/https://best-stroy.ru/statya_5-nishtyakov-borby-zhirom-kukhne-aliexpress_3383https://sovet- ingenera.com/gaz/mount/chem-obshit-gazovuyu-plitu.html
TOP 5 goodies for fighting fat in the kitchen from AliExpress
Housewives, hey, we have found 5 effective means for quickly and accurately removing old dirt with 100% results, fortunately the Chinese industry is famous for this!
During the cooking process, especially when frying something in a frying pan until golden brown, small splashes of hot oil fly to the sides. They then harden on the surfaces of the countertop, kitchen apron, in general, wherever they got there and settled. And we are generally silent about dishes. everything is covered in old crusts and soot . Picture brrrr.
If you are familiar with this kind of trouble and you are not ready to give up and say: “I’ll buy a new pan and change the kitchen.” then scroll through our new selection, in which you can find 5 products tested by thousands of customers to combat fat in the kitchen.
Arm yourself with anti-fat products at generous prices from Aliexpress and win!
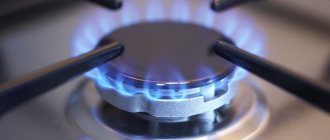
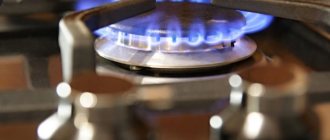
Rules for safe operation of a gas stove
Operation must be safe. This can be achieved, first of all, through proper installation of the gas stove.
The room in which the stove is installed must meet the following requirements:
- the ceiling height must be at least 2.2 meters;
- the room should have a window with a window, a ventilation duct under the ceiling with an open grille. It is not allowed to install a gas stove in basements;
- in a room with a volume of 8 m3 it is allowed to install a stove with two burners, 12 m3 - with three burners, 15 m3 - with four burners;
- the passage near the stove must be at least one meter wide.
Before turning on the gas stove and after cooking on it, in order to avoid an emergency, you should make sure that all the taps on it and on the supply pipe are in the closed position. In the apartment, while the stove is operating, it is necessary to ensure a flow of fresh air and ventilation.
When operating a gas stove, the following rules must be observed:
- Constantly monitor the operating stove. When the contents in pans boil, reduce the flame on the burners;
- When using the oven, periodically monitor the operation of the burners through the inspection window located on the oven door. In the event that the burner flame goes out, you must close the taps of all burners on the stove, as well as the tap on the inlet pipe to the stove, and ventilate the oven to avoid gas “popping” when you turn the oven back on;
- stove burners, their caps, grates and other removable elements of the stove should be periodically washed with water and detergents;
- If you smell gas in the room, you should immediately turn off the stove, close all taps, open the windows and notify the gas service. At the same time, open fire, electrical appliances and electric lighting must not be used indoors. All people and pets must be removed from the contaminated premises;
- do not allow children under twelve years of age to use the stove, as well as incapacitated persons and those not familiar with the rules for using gas equipment;
- It is not allowed to use a gas stove to heat the room;
- You cannot independently connect or disconnect the stove, as well as rearrange it using welding or a flexible connecting hose;
- It is not allowed to operate a gas stove if the ventilation ducts are faulty.
Ventilation ducts must be periodically checked and cleaned. Air ducts free of grease deposits are a guarantee of safety, since a spark entering such an environment can cause a fire. To check how well the exhaust ventilation works in your apartment, you should contact a professional. To do this, you need to call the management company and complain about poorly functioning ventilation.
You can check the ventilation yourself, although with a less accurate method. To do this, you need to bring a burning match, candle or thin sheet of paper to the ventilation hole. Smoke or paper should be drawn into the air flow into the ventilation hole. If this does not happen or the air flow is very weak, try opening a window to “depressurize” the room. If this does not help, then problems with ventilation really exist and need to be solved.
In apartment buildings, the management company is responsible for the operation of ventilation, so it should be responsible for restoring the operation of the ventilation system without requiring additional payment from residents.
Set of melamine sponges for kitchen and household needs XC USHIO (20 pcs)
Price: from 86.49 rub. (check price and discount)
Seller's reliability: excellent!
Delivery within Russia: free!
Customer reviews:
Review #1: Good melamine sponges! They are disposable, so you have to wash everything at once! For the general manager - that’s it! Delivery to Germany 2 weeks. Thank you very much!
Review #2: I use this sponge all the time, dried-on grease comes off instantly. As soon as I pick it up I can’t stop)))) Thanks to the seller, the set will last a long time.
Review No. 3: Friends, well, the sponges were tested on the same day) the result is 5! Stains from concrete, the house was built 3 years ago, I haven’t tried anything to wash them during this time, the result was zero. There is probably a special tool for such purposes, but these sponges did the job without anything. Not without difficulty, of course))) They are also just right for the home - the oven and the soot on the pans came off perfectly!
Covering bathhouse walls with non-combustible insulating materials
To prevent the walls from overheating, you can use materials with increased thermal insulation properties and inertness to high temperatures. Two types of materials are used:
- reflective;
- fireproof with lining.
The first type includes materials for wall cladding, consisting of thermal insulation with fire-resistant properties and a metal covering in the form of a sheet.
Insulating walls with reflective sheathing
A protective cake with reflective materials is done this way. First, the thermal insulation is attached using ceramic bushings directly to the wooden walls, then it is sewn up with a stainless steel sheet.
Advice! It is better not to use galvanized metal, since heating may release heavy metals harmful to the human body.
Stainless steel with a polished surface reflects the heat flow inside the steam room, reducing heat loss. In this case, reflected heat is more useful than direct heat. For thermal insulation use:
- basalt cardboard or cotton wool, the only material with increased hygroscopicity, non-flammable, environmentally friendly;
- asbestos cardboard, which reliably protects against flames and has a long service life;
- mineralite, an artificial material made specifically for these purposes.
Protective sheathing requires ventilation gaps of 2 cm from the wall to the insulation, 2 cm from the insulation to the steel sheet. If it is necessary to install the stove as close to the wall as possible, make a double skin of non-combustible insulation, use ceramic bushings to maintain gaps of 2-3 cm and sew them up with a steel sheet.
Insulation with cladding
Measures to protect walls with cladding are necessary in order to preserve the interior decoration of the room. They are more expensive, but no one has canceled the aesthetic advantages of the bathhouse. It is based on tile cladding, which is laid on fire-resistant cladding made of gypsum plasterboard, non-deformable gypsum-based cardboard with fiberglass, mineralite, non-flammable cement-fiber material, moisture-resistant and resistant to biochemical influences, LSU, fiberglass material bound with magnesium additives, resistant to high temperatures, high humidity. Heat-resistant glue is used for installation.
Advice! Use heat-resistant reinforced Terracotta glue, made from fireclay dust bound with kaolin additives, intended for tiling stoves, fireplaces, and all heated surfaces.
The recommended facing materials are quite varied, the best of them are:
- terracotta tiles, they are made from specially fired clay, which gives increased heat resistance and durability;
- clinker, denser clay tiles with a surface of various colors, similar to facing bricks;
- tiles, also made from clay, having an original embossed surface;
- porcelain stoneware made from a mixture of clays, kaolins, quartz sand, feldspars by high-temperature firing under a pressure of 400-500 kg/cm², with imitation of stone, wood, durable artificial material;
- soap chloride, a rock mineral consisting of talc, magnesite and chlorite, an environmentally friendly natural material that does not absorb moisture at all, has an attractive appearance, does not crumble, and is not afraid of high temperatures.
Advice! Use soap chloride to finish the steam room, this mineral has a healing effect on the human body, regulates blood pressure, stimulates cerebral circulation, expels viruses and microbes due to the release of vitamin D when heated.
All of the listed tiles are an element of protection that forms a cake, the basis of which is a fire-resistant material. Just like a screen, sheet material is installed on ceramic bushings with a gap of 2-3 cm from the wall. The minimum distance to the heat source from the tile should be 20cm.
Protection with cladding decorates the room, creates a positive mood, and helps to increase the efficiency of procedures. And most importantly, properly installed insulation prevents wooden walls from overheating and catching fire. Have a nice steam!
What can be done
- a relatively inexpensive, waterproof material and can withstand heating up to 120° C. In addition, it is very durable and cannot be broken with a hammer. And the screen itself does not heat up.
The screen can be mounted on the front of the stove either perpendicular to the floor or at an angle.
The optimal thickness of polycarbonate for installation on a gas stove is from 4 mm, taking into account that the dimensions of the protective screen will be 60 cm or more in width and 30 cm in height.
You can order monolithic polycarbonate by calling: 8-029 676-38-61; 8-029 151-37-03; 8-029 873-06-40. Cutting to size for free!
Advice! If you are going to glue the protective screen to the stove, then carefully select the brand of glue. Thermal expansion must be taken into account; not every glue can fail.
We suggest you familiarize yourself with How to make PVC panels on the wall
It is better to mount monolithic polycarbonate to a stove or countertop mechanically using washers.
Please check the availability of polycarbonate in the color range and thickness you need by calling: 8-029 676-38-61; 8-029 151-37-03; 8-029 873-06-40.
Polycarbonate comes in a variety of colors, so you can choose or make your own protective screen to match the style of your kitchen.
For those who do encounter heating in their kitchen furniture, there are two options for solving the problem. The first - the simplest, but not always feasible - involves a banal rearrangement: if the stove or oven does not come into contact with the set, the unpleasant consequences will disappear by themselves.
In small-sized kitchens, it is quite difficult to “outdo” the interior, so it is more logical to resort to the second method - independent thermal insulation. There are several materials suitable for this purpose:
Any of the listed products, provided they are secured between the device and furniture, can serve as an effective protective screen. The easiest way is to purchase a roll insulator with foil: it needs to be folded in half or three, adjusted to the dimensions of the adjacent wall of the cabinet/cabinet and securely secured with foil tape around the entire perimeter.
For the oven, it is optimal to use regular foil paired with basalt cardboard: the first is attached to the side of the appliance, the second - directly behind it. Fiberglass can be used as a fireproof layer if, for example, a sheet of aluminum is laid between equipment and furniture. Some users prefer to dismantle part of the countertop and the end sides of the set (directly adjacent to the stove) - non-combustible materials such as artificial stone or tempered glass are selected to replace them.
We invite you to familiarize yourself with the use of CBPB for flooring - options
Before testing any of the above approaches, you need to carefully study the instructions - some manufacturers clearly state that thermal protection strips prevent normal cooling of the device case, and therefore are categorically not recommended for installation.
In conclusion
A kitchen apron is regularly exposed to negative influences: splashes of water, drops of fat and various products, high temperature, frequent washing. All this makes us look for the most practical and resistant material to all this. Everyone wants the kitchen to be attractive, stylish and harmonious, so another requirement is put forward for the finishing material - a pleasant appearance
In addition to ceramic tiles, there are many other ways to decorate a kitchen working wall: when choosing one option or another, it is important to compare all the pros and cons, consider how the material fits into the kitchen conditions, and only then make a decision
Tags:Kitchen
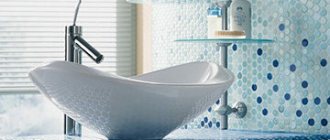
No. 9. Mirror: original, but troublesome
A mirrored apron will become a real highlight of any kitchen. It can visually significantly enlarge a room , so it is a good option for the smallest kitchens. The mirror is not afraid of moisture , and high temperatures, drops of fat, and detergents cannot harm it. This is a very original way of finishing that will transform the kitchen.
There are probably more disadvantages to a mirrored apron than advantages , although the issue must be considered individually in each specific case. The ability to reflect and double the area of the room can play a cruel joke: the amount of dirty dishes will also be doubled . There is often high humidity in the kitchen, so the mirror can fog up , and its appearance deteriorates. But the mirror will look much worse when it gets splashed with water and grease. Of course, it’s not difficult to wipe it down and put it in order, but such a procedure will have to be carried out constantly during active cooking.
Liquid soap
If you don’t have the time or desire to mix different components, you can simply apply a layer of liquid soap to the work surface. All the fat that gets on the stove during the cooking process simply will not have time to burn, so the surface can be easily washed off with a regular sponge. The role of the detergent will be performed by the previously applied liquid soap; you just need to rinse everything thoroughly with water.
Of all the listed methods, any housewife will find a suitable option for herself. These little tricks will help you forget forever about a thick layer of burnt fat and long cleanup after cooking dinner. At the same time, money will remain in the budget that was previously spent on purchasing many products for cleaning the stove.
Splash suppressors
The simplest and cheapest way to help protect the stove from greasy splashes is splash traps in the form of a mesh lid. This device has never satisfied me with the level of protection. I think you too.
As soon as you lift the mesh above the frying pan, everything around is covered with greasy dots. Yes, a splash suppressor reduces the degree of contamination, but not the cleaning area.
There are two types of splash guards: like a regular lid, with a handle in the center, and like a small racket, with a handle on the side. I used both. I strongly do not recommend a sprinkler with a handle in the center. It becomes greasy during cooking.
Minuses:
copes 50%.
A simple device collects fat perfectly, it’s a pity that you have to lift it from the frying pan. And then, beware.
Triplex or tempered glass
The other extreme is a stylish and expensive glass screen, which in the kitchen can last longer than the furniture itself. You will have to order its production individually according to your dimensions if you want to assemble a large, full-fledged apron. But for a compact screen, only for the section of the wall above the stove, it may be possible to buy small standard panels with eyelets for fastening. But in general, the cost remains the same - 6-7 thousand per square. But in terms of practicality, this finish has no equal.
Keep in mind that for a protective screen, the optimal panel thickness is 6-8 mm.
This seems small, but with such dimensions the glass is already beginning to have a green tint. If this shade is not suitable for the chosen style of kitchen interior, you will have to buy lightened or, on the contrary, tinted panels. But more often, customers prefer glass screens with a beautiful pattern printed on the back.
Although glass screens are among the most expensive and may well exceed the cost of some types of artificial stone, from a practicality point of view they are the best solution for the kitchen.
And their price in comparison with durability will no longer seem to you a serious drawback and an unjustified waste of money.
My life hack on how to protect the stove and walls from splashes
Not a single kitchen accessory does the job for my taste. Some splashes of fat from the frying pan quickly jump over the screen, staining everything around.
The splash suppressor in the form of a lid only works while in the frying pan. Although today I observed how small splashes of oil broke through the mesh.
Therefore, I decided to combine a protective screen and a splash guard. The area and intensity of pollution have noticeably decreased. Chose:
If you are interested in other protection options described in the article, they can be found here:
No. 7. MDF panels: a budget and practical option
You can make a kitchen apron from MDF panels: it will not cost much, but will be much more practical than finishing it with film or PVC boards. The main advantages of this method of finishing a working wall:
moisture resistance and strength;
quick production, because, as a rule, such an apron is created together with the kitchen set;
ease of installation. The walls do not require careful preliminary preparation, and the panels can be fixed either to the frame or using liquid nails
If you need to replace the apron, this can be done very simply - you don’t even need to remove the furniture;
seamless coating, which is important in a kitchen work area;
beautiful appearance: such panels can imitate ceramic tiles, stone, wood, brick, and recently a bright pattern has been applied to the material so that the apron becomes a real highlight of the kitchen.
But the material, unfortunately, has disadvantages:
- Not all detergents can be used to clean the surface. Too active substances can negatively affect the material, ruining its appearance and performance;
- flammability, so it is better to use MDF panels only in kitchens where an electric or induction stove is installed.
Primary requirements
Since the functions are the same, it means that the requirements for the surface of the kitchen screen will not differ from the characteristics of a reliable apron. Among them:
- Resistant to high temperatures and humidity;
- Wear resistance;
- Easy to clean;
- Attractive appearance.
However, some screens today are made in the form of a simple PVC film with a decorative pattern. You can buy such stickers for only 100-200 rubles, and it is assumed that as damage appears on the surface of the film, the owners will be able to immediately replace it with a new one. However, those who are used to doing everything well should choose a screen made of more serious material.
Connecting a gas stove at the dacha
The installation and connection of any gas equipment must be carried out by the gas supply company or other certified companies with permission. The task of specialists is to connect the gas stove using a flexible hose to the main gas entry point and adjust the horizontal level of the working surface of the stove.
The operational requirements for a stove in a country house are the same as for an apartment stove:
- The flexible hose cannot be bent, ventilation is required, a gas detector is desirable, access to the gas shut-off valve to the stove is free.
- Installing a gas meter if you don’t already have one.
Actually, regarding the gas sensor, the idea is, of course, a good one, but its usefulness is questionable. Many simply do not work, and if they do, then there is another problem - when filling a room with gas when no one is home, the detector beeping can cause an explosion. And if you are at home, you cannot help but smell the gas.
So, if everything is done correctly and there is good ventilation, then there is nothing to fear.
As for the question as a whole - is it worth installing a gas stove at the dacha - with a main gas connection or with bottled gas - it is difficult to answer unequivocally. A gas stove using liquefied gas is the best option if you are at the dacha only during the season. Connecting main gas is justified only in case of year-round living in a country house.
Is it possible to cover the gas water heater with the facade of the kitchen. What did SNiP tell you about?
The fashion for cabinets with built-in household appliances has not bypassed gas equipment. Many representatives of furniture production offer their clients a sophisticated design of such cabinets for every taste. However, is it really possible to build a gas water heater into a closed kitchen cabinet? Building codes and regulations (SNiP) clearly state that this should not be done under any circumstances.
The column should be located on the wall at least 2 cm from it, both behind and to the side if gas equipment is installed in a corner. Moreover, nearby surfaces must have a non-flammable composition.
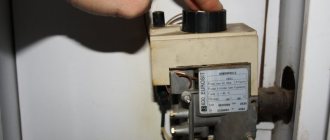
Main parts of the gas water heater: 1 – casing; 2 – traction diverter; 3 – heat exchanger; 4 – burner; 5 – gas unit; 6 – water unit; 7 – electronics unit (except for speakers with piezo ignition).
You can, of course, argue that this is not a problem and apply a safe coating to the inner surface of the cabinet. But, besides this, there are other requirements that prevent the placement of a gas water heater in a closet. If a gas leak suddenly occurs, a life-threatening concentration will very quickly form in a closed space. Only 5-15% in the room is enough, and since the gas does not have a pronounced odor, to enhance which the Odorant additive is used, it will be felt much later.
The installation of a gas water heater and all the details of its location are regulated by the section of SNiP relating to the gas supply area. Therefore, when starting a renovation, especially with replacing a water heater in the kitchen, it would be a good idea to study clauses 2.04.08-87, 42-101-2003, 42-01-2002.
Care Tips
In houses with stove heating, maintaining the stove and fences that protect the combustible structures of the house from overheating in good condition is the key to trouble-free living for its owners. Fire is no joke, and there are no trifles in observing fire safety rules! If they say that a sheet of metal measuring 500x700 mm is needed in front of the furnace loading door, it should be there!
Every year, before the start of the heating season, you should check the condition of the heating appliances at home. It is necessary to check whether the heat-resistant plaster of the stove is damaged, whether there are cracks in the chimney, or whether the facing tiles have fallen off. All identified defects must be corrected in a timely manner.
No. 2. Ceramic tiles: immortal classics
Most of us still choose ceramic tiles for our kitchen backsplashes, and for good reason. This is one of the best and most practical options, and it has a lot of advantages:
- high strength;
- heat resistance;
- ease of care;
- a huge assortment: you can choose tiles of any size, color and with any pattern;
- relatively simple installation, which with some skill you can even do yourself.
Using tiles, you can create a variety of effects, for example, highlighting a certain area using a material of a certain color: with decorative tiles, you can highlight the area near the stove or sink, and lay out the rest of the area with simpler tiles. It is worth noting that dirt can accumulate in embossed ceramic tiles and in the joints between the tiles, so it is better to choose the smoothest possible material and make the seams thin or varnish them. When combining tiles above the work area and other types of finishes in the rest of the kitchen, it is better not to settle on one color. It is better to separate the work area with color from the dining area in the kitchen, thus creating an effective zoning.
Super brush for fighting grease in the kitchen AIHOME 3 in 1
Price: from 612.26 rub. (check price and discount)
Seller's reliability: excellent!
Delivery within Russia: free!
Customer reviews:
Review #1: The order arrived in 2 weeks, quickly, I think. The sponge itself is made of silicone, has bristles and a scraper as a tip. You can pour detergent into it, which is convenient. Cleaned trays and other utensils with ease. Thanks a lot!
Review #2: I didn’t think I’d say this, but this brush is a thing! Freaky as hell. Scrubs, washes and scrapes without damaging the surface. Silicone is moderately soft and flexible, which is very convenient for intensive use. I washed everything for her! Beauty!
Review #3: I decided to try something new and didn’t regret it. I washed dishes, barbecue grills and other utensils at the dacha after the barbecue season. Everything came together perfectly! Even the old fat has come off. Fairies can be poured into the tank, which speeds up the cleaning process. I have been looking for such an assistant for a long time and found it. I recommend it to everyone, honestly!
Cleaning well is great, but tasty and quick cooking is much better! Catch our selection of TOP 5 tricks for quick cooking from AliExpress and do it with pleasure!