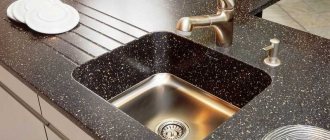
Hello, dear friends! Today we’ll talk to you about how to embed a sink into a countertop, what you’ll need to work at home, and how to implement your idea with your own hands.
We install sinks in the kitchen, but in the bathroom we may need to install a sink. At the same time, there is no fundamental difference in where exactly these actions take place.
But there is a difference in whether you are cutting in a round, oval or rectangular sink, and the material of the countertop and the element being cut in also matters. In particular, in kitchens and bathrooms, stone and metal countertops, ceramic and made of MDF can be used; there are products made of artificial stone. I don’t think it’s worth reminding that you need a moisture-resistant countertop in the kitchen and bathroom. Especially under the sink. I will try to touch on all these points to one degree or another today.
If you have anything to add or have any questions, leave comments and your feedback.
Features of installing an overhead sink
The main advantage of overhead products is their low cost and extreme ease of installation. They go well with almost any kitchen design. They can be made of different materials, but stainless steel remains the main one. The sink simply fits onto the cabinet; the main thing is to choose its size in order to avoid unnecessary gaps between the kitchen furniture.
No preparation of the surface of the cabinet is required. It is a rectangular hole, which is limited by the walls of the cabinet. The only thing that needs to be done is to treat the ends of the walls of the bedside table with silicone, to provide the wood with insulation from moisture.
Installation materials and tools
Although the installation is not difficult, the work requires the following set of tools:
- fasteners, masking tape;
- measuring instruments, pencil, ruler;
- electric drill;
- pliers;
- set of wood drills;
- silicone sealant;
- bedside table with work surface, water hoses, mixer, siphon.
Sink installation process
Before installing the countertop sink, the base cabinet is assembled. The doors are installed on the cabinet after installing the work surface. Before starting work on fixing the sink, a siphon and mixer are attached to it. Next, the structure is connected together; this can be done in several ways:
- Fastening with glue. The sink should be wider than the bedside table and cover the ends of the walls. The contact points between the elements are treated with sealant, a sink is installed on top of the support and pressed. After the silicone has completely dried, the two objects are completely glued together.
- Installation on brackets. Universal method. Fastening elements are included with the product and can be sold separately. The fixation process begins with fixing the brackets to the ends of the side walls of the support; for this, self-tapping screws are used, which are screwed into the inside of the side walls. Next, the sink is installed, and the main fastening screw should rest all the way against its metal corner. The pressure to the ends is adjusted by moving the mounting angle.
- Fixation on a hand-held stand. The product is made in the form of a lathing and can be attached inside to the walls of the cabinet. After installation, the sink is supported both on the walls and on the frame. The sheathing can be an independent support.
- Using wooden blocks. If there are no brackets or there are defects on the cabinet, you can use bars that will serve as fasteners.
At the final stage, the corrugated pipe from the siphon is discharged into the sewer, and the hoses are connected to the water supply system. After checking the structure for leaks, you can safely use the sink.
Disadvantages of Eurosaw connection
The positive side of the euro saw is its smooth surface, on which the joint is not visible.
There are also disadvantages, they are few, but they are quite noticeable. Eurozapil is a lock that requires a clearly defined arrangement of parts of the tabletop; they cannot be moved. Placing a headset with a top panel requires an absolutely flat wall and correct angles. If the walls are uneven, then the countertop will not adhere to it, and there will be a gap between it and the wall. It cannot be closed by changing its position. You will have to cover it with a table plinth. If the curvature is significant, then the gap will still remain. You'll have to level the wall.
If you plan to install a set with the letter “P”, then the curvature of the walls will disrupt the arrangement - there will be gaps along all the walls.
In this case, small irregularities will have to be covered in this way: the installation is carried out as close to the wall as possible, and the surface should be worked on separately. The gaps in it will have to be sealed with special planks, and the sides adjacent to the wall will have to be filed down. Therefore, in addition to the question of how to connect a tabletop without a joint, you can immediately figure out how to quickly make the walls straight and even.
Methods for attaching stone sinks
It is precisely because of the characteristics of the material used in production that installing a stone sink into a countertop is somewhat different from installing a regular stainless steel sink. It is necessary to properly prepare for the installation process.
There are three ways to install stone kitchen sinks:
- Apply to the surface of the corresponding cabinet. In this case, there is simply no need for a countertop.
- Embed the set into the countertop installed on top of the cabinets.
- Integrate into the work surface. The most modern way. Most relevant in the latest trends in residential kitchen design. Allows you to achieve unity of the entire composition, since the level of the countertop of the work surface and the edge of the sink are on the same level.
Preparatory stage: tools, measurements, markings
Before installing a granite sink, you should make sure that you have all the necessary working tools, namely:
- electric drill;
- drill 10 mm;
- jigsaw;
- set of self-tapping screws;
- construction tape, ruler;
- knife;
- cross screwdriver;
- pencil;
- sealant.
If you decide to install the sink yourself, then all of the listed tools should be at hand before starting installation work.
The first thing that distinguishes artificial stone sinks from standard metal bowls is depth. Therefore, you should make sure in advance that the furniture cabinet in the kitchen in which you plan to install a sink allows you to install such a structure. It is desirable that the width of the inner side of the cabinet be at least 55 cm.
Installation steps
Washing device diagram
Having removed the product from the original cardboard packaging, do not rush to throw it away. As a rule, manufacturers provide a template for the cutout, which greatly simplifies and speeds up installation. In this case, all that remains is to cut out the finished workpiece and cut a hole along it. If the workpiece is not included in the equipment, then the work is carried out according to the following algorithm:
- To avoid damaging the surface of the countertop, protect all “dangerous” areas by covering them with masking tape.
- Sink and place the base against the countertop.
- Turn over The distance from the edge of the table to the intended cutout should be at least 5 cm, but not more than 11 cm.
- Outline the sink with a double contour: the first clearly along the edge of the product, and the second - indented to the width of the side. It is the second line that is the guideline for cutting.
- To use a jigsaw, you should prepare a small hole into which it will be convenient to insert the tool. If the sink is round, then one hole is enough. If it is square, then you need to prepare 4 (one in each corner).
- Make the cut according to the intended line: it is advisable not to retreat or bevel the direction.
- Upon completion, thoroughly clean the sections from sawdust and dust.
- Apply silicone along the cut of the tabletop. It will protect the furniture structure from moisture, and, consequently, from swelling and mold.
- The inside of the sink rim should also be treated with a special synthetic sealant (can be replaced with a thin rubber gasket).
After treating the sides with sealant, you should wait a little for it to dry. Only after this the shell is turned over and inserted into the prepared hole. When installing, you should insert the sink in one movement, without displacement, so that the sealant layer is not smeared or displaced.
Types of sinks and their design features
There are a number of requirements for how to properly install a sink in a countertop. This process must be carried out according to technology. The choice of a specific solution regarding the installation method depends on the design of the sink.
The most popular types are:
- Overhead products
. They are considered the most budget option, which is characterized by the ease of installing the sink into the countertop. This installation principle is based on the fact that the sink is placed on a free-standing cabinet, as a result of which it is a continuation of the countertop. Sinks of this type have disadvantages - insufficient thickness of the product material and the presence of a gap between them and the countertop, which causes inconvenience. Experts recommend choosing an overhead sink when the kitchen set has several separate sections. If they are united by a common countertop, the best option would be to use a built-in model. - Built-in sinks
. These products are installed directly into the countertop. Installation work should begin by preparing a hole in it. The technology of inserting a sink into a countertop involves attaching the structure to the inside of the module using special brackets and clamps. Built-in models of this type are distinguished by their solid appearance and convenient operation. Despite the fact that they are more expensive, specialists with extensive experience prefer them because of their practicality and the ability to prevent moisture from accumulating between the bedside tables. - Undercounter sinks
. The price of these innovative models is so high that it makes them inaccessible to most consumers. The installation principle of such sanitary ware involves fixing them below the level of the countertop and therefore they form a single whole with it. Undermount sinks have an aesthetic appearance and good sound absorption. Thanks to the effective sealing of joints, these products are characterized by hygiene and long service life.
Video description
Watch the video on how to embed a stone sink into a countertop:
We install ceramic products
Ceramic sinks have the following feature: one part of the sink is overhead, the other is cut into the countertop. Such models are fastened using a combined method. To ensure the reliability of the structure, both sealant and mechanical fixing devices are used.
In addition, to secure the sink, load-bearing structures are made from wooden blocks. You can do this yourself. Wood should be treated with antiseptic agents.
Products made of ceramics and natural stone are very heavy, so when installing them, durable countertops and cabinets are required Source www.build2last.ru
Slice processing procedure
Experienced experts advise: since in the process of creating a hole along the inner edge of the cut, roughness and small chips often form, you need to become familiar with the rules for processing the cut, failure to comply with which leads to a number of problems:
- Since it is impossible to ensure absolute sealing of the unprotected surface of the chipboard, its insufficient degree causes moisture to penetrate into this part of the tabletop. As a result, decay processes may be activated and a fungal coating may appear.
- Subsequently, the cutting edge becomes fragile and the stability of the shell decreases, which ends with its distortion.
- As a result of rotting of the countertop, its aesthetic, strength and performance qualities are reduced and then replacement will be required.
To prevent the above-described troubles, you should:
- Treat the end surface of the cut with fine-grained sandpaper and treat it with high-quality plumbing sealant. Professionals recommend using a spatula to perform this work; in the absence of which, the composition can be applied with your finger. Carrying out protective measures helps prevent wetting and subsequent swelling of the surface of the cabinet.
- If, when performing work such as cutting out a sink in a countertop, chips are found on the front side of the plastic, they are carefully treated with sealant, and there is no need to apply it in a thick layer, since in this case the thickness is not important.
- There is another way to protect the end side of the cut - it involves treating it with PVA glue. Despite the laboriousness of this process, it is reliable, like the previous option. To enhance the protection effect, the applied layer of glue should dry for about 30 - 50 minutes.
- Next, you should glue the seal made of foamed polyethylene; it is usually included with the sink. This material is fixed on the side of the sink along its perimeter. When, after attaching the seal, it can be seen, the material is carefully trimmed with a knife. If this is not done, the edges of the sink will not fit tightly to the countertop and water, getting into the gaps created, will cause swelling and further rotting of the end.
Since the process of attaching the seal directly affects the performance and wear resistance of the kitchen set, attention should be paid to it:
- You need to take the material and degrease it with a rag soaked in gasoline and solvent.
- Then sealant is applied to the seal in a continuous thin strip so that the glue does not come out when compressed and pressed against the outer edge of the sink.
Conclusion
Anyone can drill a ceramic sink, but any mistake leads to damage and destruction of the product, remember this. The video in this article will clearly show some important features of the workflow.
Sources:
- https://santech-info.ru/santexnika/prosverlit-otverstie-v-rakovine.html
- https://124prm.ru/santehnika/kak-prosverlit-rakovinu.html
- https://stroypomochnik.ru/kak-prorezat-otverstie-v-mojke-iz-nerzhavejki-iskusstvennogo-kamnya-pod-smesitel-video-i-foto/
- https://septik.guru
- https://remontstroimat.com/kak-prosverlit-mojku-iz-iskusstvennogo-kamnya-v-domashnix-usloviyax/
- https://gs16.ru/santehnika/kak-prosverlit-keramicheskuyu-mojku.html
- https://gidroguru.com/vnutrennyaya-kanal/santeh-pribory/mojki/1791-otverstie-v-rakovine-pod-smesitel
- 1
Sealing the joint and installing the sink
Particular attention should be paid to sealing the joint. Otherwise, the water that will fall on the countertop when washing dishes in the future will begin to flow into the gap between the edge of the sink and the table cloth
Because of this, deformation of the wooden elements of the set and their delamination may begin, which should not be allowed under any circumstances, since this process will significantly shorten the service life of the countertop, and in the future it will have to be replaced with a new one.
Sealant treatment
Prices for polyurethane sealant
Polyurethane sealant
You can attach a seal along the cut edge of the hole. All protruding parts of it must be cut off with a knife - it should cover only the end part of the cut. Silicone sealant must be applied on top of it, which will ensure waterproofing of the joint. Only after this can you install the sink itself. You should have time to install it before the sealant hardens.
The sink must be lowered into the cutout and carefully aligned along the very first marking line. After this, you need to fix it on the wrong side using the fasteners supplied with it. The screws on the fastenings should be tightened tightly only after the sink is leveled and installed correctly. Overall, it should fit very tightly once installed.
Installation and installation of the sink
Apron without baseboard
The apron is laid out after installing the kitchen and countertops, the tiles are selected before ordering the kitchen (height from the countertop to the cabinets) and placed on the countertop.
There is practically no joining seam left, and the one that exists is treated with transparent silicone, or better yet, epoxy grout (it looks clean and fresh longer).
It is more expensive, and not every tiler can work with it, but epoxy grout has zero water absorption.
That is, fungus will not grow in it, the seams will definitely not turn black or green and lose color unevenly from constant contact with water.
How to choose a sink for a countertop
In any plumbing store, the buyer will see a large number of different sinks, but not all of them are suitable for insertion. There are several options:
- Invoices. They are installed on the cabinet from above and completely cover it. Extremely easy to install. The main disadvantage is the presence of gaps between the furniture and the sink.
- Mortise. They are inserted into the hole provided in the base. Installation is a little more complicated, but the cuts are reliably protected from moisture.
- Integrated. Practical combination of sink and work surface. The side can be at different levels: level with the table, below it, etc.
- Under-table. They can only be integrated into countertops with special properties: hardwood or stone. The edge of the bowl drops below the level of the base.
In practice, mortise devices are most often installed. They are durable and attractive, easy to use. The most popular equipment is made of stainless steel and artificial cast stone.
Instagram solkuhni
Necessary materials
The sealant is used to prevent moisture from entering the areas of contact between the sink and the countertop. Water can greatly damage chipboard. There is a different sealant for different surfaces. When working with artificial stone, only silicone is used. Sealants containing alcohol are more often used for wood and plastic.
If you decide to cut a hole in the countertop for the sink yourself, you will need a special tool - a grinder with a diamond wheel.
Using a sealant not only prevents unwanted water penetration. This also serves as additional strength to the connection.
If the sink is purchased separately and requires installation, it is advisable to entrust this work to professionals.
- electric drill
- electric jigsaw
- wood drill with a diameter of 10 mm.
- set of wrenches
- brush
- adjustable wrench
- rasp
- screwdriver
When purchasing kitchen furniture with such a surface, it is advisable to have a ready-made product that will only require connection to the water supply and sewerage system.
Before cutting a hole in the countertop for the sink, mark the required hole. To do this, a template is made from cardboard or thick paper. Some manufacturers and manufacturers of sinks include a template with the product itself. If you have chosen the option of installing on a tabletop and the sides are of sufficient width, you can mark without a template. For this, the sink is used as a template. The upper surface is applied to the plane and traced along the contour with a marker or pencil. For ease of installation, it is advisable to remove the tabletop. Having stepped back 0.5 - 1 cm from the drawn line, a working contour is drawn along which the cut is made.
It will look more solid, but it will be more difficult to install a sink into it yourself.
Having marked the cut line, the template is removed and you can begin the process of cutting out the place for washing. A drill is used to drill a place for an electric jigsaw file, approximately 10 mm in diameter. For a quadrangular or triangular sink, holes are made in all corners. If the product has a round or oval shape, one will be enough for the job.
Installing a sink in a countertop made of wood or chipboard is not difficult if you have the required tools and basic handling skills.
The hole and cut are made from the side of the laminate, this will prevent it from chipping. Use a jigsaw to carefully cut out the required hole along the drawn contour. The electric jigsaw must be pressed firmly against the surface. The saw blade should go exactly at a right angle.
The sink is covered with a sealing tape supplied with the product.
The inner part being cut must be supported while doing this work. Or position the tabletop so that when cutting is completed, this part does not fall. If the remaining and removable parts are abruptly separated, the laminated coating may crack. Or a part will break off from the chipboard.
You can use a drill with a special drill - a furniture crown, just immediately take a drill of the required diameter.
If there is no room for such an arrangement, or the tabletop has not been removed, use construction tape. Sawing is done in this case with stops. A 10-15 cm cut is made, which is then taped on both sides.
A drain and, if provided for by the design, a mixer (water tap) are mounted to the bowl.
After the cutting is completed, the sink is first tried on. It should fit freely, but the gap should not be large. If it fits too tightly, you should widen the installation site with a rasp or jigsaw.
Having marked the cut line, the template is removed and you can begin the process of cutting out the place for washing.
Now you should carefully “sand” the inner end to which the sink will adjoin. This is done with fine-grit sandpaper. The resulting dust is removed, and a thin layer of sealant is applied to the contact area using a brush.
For ease of installation, it is advisable to remove the tabletop.
Furniture manufacture
OUR PHONES: Moscow 799-91-70, 799-91-71, 799-91-76 799-91-77, 782-49-05
- Woodworking equipment The path of materials in furniture production
- Equipment sets for furniture production
- Grinding machines
- Band saws
- Paint and varnish equipment
- CNC milling machine
- Milling machines
- Edge banding machines
- Slitting machines
- Gluing machines
- Paint booths
- Drilling and filler machines
- Production of furniture facades
- Sharpening equipment
- Grinding tools
- Chipboard and fibreboard
- HPL
- Shelf holder
- Accessories
- Furniture styles
- Exhibitions
How to cut a hole
After the marking has been made, the hole needs to be cut. It should be accurate, but slightly larger in diameter than the sink bowl so that the sink can easily fit into it. To do this, you need to step back a couple of millimeters from the inner contour to the outside and make a cut along this line. This way you can achieve the necessary backlash.
Installing an undermount sink in the kitchen
You can use a jigsaw or drill to cut the hole. It will take longer to tinker with a drill, but this work is much easier to do with a jigsaw.
Prices for popular models of jigsaws
Jigsaw
In order to make a hole using a jigsaw, first you need to make a hole anywhere along the inner contour with a drill so that you can insert the jigsaw blade. Next, you just need to take a jigsaw and saw the tabletop along the drawn line. To prevent the cut piece of the tabletop from falling on your feet, it is best to hold it or place something under it. It can be quite heavy and injure the master if it just falls.
Hole for sink
Once the hole has been made, you need to fit the sink to it. If it fits in freely enough, then everything is done correctly. If the sink is inserted with resistance, you will have to sand the edges of the hole a little so that it fits in smoothly. By the way, it is better to sand the edges of the cut in any case using a file, a sander or regular sandpaper. This measure will allow you to achieve an even and neat cut.
Sander
Support the workpiece from the reverse side
Regardless of the type of drill bit, when metal penetrates wood, the unsupported wood fibers on the back of the workpiece are torn, resulting in chips. Therefore, you should not forget to support the back side of the material with a trim
boards. The backing scrap supports the fibers where the drill exits and prevents a sharp increase in feed at the end. When making holes on a drilling machine, simply place the scrap under the workpiece, and when using an electric drill, secure it with clamps. If at the beginning of drilling the fibers around the hole rise or small chips form, apply masking tape to the surface, and then mark the center and start drilling.
How to embed a sink into a countertop with your own hands?
How to properly and easily embed a sink into a countertop? This question is faced by everyone who has started renovating their kitchen. We will tell you clearly and in detail how to do the installation competently and quickly.
How to install a sink into a countertop?
Often, the installation of the sink is carried out by the manufacturer. But it happens that this service is not listed in the price list. Then this concern falls on your shoulders. But don't worry. You can install the sink yourself, armed with the necessary tools and advice from professionals.
Installing a sink involves several stages. At the initial stage, you must make a hole in the middle of the array, then process the edges. The next stage is inserting the sink, fastening its back side and sealing the distance between the countertop canvas and the sink. The final stage is the supply of water supply and sewerage communications.
The key to a high-quality sink installation is: reliable fastenings, sufficient fit and high-quality sealing. Moisture is a fairly aggressive factor affecting the kitchen countertop, especially if it is made of chipboard. High-quality installation will prevent the tabletop from drying out or swelling, which will extend its service life many times over.
Garden sprayer: types, tips on how to choose, DIY assembly
Performing markup
This is quite an important stage. Place the sink in the center of the countertop. Remember that the gap from the edge of the countertop to the side of the sink must exceed 50 mm. If this distance is less than 50 cm, then the sink needs to be deepened.
The distance from the corner plinth should be more than 30 mm so as not to create problems during cleaning. If the dimensions of the countertop allow, then it is better to leave a little space on both sides for household chemicals and a sponge.
If the manufacturer provides a template for inserting the sink, then the task is much simpler. The template is glued to the tabletop and makes marking easier.
If the countertop does not have a template, you should install the sink on it, upside down, and trace along the contours with a washable marker. If there is a sink and a drying compartment or waste tray in one block, then one common hole is cut out.
How to make a hole for a sink?
To make a hole in the tabletop you will need an electric jigsaw. It is suitable for countertops made of wood and chipboard. If the countertop is made of durable materials, then a jigsaw will not cope. First, prepare 4 holes with a diameter of 1 cm in the corners of the rectangle, without crossing the marking line. Then a file with the required tooth length (2 mm) is put on the jigsaw. To avoid chipping on the front surface, choose the opposite direction of the tooth.
Apron for the kitchen (photo): choice of design and material
Holes are made on the left and right, and then the wooden plank is pulled in with self-tapping screws across the sawn lines so that the cut part does not fall prematurely under the force of gravity. The cut out part is carefully removed, and the exposed edges of the hole and irregularities are coated with liquid silicone.
Installation of sink and connection of communications
Here again you will need liquid silicone. Stepping back a couple of millimeters from the edge of the hole, we apply the silicone in a thickness just above the side of the sink. Stepping back from the first one another centimeter, we apply another flagellum.
After half an hour, the silicone will dry and stop sticking to your hands. Then you need to insert the sink into the hole and firmly press the edges so that the silicone strands take the shape of the sink, and leave for a few minutes. Then the sink is removed and the silicone is checked. If it is not broken, then everything is in order, and the sink will have a reliable additional side.
We attach fittings to the countertop to install the mixer and hose. It is more convenient to attach the siphon to an installed sink. Many sinks have special loops for screw clamps in the shape of the claws. They help tighten the sides to the tabletop more tightly.
Painting with hearts using the isothread technique
Tips from the professionals
The most difficult thing is to make the hole correctly. If it turns out to be larger than expected, the paws will not be able to hold the sink. Saw out the hole, just short of the marking, and if the sink doesn’t fit, a rasp will help you adjust the hole to size.
Different silicones harden differently. Before pressing down the edges of the sink, check how long it takes to tighten the drop in minutes. If you rush, the silicone may burst.
Do not tighten the screws too tightly. Otherwise, the sides of the sink will bend upward.
How to embed a sink into a countertop with your own hands? updated: by:
This is interesting: Do-it-yourself supply and exhaust ventilation of a private house - device and diagram
Marking
The sink should be centered in the middle of the depth of the countertop, shifting to the left and right for the most convenient location. The distance from the side of the sink to the edge of the countertop should not be less than 50–70 mm, otherwise the sink should be moved slightly deeper. It is not recommended to make an indentation from the corner plinth less than 30–40 mm, otherwise it will be difficult to wipe the surface in this place. When installing a sink in a corner section, it is useful to leave a space of 100–140 mm from both walls in order to obtain a small space for convenient placement of household chemicals and cleaning accessories.
If there is no template, the sink must be turned over and installed on the countertop, carefully observing the indentations. The sink should be outlined in a circle with a water-soluble marker and removed, and then the contour line should be shifted inward by the width of the side. If the bowl does not follow the external contours, which is the case in sinks with a drying tray, the marking lines must be shifted a certain distance on each side. If two sinks or a waste compartment are combined in one block, a common hole is cut for them.
Making and using a template
Ready-made template for washing
The process of installing a sink into a countertop consists of several stages. To properly perform this labor-intensive job, you need to carefully cut a hole in the tabletop, and it is advisable to follow the instructions below.
- First you need to purchase a blank sheet of cardboard of the required size from which the template will be cut. This work step will be simplified if the manufacturer, which often happens, made the template himself and included it in the product packaging. All that remains is to cut out the template using scissors along the drawn contour. If there is no template, you need to take the sink, turn it upside down, attach it to the cardboard, then use a pencil to draw the necessary outline and cut out the template along the finished outline. If there is no packaging with a pattern, and there is no necessary sheet of cardboard, the inverted sanitary ware is drawn directly on the tabletop.
- Next, you need to evaluate the future location of the furniture block. You need to know in advance where the mixer will be installed, how to route the pipes, and whether the countertop will be trimmed before final installation. It is also necessary to examine the structure of the furniture from the inside. This will allow you to determine which elements, if necessary, can still be trimmed, and which cannot be touched - the load-bearing fragments of the tabletop must remain intact and untouched.
Need to indent
- Once the template is ready, it's time to use it. To mark the tabletop, you need to attach a template to its surface, and it must be motionless. After this operation, a contour is drawn. The same work is carried out if a factory template is available. You can cut right away along the outlined line. If cardboard is used or the upside down sink was traced with a pencil on the countertop, there is additional work to be done. The fact is that the drawn line will follow the edges of the sink, and its bowl will be inserted into the future hole. Therefore, you need to draw one more contour - the internal one. When drawing it, you need to take into account the distances from the edge of the sink to the fastening elements of the plumbing fixture. The result is a new template that is tailored to the dimensions of the bowl. It is applied to the surface of the tabletop and a new contour is applied along which a hole can be cut.
- There is an option in which a cardboard template is attached to the surface of the tabletop and a hole is sawed along its edges. If you look at such work from the practical side - it is inconvenient - it is better to draw the outline with a pencil. When cutting along a drawn line, there is a real chance of chipping on the inside edges of the tabletop. To avoid defects, it is recommended to stick masking tape to the surface in the area of the intended contour, which can be easily removed in the future. In order to start sawing, you need to make a hole in the body of the tabletop with a drill from the inside of the drawn line. A jigsaw file is pulled into the drilled hole, after which it is fixed in the tool. You need to cut carefully and without haste, since when pressed, the blade may move away from the intended contour.
- The resulting cut is cleaned with sandpaper, blown and thoroughly lubricated with silicone. Thanks to this composition, the harmful effects of moisture on the cut surface will be minimized. If any fragments of the furniture block interfere with the installation of the sink bowl, they must be carefully trimmed. Measurements for trimming must be taken accurately - it is not recommended to do such work “by eye”. You need to know that when using a template from the manufacturer, cutting out internal elements is much easier and simpler, since such nuances are also provided for in its manufacture.
Rules for working with a jigsaw
To understand how to properly saw a circle in wood, it is important to study the features. This carpentry tool helps to cut out ovals, wavy patterns, figures with uneven outlines, non-standard carved boxes, shelves with end-to-end patterns
To ensure that interaction with a jigsaw is organized and safe, it is important to adhere to the following rules:
In order for work with a jigsaw to proceed quickly and safely, do not forget to fix the product before work.
- To avoid inconvenience, special stands should be prepared during work. A slot is made up to the middle of the support, somewhat reminiscent of a lock hole.
- The stand is fixed with clamps or screws to the workbench.
- At the time of work, you need to sit down, position the file strictly vertically relative to the floor and perpendicular to the surface.
- The workpiece is placed in the middle of the stand, holding it with your left hand; you can saw the plywood with your right hand. The location of the cuts should be in the middle part of the support hole.
- The tool does not tolerate strong pressure: just a small touch and gradual movement up and down, and it will begin to work effectively.
Attributes:
- pencil;
- drill;
- drill;
- jigsaw
Final stage
At the final stage, it is necessary to use another tool. To do this you will need a rasp or file, sandpaper, GOI posts, adhesive tape and a decorative corner made of duralumin.
Here the process is simpler and does not require special skills in working with tools. Yes, and millimeter precision and accuracy are not required here.
The first step is to sand the wood. For this purpose, you can use a rasp or file, with which you want to remove excess. After this, use a sanding machine or regular sandpaper (zero grade will do) to bring the wood into a nice looking state. It is recommended to carry out this work even if you are not going to do anything after it. Due to the torn elements of the wood, the material will attract moisture much faster, which will cause faster wear of the material.
Having brought the tree back to normal, it is necessary to bring the plastic to the same condition. Usually, the use of special polishes is sufficient for this. But if one is not available, then you should not buy a new one, since to process one tabletop you will need very little of this product, and then it would be a pity to throw away the polish, and it is not economical.
The ideal option for processing plastic is GOI paste. It is available in almost every home, and is an absolutely universal remedy and quite effective.
Even if the cutting was successful and the grinding was of high quality, it is still better to play it safe so that even small millimeters do not make themselves felt in the future. Therefore, it is recommended to use a special furniture corner made of duralumin for decoration. It should be attached to its place, while the appearance will become neat.
Tabletop connector - euro saw: hidden docking (photo)
A method of processing ends that uses patterns. To create it you need a milling machine. Only with high-quality equipment it turns out flawless.
Sometimes euro-sawing is produced on a cutting machine - this significantly reduces the cost of production, however, with such economical production, the ends are obtained with fluctuations of a millimeter or more. Therefore, when purchasing, you should check this point very carefully, especially if the price of a prefabricated kitchen surface is significantly reduced. A poorly made joint will not connect as it should, leaving gaps.
Correctly executed ends after assembly form a surface on which the gap is not visible at all - it is there, but its width is a fraction of a millimeter. If the coating is dark in color, it will not be easy to find where the euro-cut table top was cut (photo).
Such ideal quality can only be obtained using a router, and the patterns must be new or at least not worn out.

