In order to connect the electrical outlet, you will need very little time. At the same time, connecting your home yourself is an extremely delicate and responsible matter; of course, you need to arm yourself with certain knowledge and comply with all the requirements. Installing new or replacing faulty devices is a necessary procedure, for example, when purchasing a new home or reconstructing an old one. In addition, retail chains are constantly being updated with innovative equipment, which often requires an appropriate connection. If you want to do without the involvement of a specialist electrician, this article will teach you how to do this.
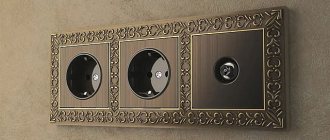
Types of socket blocks and their placement
Socket blocks are installed in two types:
- Used for open wiring. Mounted on the wall plane using a plate-shaped socket box;
- Designed for hidden wiring. They are mounted in a wall niche using a module made from glass-shaped socket boxes.
In addition to the main types of socket blocks, there is a very practical retractable type of product. They are easily built into a tabletop or cabinet, then, if needed, they can be easily called up by lightly pressing the top of the structure.
Their basis of operation is similar to models located in or on the wall. Socket blocks are often mounted in kitchens, placing them behind the work table at a height of 10 cm, inside kitchen cabinets and behind the wall of adjacent cabinets at a height of 30-60 cm from the floor level.
Built-in sockets are good to use when turning on a set of weak household devices: refrigerator, toaster, multicooker. When renovating halls and living rooms, they are placed near computer tables or behind the TV screen.
3-point socket sets can often be seen in bathrooms. In such an environment, it is worth using products with housings protected from water; they are placed at a distance of 60 cm from the source of liquid.
Drilling out socket boxes
Next begins the noisiest and dustiest part of electrical installation work - drilling and chipping.
In order to minimize the amount of dust, construction vacuum cleaners are used.
In addition, each tool in this case must have an outlet with a pipe or a dust removal device.
Small hammer drill, medium hammer, large hammer, wall chaser, all of these tools must have dust removal, otherwise your vacuum cleaner will be of no use.
First, the centers of the socket boxes are drilled out using a d-6mm drill. Then, based on the material of the walls, a tool is selected for arranging niches for socket boxes.
It could be:
medium hammer drill with diamond bit
large hammer drill with impact bit
wall chaser with a cut 60mm deep
Socket block sizes
When socket boxes are installed 2-3 in a row at once, then this is done by installing a set of socket boxes.
- To drill holes for suitable sizes of socket block, take a crown with a diameter of 68 mm to 80 mm.
- The landing niches are made interconnected, and the gap between the axes is 71 mm.
- A transverse mark is placed regarding the wire that needs to be inserted on the right, then a mark is placed on the wall for drilling the landing niches, taking into account the required axial distance, or it is traced along the contours of the block with a pencil.
- Holes are made, then using a chisel and a hammer, they scrape out what is unnecessary, remove the partitions, and drag the wire along the placement line.
- The margin in diameter will facilitate the even alignment of the block. Here the transition ears play the necessary role - they connect the socket boxes into a common block.
How to choose the right method
Connecting two outlets to one cable
To choose parallel or serial connection of outlets, you need to calculate several parameters: the amount of money that can be spent on electrical wiring, equipment power and wall decoration (the ability and desire to redo repairs in case of breakdowns).
The optimal way is to connect two sockets to one wire of a panel or distribution box - a parallel connection. If the room does not have a large number of sockets and appliances (for example, only a TV), the loop method is suitable.
DIY socket block installation
Installation and connection of socket blocks occurs in accordance with the written rules. It will be more convenient to drill a niche for a set of sockets while plastering the walls.
Step-by-step instructions for installing blocks are performed using a set of actions:
- Using the level, the location for installing the unit and the direction of laying the wiring that needs to be connected to the outlet are outlined.
- An opening for the socket boxes is drilled with a hammer drill; a separate socket comes out 72 mm wide and 42 mm deep. If you plan to insert 5 sockets, you will need to drill a niche with a height of 75 mm and a length of 360 mm.
- The socket boxes are brought together into a single block and then it is inserted into the opening.
- The cable exits through the side hole in the body of the initial socket box.
- The inserted block is leveled along the surface of the wall, also across and vertically.
- The gaps around the blocks are carefully filled with gypsum putty.
- Excess gypsum substance is removed with a spatula.
After 3-4 hours, the plaster dries, its excess is removed from the housings and the cable can be connected to the ground.
When you plan to connect a socket block on a plasterboard wall, then you need to use fasteners on the sides in the form of two legs. When the set screw is tightened, the metal plates move apart and firmly secure the socket box in the opening.
Electrician's recommendations
You should adhere to the basic rules when working:
- horizontal transitions from the junction box to the sockets or switch are laid at a height of 2.5 m;
- the insertion of veins is carried out only vertically or horizontally;
- connection points should only be located in mounting boxes;
- for underground cable laying, you need to use only a single piece with a strong armor tape;
- The biggest mistake is installing the switch in the zero gap;
- It is forbidden to install electrical wires near a wooden surface, but if this is unavoidable, then an insulating hose or gasket made of asbestos and steel with a thickness of 0.2 - 0.5 mm is used.
Connecting wires
In many situations, it is very convenient to connect the contacts to the input part of the electrical wiring using ready-made pieces of wire, 20 cm long. Multi-core PVZ wire with ends in the form of sleeves is best suited.
The phase connection can be done with a brown wire, and blue is suitable for ground. The grounding connection is made with a lemon or yellow-green wire.
A wire with many cores turns out to be more convenient and flexible than those containing one core; it can be easily laid, bent and laid in hard-to-reach areas of the electrical outlet.
The work progress is as follows:
- Grounding is required;
- Before installation, a wire of the specified length must be connected to the ground contact of a separate outlet. For the first socket box, 15 cm is cut off, for the final one 40 cm, and the intermediate ones must be measured locally;
- All grounding wires should be connected to a single point - to the ground of the input cable;
- Here it will be possible to use an installation block, but many electricians want to connect the ground with the usual twisting, which is insulated with heat shrinkage;
- After pulling the grounding through all the plastic boxes, you need to strengthen the phase with zero on individual sockets;
- On the initial socket there are two contacts in the form of plates, where a separate wire for the phase and also a neutral wire from the input cable are connected;
- There are two bolts on the body that are screwed in with a decent amount of force;
To supply electricity to another outlet, along with the input contacts, you should install one passing wire connecting the first group with the next one. These jumpers should be used to connect all contacts on the block.
What is high voltage power used for?
For the same reason that main power lines operate under a voltage of 10 thousand volts. To provide a certain load (power of an electrical appliance), there are two ways: increase the current strength at a reduced voltage, or vice versa: by increasing the voltage, you can reduce the current in the circuit. To save power cables, it is more rational to supply the consumer with 380 volts instead of 220.
The benefit is obvious: the current is lower, the wires heat up less, and their cross-section can be reduced. Likewise, switching devices are designed for lower current.
Accordingly, to connect the final electrical installations, there must be a three-phase socket in the room.
Important! If you have a 3-phase socket installed in your house, connecting powerful single-phase consumers to it without specially switching the input terminals is prohibited!
In this case, load imbalance occurs, this negatively affects the operation of generating devices and can damage the protective automation.
Final procedures
- The wiring is carefully placed in the socket boxes, so that the mechanism with contacts is also located;
- A separate group is inserted into the socket boxes and secured with bolts;
- The sockets are set according to the level and tightened with bolts;
- The ground is connected, the overlays are installed and the front block panel is put on using latches;
- After assembly, you will need to connect the wires in the distribution board. This is done by twisting, but the best solution would be to connect using a mounting block;
- It is checked whether there is a phase in the contact using an indicator and once completed it is allowed to connect the devices.
Looking at different photos of socket blocks will help you see the whole process, how it happens in practice.
Safety precautions
- use high-quality tools with good insulation;
- wear protective clothing and shoes with rubber soles;
- perform actions only during the day in good lighting;
- turn off the power in the electrical panel to avoid electric shock;
- make sure that no one turns on the electricity: hang a warning sign on the panel, personally warn your neighbors;
- make sure that there is complete absence of wiring in places where it is planned to drill and groove walls for electrical wiring and socket boxes;
- It is good to tighten all screws in the terminals so that there is no sparking or heating in such connections;
- carry out work in a dry room.
To install a triple socket you will need to perform the following work:
- Preparation;
- marking walls;
- drilling a hole for the box;
- the installation itself.
Photos of the best socket block manufacturers
Share with friends
Installation process
Electricians have one strict rule, which corresponds to the official safety standard. When performing any work on the network, you must turn off the power supply. Moreover, double control will not be superfluous: after the circuit breaker is turned off, from time to time it is necessary to check the wiring for the presence of current. Scrupulousness in this matter will help to avoid many troubles.
Stage one: preparatory work
The socket tends to come apart into parts, and this should be done at the preparatory stage. It is necessary to unscrew the housing, which is secured with a non-removable screw. If the outlet has a socket box, you need to remove it too. The point is to gain access to the terminals to which the wires will be attached.
Here it should be clarified that not all socket boxes are removable. There are also those that are one piece with the block. In this case, the disassembly process is somewhat simplified.
If the socket will have to be mounted on top of a concrete wall, it is recommended to use plastic dowels. For them, it is necessary to drill the wall in advance according to the diameter of the dowel and the location of the mounting holes on the socket box. If we are talking about a wooden wall, it is quite possible to get by with self-tapping screws.
Hidden installation of an outlet is somewhat more complicated. Under the socket box, you will need to drill a hole of the appropriate diameter and depth in a brick or concrete wall. A core drill for concrete, a hammer drill or impact drill, a chisel and a hammer will be useful for this work. A round groove is cut with a core drill.
Anything inside this groove is removed using the tools mentioned above. The wire leading to the junction box will also have to be hidden under the plaster. To do this, you need to make a groove with a hammer drill, drill or wall chaser, if you have one.
It is also necessary to connect the wires to the power cable in the junction box.
Each master chooses his own method, but the three most popular are:
- Use of PPE caps. The insulation from the wire should be removed by 3 cm, twisted with the power cable, put the cap on top and screw it on;
- The use of VAGO terminal blocks is more promising, since the process is simplified to the limit, and you can connect the required number of wires, creating several parallel lines. The wire is stripped to one and a half centimeters and inserted into the terminal block. When installed correctly, a click is heard;
- The same as in the first method, but instead of caps, electrical tape is used.
For all types of connections, care must be taken to ensure that adjacent conductors do not come into contact with the cleaned parts. Otherwise, a short circuit will occur when turned on.
Stage two: connecting the wires to the outlet
A double or triple cable must be connected to the socket terminals, positioning it so that all wiring is separate inside the housing. The connection must be reliable, but contact between cleaned parts of the conductors must not be allowed.
That's why:
- General insulation is removed. If the socket is not overhead, experts recommend leaving up to 20 cm of cable for future use. The total insulation needs to be removed one and a half centimeters more;
- There is no place to place extra wire in a surface-mounted socket, so the cable length should be no more than required. It is recommended to insert the total insulation into the socket body by about half a centimeter if the wire is mounted on a wall without a box;
- To connect the wires to the terminals, they must be stripped of about a centimeter of insulation;
- The contact between the wire and the terminal should be as large and reliable as possible. It is recommended to twist the cleaned wire into a ring and then clamp it with a screw to the contact pad. The aluminum or copper ring can be further flattened with a hammer;
- The screws are tightened firmly, but not excessively. Excessive force can damage the outlet, which contains many fragile plastic elements.
Stage three: connect the outlet
The socket box or socket box in the case of a surface-mounted socket was prepared at the previous stages. All that remains is to secure the block and then screw on the decorative box.
The legs are screwed alternately, each by several turns, otherwise distortion will inevitably occur. In this case, it is necessary to control the position of the block so that the line between the paws remains parallel to the floor line. The block itself should go deep into the box to the required depth. Otherwise, the decorative box will also be installed unevenly. The legs are screwed all the way. If the socket box is selected correctly, the structure will hold securely.
When the assembly is completed, all that remains is to connect the circuit breakers and check the functionality of the outlet. But you shouldn’t make the common mistake of turning on some household appliance first. To check the presence of voltage, use a multimeter.
Important! To protect your home from fire, and your family and friends from electric shock, the home handyman must constantly remember the safety rules while working.
Conclusion
We have considered almost all possible options that you may encounter when installing and repairing sockets. But some “mega-specialists” forget the PUE standards given in clauses 1.1.27 and 1.1.28, which say that all electrical installations must have the most simple and clear diagram possible.
Because of this, incidents are possible. Therefore, when installing your electrical network, “you shouldn’t reinvent the wheel,” but do everything according to the rules. This will save not only a lot of nerves and strength for those who will be doing the repairs, but also possibly their lives.
Protecting connected devices
To protect three-phase sockets, as well as equipment connected using them, fuses equipped with fusible inserts are used, as well as automatic switches that disconnect the supply line under abnormal operating conditions (overload, short circuit). The connection and protection option using a circuit breaker is shown in the following figure:
Connection diagram for a three-phase consumer using a socket and a circuit breaker
The protection device, in its ability to disconnect the protected section of the network, must correspond to the value of the short circuit current (maximum value) at the beginning of this circuit. The current of the fuse link and the setting of the circuit breaker are selected based on the minimum value of the short-circuit current or the current of the protected equipment.
The multiplicity of the short-circuit current in relation to the rated current for various protection devices must correspond to the following values:
| Device type | Multiplicity, % |
| Circuit breakers | 300,0 |
| Automatic circuit breakers equipped with instantaneous overload release (cut-off) | 450,0 |
| Circuit breakers with non-adjustable inverse current characteristic | 100,0 |
| The same, but with adjustable characteristic and cutoff | 125,0 |
