- preparation and securing of built-in equipment in a special niche
- connection to the electrical network
- connection to water supply and sewerage
Let us consider in detail, indicating common errors, precisely the stages of installation to utility networks and communications.
Electrical connection
To connect the dishwasher to a 220V network, you will not need many materials:
- three-core copper cable VVGnG-Ls 3*2.5mm2
- 16A socket “Schuko” type with grounding contact
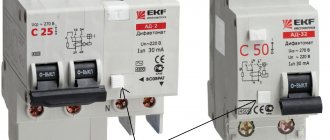
- RCD or diffavtomat 16A with leakage current 30mA
A dishwasher (DMM) is not a particularly powerful consumer of electricity, such as a hob (from 7 kW and above). Its power usually does not exceed 2.0-2.5 kW.
Modern energy consumption models correspond to class “A” or “A+”. That is, in a year, approximately 220 kW will run on your meter.
Despite this, it is still advisable to connect the PMM at the repair stage to lay an independent cable line in a separate groove.
If your renovation has been completed a long time ago, and after purchasing the equipment you don’t feel like scratching the walls again and ruining the wallpaper, then you can make do with the existing outlet. Just be sure to make sure that it is protected by an RCD.
Connecting a dishwasher through a simple modular machine is extremely dangerous.
The socket should be placed at a convenient height - up to 90cm from the floor level.
At the same time, place it on the right or left side of the washing machine, but not behind it.
Please also take into account the fact that the total length of the cord with plug for this equipment rarely exceeds 1.0-1.5 m. Based on this, choose a place for the outlet so that you don’t have to use an extension cord later.
The outlet itself must, of course, be grounded. But not everyone has this same grounding. Especially in apartments in old high-rise buildings.
Therefore, many people use regular ones, and everything seems to work fine. However, the level of protection will no longer be sufficient.
Roughly speaking, if there is a grounding contact and there is a current leak, then you will not even be able to turn on the RCD. The consequences of these leaks, even small ones, can be quite lethal.
With a simple socket, the shutdown will occur only at the moment when you touch the body, which is already energized.
And you will still feel this electric shock, at least at the initial moment.
Vapor barrier for kitchen furniture
Some manufacturers of built-in dishwashers supply their products with special material that insulates its walls. Due to this, the efficiency of the device increases. This approach allows us to reduce the vibration that occurs during operation.
For self-vapor barrier, a special film is used. It has vapor barrier properties and is glued to the furniture around the car. There is no need to use regular film, which does not allow air to pass through. This will cause condensation to form on the walls of the machine, which is unacceptable. It is better to use a special material that allows air to pass through very slowly.
Connection to water supply and sewerage
Connecting the dishwasher to the water supply can be done in two ways.
The first is when you are at the stage of construction or major renovation, and you can afford to lay separate pipes, trench walls, etc.
The second is when your entire kitchen has already been installed and all finishing work has been completed. At the same time, you bought a dishwasher and you need to connect it all somewhere, to the existing water supply and sewerage system with minimal alterations and hassle.
Checking the operation of the dishwasher
After the connection diagram of the dishwasher to the sewer has been implemented, a blank test of its performance is performed.
In this case, you need to check:
- speed of filling the unit with water;
- heating the incoming water;
- operation of the drying mode for washed dishes.
Checking the operation of the various modes of the dishwasher must be done without dishes, but using a detergent in accordance with the operating instructions supplied with it. It doesn’t hurt to make sure the places where pipes and hoses are connected are tight. When the independent connection of the dishwasher is completed in accordance with all the manufacturer’s installation recommendations, the kitchen furniture is placed in place, and the new product is secured with a special panel.
Installation of new pipes
For major installation you will need a varied range of materials:
- polypropylene pipe PPR PN20 with a diameter of 20mm
- water socket
- union nut connectors
- 90 degree connection fitting PPR-90
- HP/HP elbow with ¾" external thread
- FUM sealing tape
When installing pipes, the socket method is used. To do this, you will need a special apparatus for soldering polypropylene pipes.
The total length of the pipe and the number of fittings are selected individually. This depends on how far the dishwasher is from the cold water collector.
To begin with, mark the route where the pipes will be laid from the distribution manifold to the installation site of the PMM.
Then, use a wall chaser to cut to the required depth.
Next, connect the PPR connectors with a union nut to one of the manifold outputs.
Cut a piece of pipe so that it will last until the first turn or corner. At the same time, do not forget to leave a margin of 15mm for connections on each side.
Connect the pipe and fittings using the soldering method, controlling the position of the elbow.
After connecting all the pipes along the marked area, install a water socket at the very end. Be sure to fix it on the wall.
Next, screw a ¾-inch male threaded elbow into the water socket.
Mount the water supply hose onto the angle.
The AquaControl or AquaStop system with which it may be equipped should protect against leaks in the event of a breakdown and automatically stop the water supply.
Turn on the water and check the entire system. If everything is fine, you can finally seal the groove.
Grounding electrical wiring
PMM is one of the most dangerous equipment from the point of view of electrical safety. And since the kitchen has the most equipment, the tension increases accordingly. Therefore, it is necessary to have a grounding connection when installing the PMM.
If there is a grounding, there is a possibility that the phase voltage of the electrical network will appear on the device body in the event of a break in the neutral wire. This kind of situation can act as a catalyst for electric shock to a person. Now you know how to properly prepare the electrical wiring for installing the machine.
Drain connection and installation in the kitchen opening
All that remains is to connect the drain hose from the PMM to the sewer outlet through an adapter collar of the appropriate diameter.
Do not forget that the drain pipe must be mounted at an angle, allowing for a 1cm height difference per 1m of length.
And the drain hose itself has a bend at 70cm from the floor. That is why it is attached to the top of the dishwasher, and not at all so that it does not dangle.
All that remains is to connect the washing machine to a power outlet and check the functionality of the entire system. Then secure it in a specially prepared opening.
By the way, some models, for example from Siemens, have non-standard sizes. Therefore, think about your kitchen furniture in advance.
When installing in an opening, do not forget about the metal plate that must be nailed to the bottom of the tabletop (for the Bosch model).
This thing is mounted at the very edge and is a vapor barrier, like a screen. With it, the countertop will not swell from steam.
For some reason, many people throw it out and replace it with aluminum tape, securing it both to the table top and to the side walls of the car.
Electrolux, instead, comes with something like a piece of rubber that sticks on the sticky side.
After installation and connection, the first wash should be done without dishes, using powder or special cleaning tablets.
This procedure should destroy all bacteria and deposits formed after long-term storage in the store.
Choosing a location
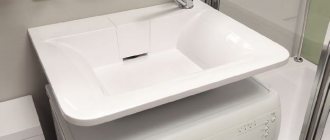
You need to choose the location of the equipment before purchasing the PMM. If you decide to build a dishwasher into your kitchen furniture, you need to know the dimensions of the corresponding niche. It can be located under the countertop, cooking panel or under the sink .
Approximate size ratio of niche and built-in dishwasher
The place to install the dishwasher should be close to the sink , which is already connected to the water supply and sewerage system. If the distance to communications exceeds 1.5 meters, problems may arise in the operation of the device.
Washing machine and dishwasher built next to the sink
Make sure that there is an electrical outlet . Since the dishwasher consumes quite a lot of electricity, it is dangerous to use an extension cord to operate the PMM, especially if several devices will be connected to it.
The extension cord must not be placed behind the rear wall of the PMM
For a compact dishwasher that can be placed directly on the countertop, the issue of supplying communications is easier to solve, since it can be easily placed as close to the sink as possible. This option is optimal when there is no niche with the required dimensions in the furniture. There is no need to make a connection to the sewer at all; just place the drain hose in the sink.
Connection via sink siphon and faucet.
There is a simpler option for connecting a dishwasher, in which there is no need to install separate pipes for draining and supplying water.
You only need to change two things:
- standard siphon under the sink to a special one
It differs in that its design already has a place for connecting the drain hose - a fitting, and sometimes two.
You can, of course, redo the sewer drain by installing an additional pipe and seal there.
The whole thing is inserted by hand, without using any special tools.
However, do not forget that connecting dishwashers and washing machines directly to the sewer pipe may be accompanied by the appearance of unpleasant odors.
Experts advise making this connection through a check valve.
Kinking or bending the hose at a height, which should act as an alternative to the valve, only helps with constant use of the equipment. Of course, your water will not return.
However, if the system stands for a couple of weeks without work and water (for example, in a country house or in a country house), everything will dry out and the stench in the kitchen will be very sensitive.
- the second thing you need to install is a tee with a ¾-inch thread
Through it, the water itself will flow into the machine. It is installed instead of the standard connector that goes from cold water to the mixer.
Screw this tee to the cold water supply hose or pipe.
Next, change the siphon. Unscrew the screw from above, holding the siphon itself from below so that it does not fall.
Disconnect the drain from the sewer. To do this, simply pull it towards you with force. It should come out of the rubber retainer.
Assemble a new siphon from the components, not forgetting the gaskets, and install it in place of the old one.
Connect the flexible drain pipe to the sewer pipe. All that remains is to connect the dishwasher drain hose to the siphon tube through a special adapter.
Included with this adapter, be sure to look for a valve, it blocks the reverse flow of water.
Fill the sink with water and check that there are no leaks anywhere.
First launch of PMM
Before starting, you will have to activate the test wash, since there is a possibility that the parts and elements inside the machine are lubricated, this will allow you to wash it inside, thereby getting rid of dirt and dust. You can see how the machine works, whether it hums, how quickly the water fills, how much detergent is needed, whether it is necessary to add salt or rinse aid. If you are connected to hot water directly, look at the quality of the water, whether there are streaks or stains on the dishes.
Be sure to turn the sprayer over before turning it on to see if it rotates normally. After this, pull out the filter and see if it is intact. Fill in the gel, add salt, and on the control panel you will have to indicate the type of product you are using. We launch the PMM and observe the work. If you hear any strange sounds or see a leak, all this can be corrected. Don't forget that you will need to let the machine dry and cool. Once you understand how to use the equipment, you can start washing dishes if all defects are absent or eliminated.
Water hose
The dishwasher has two hoses:
- Jellied.
- Drain.
The first (inlet) hose is designed to supply water to the machine. It must withstand operating pressure and meet temperature requirements.
So, for hot water supply lines the permissible temperature is 65-70°, and for hot water supply lines - 20°. Externally, it is a smooth hose with two threaded connecting elements at the ends (in the form of union nuts).
The drain hose ensures that waste water is discharged into the sewer system . It is not designed for high pressure, so the requirements for it are much softer.
Basically, such hoses are selected by length. As a rule, drain hoses are corrugated, and their connecting elements are of the usual bell-type type, without threads. You can learn all about dishwasher hoses here.
Recommendations for individual installation operations
The work on installing the PMM also includes leveling the position of the machine using adjusting screws. Two of them are located in the front of the body, one is located in the back. Built-in models are secured in the opening using bushings and screws. Tips to help you connect correctly and extend the trouble-free operation of your dishwasher:
- installing a drain hose in a sink may risk flooding your neighbors; if the hose falls out of the sink, it is better to connect it through a siphon;
- the grounding wire from the PMM socket is connected to the bus of the same name on the apartment panel - it is prohibited to ground the machine to gas, heating, or water pipelines;
- the gap between the wall and the back panel of the device must be ≥5 cm to ensure air circulation;
- Electrical sockets for each high-power household appliance: stove, washing machine, PMM must have a separate connection to the apartment panel so that there is no overload in the electrical network.
The device comes with a user manual, which includes connection instructions. Each PMM model is individual, but the recommendations are general.
