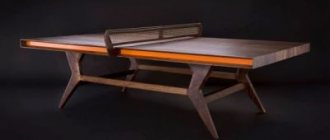
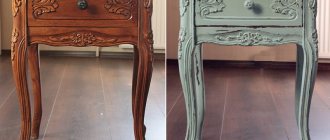
If you have seen handmade oak furniture at least a few times, then you understand how different it is, both in appearance and in durability, from modern options made from cheap substitutes. After all, solid wood products are different not only in their beautiful appearance, but also in their strength and durability. Natural wood has always been and will be a sign of good taste and sophistication; even solid pine furniture, if it is beautifully made, will look better than artificial materials.
Current breeds
It is clear that any array will do for making crafts. However, joiners and carpenters warn that poplar, common in the city, is an energy vampire and a quickly drying tree. Hardwoods like oak, walnut and maple are best used for making complex items. But conifers are just right for thematic creativity due to the following features:
- Release of a pleasant aroma;
- Rot resistance;
- Ease of machining.
However, in addition to pine, spruce and larch, you can try soft linden or light birch. However, it is unlikely that if someone wants to make wood crafts for their home, they will want to understand the origin of dead wood.
Types of wooden slats
Wooden slats vary in the wood used:
- Pine is a budget option, but has sufficient strength and resistance to other external influences. Among the disadvantages is low resistance to mold formation.
- Beech - they are distinguished by a more attractive appearance, dense, solid structure with an interesting texture. You should be wary of increased moisture absorption, which requires special impregnation.
- Oak - considered the best option for most parameters, but has an increased cost.
- Rare wood species - lumber from red and black wood belongs to this category.
Exotic species include padauk, ramin, verdi, boxwood, teak, mahogany and some others. They are particularly chic, but are expensive.
Veneered MDF - in fact, here the wood is represented only by a surface layer that imitates a wooden lath.
This option is cheaper, but fully meets the requirements. Veneer can be natural or fine-line. The use of such material is similar to wooden slats. However, when using it, it is possible not only to provide an attractive design, but also to improve the acoustic parameters of the walls. Veneered slats look especially attractive in niches.
The choice of slats depends on many factors, with the financial side often becoming the determining criterion.
Branches, logs, circles
The size and shape of the craft matter. The fact is that these indicators influence the choice of consumables:
- Medium and small branches - suitable for making frames, vases, lampshades and shades;
- Logs - perfectly folded into large structures for decorating a country landscape;
- Circles - serve as the basis for internal cutting with subsequent filling of finished holes.
If working with branches welcomes the use of pruning shears, a small hand saw, an awl and a hammer, then it is very difficult to do DIY wood crafts for the garden without an electric jigsaw and an ax.
Connecting individual parts - we use all types of woodworking
Regardless of what lumber you need to fasten together, the options will always be the same and quite numerous. The blanks can be connected in length, building one another, you can also assemble a shield from them, connecting them with side planes, or assemble complex structures, combining them at different angles. The extension is carried out end-to-end or by turning grooves or folds and, accordingly, tongues or ridges on another part. If you prefer the “butt” option, you can drill holes in both ends and insert a secret tenon into them, or grind grooves and insert a piece of strip, which will serve as a kind of ridge. It is also possible to connect with two plates with through-bolt fastening.
Butt-lock fasteners are considered the rarest.
It is also possible to assemble two parts in length by making a groove in the end of one and recessing a ridge in the other. Also popular is the “quarter” connection, with the flange turned on each part to the middle of the lumber, and the parts can be joined using either glue or screws, nails or bolts. The assembly of parts in length is carried out either on a miter or with an oblique cut, that is, a small indentation is made at the end of the beam, then an oblique acute-angled cut is made, at the end of which a shelf is machined equal to the width of the original indentation. An adhesive toothed joint will also be strong when a triangular groove is machined into the end of one product, and the second is cut into a wedge shape corresponding to the groove. There is a more complex gear connection, when several grooves and teeth are made in a row, without a machine, this is difficult to do. The rarest are end-to-end locking fasteners, similar to the “quarter” type with the difference that the shelf is made 2-thirds of the lumber thick, after which a wide groove is machined into each part at the base of the shelf, and a protrusion is obtained at the end. There is a straight overhead lock, described above, as well as a similar straight tension lock, when the grooves are made slightly wider than necessary and a square pin is driven into the gap between the protrusions. There is also an oblique patch lock, made of the “must-worn” type, but also with grooves and protrusions on both parts and, accordingly, depending on whether the option is tensioned or applied - with or without the insertion of a pin.
If you want to assemble a shield, the easiest way is to fold the side edges of the boards or move the beams, make a mark along their common end, along which a groove is then made and then the slats are driven into it (with glue). A similar option is with a recess of a triangular groove and insertion of a triangular strip. Working with wood by selecting a dovetail groove and then inserting a trapezoidal key is considered more labor-intensive. You can connect each element with neighboring ones using a tongue-and-groove method or by cutting out folds, or only by turning the grooves and fitting them onto a rail. When assembling structures at an angle, they are also connected in half a tree, in a third and in a quarter of a tree, using the “tenon and groove” method. At the same time, the tenons are also different: through, not through, rectangular and triangular (with corresponding grooves), flat and square.
Frame of branches
The smaller the workpiece, the easier it is to make. On the other hand, the level of difficulty is influenced by originality. The frame of branches is proof of this. Its creation occurs in stages:
- First, four branches with a diameter of about 10 mm are cut or sawn;
- Next, the branches are adjusted to the dimensions of the future frame;
- The next step is to attach the sticks to each other so that their edges protrude outward (felt rope is used to wrap the sticks crosswise);
- Next, a paper, fabric or leather base with an image is attached to the frame.
The plot is secured using glue or staples. The frame remains to be supplemented with a rope for hanging.
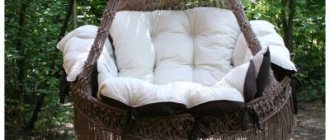
Armchair
In the case of slatted structures, it is better to immediately consider a hybrid option in the form of a chaise lounge - a beach lounger. Other design options in the interior will look too rough.
Portable, lightweight design with a fabric back is easy to assemble and convenient to transport. It is recommended to make the load-bearing elements from maple wood, and the lintels on the seat from cherry, beech, and pine.
To make a chair, you need to prepare the legs: 2 parts 20x40x800 mm and 2 parts 20x40x560 mm each. The lower crossbars are also paired, 10x50x380 mm each. Top 1, size 20x40x380 mm. The crossbar for sitting is also needed in a single copy, 20x40x300 mm. You will also need 5 slats 20x40x400 mm and a piece of fabric for the back 600x500 mm.
The assembly order will be as follows:
- jumpers are attached to a long pair of legs at the top and bottom;
- fabric for the back is stretched over the resulting part;
- The seat is assembled: a jumper is attached to the short legs at the top, then 5 prepared slats;
- chair assembly: the second pair of legs is passed between the lower jumpers of the long part and secured with a movable connection.
- You can first paint or coat the chaise lounge frame with impregnation.
Vase of branches
Flexible and thin wood gives any product chaotic patterns. Therefore, craftsmen often make original vases from branches. The latter can be made in different ways:
- Winding branches of equal length around the pipe, followed by fastening the bottom to the walls of the vessel;
- Weaving different branches together until you get a complete vase.
The easiest way is to weave a vase from willow vines. On the other hand, armed with a glue gun, you can fix the branches to each other in different places so that simple DIY wood crafts do not break under the load.
Geometric carving technology
Geometric wood carving is considered the simplest and is perfect for beginners. To create the intended design, you need to have a small set of wood carving tools and clearly follow the design. In geometric wood carving, symmetry and repetition are of utmost importance. This achieves a wonderful play of light and shadow.
Cutting boards using this technique and wooden panels look wonderful in the kitchen.
Geometric carving consists of sequential cutting out of simple geometric shapes: rectangles, triangles, squares, rhombuses. But the result is a wonderful ornament that looks different in different lighting.
The sequence of performing any wood carving is as follows:
- First, a wooden blank is made (board, deck, blank).
- Next is rough leveling of the surface of the workpiece, during which all defects and roughness are removed.
- Then a decorative relief is formed using special cutters.
- After the main carving is completed, the finishing process is grinding, impregnation, painting, varnishing.
You cannot work with a workpiece on your knees! The master must have a table to work on.
Master class “Geometric wood carving on a cutting board”
Tools . You will need 2 knives for wood carving: a triangular jamb knife and a feather knife, a ruler, a compass, a pencil.
A triangle jamb knife is necessary for cutting triangular shapes of various configurations, as well as for cutting long straight lines. A pen knife is used to cut long lines such as a petal or groove. Carving knives should be sharp and comfortable.
First stage. We make a sketch of the pattern on the board. It can be applied using a compass and ruler. Or you can print out carving patterns taken from the Internet and use carbon paper to transfer them to a prepared cutting board.
Second phase . Cut out the petals. We use a pen knife.
While working, the thumb is pressed firmly against the board, and the index finger lightly touches the wood. This will help regulate the depth of the knife into the surface and the angle of inclination. And your thumb will help you move the blade smoothly. First, we cut in one direction at an angle, then we turn the board over and cut on the other side.
If the shavings curl like a rope, the knife is good and sharp. It must be periodically sharpened with a piece of leather with GOI paste.
Third stage . We cut out the triangles with a blunt knife. Using the heel, at an angle of 45 degrees, we cut the knife into the wood, not reaching the edges of the pattern on three sides. The slots should meet on all sides in the shape of a pyramid. The sliver falls out and forms a beautiful triangle.
Fourth stage. What we couldn’t cut, carefully clean it so that the edges are frequent and even. Using the same principle, we cut out grooves and triangles around the perimeter of the board.
Fifth stage . We sand everything with sandpaper and treat it with natural impregnation. All! The work is done. We decorate the kitchen with a useful and beautiful cutting board with wood carvings.
Original
Lampshade made of branches
Artificial shades place a large load on the lamp. Another thing is a lampshade made of branches. Having prepared 50-100 branches 40-70 mm long, you can start making it:
- First, the balloon is inflated;
- Next, the ball is trimmed with branches by gluing the latter to each other;
- The next stage is releasing air from the balloon;
- Next, all that remains is to build a lamp into the round lampshade and hang it from the ceiling.
But first, it is better to make easy wood crafts for beginners, including a small table lamp with a lamp and a battery.
Which slats are best to choose?
When choosing slats, the following criteria are used:
- Exposure to moisture. In conditions of high humidity, pine and beech slats require impregnation with special compounds. It is enough to subject the oak elements to surface treatment.
- Environmental friendliness. All wooden slats are safe for humans. The exception is veneered MDF, which can emit harmful substances, which limits its use in residential premises, especially in bedrooms and children's rooms.
In terms of strength characteristics, preference is given to oak and some rare wood species.
- Appearance. Any decor made from slats on the wall is natural and attractive. However, exotic wood species stand out especially for their beauty of structure and color shades.
In the price segment, inexpensive, budget options and luxury materials are distinguished. The first category includes pine and beech. Oak is somewhat more expensive. You will have to pay a significant amount for the chic look of valuable wood.
Buffels can be created from flat or three-dimensional elements. Sizes also vary. The cross-section of the slats can vary from 10x10 mm to 20x50 mm (veneered slats - up to 50x50 mm). The length ranges from 1 to 3 m.
Log structures
The logs are very strong and massive. They are useful for assembling cars, motorcycles with sidecars, benches and other structures on which you can sit in the yard or garden.
Logs are often sawn into many round pieces to decorate walls and create decorative pendants. The latter become beautiful thanks to:
- Painting;
- Burning;
- Gluing rhinestones.
By stacking round timber with each other, you can get a romantic heart or a huge star. This decor is appropriate for walls.
Note!
- Crafts for February 23: master class on creating interesting DIY crafts for Defender of the Fatherland Day
DIY crafts for February 14th step by step: a master class for beginners, with a description of how to make a craft for St. Valentine's Day. Valentina (140 photos)
- Crafts made from jute: 100 photos of beautiful options. Easy instructions with photos and descriptions on how to make a craft with your own hands
Advantages and disadvantages
Decor made from slats has the following advantages:
- environmental cleanliness;
- ample opportunities for designers to create various compositions that differ in color and size;
- repairability of the slatted coating: the ability to eliminate defects on the surface, restore color, replace individual elements, etc.;
- the ability to change the appearance by external processing (painting);
- versatility, possibility of use in premises for various purposes;
- increased feeling of coziness and comfort.
- affordable price;
- ease of installation;
- masking all wall defects;
Decor made from wooden slats also has certain disadvantages:
- cladding with lathing reduces the total area of the room;
- the flammability of wood, which increases the fire hazard of the entire room;
- insufficient durability of some types of wood.
To decide on the use of wooden slats, you should carefully analyze the pros and cons of such cladding, taking into account specific conditions.
Circle decor
Circles are the same round timber, but with a larger diameter. Accordingly, you can create different patterns in them, as demonstrated by individual photos of DIY wood crafts.
But before you start cutting, you need to arm yourself with an electric jigsaw, drill and imagination. Creative thought will help create a plot. A drill will be needed to drill holes that will serve as the basis for cutting in the jigsaw. The latter directly creates plot patterns.
What do they look like in the interior?
By choosing the right design option, design style and installation method, you can provide an original and attractive look to the interior in any room. You just need to consider its size and purpose.
In the hall
A decorative panel made of slats can be combined with a hanger.
In the interior of the living room
In the living room, wooden slats are used to decorate the walls and zone the room.
- One of the common options is a slatted surface behind the sofa. You can place a picture, shelves, indoor plants on it, or simply leave a slatted element in the form of a panel.
- Another common option is the wall opposite the sofa. A TV just begs to be seen here. In this case, all supply wires will be disguised under the cladding.
Using a slatted partition, you can provide zoning for the living room. It is quite popular to move the kitchen here. You can select a dining area or a small office.
Reiki in the kitchen interior
A slatted wall looks good in a large kitchen, highlighting the dining area.
The naturalness of the interior increases appetite, and its appearance attracts the eye. It is advisable to reinforce the impression with a beautiful dining table. Sometimes in the kitchen the ceiling is finished with slats. This makes it possible to create a special lighting system.
In the bedroom interior
Wooden designs are quite popular for bedrooms. The classic option is to decorate the wall behind the head of the bed with a slatt.
This way you can decorate the entire wall or cover only the width of the bed, but up to the ceiling. There is a belief that wood improves sleep. In modern styles, preference is given to asymmetry.
In this case, you can cover the wall only on one side of the bed.
Wooden slats in a children's room
In a children's room, the possibilities of slatted decor expand. Here you can veneer a wall or ceiling, make a transition from floor to wall or from wall to ceiling.
Separate the recreation area (bedroom) from the play or study area with a partition.
It is better to make partitions airy, decorative, with large gaps between the slats. As in the bedroom, a wooden wall behind the head of the bed looks good in the nursery. You can hang shelves on a wooden surface near the table.
Decorative circle for watches
The finished circle with a diameter of 100-200 mm can be used as a dial. All that remains is to purchase a themed kit, which includes:
- Numbers;
- Arrows;
- Mechanism with battery compartment.
However, this set can be removed from worn-out wall clocks, which are always in abundance at the flea market.
Preparation of material
To prepare high-quality parts, you will need to know how to use a hacksaw or circular saw to get a neat cut of wood.
Material procurement procedure:
- selection of wood (knots, branches, logs),
- removal of bark and sawing in the transverse direction,
- grinding the cut, drying, polishing,
- treatment with compounds to reveal the texture of the pattern,
- treatment with anti-rot compounds, varnishing.
Working on blanks will require time and skill. The result will be beautiful parts for making a wide variety of products. There are many options for products made from end-cut wood, ranging from crafts for children to home or garden interior items.
For further work you need a jigsaw and glue, and additional decorative elements if necessary.