Restoring furniture with your own hands at home is a fun and creative activity that allows you to give new life to your favorite items. At the same time, self-restoration helps you save a lot of money, because the services of professional furniture makers can be so expensive that it would be easier to buy a new cabinet, armchair or sofa.
You should only contact specialists when you want to restore expensive furniture or valuable, antique interior items - here, independent restoration by an inexperienced craftsman can only do harm. You can restore old furniture or something that was bought in a regular furniture store with your own hands - below we will talk about some of the tricks of this process.
DIY furniture restoration
Definition with necessity
To figure out what furniture can be restored. You need to understand that the costs of specialists will be appropriate for antique furniture. It is better not to take risks with it to avoid harm.
Ordinary old furniture that has lost its former attractiveness and was purchased at a shopping center can be restored manually yourself.
pros
Saving time and money. There is no need to use the services of cargo taxis, movers and restorers.
Confidence in the result. Cost control, selection of desired materials and the ability to follow all instructions personally.
Implementation of ideas. Furniture can be customized to your personal ideal. In the creative process, new thoughts may arise and a desire to correct what has been started.
For example, add intensity in color or add accessories. And the need to coordinate every change is eliminated. And after accepting the job, it is unlikely that changes will be made.
Disadvantages of restoration
It is preferable to leave it to specialists to give new shapes to old furniture or work on small details. A person without experience who does not know the nuances of work can completely ruin items.
Saving personal time. By handing furniture over to professionals for restoration work, you can forget about it and wait for the finished result.
DIY work requires an investment of energy in your free time; evenings and weekends will be devoted to the process. If you don’t treat your business as a hobby, then soon the activity will begin to burden you.
Eurobook sofa - 130 photo recommendations on how to make and assemble a comfortable and compact sofa- Assembling furniture with your own hands - 105 photos and a detailed video of how various furniture elements are assembled
- Do-it-yourself bookshelves - ideas for building shelves and shelves quickly and easily from scrap materials (155 photos and videos)
Allocation of special territory. Giving new life to old furniture is a dusty task. Chemical compounds, sawdust and dirt will fill the room.
It is necessary to allocate space for freedom of action. It is advisable to carry out work in non-residential areas: street, garage, workshop.
If restoration work is carried out in an apartment, then one room should be completely circled, and the floor should be covered with cellophane or paper.
Minor repairs
If the item does not shine and its surface is clearly not polished, then it does not need to be refinished - just follow the recommendations for caring for wooden furniture.
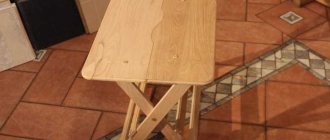
New life for the hallway table
To do this, you need to bring the thing into the light and evaluate which of the following defects it has.
Loss of gloss
The first possibility is that the thing has lost its luster . This happens to a tree simply from time to time, from the fact that it stands and gathers dust, from the fact that it is touched with hands. If the surface seems worn and has lost its original color, you need to:
- buy a wood care product with orange oil at any hardware store;
- take a clean sponge, dip it in water and heat it in the microwave for thirty seconds - or treat it with steam, the main thing is that it is almost hot to the touch;
- Spray the product onto the surface using a spray bottle and wipe it with a hot sponge.
Classic is always in fashion
Your hands should be gloved when working, and the sponge, when it starts to cool, needs to be warmed up again.
If the thing is painted - for example, a wooden tabletop - you need to use a different recipe:
- Dilute a teaspoon of baking soda in a glass of water and thoroughly wipe the countertop;
- wait until it dries and wipe with a dry soft cloth to remove plaque;
- Pour two teaspoons of ammonia into a liter of warm water and wipe the countertop again with this composition.
Restored bedside floor lamp
If the wood is not simple and not painted, but varnished, a third approach is needed:
- pour a tablespoon of any dishwashing detergent per liter of warm water and carefully wipe the surface to degrease it;
- wipe a second time, but with a cloth soaked in plain water;
- wait until it dries and wipe with a small amount of vegetable oil.
Instead of vegetable oil, you can use a mixture of linseed oil, turpentine and vinegar. Or butter and beer in equal proportions. Or beer, which was previously boiled with a piece of wax of the desired color and cooled to a warm state.
You can reupholster upholstered furniture yourself
As a result, the item will become bright, as if renewed. Often these simple recipes are enough to make the item look good and no further restoration is required.
Stains and dirt
The second is the presence of stains and dirt. You can approach the question in different ways:
- Minor abrasions and old faded stains can be wiped off with a banana peel.
- Simple stains for unknown reasons, which cannot be removed with a banana, need to be removed differently. First clean the surface with water and detergent, and then wipe with alcohol - not completely, but only the affected areas. If the color is not restored, you can paint them over with a furniture marker of a suitable color, or you can try to remember what they are from and bring them together in other ways.
Minor scuffs and faded stains can be wiped off with a banana peel.
- Grease and fumes on kitchen cabinets must first be rubbed with talcum powder so that they set, and then the resulting dirty powder must be wiped off with a rag. Then dilute two teaspoons of ammonia with a liter of water and wipe.
- Whitewash and emulsion paint are washed off with a cloth, which is dipped in a mixture of wine vinegar and olive oil - three drops of the second per glass of the first.
The main thing is that the cloth is barely damp and does not drip the mixture everywhere.
- White water stains that remain when you place a wet glass on wooden furniture or spill something are sprinkled with flour. Then moisten a cloth with oil - corn, olive, palm or regular sunflower - and wipe the surface. Then they wipe it again with velvet.
Grease and dirt on kitchen cabinets should be rubbed with talcum powder, then shaken off with a cloth
- White hot spots that remain if you place a hot frying pan or pan on wooden furniture are wiped with a heated mixture of paraffin and wax of the desired shade in a one-to-one ratio. Then cover with a paper napkin folded in several layers and iron it. The result is polished with felt or other rough cloth.
If the white spots are weak, not swollen, and do not reach deep, they are removed differently. Cover with regular table salt, add a couple of drops of oil and leave for three hours. Then the mixture is removed and rubbed with felt until the stain completely disappears.
Without stains, the furniture suddenly begins to look much better - beautiful and updated.
Beautiful, updated furniture
Mechanical damage
The third is the presence of cracks, chips and other mechanical damage. There are also numerous recipes here:
- If the furniture is varnished and small cracks have appeared on it over time, a mixture of ethyl alcohol and burdock oil in a one-to-one ratio will help. It must be applied with a white cloth, preferably flannel. Rub with felt.
- If lacquered furniture has a deep scratch from an unsuccessful mechanical impact, you can paint it over with a regular furniture marker or iodine - to achieve the desired shade, it can be diluted with water.
- If there is a scratch on lacquered furniture that has already turned white, you can use shoe polish of a suitable color or a mixture of mastic and wax in a ratio of four to three. The result must be polished.
Stylish leather sofa
- If there is a chip on the furniture, you will have to use putty, preferably a special furniture putty. It is better to buy a light tone and achieve the desired color with a color scheme. Then apply it to the chip, spread it so that it is completely covered, and the putty spreads evenly over the surface. Wait until it dries and sand with fine-grain sandpaper.
- If the furniture is swollen from moisture - not completely, but only in one place - it is covered with salt and a couple of drops of vegetable oil. Salt will absorb water, oil will restore flexibility to the tree. The result, again, should be wiped off with a cloth.
All these simple manipulations are often quite enough for the furniture to start looking good and no further restoration is needed.
But if you want the item to look not just updated, but completely new, you can process it additionally.
Modern style office
Required materials
An individual list of materials should be selected for each piece of furniture. But there is a standard set of devices that will be universal for almost all ideas.
It is recommended to make a list in advance. You can use equipment rental because professional tools significantly save time, effort and give a higher assessment of the quality result.
- White table: 115 photos and videos describing the selection and construction of cool and easy-to-use tables
Do-it-yourself tabletop: video instructions for making a tabletop + 140 photos of the most modern ideas
Corner sofas - 130 photos and videos on how to choose and where to place modern original corner sofas
For DIY work you will definitely need: a sanding machine, a construction vacuum cleaner, an electric jigsaw, a screwdriver and a construction hair dryer.
Small details should include: sandpaper, brushes with rollers, several spatulas of different sizes.
To maintain health safety, buy good protective gloves and a respirator. Don't forget about removers, wax, paint, mixtures for sealing cracks.
Materials for work can be found in specialized stores, or use advertisements. Often the necessary compounds are sold at a reduced price, the remains from repairs do not match the color.
Water stain and its specifics
Water-based stain is available as a ready-to-use liquid and as a powder that can be diluted to the desired concentration. Water-based stains have good adhesion, naturally highlight the grain of the wood and come in a wide range of shades, from light tones to deep dark reds. The absence of toxic odors makes such compositions indispensable when performing interior work.
When processing resinous wood, water stain may become stained due to uneven absorption into the structure of the material. In this case, it is recommended to subject the surface of the product to a de-tarring procedure.
Another disadvantage when working with water stains is the problem of raised lint. To eliminate this defect, the prepared surface is moistened with water and allowed to dry. Then the product is sanded with fine-grained paper and opened with a finishing compound.
Time spent
It is impossible to accurately calculate the time spent. For example, you can spend one day on small items. Larger works may take several months to complete.
- Do-it-yourself computer desk: 150 photos of making corner tables and features of the choice of materials
DIY ottoman - step-by-step guide to the best homemade ottoman options (video + 125 photos)
Coffee table: simple and stylish design options and design ideas for coffee tables (115 photos)
Deadlines are calculated based on the working material. Each composition has a certain drying period.
It is necessary to carefully read the instructions and strictly follow the advice and instructions for restoring furniture. If the recommendations are not followed, the final result will decrease in quality.
Before each application of a layer of varnish, you need to be sure that the previous one has dried completely. To save time, buy mixtures that do not require long drying. It's a good idea to read reviews before purchasing.
Plan all your purchases clearly. This will help you avoid unnecessary trips to the store. The necessary materials should be purchased immediately and kept on hand.
Grandma's new chest of drawers: we repair and restore wooden furniture
Buying new furniture is always an expensive and troublesome undertaking. And finding something with soul and zest in stores is a rare occasion. Take a closer look at the “old fund”. Maybe your grandmother’s solid buffet is gathering dust at your dacha, which could be a better alternative to plywood kitchen cabinets? You just need to add a little polish, refresh the paint, rub out the cracks so that it can once again decorate the house with its appearance. Our forum members talk about simple and accessible techniques for remodeling and restoring furniture.
Sequencing
Each piece of furniture has its own step-by-step instructions. To figure out how to restore upholstered furniture with your own hands, you should add a little to the list.
But just like with a set of tools, there is a standard set of actions.
Disassembling items
The very first step will be to disassemble the furniture. The work process will be much simpler if you disassemble it as much as possible. Remove the doors, unscrew the handles, take out the shelves, preferably unscrew the frame parts.
But don’t get carried away; parts stuck to the glue should not be disturbed. There is a risk that during assembly it will not be possible to repeat the fastening of the elements. It is advisable to remove all fittings.
To simplify the assembly process, you should photograph the fastening points in advance. Label the accessories and put them into bags.
Removing the top layer of varnish
To remove paint and varnish material, use sandpaper, a hair dryer or varnish remover. A smooth surface should be achieved using any convenient method. Methods can be combined. The main thing is to come to a result.
Don’t forget about your health and use a respirator, gloves and goggles. Since the work is very dusty, particles of chemical compounds will fly in the air.
Working on defects
Using specialized mixtures for grouting chips and scratches. The next step is to smooth out all the cracks and smooth out the uneven surface.
For scratches, grout is used, large cracks are filled with furniture wax, abrasions should be filled with putty.
Finish coating
If you want to preserve the original wood pattern, then use varnish, wax or oil as a finishing coat. When completely changing the color, choose paint or enamel for furniture.
When choosing bright and light shades, pre-paint the parts white. With this move, the paint will lay beautifully in the chosen tone.
How to paint with stain in two colors
To more clearly emphasize the texture of the wood (especially after brushing), to give it an unusual color or an “antique” look, the part is coated with two different stains.
They do it this way: first, the wood is covered with a light (often bleaching) water- or alcohol-based stain, creating a general background. Then, a darker stain on an oil or oil-wax basis is applied with a swab or roller. At the same time, the denser fibers that form the pattern remain light.
Restoration of old furniture
Before starting work, you should carefully think through or even sketch in color what the finished product will look like. Study photos of furniture restoration with your own hands and head to a specialized store for materials.
The list of goods includes: brushes (for paint and varnish), paint, paints and varnishes, sandpaper (hard and soft), primer, paraffin, spray bottle, glue, masking tape and napkins for decoupage.
Upholstery restoration
If you look at the chairs in concert halls, you will notice their perfect condition: the upholstery looks like new, despite the constant load. Upholstery of upholstered furniture is its most important part. It is the upholstery that bears an incredible load, rendering it unusable. Over time, abrasions and torn parts of the fabric appear, and the soft filling becomes wrinkled.
To restore the upholstery you will need a modest set of items. Furniture repair supplies include a furniture stapler and new fabric.
The easiest way to update the covering on chairs is:
- First of all, you will have to disassemble the chair and separate the old fabric from the seat;
- After taking accurate measurements of the seat, you can go to the store to buy fabric. The size of the canvas should be approximately 20 cm larger than the size of the seat in all dimensions. If you change the upholstery on all the chairs, you can choose a completely new color that matches the interior of the room. You should choose a strong and durable fabric. In addition to upholstery, you will have to buy soft filling, for example, synthetic winterizer;
- The soft part is cut along the contour of the seat with a margin of a couple of centimeters;
- The synthetic winterizer is placed on the seat and covered with a cloth, which is attached to the back of the seat using a stapler;
- After fastening, you should cover the wrong side of the upholstery with another piece of the same fabric. And assemble the chair.
Removing staples
We pry off the old upholstery and fasten the padding polyester
Cutting fabric to size
We fasten the new upholstery with a stapler
Step by step steps
Furniture disassembled from its fittings should be sanded. To make the work progress faster, it is better to use a grinding machine, but in the absence of this, the process can also be done manually.
Cover the top layer with a primer before painting. Apply in one layer and set aside until completely dry. The time is selected according to the instructions, usually a minimum of three hours.
Parts that are not planned are sealed with masking tape for painting. Paint is applied to exposed elements in one layer. After drying, the paint layer can be repeated to enhance the color intensity.
To achieve the scuffed effect, rub the necessary areas with a wax candle.
The next layer of paint should be a tone lighter than the previous one. Alternatively, add a little white paint and mix. Having sealed the joint lines with masking tape, it is permissible to paint the protruding areas in a different shade.
For the decoupage technique, details are decorated. The finished napkin with a pattern is moistened with water, straightened out until smooth and covered with PVA glue.
At the finish, apply two layers of varnish, remembering to dry each layer completely.
Major damage
If you need expensive repairs of Italian furniture, correction of significant surface damage or complex mechanical breakdowns, you will have to contact a special company that performs furniture repairs at home.
The repair process in this case should be carried out by professionals with extensive experience. They will repair the walls of the cabinets or replace them with similar ones if repair is impossible, and replace worn out parts.
Some serious defects that affect the operational properties of furniture can be corrected independently; local repairs will not cause difficulties for a neat person. Constant changes in temperature and air humidity, characteristic of every working kitchen, cause cracks to appear, and table legs become unusable over time. Repairs should be carried out as soon as possible, before the deformation becomes very noticeable:
- Regular PVA glue is drawn into a medical syringe; for better penetration of the substance, the needle is removed;
- Putting the needle on a full syringe, carefully fill the crack with glue;
- The part is pressed tightly with a clamp, the remaining glue protruding from the crack is removed;
- After a day, the clamp is removed and the repaired part of the furniture is coated with varnish. This will extend the life of the furniture and protect it from further damage.
Putting glue into a syringe
Fill cracks with glue
We clamp the crack and cover it with varnish.
Recommendations
For quick renovation, there are ways to restore furniture yourself:
Simply sand it with a sanding machine and coat it with clear or light varnish.
Get rid of dirt, sand with light sandpaper and paint.
You can get rid of defects using drawings. If you don't have artistic skills, use a stencil. The patterns are applied with acrylic paints and covered with clear varnish.
Using the decoupage technique.
Veneering/veneering
Veneering is one of the ways to restore interior items. By covering the tabletop with veneer, you will transform it beyond recognition and give it a rich look. Thanks to the huge number of colors and textures, it is possible to choose the material that will fit perfectly into the overall interior.
There are three veneering methods:
- Hot. The material is glued to the base with glue.
- Cold. The material is pressed using special equipment.
- Membrane. Used in industrial environments and suitable for difficult surfaces.
At home, you can only use the first method. It is implemented in several steps:
- Removing old coating, fittings, eliminating damage using putty. After filling the cracks, the putty is leveled with sandpaper until a completely flat surface is obtained.
- Veneer preparation - unwinding the roll, moistening with a sponge. In order for the material to become straight, it must be laid wet between the boards and left to dry.
Glue is applied to the prepared surface, then the veneer is glued. The top is ironed through paper.
Who is suitable for furniture restoration at home?
Restoring furniture on your own gives old furniture a second life. Interior items can be updated beyond recognition, according to your taste.
DIY repair of cabinet and wooden furniture with your own hands is suitable for those who want to preserve their favorite things and save money.
Work on updating furniture, if desired, can be carried out even in an apartment. Even a beginner can handle the technique. The main thing is to be able to use carpentry tools and follow all instructions.
Small jobs can be completed in a couple of days. By following all stages of restoration, your favorite furniture will last for another year.
The final stage is decoration
Bringing wood products into proper shape can be correlated with your own design approach. For old furniture they come up with a fresh design:
- painted in a different color;
- apply a pattern or ornament;
- they make scorch marks and appliqués;
- covered with tinted film.
Items not made of wood, but made of MDF, chipboard, laminated chipboard, combined items require an individual approach and a number of other materials.
The application of the ornament is done using a stencil so that the images are smooth and clear.
A kitchen cabinet or chest of drawers, decorated in Provence style, looks interesting. You can combine this decor with carved details - make straight legs curly.
Bringing wood products into proper shape can be correlated with your own design approach.
The headboards of old beds can be modified by rounding the corners, adding designs in the form of vignettes, etc. to the surface.
You must use a wood saw as a cutter; with its help, the size of the fitted parts will be accurate.
You can use a different fabric to upholster chairs, an ottoman or a couch. Decorative material with gold or silver embroidery looks good in classic interiors.
The application of the ornament is done using a stencil so that the images are smooth and clear.
An old cabinet can not only be re-laminated and polished, but completely modified. For example, make a surface with craquelure. Or add a mirror panel, including one with a pattern. The spot lighting at the top of the product also looks impressive. Modern designers often use photo panels - making them yourself is not difficult.
Tools are used to restore old furniture.
Photos of DIY furniture restoration
Tell your friends
