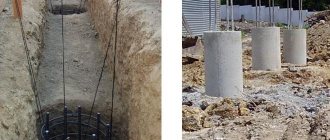
The strip foundation has a non-standard geometry: its length is tens of times greater than its depth and width. Due to this design, almost all loads are distributed along the belt. A concrete stone cannot compensate for these loads on its own: its bending strength is not enough. To give a structure increased strength, not just concrete is used, but reinforced concrete - this is a concrete stone with steel elements located inside - steel reinforcement. The process of laying metal is called strip foundation reinforcement. It’s not difficult to do it with your own hands, the calculations are elementary, the diagrams are known.
The quantity, location, diameters and type of reinforcement - all this must be specified in the project. These parameters depend on many factors: both on the geological situation on the site and on the mass of the building being constructed. If you want to have a guaranteed strong foundation, you need a project. On the other hand, if you are building a small building, you can try, based on general recommendations, to do everything yourself, including designing a reinforcement scheme.
Reinforcement scheme
The location of the reinforcement in the strip foundation in cross section is a rectangle. And there is a simple explanation for this: this scheme works best.
Reinforcement of a strip foundation with a strip height of no more than 60-70 cm
There are two main forces acting on the strip foundation: heaving forces press from below during frost, and the load from the house from above. The middle of the tape is almost not loaded. To compensate for the action of these two forces, two belts of working reinforcement are usually made: above and below. For shallow and medium deep foundations (up to 100 cm deep) this is enough. For deep belts, 3 belts are already required: too high a height requires reinforcement.
You can read about the depth of the foundation here.
For most strip foundations, the reinforcement looks like this
To ensure that the working fittings are in the right place, they are secured in a certain way. And they do this using thinner steel rods. They do not participate in the work, they only hold the working reinforcement in a certain position - they create a structure, which is why this type of reinforcement is called structural.
To speed up work when knitting a reinforcing belt, clamps are used
As can be seen in the strip foundation reinforcement diagram, the longitudinal reinforcement bars (working) are tied with horizontal and vertical supports. They are often made in the form of a closed loop - a clamp. It’s easier and faster to work with them, and the design is more reliable.
What fittings are needed
For strip foundations, two types of rods are used. For longitudinal ones that bear the main load, class AII or AIII is required. Moreover, the profile is necessarily ribbed: it adheres better to concrete and transfers load normally. For structural lintels, cheaper reinforcement is used: smooth first class AI, 6-8 mm thick.
Recently, fiberglass reinforcement has appeared on the market. According to manufacturers, it has better strength characteristics and is more durable. But many designers do not recommend using it in the foundations of residential buildings. According to the standards, it must be reinforced concrete. The characteristics of this material have long been known and calculated; special reinforcement profiles have been developed that ensure that metal and concrete are combined into a single monolithic structure.
Reinforcement classes and their diameters
How concrete will behave when paired with fiberglass, how firmly such reinforcement will adhere to concrete, how successfully this pair will resist loads - all this is unknown and has not been studied. If you want to experiment, please use fiberglass. No - take iron fittings.
Grillage
The external similarity of the grillage to a strip foundation leads to errors in self-reinforcement. The tape experiences tension at the base from the prefabricated loads of the cottage, and at the top from swelling of the soil. Heaving forces never act on the grillage, since it is separated from the ground by a crushable layer of polystyrene foam or an air gap of 10–20 cm. However, here a bending moment arises in the vertical direction in places where the posts are rigidly pinched into the beams.
Important! For a grillage, it is not enough to make a standard frame of longitudinal rods tied with clamps. It is necessary to further strengthen the top row near the columns (piles and pillars), and the entire lower belt.
Diagram of the correct reinforcement of the grillage/pile interface.
Recommendations on how to properly knit reinforcement joints apply only to steel rods. It is not recommended to use composite reinforcement in foundations, which, when tensile forces appear, first elongates and only then begins to absorb loads. This is fraught with the opening of cracks in the base of the upper part of the concrete foundation beams that make up the grillage.
We recommend reading: Reinforcement of the grillage of a pile foundation.
Do-it-yourself calculation of strip foundation reinforcement
Any construction work is regulated by GOSTs or SNiPs. Reinforcement is no exception. It is regulated by SNiP 52-01-2003 “Concrete and reinforced concrete structures”. This document specifies the minimum amount of reinforcement required: it must be at least 0.1% of the cross-sectional area of the foundation.
Determination of reinforcement thickness
Since the strip foundation in section has the shape of a rectangle, the cross-sectional area is found by multiplying the lengths of its sides. If the tape has a depth of 80 cm and a width of 30 cm, then the area will be 80 cm * 30 cm = 2400 cm2.
Now you need to find the total area of the reinforcement. According to SNiP it should be at least 0.1%. For this example it is 2.8 cm2. Now, using the selection method, we will determine the diameter of the rods and their number.
Quotes from SNiP that relate to reinforcement (to enlarge the picture, right-click on it)
For example, we plan to use reinforcement with a diameter of 12 mm. Its cross-sectional area is 1.13 cm2 (calculated using the formula for the area of a circle). It turns out that in order to provide the recommendations (2.8 cm2), we will need three rods (or they also say “threads”), since two are clearly not enough: 1.13 * 3 = 3.39 cm2, and this is more than 2.8 cm2, which SNiP recommends. But it will not be possible to divide three threads into two belts, and the load on both sides will be significant. Therefore, they stack four, laying a solid margin of safety.
In order not to bury extra money in the ground, you can try to reduce the diameter of the reinforcement: calculate it at 10 mm. The area of this rod is 0.79 cm2. If we multiply by 4 (the minimum number of working reinforcement bars for a strip frame), we get 3.16 cm2, which is also enough with a margin. So for this version of the strip foundation, you can use class II ribbed reinforcement with a diameter of 10 mm.
Reinforcement of a strip foundation for a cottage is carried out using rods with different types of profiles
We have figured out how to calculate the thickness of longitudinal reinforcement for a strip foundation; we need to determine with what step to install vertical and horizontal lintels.
Installation step
There are also methods and formulas for all these parameters. But for small buildings it’s simpler. According to the recommendations of the standard, the distance between horizontal branches should not be more than 40 cm. This parameter is used as a guide.
How to determine at what distance to lay reinforcement? To prevent steel from corroding, it must be embedded in concrete. The minimum distance from the edge is 5 cm. Based on this, the distance between the rods is calculated: both vertically and horizontally it is 10 cm less than the dimensions of the tape. If the width of the foundation is 45 cm, it turns out that between the two threads there will be a distance of 35 cm (45 cm - 10 cm = 35 cm), which corresponds to the standard (less than 40 cm).
The reinforcement step of a strip foundation is the distance between two longitudinal bars
If our tape is 80*30 cm, then the longitudinal reinforcement is located one from the other at a distance of 20 cm (30 cm - 10 cm). Since medium-level foundations (up to 80 cm in height) require two reinforcement belts, one belt from the other is located at a height of 70 cm (80 cm - 10 cm).
Now about how often to install jumpers. This standard is also in SNiP: the installation step of vertical and horizontal dressings should be no more than 300 mm.
All. We calculated the reinforcement of the strip foundation with our own hands. But keep in mind that neither the mass of the house nor the geological conditions were taken into account. We relied on these parameters to determine the size of the tape.
Recommendations
An armored belt for a foundation is a metal structure that takes on the resulting loads and deformations. Technological recommendations will help in its manufacture:
- how to make an armored belt for aerated concrete;
- what mesh to use for the screed;
- what marking of fittings is used during manufacture;
- what is marble concrete;
- what types of couplings there are for connecting reinforcement;
- what is a plasticizer and why is it needed?
Knitting of frame elements, depending on the conditions, is carried out directly inside the formwork or in another place on the construction site.
Corner reinforcement
In the design of a strip foundation, the weakest point is the corners and the junction of the walls. In these places loads from different walls are combined. In order for them to be successfully redistributed, the reinforcement must be properly tied. Simply connect it incorrectly: this method will not ensure load transfer. As a result, after some time, cracks will appear in the strip foundation.
The correct scheme for reinforcing corners: either bends are used - L-shaped clamps, or longitudinal threads are made 60-70 cm longer and bent around the corner
To avoid this situation, when reinforcing corners, special schemes are used: the rod is bent from one side to the other. This “overlap” should be at least 60-70 cm. If the length of the longitudinal rod is not enough to bend, use L-shaped clamps with sides also at least 60-70 cm. Schemes of their location and fastening of the reinforcement are shown in the photo below.
The abutments of piers are reinforced using the same principle. It is also advisable to take the reinforcement with a reserve and bend it. It is also possible to use L-shaped clamps.
Reinforcement diagram for adjacent walls in a strip foundation (to enlarge the picture, right-click on it)
Please note: in both cases, in the corners, the installation step of the transverse jumpers is reduced by half. In these places they already become workers - they participate in the redistribution of the load.
How to knit a frame correctly
So, how to properly make a reinforcement cage for a foundation?
The design drawings are studied in advance, since the operational life of the structure depends on the reliability of the foundation.
To avoid mistakes, it is recommended to follow certain rules while working:
- minimum overlap - from five centimeters;
- in corner areas, rods located perpendicularly are connected to each other. Blocks that are not connected to each other are prohibited from being used. An excellent option is corners prepared from bent reinforcement. This frame design is considered to be of higher quality. True, certain equipment will be required to bend rods whose cross-section exceeds fourteen millimeters;
- if the connections are made with binding wire, they must differ in density. Using a special hook, the wire should be tightened until it stops, leaving no free spaces between the clamps and reinforcing bars. Be sure to check the clamp for mobility. If it is easy to move it by hand, it is necessary to perform an additional ligament;
- the spacing between the reinforcing bars must correspond to the design drawings;
- the reinforcement frame for a slab or other foundation in the formwork structure is installed evenly, the metal must be surrounded on all sides by a concrete solution that protects against corrosion;
- The reinforcement is bent cold, without preheating, so as not to reduce the strength of the metal.
Reinforcement of the base of a strip foundation
On soils with not very high bearing capacity, on heaving soils or under heavy houses, strip foundations are often made with a sole. It transfers the load to a larger area, which gives greater stability to the foundation and reduces the amount of subsidence.
To prevent the sole from falling apart under pressure, it also needs to be reinforced. The figure shows two options: one and two belts of longitudinal reinforcement. If the soils are complex, with a strong tendency to winter baking, then two belts can be laid. For normal and medium-heaving soils, one is enough.
Reinforcement rods laid lengthwise are working. They, as for the tape, are taken in second or third class. They are located at a distance of 200-300 mm from each other. They are connected using short pieces of rod.
Two methods of reinforcing the base of a strip foundation: on the left for foundations with normal bearing capacity, on the right for not very reliable soils
If the sole is not wide (rigid design), then the transverse segments are structural and do not participate in load distribution. Then they are made with a diameter of 6-8 mm, bent at the ends so that they cover the outer rods. They are tied to everyone using a binding wire.
If the sole is wide (flexible), the transverse reinforcement in the sole is also working. She resists the soil’s attempts to “collapse” her. Therefore, in this version, the soles use ribbed reinforcement of the same diameter and class as the longitudinal one.
Required materials and tools
Before starting reinforcement and installation of the strip foundation, prepare the necessary materials and tools:
- corrugated reinforcement for longitudinal rods;
- smooth reinforcement for crossbars;
- knitting wire;
- shovel;
- hammer;
- nails;
- screwdriver;
- self-tapping screws;
- roulette;
- level;
- Bulgarian;
- crochet hook or gun;
- device for bending reinforcement;
- formwork material (wood, plywood, etc.);
- sand;
- vibrator for compaction.
How much rod do you need?
Having developed a strip foundation reinforcement scheme, you know how many longitudinal elements you need. They are laid around the entire perimeter and under the walls. The length of the tape will be the length of one reinforcement rod. By multiplying it by the number of threads, you get the required length of the working reinforcement. Then add 20% to the resulting figure - a margin for joints and overlaps. This is how much in meters you will need working reinforcement.
You count how many longitudinal threads according to the diagram, then calculate how many structural rods are needed
Now you need to calculate the amount of structural reinforcement. Calculate how many crossbars there should be: divide the length of the tape by the installation pitch (300 mm or 0.3 m, if you follow the recommendations of SNiP). Then you calculate how much it takes to make one lintel (add the width of the reinforcement cage with the height and double it). Multiply the resulting figure by the number of jumpers. You also add 20% to the result (for connections). This will be the amount of structural reinforcement to reinforce the strip foundation.
Using a similar principle, you calculate the amount needed to reinforce the sole. Putting everything together, you will find out how much reinforcement is needed for the foundation.
You can read about choosing the brand of concrete for the foundation here.
Knitting reinforcement using a special device - a knitting machine
To create this tool, you need to take several boards 20 millimeters thick, cut 4 boards along the length of the reinforcement, connect two at a distance equal to the pitch of the vertical posts, creating 2 identical templates. Next, two vertical supports are made with a height equal to the height of the reinforcement mesh. The supports are constructed with side corner stops; it is better to choose a flat area for work.
The device is used as follows: the legs of the stops are installed on two knocked down boards, the two upper boards are placed on the top shelf of the stops and fixed. That's it, the reinforcement mesh layout is ready, now you can quickly knit it. It is enough to place the vertical reinforcement struts in the marked places, fixing them with nails, install the rods on each steel lintel, doing this on all sides of the frame. Next, take a hook and wire - that’s it, you can knit. Such a device is relevant where it is planned to create many similar mesh sections.
Video on how to knit reinforcement using a device
Technologies for assembling reinforcement for strip foundations
Reinforcing the strip foundation with your own hands begins after installing the formwork. There are two options:
- The entire frame is assembled directly in a pit or trench. If the tape is narrow and high, it is inconvenient to work. According to one technology, the reinforcement is knitted directly in the formwork
- Frame sections are prepared close to the pit. They are transferred in parts and installed in their designated place, linking them into a single whole. It’s more convenient to work this way, except that it is very inconvenient and difficult to move connected structures made of reinforcement.
Both options are imperfect and everyone decides how it will be easier for him. When working directly in a trench, you need to know the procedure:
- The longitudinal rods of the lower reinforced belt are laid first. They need to be raised 5 cm from the edge of the concrete. It is better to use special legs for this, but pieces of bricks are popular among developers. The reinforcement is also 5 cm away from the formwork walls.
- Using transverse pieces of structural reinforcement or molded contours, they are fixed at the required distance using tying wire and a hook or a tying gun.
- Then there are two options: If contours formed in the form of rectangles were used, the upper belt is immediately tied to them at the top.
- If during installation you use cut pieces for crossbars and vertical posts, then the next step is tying up the vertical posts. After they are all tied, a second belt of longitudinal reinforcement is tied.
There is another technology for reinforcing strip foundations. The frame turns out to be rigid, but there is a large consumption of rods for the vertical posts: they are driven into the ground.
The second technology for reinforcing a strip foundation is to first drive in vertical posts, tie longitudinal threads to them, and then connect everything with transverse ones
- First, vertical posts are driven in at the corners of the tape and at the junction of horizontal rods. The racks should have a large diameter of 16-20 mm. They are placed at a distance of at least 5 cm from the edge of the formwork, checking horizontal and vertical, and driven into the ground 2 meters.
- Then vertical rods of the calculated diameter are driven in. We determined the installation pitch: 300 mm, in the corners and at the junctions of the walls it is half as much - 150 mm.
- The longitudinal threads of the lower reinforcement belt are tied to the posts.
- At the intersection of the racks and longitudinal reinforcements, horizontal jumpers are tied.
- The upper reinforcement belt is tied, which is located 5-7 cm below the upper surface of the concrete.
- Horizontal jumpers are tied.
It is most convenient and quick to make a reinforcing belt using pre-formed contours. The rod is bent to form a rectangle with the specified parameters. The whole problem is that they need to be made identical, with minimal deviations. And a large number of them are required. But then the work in the trench moves faster.
The reinforcing belt can be knitted separately, and then installed in the formwork and tied into a single whole on site
As you can see, reinforcing a strip foundation is a lengthy and not the easiest process. But you can cope even alone, without helpers. It will take a lot of time, though. It’s easier to work with two or three people: both carry the rods and set them out.
Nuances of performing work
We know how to knit a frame from reinforcement for a foundation. Now let's study some of the features that will have to be encountered in performing this type of work. Having certain secrets, you can easily cope with the task and even minimize the consumption of building materials.
Here are a few basic rules:
- it is necessary to reinforce the entire area of the foundation;
- it is forbidden to expose the reinforcing edges, otherwise the metal will begin to undergo destruction;
- points where metal rods are connected. Connecting using a welding machine is strictly prohibited;
- The reinforcement frame is formed from several types of material. Longitudinal elements can be twelve millimeters in diameter and have a corrugated surface. For transverse and vertical rods, it is allowed to use smooth reinforcement and take a smaller diameter;
- when deciding on the choice of steel material, clarify the expected load effects on the concrete base, study the structural structure of the soil, climatic features of the region;
- the frame base is prepared initially on the surface, then lowered into the formwork structure on supports.
In the absence of technical capabilities to calculate the zones most likely to deform, it is recommended to install three longitudinal rows of steel rods over the entire area of the foundation structure, connecting them with knitting wire.
If you do not have sufficient experience in carrying out such work, you should not try to do it yourself. Seek help from specialists or find an experienced assistant.
Slab
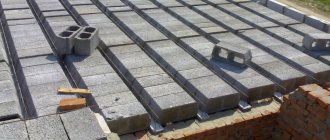
The frame for a slab foundation consists of two reinforcing meshes, the distance between which is determined based on the selected slab thickness. Each such mesh is a collection of longitudinal and transverse rods of the same cross-section (12-14 mm). Ribbed reinforcement is used to ensure maximum contact with the concrete mixture. The distance between two reinforcing meshes is maintained by jumpers, which can be made from metal corners, scraps of PVC pipes, sand-cement tiles - any materials that are not subject to rotting and are resistant to heavy loads. It is advisable to refrain from using wood. When making a frame for a slab base, as in other cases, be sure to leave space for a protective layer of concrete (50 mm): on top, bottom, on the sides.
Practical advice
In places where there is no heavy load, you can select reinforcement in favor of bars of smaller diameter. If strength does not suffer from this, but it is possible to reduce the cost of work, this option is allowed. Deciding what diameter of reinforcement to use in your work should take into account two parameters: ensuring sufficient strength and the cost of work, choosing the optimal price-quality ratio. In some places, the use of thick reinforcement is simply not relevant, but purchasing more expensive material will significantly increase the cost of the entire construction.
The layout of the frame in the formwork must be level. Before laying the structure, it is necessary to carefully check all dimensions to exclude distortions, deformations, and non-compliance with parameters.
Video reinforcement of shallow monolithic strip foundations
And another video: