A folding table is a useful attribute for the home. It can save space, be useful in everyday life and be a beautiful addition to your interior. The functionality of folding tables allows them to be used not only inside a house or apartment, but also outside - on a terrace or balcony, in a gazebo and in a garden. There are many variations in furniture stores with complex mechanisms, materials and designs to suit every taste. It may not be easy to replicate a complex model from a store on your own. But working on your own table will allow you to get away from mass models available to everyone and make an absolutely unique and inimitable copy.
You definitely won’t find such a table when visiting your friends. You also don’t have to worry about the wrong size or the wrong shade of oak - everything is in your hands and depends only on tastes and preferences.
A photo of a do-it-yourself folding table is often found on specialized forums on furniture assembly. Inspiring selections of interior design solutions can also make you think about a folding table.
Attention: To avoid mistakes and mistakes, you should make accurate calculations and follow the step-by-step instructions.
Brief overview of the article
How to make a coffee table out of wood
If you are just starting out in carpentry, the most suitable project for a beginner is to make a DIY wood coffee table.
Here's a good example with step-by-step pictures from wikihow. The table consists of a top part, an apron (drawbar) and legs. With simple tools, you can make a simple coffee table that will be a great addition to your home! Below you can read a short version of the step-by-step instructions, detailed information on the website, the link is under the gallery with step-by-step pictures. Frame. From a 2.4 m board, cut 2 pieces 2.5 cm × 10.2 cm and 110 cm long. Measure the length of the board and mark where you plan to make the cut with a pencil. You can use any wood you want. Cheaper is pine or oak. For a high-quality look, use maple or walnut. From another 2.4 m board, cut 3 short pieces of 2.5 cm x 10.2 cm to 24 61 cm long. Make sure the edges are straight so they lie flush with the rest of the boards. The size of the table can vary depending on how much space you have. Arrange the boards in a rectangle so that the narrow sides are on the floor. Place 2 short boards between the ends of the long boards to form the corners. Place the third board in the middle, this will be the support beam. Secure the corners of the boards with nails. Use 5cm finishing nails on the sides of the 110cm boards. This will be the drawer on the underside of the table so you can easily attach the top and legs.
Tabletop.
- If you want a durable tabletop, use a sheet of plywood at least 2.5cm thick, measuring 122cm x 71cm.
- Make a surface from several boards. Buy boards measuring 2.5 cm x 25.4 cm with a length of 36 cm. Place one of the boards in the middle of the apron so that it is 20 cm at each end. Mark with a pencil where the edges meet.
- Apply glue to the top of the apron and spread evenly over the surface using a brush.
- Press the tabletop against the frame so that the protrusion is 2.5–5 cm. Hold for 30 seconds to 1 minute. Then put something heavy on top and leave it to dry.
- Secure the tabletop. Nail 2 nails at the ends of the countertop, as well as 2 nails into the middle support of the backsplash.
Legs.
- Turn the table over. Saw 10 cm x 10 cm plywood into 43 cm pieces.
- Also cut a 2.4 m board into 4 equal parts. Use a sander to smooth out the ends.
- Pre-4 holes in each corner and leg. Install 10 x 10 cm supports in each corner. Make 2 holes 5 cm from the end of the drawer, making sure the drill fits into the support.
- Drive 6.4 cm screws from the drawer into each leg. Tighten until they fit snugly to the surface so that they are not so noticeable.
- Turn the table over and check if it wobbles. Sand the legs if necessary to ensure the table sits level.
Coating. Once everything is assembled, sand the entire table with a sanding block. Apply impregnation. Wipe off excess with a dry cloth to create a uniform surface. Let dry for 8 hours before adding a second coat. Paint the wood to ensure an even color. Apply a thin layer of primer to the surface of the table to help the paint adhere more easily and retain its color. Allow the primer to dry for 1-2 hours before applying paint. Make long, back-and-forth strokes along the grain to coat the table evenly. Let dry for at least 3-4 hours before applying a second coat. Apply a polyurethane coating to protect against moisture. Work in a well-ventilated area. Let dry for an hour or 2 before applying a second coat.
Homemade folding wooden table against the wall
Wall-mounted tables are one of the most optimal solutions for small kitchens. These designs do not take up much space, which makes them very functional. The construction of such a structure involves performing the following operations:
Initially, you need to select the material for the countertop. Many today use chipboard sheets for this, but wood is best, as it is durable and beautiful. The shield can be knocked down or glued together from several polished boards. After this, you need to determine the height of the table. Based on these values, 2 support legs are made. Theoretically, they can be adjusted to the height after fixing the cover to the wall. At the very end, the tabletop is screwed to the wall. For this purpose, special rotary mechanisms are used.
Please note that the product should not fit closely to the support, as it will not be possible to close it. When the canvas is screwed, you should take care of the fixation system in a vertical position
The process ends with installing the legs. They are attached to two corners using rotating systems.
The nuances of making small folding tables
These tables will differ from the country tables only in size.
DIY folding tourist table
The tourist carries everything on his back. He also needs a small and light table. A tabletop measuring approximately 500×350 mm should be made of plywood 3-6 mm thick. Legs made of aluminum tubes. To avoid bending the tubes yourself, you can use folding benches with a cloth seat for this purpose. If desired, their height can be increased by extending the tubes. You should not make the height more than half a meter. Repeat the design of the hinges in the appropriate size as described in the “Picnic Table”.
DIY folding table for fishing
A table for a fisherman can be completely similar to a tourist one. The tabletop should be covered with hard, easy-to-clean plastic. After all, you will probably have to clean fish on it.
Studying and drawing up drawings
You should first study the drawings of a folding table or develop them yourself.
- The diagram shows each element in detail, indicating the exact dimensions and mounting locations.
- The drawing is drawn up taking into account the design features of the product.
Let's look at the most popular design options and provide detailed instructions for creating them.
Table attached to cabinet
Having chosen the design and diagram of how to make a folding table attached to the cabinet, we will begin to manufacture it.
The workflow looks like this:
- A slab of chipboard of the required size is cut out or a shield is made from natural wood.
- Using a bracket, one side of the working surface is attached to the cabinet wall at the required height.
- On the other side, legs are installed, which must be made in accordance with the design features. They can be folded or secured using threaded connections. These elements can be made from metal profiles or wooden blocks.
- The working surface is covered with film or paint material.
This design allows you to quickly unfold the table for use if necessary. After which the table is folded, and the area is freed up for use for other purposes.
Finishing
In order for a wooden surface to serve for a long time, it must be well treated. The algorithm of actions is as follows:
- It is good to sand all parts of the structure with sandpaper.
- Cover the structure with primer, which will prevent the wood from rotting.
- To make the table look presentable, saturate all parts with stain of the desired color.
- After drying, you can apply furniture varnish in 2 layers.
Advice . If there is no varnish or stain, you can soak it in drying oil and paint it with wood paint of any shade.
Folding table options
Folding tables can differ not only in size, but also in their design. Some fit in the trunk of a car for a picnic, while others would be appropriate on a small balcony.
Transformer
A transformer can become an alternative to the usual dining tables, especially when there is a shortage of free space. The advantages of such designs are:
- efficiency;
- functionality;
- convenience;
- the ability to free up space for games and other items.
Transformers can also combine other pieces of furniture, such as a bed, cabinet or shelving unit.
Table-bench
This design combines two types of furniture: a table and a bench. This has its advantages, since with one movement of the hand the folded table can be transformed into either a seating area or an entire dining area.
Table-bed
A good option for small rooms where you need to find space for both a bed and a table (for example, in children's rooms where several schoolchildren live at once). This design can fit into any interior. The main advantage is functionality.
Another advantage is that the sleeping place is hidden from prying eyes. Therefore, such structures are often installed in studio apartments.
There are several options for the table-bed mechanism:
- a lifting bed (when assembled it is a table, and after lowering a special mechanism to the floor a full-fledged bed appears);
- lifting table (for the bed to appear, the table needs to be raised, while in some designs a bedside table remains on which you can place a night light or any other items);
- a design that folds into a furniture niche (there is a table on one side and a bed on the other);
- bunk bed-table (in this case, only the lower bed is transformed into a working surface)
Swing-out
The peculiarity of the design is that when folded it is a stationary dining table that can be expanded and almost doubled in size. An additional tabletop is located under the main one. To get it out, you need to turn the top (hence the name). A round sliding table works on the same principle.
Making a turntable is more difficult than making a folding table.
Table-book
This design is considered universal and is valued for the fact that when assembled it takes up little space, but, if necessary, can turn into a large table. The range of book tables is wide:
- option with shelves (has two large parts of the table top and a frame table top; if desired, only one half can be expanded);
- design with chairs (in the inner part of such a table there are folding chairs);
- DIY kitchen table with bar (shelves with alcohol move out of the cabinet);
- magazine folding;
- children's table;
- design with a cabinet (resembles a table with shelves, but has more functional space).
Suitcase table
This is a camping table, characterized by high strength and low weight. Most often, a tourist table in the form of a suitcase is made of plywood.
Table rack
This table consists of two parts: a table and a shelf. If necessary, the first one can be removed or folded (in the second case, the leg is bent, the tabletop is lowered and turns into a kind of wall.)
Color and design of the dining table
The choice of color is not an unimportant component that will help decorate the dining table in the interior. It is recommended to select it according to the chosen style or material, but in this case there are options.
For example, a wooden table can be preserved in its natural color by covering it with a transparent protective coating. It will be applicable to various rustic styles.
To achieve a strict and restrained style, it is enough to paint the tabletop in the main color of the interior. A white dining table can generally become a universal solution for both modern and classic styles.
DIY wooden table book
Have you decided to make a kitchen table with your own hands? We advise you to take a closer look at the option of a folding bed. This dining table will fit perfectly into the interior of a city apartment and will not take up much space. Its mechanism, despite its apparent complexity, is very simple.
The only thing that really needs to be paid attention to is the manufacturing of parts.
Before you make a book table with your own hands, as in any other case of creating homemade furniture, prepare a drawing.
Drawing of a folding table
A homemade folding table consists of the following parts:
- A - tabletop, 700x670 mm (recommended material thickness - 20 mm, it can be MDF,
- Chipboard or hollow panels, at your discretion), 2 pcs.;
- B - lid, 700x200 mm (the material is the same as that used for countertops), 1 pc.;
- B - leg, 720x200 mm (tabletop material), 2 pcs.;
- G - drawer, 638x190 mm (tabletop material), 1 pc.;
- D - bottom shelf, 628x190 (tabletop material), 1 pc.;
- E, F - horizontal and vertical bars, 500x40x25 mm, E - 4 pcs., F - 2 pcs.;
- Z - movable leg, 720x40x25 mm, 2 pcs.;
- And - piano hinges, 4 pcs.
Scheme of work:
- After the drawing of the book table is prepared and all the necessary parts are cut out, do not forget to treat them with melamine film. This will protect the saw cuts from moisture and protect you from the toxicity of the material.
- Start assembly by connecting parts Z, G and E (movable leg and bars). To do this, it is best to use a connection with blind straight tenons. This design is equipped with an elastic band or a metal button at the end.
- Connect parts B, D and E. These are the table top, the leg, the drawer and the bottom shelf.
- Attach the cover to the legs (parts B and C). Here we recommend using round spikes. Attach piano hinges to the structure with a movable leg, then connect everything to the table leg.
- Using the drawing, carry out all work on both sides.
- Now you can paint or varnish your dining table.
A table-book the size of “a very serious banquet table” has been made. As you can see, it's really not difficult.
Required Tools
You will need a lot of fasteners. Including self-tapping screws 20x4 and 16x3 mm, M4 screws, furniture locks, telescopic guides of approximately 500 mm and aluminum corners 50x50 mm. The legs may require 4 thick metal tubes - 710 mm in diameter. For installation work, hot melt adhesive is used, applied to the edges of PVC, plastic or wood boards. During work, protect your hands with household gloves. Among the auxiliary devices you will also need a marker, a long ruler, a thick pencil, a tape measure and a building level. A heat gun and a hair dryer will ensure the reliability of the glue connection. Chipboard sheets are cut with clamps. For cutting, you may also need a small-tooth file, a jigsaw, a circular saw and a router. A screwdriver is used to work with hardware. The holes are made with a drill using 4.2 mm drill bits.
DIY book table: modern design of the 18th century
You knew this model has been around (at least) since the 18th century. This table was discovered in furniture documentation dating back to the 1700s. While some of the older tables were legged, carved, and had tall shaped pieces, the vernacular book table shapes looked just like the ones you see at Ikea. If you want to learn how to make this antique modern book table with your own hands, read the instructions on the website.
Folding table for garage
A folding table book is useful wherever you need to save space and, if necessary, have a large work surface. This tutorial shows you how to make a folding table for your garage. Of course, this table is not intended for serious carpentry or plumbing work, but minor repairs, cutting materials, cutting glass and the like are just the thing. It's quite easy to assemble, link to instructions below.
Photo source: www.familyhandyman.com/workshop/workbench/folding-workbench/
Video description
In the following video, the master shows in great detail the process of making folding garden furniture on a metal frame from bent elements, indicating all the dimensions and methods of connection:
If you calculate the cost of such a bench, made by yourself, and compare it with the price of similar products sold on construction markets and through Internet, then it will be almost three times lower. The benefits are tangible, and you can choose the most suitable design for yourself, rather than buying what is on sale.
Photos of do-it-yourself sliding tables
Types of folding tables
Folding tables can have different designs and be made from different materials. They also differ in their shape and the way the legs are attached. It all depends on their purpose.
Small tables are perfect for small spaces, hiking and outdoor recreation. The smaller and simpler their design, the more likely it is to build it yourself.
The advantage of such furniture is high mobility and compactness. It does not take up much space and can be folded and placed in any corner at any time without taking up much space.
Tabletops can have different geometric shapes. As for the materials from which they can be made, the best option is tables made of metal or wood. Combining them is also permissible. It can take shape in completely different ways: it all depends on the imagination of the master.
There are tables in which only the legs fold out. And there are completely dismountable ones, the parts of which are attached using threaded connections.
There are also more complex designs, for example, a table that, after being assembled into a transport state, resembles a suitcase.
Portable picnic table
But what about those who don’t have a personal car? Then let's try to make a folding picnic table that could be easily carried in the hand. When assembled, it fits dishes and other things perfectly.
To make it light and small-sized, it is better to make it from plywood. Sizes are determined based on personal preference.
The product will be of high quality if you strictly follow the steps in the following sequence:
- Take a plywood board and cut a couple of halves out of it. The edge on the underside of the workpieces is framed with a thin block.
- Join both halves along the long part and make a small groove on them for the loop.
- Align the loop on the bars and secure with self-tapping screws.
- Pull the bars completely together on the sides of the tabletop.
- Prepare the frame and drill holes for the legs. On top of the supports you will need to make a through perforation for fastening.
- Connect each leg to the tabletop with wing nuts.
- Install metal corners at the corners of the sides to give the structure strength.
The suitcase table is almost ready. All that remains is to mount the latches and secure the handle.
Photos of do-it-yourself folding tables
Step-by-step work algorithm
Regardless of whether the master is going to make a table from timber, boards or solid wood, oval or square, with 4 or 2 legs, the algorithm will be similar. The first stage is cutting all the necessary parts. Since the drawing with the dimensions of each element is already ready, you can begin making a wooden table with your own hands. If the legs are planned to be metal, the best option would be a steel or aluminum pipe of a suitable cross-section. But the easiest way is to make table legs from timber with your own hands. For this purpose, you will need a block with a cross-section of at least 5 × 5 cm. It is even easier to find ready-made balusters.
The second element is the tabletop. When talking about how to make a wooden table with your own hands, we can mention different shapes and types of tabletops. The easiest way is to make it rectangular or square. They use boards, timber, solid wood, even tree cuts, glass, and other decorative materials. The main thing is to cut them to one size and fasten them together - most often, special glue and wooden dowels are used for this.
At this stage, it is important to remember the strict sequence of actions:
- manufacturing, fitting of all elements;
- sanding;
- opening with soil;
- grinding.
At the second stage we assemble the table. To do everything correctly yourself, you need to adhere to a certain scheme:
- The legs are fastened in pairs with transverse boards, using screws and glue;
- fix pairs of legs to long crossbars;
- Use screws to connect the frame and tabletop.
The last stage is finishing. The DIY wooden dining table is almost ready. All that remains is to give it a beautiful appearance. You immediately need to hide all fastening points using a special putty for wood. It is applied so that the composition completely covers the recesses, leveling the surface. Then everything is sanded and brought to perfect smoothness using a grinder.
Next is the application of paints and varnishes. Those who know how wooden tables are made will name many types of coverings. This is a colorless or tinted varnish (acrylic, solvent-soluble), paint, oils, waxes. Stain does not lose popularity, after processing which the surface is covered with a transparent varnish. It is better to apply coatings to the tabletop with a brush.
Cutting parts Fitting elements Making tabletops
Making legs Installing legs Assembling a single structure Painting parts Finished table
What tools and materials will be needed
For the manufacture of transformers, a square or round water pipe, wooden slats, timber, board, self-tapping screws and furniture bolts are traditionally used. To work with the material you will need:
- Angle grinder with cutting wheel for metal;
- Welding machine;
- Pipe bending device or machine;
- Marking tool.
If the transformer bench is planned to be made from wooden slats or timber, then you will additionally need to purchase a screwdriver and a sander with a sanding belt.
Most of the work on making a transformable bench will have to be done in a home workshop or garage. Regardless of the design scheme, the bench parts are made separately, welded or bent on a pipe bending machine, painted and transported to the assembly site at the dacha.
Master class on creating a folding model with your own hands
We bring to your attention the production of furniture attribute with a transformable mechanism at home. The choice of design and diagram of how to make a table directly depends on the area of the room where it will be located.
What do you need to make a folding table? Before you start producing such a model, you need to prepare the following tools and materials:
- Chipboard panels;
- hammer;
- self-tapping screws;
- screwdriver;
- hacksaw;
- thread locks;
- sandpaper;
- folding mechanism.
The process of creating a product consists of several stages:
First of all, it is recommended to prepare the tabletop and additional sections. To do this, markings of the component parts are made on the surface of the chipboard panel.
Now all the components are fixed to the folding mechanism using self-tapping screws and a screwdriver. Additional sections should be located in the interior of the product to increase the area of the dining area. The tabletop will be located on top.
The final stage will be fixing the support legs to the threaded bolts and painting the finished product with a protective varnish. The photo of a handmade folding table shows the end result.
How to calculate a bench table?
For a beautiful and harmonious table as a result, you need to adhere to simple calculations:
- The thickness of the tabletop should vary between 20 and 30 millimeters.
- The length of the tabletop should be proportionate to the height.
- The legs must be able to support the tabletop and the dishes on it.
- For reliability, we use zip ties.
When starting to create your own dream folding table, remember the precautions and safety precautions. Perform complex work outdoors or in a free, well-ventilated area.
Choose beautiful colors and stylish decor for your future table according to the overall style of the room. Do not forget that such a table is easy to use in a country house and is especially easy to transport and move.
Note!
- How to make a backlit mirror with your own hands: necessary materials, tools. Tips for choosing lamps and LED strips
- A simple and beautiful DIY bathroom shelf made of MDF, glass, plasterboard: straight and corner options. Photo instructions, tips, video master class
- How to make a computer desk with your own hands from wood or chipboard. Photo/video master class + description of models
Choose a table for your balcony or terrace. Design the book-table as a decorative console if you do not plan to use it every day and create it only for receiving guests on holidays.
Folding desk
If there is absolutely not enough space in the children's room, a folding wall-mounted table will be the ideal solution.
The folding wall-mounted table has three positions - when closed, it is a slate board where you can draw with chalk; when open, it is either a drawing table or a writing wall-mounted desk.
This design is a large rectangle 86 x 61 cm, which rotates on a 28 mm dowel rod, attached along one edge to a rod in a frame that is attached to the wall. A wooden side pin secures the table in the closed position. The legs fold on piano hinges and the outer leg is a large rectangle underneath the table. Two other rectangles on the sides allow you to remove the legs. Special recesses in the frame allow you to install the tabletop in different positions. For the table surface here, MDO plywood (a type of plywood for external use) was used. MDO provides a flat surface on both the table and chalkboard surface. The table is supported in two positions by two folding legs. There are four holes made in the lower part into which pegs are inserted to block the legs. There is also a magnetic latch that holds the legs when the table is closed. There is also a book stand that can be used when the folding table is lowered. Holes are drilled into the top edge of the panel to form the front of the pencil rack. At the edge of the frame there is a bracket for attaching a table clamp lamp.
Photo source: www.instructables.com/id/Wall-Desk/
Rotary, sliding or classic “book”
There are truly many ways to transform a tabletop. The simplest and most familiar of them is used in a cabinet table, which has two lifting tabletops on piano hinges and swivel legs as a support for them. The table is not always comfortable: for those sitting at the central section there is simply nowhere to put their knees, and when unfolding it, it often has to be moved and turned. The aesthetic value of such furniture is almost zero, but the “book” is the most budget option for a table.
Sliding tables have a rigid frame with fixed legs. Only the tabletop undergoes transformation: it is moved to the side to the middle of the frame, while the open part is covered with the second half, which is stored separately. Such tables are good in spacious dining rooms; transformation is carried out in a few simple movements.
By the way, there are several layout options; for example, the edges of the tabletop can be moved with the insertion of a central segment. Or, for example, the tabletop can be folded in half on hidden mortise hinges and fold back onto the open part of the frame after sliding. Do not ignore the rotating structures, in which the tabletop does not move to the side, but turns perpendicularly, after which it is supplemented with a second half.
Wood or plastic?
The choice of materials for a homemade table is determined by their availability and appearance
Particular attention is paid to the tabletop. It can be made from the following materials:
- tree.
The most spectacular, but also expensive, option is solid wood. Such tables have a rich appearance, but the overall design is heavy. A cheaper option is shields assembled from boards. They can be tightly fitted to each other, imitating a monolith, or they can be laid with a gap - a lightweight country table; - wood-shaving and wood-fiber materials. Chipboard, MDF, and plywood are widely used. They are technologically advanced, but have a reduced service life;
- plastic. Plastic sheets can be selected in different colors. Their advantage is low cost, light weight;
- glass. Glass countertops have become fashionable and are in demand for modern interior styles. The main disadvantage is the complexity of manufacturing.
In addition to the tabletop, the table must stand securely on legs. For their manufacture, wooden beams are most often used.
Tip: you can also use a metal profile for them; in particular, an aluminum flat pipe, corner or U-shaped profile looks modern.
Material selection
There is no more convenient option than wood. Among the disadvantages are the high cost and the problem of compatibility with certain types of interior. Laminated chipboard often becomes a material for self-production. Finished products acquire compact dimensions. Chipboards can withstand high humidity and it is this quality that has turned them into a successful solution for kitchen areas. Table legs are often made of metal, despite the fact that solid structures in most cases look better than options with metal inclusions. The reason is the low strength of the wooden legs. In addition, installing wheels on a profile pipe will take less effort. Sheets of plywood are often used in clamshell models. Polypropylene pipes will give the structures a presentable appearance. These can be assembled using several methods, including gluing or welding.
Where is a folding table useful?
Folding tables are structures constructed from several independent parts. All of them are connected to each other using fasteners and a number of parts that make it possible to fold/unfold/disassemble the table. A folding table is also called a table with a sliding tabletop, in the middle of which you can additionally install another bar. This creates a structure with a larger area. This option is suitable for those who have invited many guests home and do not know how to place everyone at one table.
The advantage of a folding table is its compactness
Where might you need a folding table? In fact, this is a multifunctional and useful thing that does not take up much space, but in some situations can serve a useful purpose.
Transformable coffee table
For example, a folding table is ideal for a picnic or a tourist trip. You can fold it and pack it in the trunk of your car, and when you arrive at your vacation spot, you can take it out and comfortably have lunch or dinner without sitting on the ground. Of course, carrying such a device on hikes is not an option, but for car travelers this is an excellent solution to problems with comfort.
Folding table for outdoor recreationA folding table will also come in handy at home. Especially in a small apartment. You can take it out as needed and use it for work, placing some things, a quick snack during repairs, and so on.
Folding table on the balcony Cute balcony table
The table will also come in handy in the country, especially in a small house. You can take it away for the winter so as not to worry about the fact that intruders or people without a fixed place of residence will use it in the winter, when the dacha is empty.
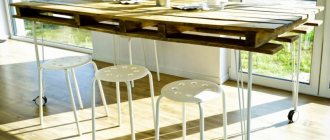
DIY table made from pallets
Advantages of a folding table:
- functionality. Any folding table can be assembled or disassembled, that is, its size can be increased or decreased for convenient use or storage. Functionality will vary depending on the type of table;
- compactness. Any folding table can be folded so that it does not take up space in the house. It can be put away for storage, for example, behind a closet;
- practicality. The product is suitable for use in any conditions and any room, be it a kitchen, a picnic, a workroom or something else;
- ease. Now we are not talking about heavy Soviet folding tables. We are talking specifically about small folding options. They really most often have very little weight. Even women and children can carry them.
Folding tables are compact and practical
Hidden storage sections
Often the interior space of the table base is used to store dishes or household chemicals. The easiest way to organize storage space is inside a folding “book”. The width of the central segment should be increased by 200–250 mm and several horizontal shelves should be used instead of one vertical crossbar. It is also possible to have a blank lining of the inner box and install doors at the ends of the base.
Due to the complex shape of the legs, the door will be 100 mm wider than the frame on both sides, so it is important to remember one point: the handle on the door is installed on the side where the table leg is located when folded. Accordingly, under different wings, the direction of opening the doors and the location of the legs should be opposite.
In sliding tables, to create a niche, it is enough to line the frame from below with a solid sheet of MDF and add several transverse strips to secure the bottom more firmly. Another option is to use frame strips up to 400 mm wide and fasten the base along the center. Drawers on full extension guides can be installed in the formed niches.
Functionality of folding furniture
There is a wide variety of folding tables - typical options are visible in the photo. Often the finished product is purchased in specialized stores; it is not difficult to make a table yourself.
In small rooms, furniture is often used that allows you to rationalize free space - it is folded out if a large work surface is required, and removed in other cases: student desks, tables in the kitchen, hall, garage, workshop, etc.
It is convenient to use portable table models: they are light, compact, and moderately durable. They are made from different materials, each of which has its own strengths and weaknesses.
Wood must be protected from exposure to water and mold, but it is affordable and well processed, steel is heavy but durable, aluminum is easily damaged, but is light.
It should be taken into account that for outdoor use protection from moisture is required. Metal structures should not rust, the materials used must be moisture resistant - an aluminum frame and a plastic tabletop are often found as the optimal combination. Plywood, wood, fiberboard are suitable for indoor spaces.
If you need to fit a folding table into a travel backpack, the requirements are higher: minimum weight with maximum functionality.
During operation, it is important not to overload the tables - they are usually not designed for the weight of an adult, so it is unacceptable to use them as a stand for large items.
Design and construction
When making furniture for the first time, it is better to choose the simplest option without various decorative elements. This will help save time and money on creation. The result is stronger, more reliable furniture that will last a long time. The simpler the mechanism, the longer it will function without problems.
For the first time, it is better to choose a simpler manufacturing option.
Small kitchens and unusual folding tables
Arranging furniture over an area of 4 meters or a little more is a common situation. Then you can use options for folding tables that do not clog up the free space.
Usually we mean models attached to one of the surfaces with loops. A folding leg or stops are created to support the product when unfolded. These countertops come in different sizes and are attached to the walls with long or short sides.
When choosing specific dimensions and features, you must rely on the following factors:
- Layout.
- Furniture arrangement.
- Number of people for whom seating is required.
It is better to decide on the sizes on the spot, and then place an individual order.
The main thing is not to forget the importance of ensuring free access from different sides.
Some companies produce round transformable tables with metal mechanisms. They are quite expensive, but they will last as long as possible due to their characteristics.
Recent developments include block tables. Their main feature is the presence of compartments of different sizes inside. It resembles puzzles that perform not only decorative, but also practical functions. Such folding tables easily fit on the balcony.
Folding tables can be called universal solutions for any environment. They will be relevant not only in a suburban area, but also for an ordinary apartment.
The operating conditions can be any; now even wood and plastic can be easily protected from harmful influences. You just need to choose compounds that successfully resist the effects of certain factors.
Deciding on the sizes
You have the opportunity to assemble a structure of any size that is convenient for you. But you need to think about what sizes will be most optimal for your home. If we talk about a standard-sized kitchen, the area of which is approximately 6-8 squares, then it is worth preparing a drawing of a standard design with a height of 7-50 mm and a perimeter within 800 x 500...1200 x 600 mm.
When determining the size, you should also take into account the number of people for whom the structure is being made. Usually this is 3 - 6 people who live in the house, and if you like to host large groups of friends, you need to consider the folding design option. To calculate, you need to multiply the number of people by 60, this is the working perimeter for one person .
