The roof is one of the most complex structures in any home. The complexity of its construction largely depends on the construction project and the requirements for this part of the house. The type of roof in a house made of timber is determined not only by the design of the structure, but is also largely tied to the climatic conditions characteristic of the region in which the object under construction is located.
The most important characteristics of a timber roof.
Without a doubt, the main advantages of timber construction:
- environmental friendliness and hygiene;
- ease of implementation;
- light weight, allowing savings on load-bearing structures (walls, foundation);
- low cost;
- good heat and sound insulation, when combined with properly selected coating and insulation materials;
- ease of maintenance.
Of course, like all wood materials, timber has characteristic disadvantages:
- low fire and biological resistance. Because of this, impregnation with appropriate compounds is required;
- high demands on wood quality and moisture content.
Self-construction of the roof of a private house
According to statistics, every second homeowner built his own home. According to their reviews, erecting a roof yourself is one of the most difficult stages for non-professional builders. Therefore, it is very important to approach this stage with a complete understanding of all the nuances of the process. To understand how to make a roof with your own hands, you need to study the device, installation technology, work order and features of fastening all components of the structure.
First you need to decide on the form. Today the most popular types are:
Covering the roof with one single slope will save nerves and materials, since structurally this is the simplest option. If you make such a frame yourself, the labor intensity of the work will be minimal and the installation speed will be high. But this form has a drawback - there is no possibility of arranging a full-fledged attic or attic, since the under-roof space is too low.
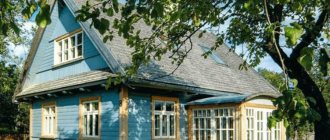
A gable roof is installed much more often. It is a little more difficult to manufacture, but allows you to get more space. Compared to the hipped one, it has less complexity and mass, but it will be necessary to make triangular pediments at the ends of the building.
Gable - the most popular form
Before you begin to independently construct a roof with four slopes, you will need to seriously prepare. This system has more elements compared to the previous two. In addition, it is not possible to make full-fledged windows in the attic, since the roof structure does not have gables and the installation of complex attic or dormer windows cannot be avoided.
The hipped roof is complex in design, but savings are achieved due to the absence of gables
For an attic, a combined design with broken slopes would be an excellent option. In this case, in the lower part the roof has a greater slope than in the upper section. This assembly allows you to raise the ceiling in the room and make the constructed house more comfortable.
Broken line - not the most “architectural”, but very effective in terms of space used
Before starting work, you need to make a design calculation. It makes no sense to calculate the cross sections of all elements. In most cases they can be accepted constructively:
- Mauerlat - 150x150 mm;
- racks - 100x150 or 100x100 mm depending on the cross-section of the rafters;
- struts - 100x150 or 50x150 mm, taking into account ease of connection with the rafters;
- puffs - 50x150 mm on both sides;
- purlins - 100x150 or 150x50 mm;
- overlays with thickness from 32 to 50 mm.
Calculations are usually performed only for rafter and slope legs. It is necessary to select the height and width of the section. The parameters depend on:
- roofing material;
- snow area;
- pitch of the rafters (selected so that it is convenient to lay the insulation; for mineral wool, there should be 58 cm of clearance between the elements);
- span.
You can select the cross section of the rafters using general recommendations. But in this case it is recommended to make a small reserve.
The calculation is usually performed for rafter legs
If you don’t want to delve into the intricacies of calculations, you can use special calculators.
If you plan to make a warm roof, then the height of the cross-section of the legs is selected taking into account the thickness of the insulation. It must be mounted so that it does not protrude above the supporting beams. You also need to take into account that for mineral wool a ventilation gap of 2-4 cm is made between it and the coating. If the height of the rafters is not enough for this, provision is made for installing a counter-lattice (counter battens).
Construction and types of roof made of timber.
For example, timber roofs.
The most important thing you need to know is that there are many types of timber roofs:
- single slope, with a slope in one direction. First of all, it is convenient for extensions or buildings with a small diameter;
- gable, most often used in individual housing construction, with the same or different slope angles;
- hip or hipped, typical for large buildings. Because of this, the ends of the covering are a triangle or hips.
Types of roof
Before you build a roof, you need to make the final choice of roof design, it makes sense to get acquainted with the types of roofs that are often used in suburban construction.
Types of roof
Any roof can be classified according to the following criteria:
- Slope.
- Design form.
- Materials used for its construction.
Rafter system roof made of timber.
Firstly, the rafter system consists of several elements:
- rafters - the main inclined load-bearing beams to which the sheathing and covering are attached;
- mauerlats - longitudinal beams laid on the walls to support the rafters and distribute the load;
- ridge girder - a longitudinal beam in the upper part of the roof under the intersection of the slopes;
- beds, tie rods, racks and struts - additional elements that give the structure spatial rigidity and stability;
- fillets and frontal boards - parts that continue the rafters beyond the outer wall and form the eaves overhang.
Secondly, the calculation of the rafter system, requirements for wood and construction technology are described in SNiP 3.03.01-87. Thirdly, the durability of the roof and the safety of residents depend on compliance with standards.
Choosing timber for rafters.
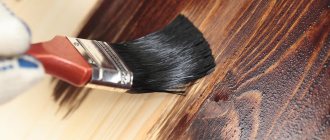
Therefore, it is better to use material for rafter beams from coniferous wood with a moisture content of 18...22%. As a result, the use of unseasoned wood with higher humidity risks uneven shrinkage, distortion and disruption of the roof geometry.
Because of this, in low-rise construction, beam sections from 50x150 to 100x200 mm are used.
In this case, pre-treatment of wood is carried out with the following compositions:
- fire retardant to increase fire resistance;
- an antiseptic that protects against diseases, fungi, rot;
- insecticide - against insect pests and rodents.
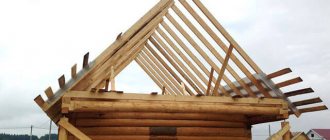
Demonstration of a timber rafter system
It is worth considering that each composition is applied twice over the dried previous layer. Of course, there are preparations for comprehensive long-term protection that shorten the processing process. For this reason, their cost is much higher.
Types of rafter systems made of timber.
First of all, there are two types of rafter systems:
- Layered. The most important thing is that with such a system, the rafter legs rest on the mauerlats along the perimeter of the walls below and the ridge girder at the top. Because of this, in long-span structures the system is reinforced with additional beams.
- Hanging. Of course, in this system, the rafters rest on the external walls, the opposite ones are fastened with a tie. The design requires careful calculation by a specialist.
Calculation of timber for rafters.
First: before calculating the required cross-section of the rafters, loads are collected. To do this, read the snow and wind loads for the climatic zone of construction, the weight of the coating, roof windows, thermal insulation, drainage and snow retainers). The length and pitch of the rafters are also determined.
Secondly, other design positions are taken in accordance with the current edition of SP 70.13330.2012 (SNIP 3.03.01-87):
- for the Mauerlat timber 10x10, 15x15 (in cm);
- for purlins, crossbars, struts - 10x10...20x20;
- puffs - 15x5;
- binders 010x2.5...10x3.
This means that the maximum length of the rafter is determined to be 6 m, since with a larger value the deflection exceeds the permissible value.
In accordance with the calculation, a roof structure diagram and drawings or sketches of individual elements with dimensions are made.
Construction of the roof of the extension: stages
Beams are installed on the walls along the entire contour. They should be located on the edge. To attach them to the walls, use nails or staples. If there are wooden walls of the house, the fastening should be carried out to the last crown of the log house. In this case, the beams when constructing the roof of a wooden house are designed to protect the interior space from wind blowing and precipitation. If there are no wooden walls, logs or beams are laid around the entire perimeter. Then, all rafters are securely fixed to them. In construction practice, such a harness is called a Mauerlat.
Installation of timber rafters
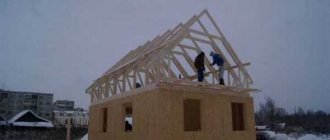
Stages of installation of a gable roof made of timber
As you can see, installation can be done in two ways:
Firstly, this is ground assembly, lifting finished elements to the top. Because of this, long-span coatings will require a construction hoist or crane, the rental of which is quite expensive.
Secondly, assembly on the roof. For this reason, lifting of timber, boards, tools and fasteners will be required.
Mauerlat installation
A layer of waterproofing is laid on the upper cut of the walls - it can be geotextiles, bitumen-polymer roofing material; ordinary roofing felt is not suitable, as it has low durability. The Mauerlat is mounted on top of the anchor bolts, leveling along the inner edge of the wall.
Installation of supports and skates
When installing layered rafters on an internal load-bearing wall, a beam is attached to the anchor bolts along the waterproofing gasket, racks are installed on it with a given pitch, secured with nails or screws to metal corners. The ridge girder is laid along the racks, the fasteners are similar.
The hanging system requires the temporary installation of racks; the mauerlat beam is attached to the wall with metal ties, since it is the mauerlat that bears the main load.
Mounting methods
The method of attaching the rafters to the Mauerlat must ensure reliability and resistance to wind and snow loads. The rigidity of the fastening for layered rafters is ensured by metal corners or fasteners in cuts.
Installation of sheathing
The pitch of the lathing is chosen according to the recommendations of the manufacturer of the roofing material, since it is different for different types of metal tiles, asbestos-cement sheets, corrugated sheets, and for soft materials, such as bitumen tiles, ondulin, rolled bitumen-polymer, the sheathing must be continuous. In addition, the step also depends on the angle of inclination of the slope. In these cases, it is optimal to make the flooring from sheet materials - moisture-resistant plywood, chipboard, OSB.
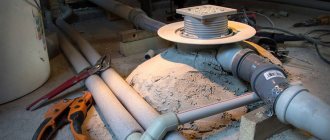
When using sparse lathing at the ridge, on the eaves, at the attic windows, in places where pipes and communications pass, in valleys with a width of 350...500 mm, a continuous flooring is also performed.
Tools and materials
- axe;
- hammer (sledgehammer);
- saw for cutting wooden elements and bars;
- measuring instruments;
- level.
- wooden beam 100x150 or 150x150;
- boards for sheathing - 25 mm thick;
- nails 120 mm - for timber, 70 mm - for sheathing;
- roofing material + fastening elements;
- drain and its components, including nails and screws;
- brackets from reinforcement for beams;
- hydro-, steam- and heat-insulating materials.
Construction and insulation of the roof of a house made of timber.
If a warm attic room is planned for the house, additional thermal insulation is required. Effective materials are chosen as a heat insulator - slabs or mats made of stone wool, polyurethane foam; insulation can be done by spraying penoizol or the same polyurethane foam - the choice of materials is huge. Roof insulation is described in more detail in this article.
Main characteristics of insulation:
- thermal conductivity - the lower it is, the lower the thickness and consumption will be;
- vapor permeability - ensures the release of water vapor, affects the microclimate in the house;
- fire safety - combustible materials can emit harmful substances and are unsafe;
- hygiene - absence of harmful emissions during operation;
- durability - duration of operation without changing consumer qualities; price - non-flammable, environmentally and sanitary-safe materials are more expensive.
Plates and mats are laid in spacers within the rafters. For central Russia, the thickness of mineral wool insulation varies between 15-20 cm. If the height of the rafters is less than the thickness of the heat insulator, then additional bars are nailed from the inside of the covering along the rafter legs.
The insulation on the inside is protected from water vapor by a vapor barrier film; on the rafters on the outside, under the sheathing, a layer of hydro- and windproof material is laid to protect against condensation.
Roof vapor barrier
When insulating with spray polyurethane foam, it is necessary to rent special equipment or invite professionals, therefore, even taking into account the smaller thickness of the layer (8-10 cm), there will be no gain in cost. In addition, polyurethane foam has minimal breathability, which is not very healthy.
The design of the roof pie with insulation with mineral wool slabs and metal tile covering (from top to bottom):
Covering: Monterrey metal tiles.
- Lathing made of timber 50X50 mm.
- Counter-lattice made of timber 75x25 mm.
- Steam and wind protection - superdiffusion membrane
- Rafter.
- Insulation (laying in the spacer between the rafters).
- Vapor barrier film.
- Lathing.
- Internal lining.
The design of a gable roof of a house made of timber.
In log or timber houses, the upper crown of the walls serves as the mauerlat, but, if it is necessary to raise the roof higher, 1-2 additional planks are laid on the load-bearing walls.
The rafter legs are secured with brackets or on brackets. If shrinkage is possible, timber with high humidity is hinged.
Installation of roofing of wooden houses from other materials.
The following is used as roofing for a wooden house:
- seam roof made of galvanized metal sheet;
- Tiles - ceramic, cement-sand;
- profiled metal, metal tiles, composite metal tiles;
- soft rolled materials and bitumen shingles;
- asbestos cement sheets;
- ondulin.
Piece and bitumen tiles look the most aesthetically pleasing on a log house. Unlike ceramic, bitumen has less weight and price, and is easier to install.
A wind- and waterproof film or membrane is laid along the rafters on a warm roof, securing it with a counter-lattice beam, and the sheathing is mounted on top - thus creating a ventilation gap to remove water vapor from the under-roof space. The lower edge of the waterproofing should go down into the gutter of the drainage system.
The pitch of the sheathing meets the requirements of the roofing material manufacturer. A layer of rolled roofing material is laid on a continuous flooring under soft bitumen shingles; it can be built-up or self-adhesive.
Installation of the finishing layer is carried out from the bottom up, the order is also determined by the manufacturer. At the roof ridge, aerators are installed to release water vapor.
The last to be installed is the drainage system, framing elements, snow guards, and walking bridges.
Varieties of forms
The key factor to consider when choosing a roof design is the climate zone. It is the climate that will influence the slope, shape and roofing material.
In fact, it makes no sense to construct a low-slope roof in regions where heavy snowfall is common.
A wooden house with a flat roof has its advantages - they are quite cheap to construct, such a roof will not be torn off by the wind, but water and snow will linger on the surface of such a roof. Sooner or later it will lead to damage and replacement of the roof.
A mansard roof, a gable roof, has a more complex structure, but its construction will allow you to organize an additional room in the under-roof space.
How to properly build a simple roof of a wooden house from timber with your own hands.
Stage 1
Installation of strapping beams with a section of 150x150 mm along the perimeter of the external walls. Fastening is done with staples. Checking the horizontal position of the upper chord.
Preparing the elements of the rafter system from 15x5 cm edged boards; cutouts for the trim beams are cut according to a previously developed template.
The first to install the truss structures is at the ends of the roof, check the correct installation along a plumb line or vertical level, and install temporary spacers. The connection of the rafter legs to each other in the ridge is done end-to-end or overlapped with screws using metal plates.
Stage 2
A cord is pulled along the ridges and the centers of the legs of the rafter trusses - this will facilitate the installation of the entire system. Intermediate trusses are installed in increments of 0.6...1.2 m.
During installation, the correct position of the structure is fixed with temporary spacers.
Stage 3
At the chimney outlet, the distance is checked according to fire safety requirements.
Check the pitch between the rafters along the cornice and the ridge - it should be identical.
The fastening of the rafters in the ridge is reinforced with a board on both sides.
Under the ridge girder, racks are installed at the ends, and temporary fasteners are dismantled.
If the house does not have roof insulation, a waterproofing film or super diffusion membrane is spread over the rafters, fastening the panels with special double-sided tape. The film is secured with counter-lattice bars along each rafter.
Stage 4.
The sheathing beams are mounted from boards with a section of 10x2.5 cm with a pitch corresponding to the finishing roofing material.
The eaves and gable overhangs are decorated with frontal and wind boards with a section of 15x2.5 cm.
Install the final roof covering.
Attach hook holders under the gutter. Install a gutter with a slope of 0.3% to the drainage funnels.
Connection of rafters and trim
Depending on the technology used to build the pediment of a house from timber, a rigid or sliding connection of the rafter legs and the mauerlat is used. The first option is used if the pediment is framed. To do this, a spike or socket is cut out at the connection point in the rafter leg; overlays can also be used to secure the structure and transfer the load to the beam of the upper frame. Additionally, the products are secured using nails and metal corners. If the gables are made of timber, using the same technology as the walls of the house, then preference is given to sliding fasteners. It allows the gables to give the desired settlement, while the roof “sits” together with the material of the gable walls.
How to properly insulate a roof in a wooden house made of timber.
Roof insulation
To insulate the roof of a house, insulation materials made from mineral or stone wool, expanded polystyrene, and polyurethane foam are used. Polystyrene foam is not suitable for this purpose - it is a packaging material with low durability, high water absorption, and when burned it releases harmful substances that cause poisoning and suffocation.
Insulation material is placed into the spacer between the rafters, covered with a vapor barrier film, and the internal sheathing is attached.
They are faced with plasterboard or other finishing material.
Thermal insulation methods
There are two ways to insulate a roof structure: from outside and from inside the room. External thermal insulation is carried out simultaneously with the installation of the roofing. Most often, the roof of the second floor is insulated from the inside; this method is less expensive and simpler. Below we will look at both options in more detail.
An important question that needs to be resolved before starting work: will the attic space be residential or not? If yes, then you will have to insulate the entire roof. In another case, it is enough to insulate the attic floors and the ceiling of the adjacent floor.
Shed roof made of timber: analysis of construction technology using specific examples.
Construction of a pitched timber roof is simpler than a gable roof. In this case, the upper end of the rafter rests not on the ridge girder, but on the mauerlat laid on a higher wall; no intermediate structures are required. The Mauerlat of the lower part of a lean-to extension can rest on a number of racks, without making a wall or with a canopy of transparent polycarbonate and soft plastic windows.
Rafter pitch.
The pitch of the truss structure is determined by the type of covering, the cross-section of the timber and the snow load. A span of up to 4.5 m does not require intermediate supports, a width of 4.5...6 m is covered with the installation of an additional rack, and a width of 6.1...9.0 m is covered by two racks. Rafter legs for large spans are made of timber with a cross-section from 100x50 mm to 200x150 mm, racks - 150x150, struts - 80x80.
The shed roof of the canopy over the terrace adjacent to the house measuring 2.4 x 3.6 m with a polycarbonate coating is carried out in the following order:
- The site is cleared of debris, the fertile layer is removed, and leveled. The wood is primed and treated with protective compounds against pests and diseases.
- They dig recesses under columnar foundations or a trench under a strip foundation with a depth of 0.5...0.8 m, install formwork, reinforcement frame, and pour concrete.
- A layer of waterproofing is laid on top of the foundations. A support beam with a cross-section of 100x150 mm and a length of 3.1 m is secured with anchor bolts; the counter beam is attached to the wall of the house, having previously drilled holes for fasteners. At a height of 2.8 m, a support beam with a cross-section of 10x15 cm under the rafters is mounted on anchor bolts.
- On the outside of the extension, racks with a cross-section of 8x8 cm, a height of 2.2 m in increments of 1.2 m are installed, and secured to the beam with corners using self-tapping screws.
- Another purlin under the rafters is mounted on the top of the racks, the places where the rafters will be installed are marked on the purlins, and the metal corners are fastened with self-tapping screws on one side of the marking.
- A rafter template is made with recesses for the support beams, and 4 rafters are prepared from it from a board with a section of 50x150 mm and a length of 3.0 m.
- The rafters are installed in place, the vertical is aligned, the counter corner is screwed in, and secured in the corners.
- Mount the polycarbonate roof on self-tapping screws with thermal washers. Profiled and flat sheets can be overlapped; cellular polycarbonate is mounted using connecting profiles.
What tools may be needed to build a roof for a house made of timber with your own hands:
- Before starting work, it is necessary to prepare all materials, tools, equipment, fasteners, and work clothes.
- Materials - in accordance with the developed design.
Tool:
- construction level - laser or bubble;
- roulette - laser or tape;
- cutting tool - grinder, gas or electric saw;
- drill and screwdriver.
Equipment - stepladder or scaffolding (to a height of more than 4 m).
Fasteners - nails, self-tapping screws, clamps, anchor bolts, corners.
Load distribution
The special design of the roof of a house made of timber assumes the presence of not only vertical, but also lateral loads. To minimize the negative impact of vertical loads, the roof structure involves the installation of additional supports, thanks to which the weight of the roof is evenly distributed over all supporting structures. But most of all you should be wary of the impact of lateral load, due to which the walls of the log house can change their geometry. To avoid this, the upper frame is reinforced with ties made of 100x150 timber, which is cut into the opposite “extendable” wall beams using a dovetail joint. If the house is large and the design of the rafter system involves the use of racks, then the base under the roof is reinforced with beams - 150x150 beams, which are cut into the top frame of the log house perpendicular to the floor beams. The racks will subsequently rest on the beds; they most often determine the location of the internal walls of the attic.