Building a wooden house with your own hands is not such a difficult task. The main thing is to know and take into account all the subtleties when performing each type of work.
Construction of wooden houses from A to Z includes:
- choice of material;
- drafting;
- foundation construction;
- erection of walls;
- roof installation;
- hanging windows and doors.
So, let's try to figure out how to build a wooden house with your own hands.
Tree selection
Modern wooden houses are built from logs and beams. The best log is rounded. It is sorted and processed industrially. Therefore, the material contains a minimal amount of traces of knots and is sufficiently dried. Chopped logs can also be used to build walls.
What are the benefits of log walls? They have a maximum thickness, thanks to which the warmth in the living quarters remains warm for a long time during the cold season. A log house has a long service life; looks original and beautiful.
Glued laminated timber has similar characteristics. In addition to its large thickness (210 markings are used for capital construction), it has the following important qualities:
- Gives minimal shrinkage (only 5 cm);
- Maximum resistance to aggressive environmental influences;
- Practically does not rot, thanks to special industrial processing;
- It has no natural defects (resin pockets, insects, etc.) that affect the quality of the walls.
In addition to profiled timber, the construction of wooden houses is carried out from sawn and planed timber. Their cost is several orders of magnitude lower. The beams have a lower degree of drying and, accordingly, shrink more.
As for choosing the type of wood, it is best to purchase coniferous species that grew in the northern part of the country. They are more resinous and therefore more moisture resistant. It is rational to build a wooden house with your own hands from spruce, cedar, and pine.
Knots of a wooden frame house
There are units of floor, roof and wall systems. They are divided into subassemblies.
The bottom strapping unit is the place where the strapping bars are attached to the base. Joints are made using bolts, clamps or other means.
Another structural unit of the lower trim is the junction of the beams with each other in the corner.
In the process of creating a frame dwelling, corner vertical supports are first placed, followed by intermediate ones.
Here the following nodes stand out: the joints of the vertical posts in the corners of the upper and lower frames and the junction of the posts with the frame beams.
The bars of the upper trim are secured similarly to the bars of the bottom.
The rafter system includes:
- Supporting unit for rafters on the ridge girder;
- Supporting unit for rafters on the mauerlat;
- Connecting the rafters to the crossbar and other spacers;
- Connecting rafters with counter-lattice bars;
- Joining of sheathing and counter-lattice.
Foundation for a frame house
The base of the frame structure can be anything.
The main thing is that the structure itself is erected in accordance with the soil where the dwelling is located and has the necessary strength.
If a strip base is used, then you should remember that the central partitions “stand” on the foundation strip, and are not in a “hanging state.”
Likewise with the columnar base. The house should be designed so that the junction of the partition and the wall is supported, but not along the gaps.
Construction of the frame of a frame house
The frame of the home is made of any material: metal, lightweight wood, solid wood, etc.
When choosing the material and design of the frame, you should be guided by the strength of the latter, its service life, the number of cold bridges, and the fact how realistic independent construction is.
The connection between the base of the frame and the foundation must have the necessary strength. The wood for the production of the frame must be dry and of sufficient quality. Also, do not skimp on processing. All frame elements must be planed before installation. Then all wooden components must be impregnated with special compounds that prevent the process of rotting and increase fire resistance. It is worth remembering that dry wood changes its geometry when used.
If the project is completed successfully and the construction work is carried out with high quality, then such a frame will be quite strong and durable.
Construction of joists and floors
The most popular option for installing a floor is to install a floor using joists. Although the process itself seems confusing, it is quite doable for an amateur. To install it correctly, you need to carefully understand all the nuances.
It is necessary to lay a layer of waterproofing between the pillars and joists. The thickness of the lag reaches from 4 to 6 cm. The distance from the ground to the floor should be more than 15-20 cm, and the underside of the boards must be treated with an antiseptic. The logs are attached to the beams. It is optimal to attach them to the sides of the beams. Then there is no need to use linings.
The construction of a wooden floor using logs is considered the most popular and durable. This floor can be easily repaired. It is necessary to carefully monitor and check the correct installation of the joists, in which case the structure will be strong and durable.
Installation of house frame posts
During the construction of frame housing, corner vertical posts are first installed, followed by intermediate posts.
To secure the vertical posts, holes are made in the corners. Fastening the intermediate posts is done in the same manner. Vertical supports are strengthened using special brackets. Making them is quite easy. Reinforcement 0.5 m in length is sharpened at both ends and bent with the letter “P”. Then they are driven into vertical and horizontal beams. They significantly strengthen the frame. It seems possible to make them in a forge, but their absence will not be a disadvantage.
When installing vertical beams, you need to carefully check the diagonal of the future wall. For these purposes, a level and string will suffice.
Attaching the top frame beam
At the corners, the bars of the upper trim are connected by cutting. They are fixed in the same way as the bars of the bottom. They connect at the corners and to the building supports.
- Corner fasteners: There are no special features here. Mounted with wooden screws.
- Fastening by cutting: first, before placing the bars on the vertical supports, grooves are made in them for each rack. It is necessary that they are located clearly vertically in relation to the grooves of the lower trim. Only then will the vertical supports be truly vertical.
Roof installation of a frame house
- Creation of a rafter system;
- Installation of insulation;
- Arrangement of lathing and counter-lattice;
- Fastening material for the roof and final components of the structure.
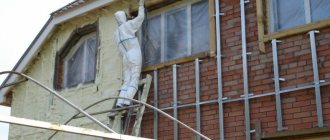
Insulating the walls of a frame house
Properly made insulation will protect the home from heat loss during the cold period and will help create comfort and coziness indoors.
Recently, mineral insulation has gained great popularity. Basalt wool is produced in the form of a fibrous substance like a dense slab. No less popular are insulation materials consisting of glass fibers. The latter are extremely simple and easy to install. Thanks to air layers, fiberglass effectively insulates sound and heat.
The technology for insulating a frame dwelling is the same for all materials. When choosing insulation, it is important to consider its cost. At the same time, it is not recommended to save on insulation of environmentally friendly housing. The inflated cost of insulation will be repaid repeatedly by the saved heat energy.
External cladding of walls of a frame house made of OSB
OSB production technology is much more advanced than that used in chipboard production.
In this regard, OSB boards have greater resistance to moisture and mechanical stress. For cladding a frame building, OSB is considered the most promising material. The main disadvantage is the high cost of the stove. The bottom trim is completely covered with an OSB sheet.
OSB boards are fixed if:
- In the intermediate section - a step of 30 cm.
- At the joints of slabs - a step of 15 cm.
- Along the outer edge - 10 cm increments.
- The distance from the edge of the slab to the fastening is 0.8-1 cm.
- The gap between the slabs is 0.5 cm.
- The self-tapping screw or nail extends 4-5 cm into the support.
Wind protection and waterproofing of frame house walls
Wind protection and waterproofing are provided by a superdiffusion membrane. In addition to the membrane, it is often recommended to use waterproofing film and polyethylene. But these materials have weak vapor permeability. In this regard, the film does not guarantee the necessary removal of moisture from the insulation, which can lead to various kinds of negative consequences.
The membrane is nailed to the frame supports, tightly in relation to the insulation.
After lathing, it creates a gap. Then stitching. A similar scheme is used:
- in the process of plastering over lining;
- if boarding turns into a fine finish;
- when facing with siding on top of OSB, SML, DSP, boards.
The rough lining is nailed to the frame supports. On top is a membrane, tightly, without gaps. Afterwards, the siding is secured along the sheathing.
Vapor barrier of internal walls of a frame house
The technology for installing penofol is extremely simple.
It requires a construction stapler. The vapor barrier is installed horizontally to save time and money. An overlap of approximately 5 cm is made. Penofol is attached with foil outward to reflect the heat radiation of the room. Moreover, this position reduces the risk of condensation. When the penofol is carefully fixed, the entire wall structure is sheathed with boards.
Insulating walls and other components of a home yourself is a fairly simple and relatively cheap process, provided you select the right thermal insulation and study the technology of the construction process.
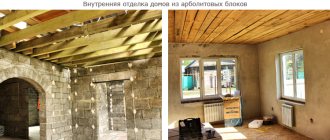
Internal wall lining of a frame house
To carry out the internal lining of the walls of the building, plasterboard or OSB is used.
Due to the unevenness of the frame supports, the drywall will take their shape. As a result, more leveling layers will have to be made for drywall. OSB boards are much stiffer and require less leveling. Often, internal lining is done using an MDF panel. When these panels are not laminated, they must be used with care as they do not tolerate moisture. It is not recommended to use them in the kitchen, bathroom, or toilet.
Ceiling device
The ceiling is one of the most significant structures in a building.
It should be approached very carefully. Usually, heat goes up and if the ceiling is equipped without going into all the details, then the heat loss will be quite large and this may affect the means for its repair. To equip the attic floor you will need:
- edged board up to 3 cm thick;
- hydro-vapor barrier;
- construction foam;
- insulation;
- nails;
- Fiberboard or drywall;
- pegamin or roofing felt;
- croaker
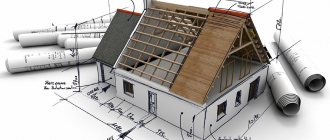
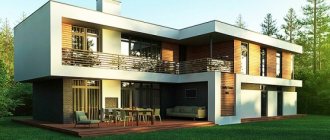
Individual project
How to make a wooden house with your own hands without a project? It's practically impossible. A private builder will definitely make an omission in something. High-quality individual projects take into account the features of each stage of construction. The type of foundation, method of installation and fastening of the crowns, types of roofing are selected taking into account the properties of the log or timber.
With the approval of the customer, the layout of residential premises and their square footage are developed. The total area, or rather the length of the external walls, determines how the crowns should be attached. Projects take into account many other nuances. Do-it-yourself wooden houses, projects (photo below) for which are developed individually, turn out to be reliable and beautiful, have no flaws and are durable.
How to legalize an extension
Before constructing an extension, you must obtain permission to use additional living space. Documents may be needed when selling a village house or renting it out.
You need to submit a notice of reconstruction to the local administration by filling out a form and providing a sketch of the project. If after some time you receive permission, then you can begin construction. When construction is completed, it is important to notify the administration of the completion of work by providing a technical plan. The technical plan is prepared by a cadastral engineer.
Specialists will come to you to check compliance with building codes and declared characteristics. Afterwards, the municipality submits information to Rosreestr in order to enter changes into the Unified State Register.
If you decide not to waste time on obtaining permission before reconstruction, then it will be much more difficult to legalize the finished extension, only through the court. When the case is lost, the log extension will have to be demolished without monetary compensation.
Construction of walls
Independent construction of wooden houses is simplified if profiled timber is used.
It has grooves that connect easily. Before starting the construction of walls, it is necessary to check the horizontalness of the foundation. It is necessary that the hydraulic level shows zero, since when installing the first crown, the construction geometry must be observed.
The foundation plane must be perfectly flat and straight. In addition, when laying, the corners of the first crown are aligned vertically. They should be exactly 90 degrees. If the geometry of construction is broken from the very beginning, the walls will not be smooth, and there will be skew at the level of window and door openings.
Installation of a wooden house with your own hands at the stage of wall construction is carried out as follows:
Main components
The frame of a low-rise wooden structure consists of:
- foundation;
- bottom trim beams;
Scheme of the construction of a wooden frame house
- door frame racks;
- beams above the frame;
- vertical corner posts;
- braces;
- connecting cross bars;
- basement and attic floors of the house.
Vertical posts can be corner or intermediate. The purpose of both is to connect the upper and lower trims. This is usually done using the following methods: using metal corners or using a full cut and dowels. The slopes are used to ensure that the frame does not warp or change its position when exposed to strong winds.
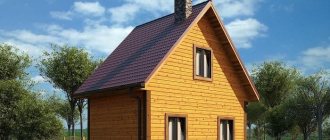
Roof installation
The best option for a wooden house is a light gable or mansard roof. Roofs of complex configuration are appropriate for large buildings, as they are heavier. The proportionality of the weight of the roof with the ability to support it with the walls of the house is calculated when drawing up an individual project. It is difficult for a non-professional to calculate this value correctly.
Do-it-yourself installation of a wooden house at the roof installation stage consists of the following steps:
- installation of foundation beams;
- rafter fastening;
- laying of sheathing;
- laying waterproofing;
- roof fastening.
The base beams (mauerpats) are attached with one edge to the upper crown in a diagonal position using anchors. The horizontality of the opposite ends is checked with a level. The rafters are wooden triangles. They are knocked together and then attached, starting from the ridge, to the beams. A sheathing is attached to the top, that is, thin transverse and longitudinal boards. The size of the gaps depends on the choice of roofing material.
If you intend to cover the roof with sheet roofing (corrugated sheets, metal tiles, slate, odulin), the distance between the sheathing is half a meter; with rolled materials (roofing felt), the sheathing has a maximum gap of one centimeter.
Consumables, tools and equipment
In addition to the timber, you need to prepare the necessary consumables and tools :
- Untreated pine timber, size 150x150 or 150x100. The best material is wood harvested in winter. The lumber must have natural moisture, so drying will be required.
- Boards. They are useful for carrying out auxiliary work (creating dowels, flooring, lathing). It is recommended to choose dried boards.
- Nageli. Needed to secure rows of beams together. You can buy ready-made dowels or make your own. The cross-sectional size must be calculated according to the size of the drill, then if you take a drill with a diameter of 25 mm, the dowel should be 22x22 mm.
- Tow. Tow is a linen roll material necessary for insulation between rows of crowns. You can also use dry sphagnum moss or felt.
- Ruberoid. Rolled material that serves as waterproofing for the roof and foundation.
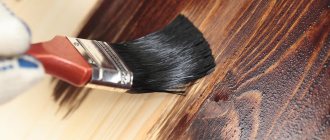
- Antiseptic compounds. Special products that protect wood from rotting, fungi and mold. It is recommended to treat each timber with antiseptic impregnations.
- Nails, screws, staples, corners. Materials required for fastening building elements.
- Sand, crushed stone, cement for foundation construction
- Level, square, tape measure, plumb line. Measuring tools that you cannot do without during construction work.
- Hand tools: hammer, axe, nail puller, chisel, sledgehammer, hacksaw.
- Electric tools: plane, jigsaw, miter and circular saws, drill.
Important : If there is a misalignment in the level, it is not necessary to use a plane - you can use a sledgehammer.
These tools should be on hand during construction.