Pros and cons of a barn
A frame shed, like any structure, has advantages and disadvantages. Advantages of a frame structure:
- High speed of construction - construction takes several days, while a do-it-yourself frame shed has a long service life.
- Reasonable cost, especially if you do all the work yourself.
- Light weight, making the structure easy to erect and does not require a strong foundation.
- The structure does not shrink, which is why defects do not appear on the building material.
Frame barn.
The structure, for all its advantages, also has a disadvantage. Materials require pre-treatment to protect them from the negative influence of the environment, mold and mildew, which increases the period of construction of the structure and entails the need for additional capital investments.
Despite the disadvantages, the design is in high demand, since the advantages of the structure outweigh the disadvantages.
Is it worth it or not to build it yourself? Expert opinion
The question to build or not to build, although it is reminiscent of Hamlet’s “To be or not to be?” in many respects can be decided after studying the opinions of experts, where you can conditionally attract both truly professionals and those who can boast of a self-built change house.
Professional builders will always be against building such a facility on their own; this is explained by certain difficulties of the work, its labor intensity, and the need to carry out several operations when using non-standard material.
For those who already have experience in assembling such buildings and can share their own experience, both positive and, alas, not entirely, I will assure you that this is quite possible and even needs to be done, well, at least in order to believe in your abilities.
The truth lies somewhere in the middle. For a person who has a clear work plan, knows how to handle basic tools, or at least hold a hammer in his hands, this is quite possible. For those who think that this is irrational, it will be quite normal to buy a ready-made project.
What are the consequences of self-construction? Builder mistakes
When constructing a summer cottage yourself, you must take into account:
- documentation of construction, this is relevant for all types of buildings, both on the land of gardening partnerships and other lands, because the structure does not hang in the air;
- the presence of a project, even the simplest one, but with minimal calculations of materials, it can be corrected at any time, but without calculations the material will have to be constantly purchased;
- the project must take into account the power of the electrical wiring, the placement of heating devices, and support systems, and this should be done primarily by professionals, since incorrect calculation of the cable cross-section can lead to a short circuit in the wiring and a fire.
But professional builders, as a rule, make the following mistakes:
- incorrect placement of the building;
- violation of construction technology;
- poor quality of various operations and works;
Frame barn
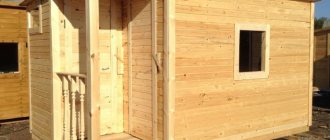
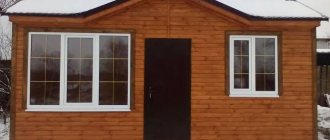
Before you start building a shed, you must first choose a site for the building. It is recommended to erect a building where there are no plans to develop beds for planting agricultural crops. At the same time, the distance of the barn from the house is not important and you can be guided by personal preferences. A wooden shed is suitable for construction both near the house and at a distance from it.
Place for a shed near the fence.
Humidity
This parameter is of utmost importance for a building material such as wood. The fact is that after logging, a tree whose natural humidity ranges from 60 to 80% begins to dry out until the level of bound moisture inside the material reaches a certain limit, depending on the type of wood and the humidity of the surrounding air. And the removal of bound moisture causes a decrease in the linear dimensions of the wooden massif from 3 to 10%, depending on the direction (along the trunk or across it). Therefore, the use of insufficiently dry wooden products during construction can lead to cracks appearing during operation and the strength of the joints to decrease. In addition, there are cases of purchasing unevenly dried boards. Such wood is internally stressed and easily changes its shape, both during mechanical processing and during use.
Wooden barn frame
The frame of the barn is erected with your own hands without the use of special equipment. It is easy to assemble using construction tools.
To build a shed frame from a board, you will need material whose size is 100x50 mm. Construction begins only after the foundation has completely hardened, if the structure is placed on a support. The first thing they do is assemble the bottom frame of the barn from 100x100 mm timber. with your own hands. Next, the boards are used to make floor logs. The pitch between the material should be 500-600 mm. Then the vertical posts are fixed.
On a note
The boards are fixed around the entire perimeter at a distance of 500-600 mm. between themselves. To strengthen the structure, jibs are attached to the corners. After this, the top trim of the barn is performed.
Tree age
The age of the tree from which the board is made is determined by the number of annual rings. Small, frequent rings are signs of a mature tree, wide and light - signs of young green wood. Pay attention to the photo below. The top board is made of 8-year-old pine. The age of the wood on the bottom board is 57 years.
Age affects the strength of wood. Therefore, when you choose edged boards for building a frame house, pay attention to the end parts of the boards in the stack. Boards made from mature wood are best used for load-bearing structures and floor joists. Such boards should not be cut into small pieces for window mullions or fire bracing. For this purpose, you can use boards from young “green” wood.
Barn frame made of timber
Most often, the frame of a barn is made of timber. To construct the structure, you will need dry material that is free from defects, mold and mildew. The recommended timber size is 100x100 mm. Before erecting the structure, it is recommended to treat the material with an antiseptic agent to protect it from the harmful effects of an aggressive biological environment, as well as a fire retardant, which will prevent the structure from catching fire.
Timber frame shed.
To build a barn frame from timber, professionals advise taking material whose length corresponds to the size of the large wall of the structure. This will allow you to make the strapping from one piece of material, rather than assembling it from parts.
Log barn frame
The log shed frame is the least popular. This is explained by the fact that the material is very heavy, and it will not be possible to build a structure from it alone. Helpers will be needed in this matter. Another disadvantage of logs is their high price. For this reason, experts recommend choosing boards or timber. However, logs make a more durable shed frame. To erect such a structure, it is recommended to hire a team of professional craftsmen.
Before constructing any outbuilding, it is recommended to draw up a drawing of the shed frame. It is recommended to order the project from professionals. There are standard drawings with standard dimensions, from which you can choose the most suitable option. Wooden shed designs are affordable.
Power frame of the barn.
However, the diagram of a frame for a barn with your own hands is not as complicated as, for example, a drawing of a house, so you can do it yourself. To do this, it is recommended to use drawings from the Internet as an example. At the same time, when making a shed frame diagram, you should take into account the dimensions of the structure.
Cutting method
Boards made from the same log may have different technical characteristics, which directly depend on what part of the tree the board is made from and in what direction the cut was made. The strongest part of the tree is located closer to the center. The outer layers in a living tree are responsible for delivering nutrients to the branches, so they are inferior in terms of strength and moisture content to the core. That is why the most durable boards and joists should be chosen from wood close to the center.
The strength parameters are also affected by the direction of the cut: radial or tangential. The radial-sized board contains parts of the core and the softer outer part. Usually only weak wood from the outer part is cut into a tangential cut, since the core is used to make high-quality timber. An intermediate option No. 3 in the figure below is also possible, which is something between radial No. 1 and dance No. 2 cuts.
Radial cut boards are preferable to those sawn from the outer layers, as they are less deformed during drying.
I hope that a small educational program will help you, at least, not to approach the choice of boards for building a frame house at random and with childish gullibility towards hardened sellers on the construction market. In addition to the above parameters, there are a dozen more requirements that experts place on edged boards, but many of them are of little use to a private buyer. For example, almost 100% of edged boards on Russian markets are pine or spruce. In America, each type of pine is described in detail according to dozens of parameters, which are included in the form of large tables in the thousand-page Building Codes (Codes). In Russia, at best, you can find out in which region the tree from which these edged boards were made was cut down. However, using simple rules and your powers of observation, you can choose a decent board from which to build your frame house.
Foundation
The frame for the shed is light in weight, as is the entire structure itself. For this reason, it is recommended to use a columnar foundation as a support for the structure. Even a non-professional can arrange it on his own.
Support columns are installed in the corners of the structure and where the partitions will be bridged. The distance between the posts should not exceed 2 meters. Supports are also erected in the center of a small wall if its length exceeds 2.5 m. This will protect the floor from sagging during walking.
Foundation for a frame shed.
Step-by-step instructions for constructing a columnar foundation:
- Dig holes 800 mm deep.
- Fill the holes with sand, crushed stone or gravel to 150 mm. and compact the materials.
- Carry out the masonry using cinder blocks or red bricks, as well as concrete mortar.
Once the foundation is dry, you can begin building the shed frame.
Actual cost
The second obvious disadvantage of buying edged boards on the market is the conditions into which the buyer is forced. Regular edged boards are sold individually on the basis that:
1) edged board with dimensions 50 mm x 100 mm x 6,000 mm: 33 boards per 1 m3;
2) edged board with dimensions 50 mm x 150 mm x 6,000 mm: 22 boards per 1 m3;
3) edged board with dimensions 50 mm x 200 mm x 6,000 mm: 16 boards per 1 m3;
4) edged board with dimensions 50 mm x 250 mm x 6,000 mm: 13 boards per 1 m3;
5) edged board with dimensions 50 mm x 300 mm x 6,000 mm: 11 boards per 1 m3;
5) edged board with dimensions 25 mm x 100 mm x 6,000 mm: 66 boards per 1 m3;
6) edged board with dimensions 25 mm x 150 mm x 6,000 mm: 44 boards per 1 m3;
7) edged board (bar) with dimensions 50 mm x 50 mm x 3,000 mm: 133 pieces per 1 m3;
 edged board (bar) with dimensions 40 mm x 50 mm x 3,000 mm: 166 pieces per 1 m3;
9) edged board (bar) with dimensions 40 mm x 40 mm x 3,000 mm: 208 pieces per 1 m3.
All fractional parts are rounded to a natural number, not in your favor.
In fact, you buy a board with a cross-section of 46 mm x 142 mm x 5,850 mm - 26 boards 1 m3, but you get 22 boards, which is 18% less. In this case, your project was created for a board with a cross-section of 50 mm x 150 mm; it will have to be changed according to the actual dimensions directly at the construction site.
When you buy a planed board, you pay for the actual dimensions, for example, 38 mm x 140 mm x 6,000 mm (31.32 boards per 1 m3); when you buy an edged board at a nearby market, you pay the extra money into the pocket of a cunning seller.
barn frame
The frame of the barn is shown in the video tutorials and this moment is clearly visible as they begin to build it from the bottom frame. It is important that the materials for this part of the structure are of high quality, since it will support the entire structure.
The frame of a wooden shed is erected as follows:
- Fix sheets of roofing material onto the support posts to waterproof the structure;
- Make the bottom trim from beams, size 100x100 mm;
- Attach the logs to the base, the distance between them should be 500-600 mm;
- When installing boards, keep in mind that you need to leave room for window and door openings. For their arrangement, smaller material is used. To fix the openings, a vertical beam is installed. The window and door sashes will be attached to them;
- Secure the posts to the frame using nails or metal plates. The recommended distance is 600 mm. However, the step can be increased, but make it no more than 1.5 m. - this is the maximum plant between the posts;
- Carry out the top binding in the same way as the bottom;
- Reinforce the frame of the lean-to shed with jibs. Fix them at the bottom of the side posts, and secure additional jibs around the entire perimeter, which will help to sheath the building.
If the frame of a shed with a pitched roof is being built, then after the construction of the structure the roof should be made. For this you will need boards measuring 50x100 mm. To make a roof, boards that are left for rafters are fixed on edge.
The length of the material must be greater than the width of the shed so that the roof extends beyond the structure. The roof can be covered with ondulin. To do this, the lathing is fixed in increments of 400 mm. and the flooring is laid. After this, the barn is sheathed with OSB or other material, windows and a door are installed, and the structure is decorated.
Time to buy
It is believed that the best quality is winter wood, that is, boards sawn from wood harvested in winter. At this moment, the movement of juices (moisture) through the wood is minimal, so boards from winter wood are stronger and less deformed. Many builders prefer to buy timber in winter and arrange stacks for atmospheric drying. The idea is good, however, 2 questions immediately arise: how to protect yourself from the fact that the boards can be stolen; how to protect the boards of the upper rows, which are not fixed by the load of the overlying boards, from deformation. If you ask market traders at any time of the year what kind of wood the boards are cut from, you will get a clear answer: “From winter wood.” Even in September they told me that in the winter we bring in logs and cut them as needed. On the left in the photo is a damp log cut down in the summer.
The demand on the building materials market in our country is so high that during the high construction season, boards from winter wood are finished by June. Timber industry enterprises and black loggers continue to fell trees all year round. Having bought a board from a winter forest at a nearby market, you are surprised to notice that it weighs twice as much as usual, a circular saw gets stuck in it, after 3 days of storage it was twisted into a spiral and black spots of mold appeared. These are signs of damp, freshly cut wood. The Americans call them green lumber, and according to their construction requirements, you can use such boards to light a fire in a barbecue. The main problem of a summer forest is the increased moisture content with all that it implies and insufficient strength for the construction of a frame house. A reasonable question: can such boards be used to build a frame house?
It is possible if you meet 2 conditions: the board must be dried in a chamber and the board must be made from mature (old) forest, and not young pine or spruce. In order to distinguish a mature forest from a young one, pay attention to the width of the rings on the cut. Young wood has wider annual rings. The best thing to do is come to the sawmill and look at these logs. An order of 20-25 m3 of timber is a decent amount for any seller, so he will be ready to invite you to production and answer any questions you may have.
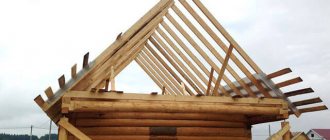
Gable roof
How to make a frame for a barn with a gable roof. It is performed in the same way as a building with a pitched roof. The only difference is the roof design. At the top of the frame made of boards, two triangles are fixed on the side of the small walls of the barn. They must be larger than the width of the structure.
Shed with a gable roof.
A board is attached in the middle of the triangles to strengthen the gable roof. To strengthen the roof, it is also recommended to nail metal plates onto the triangle. After this, the rafters are fixed. For this, boards 150x50 mm are used.
A sheathing under the roofing material is installed on such a barn roof frame. It is recommended to use metal tiles. After this, the sheathing is done, the doors are installed with your own hands and the barn is decorated. The structure is ready for use.
Knowing how to build a plank shed, you can build the structure yourself in a short time. The main thing is to choose quality material and adhere to construction rules.
Presence of natural wood defects
Knots, bark residues (wane), and resin pockets reduce the quality of the boards, and hence the price. All these defects directly affect the strength of such boards, so even by removing the bark, peeling out the knots and emptying the resin pockets, you can use such boards in those parts of the frame house that do not bear a significant structural load. For example, frame racks of non-load-bearing walls. To assess the quality of wood in Russia, the GOST system is in force. However, when buying a board on the market, you will not be able to receive a quality certificate unless it is a board manufactured for export.
States have their own quality assessment system, according to which boards are assigned grades 1-4. For the construction of frame houses, boards of the 1st and 2nd classes are usually used, that is, the number of natural wood defects is minimal.
