A major or simple cosmetic renovation of a room includes finishing the ceiling. To make the upper part of the room look aesthetically pleasing, it is necessary to carry out preparatory work before applying decorative finishing. Therefore, the question of how to level the ceiling is very relevant for those who are renovating an apartment.
How to make a ceiling smooth using the raw method
If the unevenness of the ceiling results from the presence of large differences, then the raw method is ideal. Before you carry out the process itself, you should do some preparatory work:
- We wash away the previous whitewash finish with water, and then remove it with a spatula.
- In case of covering the ceiling surface with oil paint, it is necessary to make small notches using a hatchet, and then cover the ceiling using concrete contact or primer so that the adhesion of the ceiling and plaster is as strong as possible.
- Leave the surface until completely dry.
Next, we carry out the alignment itself, for this:
- We find the lowest point on the surface, since it is from this point that the finish will be leveled. This also minimizes wastage of space.
- The surface is leveled in the direction of the slabs on the floor.
- Then, let the surface dry completely.
- Apply another layer of the mixture. To do this, you need to apply a layer of plaster and use a lath to remove excess. It is important to keep in mind that one edge of the batten should be level with the chosen low point.
- Let the ceiling dry and then apply a layer of leveling putty.
Preparation of concrete slabs
Leveling the ceiling with plaster is a very common method. However, experts do not recommend using it if there is a large difference in surface height (more than 5 cm). In this case, you will have to apply a very thick layer of plaster, which may fall. This will lead to property damage or injury to household members.
But whatever method you choose, it is necessary to prepare the surface for leveling. And if, in the case of using drywall, this step can be skipped (but not advisable), then when leveling with plaster, you will have to prepare the surface.
Removing old coating
Before applying a new layer of plaster, you need to remove the old one. The fact is that it is the rough ceiling - concrete slabs or boards - that needs to be leveled. If the room has already been renovated several times, then the slabs already have one or several layers of plaster and a decorative coating.
You can make your work easier by following a few tips:
- To remove old layers of leveling material, you must use a sharp spatula. During the process, the tool will need to be sharpened periodically;
- if you like to work with both hands, then it is better to choose a tool with a long handle;
- To make the work easier, you need to soften the plaster layer with plain water. This is done using a spray bottle or wet foam rubber;
- a ceiling with a water-based coating should be washed with an iodine solution to remove the coating;
- water-dispersion paint is removed using special removers. If there are none in your locality, then be patient and have a sharp spatula. The special composition is applied to the surface with a roller or sponge, and after 30 minutes it is simply erased with a spatula. It should be noted that after applying washes, the paint comes off very easily and there are no uncleaned areas left;
- After cleaning the main surface, the plaster is removed at the junctions of the parts of the rough ceiling. To do this, use heavier tools - a pick, a hammer and a sharp spatula. However, it is not necessary to delete the entire layer. You just need to break off those pieces that come off easily and may unexpectedly fall off after repair.
Removing fungus and mold
In rooms with high humidity, there is a high risk of mold and mildew. If you have just such a room, then traces of parasites need to be removed. Otherwise, mold will appear on the fresh coating and ruin the entire appearance. In addition, the fungus can destroy the new coating and lead to its peeling.
The fungus is also dangerous to human health. It can cause allergic reactions or trigger an asthma attack.
Attention! After the old coating, moldy stains and other contaminants have been removed, the ceiling surface is treated with a primer. This is done in order to improve the adhesion of the rough surface to the leveling layer.
Ceiling leveling
First of all, large cracks and irregularities are sealed. For those who know how to level a ceiling with putty, there is nothing difficult. This is done with a special putty intended for rough work, mixed with tow.
The peculiarity of the putty is that it has a higher grain size compared to the building material used for finishing. The tow is impregnated with putty and placed in cracks and other openings.
To prevent new cracks from forming, the rough ceiling should be reinforced. To do this, apply a thick layer of putty to the edges of the slabs for rough work. When the layer dries a little, the mesh is pressed into it.
Self-leveling mixtures
Self-leveling mixtures can be combined with any coating, but are quite expensive and, as a rule, can only be applied in a thin layer - no more than 30 mm. Read the instructions for using the mixture carefully! Many materials of this type impose specific requirements on the base, for example, they require dust removal, but exclude the application of adhesive concrete-contact primers.
Preparatory work
Before leveling any ceiling, it is necessary to carry out preparatory work on the surface. To do this, you need to remove all the old plaster using a spatula. Then you will need to wash off the remaining chalk with water.
To quickly cope with rough work, before starting to remove the plaster, it is worth sharpening your spatula.
To remove water-based paint from the ceiling, you can use a solution with iodine. In 10 liters of water, you need to stir one bottle of this substance. The resulting liquid must be thoroughly soaked into the ceiling. To do this, it is better to use a roller or a wide brush. After complete cleaning of the surface, it is necessary to begin sealing the interpanel seams.
Sequence of seams:
- The space must be filled with foam and left until completely dry.
- Excess material must be cut off using a construction knife.
- Coat the seams well with a primer solution.
- Seal the recesses between the panels using Rotmand.
- Place a layer of serpyanka mesh on top of the mixture.
Important! For large and uneven seams, it is better to use plaster fiberglass mesh instead of serpyanka mesh.
In order for the putty to adhere and stick well, the ceiling in the apartment must be covered with a layer of primer. When choosing a liquid, you need to pay attention to the type of surface and moisture level in the room. For the bathroom and kitchen it is worth buying a primer with waterproofing.
Useful information: “How to putty the ceiling yourself”
Wet screed
Significant unevenness is usually eliminated with the help of a screed, the installation of which in a new building should be carried out according to a standard design, and in secondary housing requires prior approval from the housing inspection authorities. Before pouring a wet screed, it is necessary to reliably waterproof the ceiling with an approach to the walls, otherwise water from the solution will leak into the voids of the building structures (this can cause a short circuit in the wiring within two floors) and into the room below. In addition, when installing the screed, it is necessary to ensure insulation of impact and structural noise. Rolled bitumen-based materials with a thickness of more than 4 mm or special two-layer substrates, for example “Antistuk”, “Tekhnoelast Acoustic” or “Shumanet-100” will help to perform both tasks at once. All joints of hydro-noise insulation strips (slabs) are glued with mastic or special tape.
Leveling with sheathing
Ceiling cladding is considered the simplest solution to the problem of uneven ceilings; to implement it you need to:
- Clean the base floor of any previous finishes such as paint, putty or primer.
- Fix the frame to the ceiling. It is a structure made of metal slats. To create it, you should attach the sheathing using dowels to a concrete surface or with screws to a softer surface.
- Next, you should install decorative panels on the created structure, which will help level the ceiling.
As a rule, there are many types of different canvases:
- plasterboard;
- gypsum fiber;
- from chipboard;
- laminated;
- plywood;
- lining;
- metal.
A unique false ceiling design can also be achieved by creating multi-level structures or degrees.
The advantages of drywall are:
- Relatively small finishing work.
- Small space consumption (within 4 cm).
- No need to install complex structures.
As for the disadvantages, they are:
- Inability to use with differences of more than 10 cm.
- Ability to deform at high humidity levels.
Classification of ceilings
The nature of the defects in the “rough” ceiling is influenced by the type of ceilings and the design of the house itself. You need to pay special attention to these parameters when it comes to a new building. Actually, the ceiling is formed from floors, which come in three types: monolithic, prefabricated and precast-monolithic. There are also more exotic types of floors, for example, aerated concrete, but we will not consider them.
- monolithic floors - typical for monolithic houses. The building structure is a single concrete structure without seams. The absence of seams reduces the likelihood of cracks at the joints. However, in new buildings shrinkage still occurs, which can lead to cracks. Monolithic buildings shrink over the years.
- prefabricated floors rest on load-bearing walls; this type of floor is most familiar to residents of panel houses. The design immediately provides for tolerances for shrinkage. Shrinkage of panel houses takes 2-3 years.
Separately, it is worth mentioning the shrinkage of brick houses; they can also have prefabricated floors; shrinkage of such a building can take from 5 to 6 years.
- Prefabricated monolithic floors are based on the use of hollow blocks, which are combined into a single structure when poured with concrete.
Dry method
A winning alternative to the messy and time-consuming wet leveling method is the simple and reliable dry method. It is easier to hide unevenness with a false ceiling - a decorative structure that covers the entire ceiling without dust and dirt.
But how to level the ceiling? We can use one of 3 types of false ceilings: ceiling cladding or tension and suspended structures.
Simple headliner
Ceiling covering is the simplest solution to the problem, how to fix an uneven ceiling.
- Let's clean the ceiling surface from peeling old paint, putty, and primer.
- We fix the frame on the ceiling slab - leveling sheathing (metal slats):
- We shoot the sheathing against the concrete with dowels using a construction gun;
- We attach the sheathing to the surface, softer than concrete, with screws.
- We will attach decorative cladding material to the resulting frame and thus solve the problem of how to correct uneven ceilings.
Drapery happens:
- from plasterboard,
- gypsum fiber,
- chipboard,
- laminate,
- plywood,
- linings,
- metal
We can modernize a false ceiling with waves, steps, tiers according to our design imagination and paint it in the desired color.
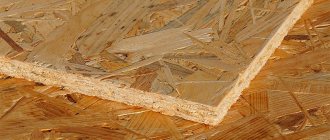
The most popular option is drywall, i.e. plaster sandwiched between two sheets of cardboard. The material breathes, eliminating dampness and stuffiness. To level ceilings, it is better to buy sheets with a thickness of 10-14mm and a size of 1.2x2.5m.
Pros:
- Drywall does not need to be puttied (only the cracks), and it is easy to paint and whitewash.
- The minimum height loss is only 3 – 5 cm.
- A cheap frame does not require complex suspension systems.
Minuses:
- The design will not hide height differences of more than 10 cm.
- Water permeability: drywall is deformed by moisture.
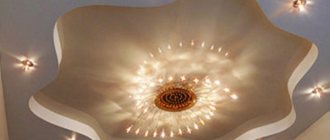
Stretch ceiling
For lovers of innovative ideas, a suspended ceiling is a trendy answer to the question, how to fix an uneven ceiling.
Installation:
- We fix a baguette frame around the perimeter of the ceiling.
- We insert PVC material, heated with a heat gun, into it - polyvinyl chloride.
- Cooling to room temperature, the polyvinyl chloride is stretched until the drum is elastic.
Pros:
- Ideally flat ceiling surface.
- Quick installation.
- Stretch ceilings are not subject to deformation and are not afraid of water.
- There is no debris during installation.
- Wide choice of texture and color.
Minuses:
- The fabric is easily pierced.
- This is a relatively expensive leveling method.
Dropped ceilings
The suspension system will provide us with perfectly flat ceilings.
Decorative panels and suspended ceiling tiles are made from mineral fiber, chipboard, metal, plasterboard, and pressed paper.
The operating procedure is as follows:
- We install a frame - metal profiles - to the ceiling on suspensions;
- We lay decorative panels on the frame.
Installation of suspension systems:
- We fix the slatted ceilings on suspended rails, into which we insert metal slats.
- Tiled ceilings have a frame in the form of a square sheathing. In each such cell we insert a square slab 60x60cm.
Pros:
- Suspended ceilings can even out large differences.
- It is convenient to hide communications behind them.
- Replacing an individual deformed strip or plate will take a matter of minutes.
Minus:
The suspended ceiling takes up to 20 cm in height.
Conclusion
Having made the final choice of how to level the ceiling, we will boldly begin to fulfill our prudent intention to make the house comfortable and fashionable.
Cement-sand screed
Its optimal average thickness is 40 mm, the minimum local thickness is 20 mm. It is advisable to reinforce the structure with steel road mesh, and prepare the concrete from a factory mixture in bags. When the design thickness of the screed is more than 40 mm, lightweight concrete is used, most often expanded clay concrete, less often - more expensive concrete with foam glass.
It is important to dry the screed properly by covering it with film or periodically moistening it. Windows cannot be opened wide; only ventilation through vents or inclined sashes is allowed. The average maturation period for a wet screed is a month, but before laying the coating, be sure to check the residual moisture of the concrete with an electronic moisture meter.
With experienced builders, provided they use non-shrinking mixtures (for example, veber.vetonit 5000), the screed turns out to be quite smooth; it is quite possible to lay laminate and interlocking parquet boards on it (on top of the substrate).
However, often the base layer requires finishing leveling with a self-leveling solution. Usually it is carried out after 7-14 days, when sand concrete (expanded clay concrete) has gained about 70% strength, but some levelers can only be laid on a completely dry base.
Leveling the ceiling with plastic tiles
Another way to level ceilings is to install strip or rectangular plastic tiles. The essence of the principle is the same - creating an additional shell below the ceiling that will hide defects in the load-bearing base.
The technology for laying tiles is similar to installing drywall:
- preparation of the base;
- frame installation;
- laying tiles.
In this case, the edges of the tiles are made with a locking device, eliminating the need to putty them after installation.
It is not difficult to cover an uneven ceiling with plastic tiles even on your own - by analogy with plasterboard, a frame is mounted, which is more conveniently made from wooden blocks - the tiles are attached to it with small nails driven into the underlayer.
The advantages of this method are that PVC tiles are not afraid of water, are easy to maintain on a daily basis and are available in a wide range of prices.
Putty for concrete
In many apartments (mostly in new houses), the floor slabs are laid quite evenly, and their joints are securely sealed; As a rule, a cement-sand screed is placed on top. This may leave defects. The method of elimination depends on their nature, as well as on the type of floor covering chosen.
Local influxes of mortar on the screed from the developer can be cut off with a chisel, and small holes and marks from the rule can be removed using cement-polymer or polymer putty on concrete and thus obtain a ready-made base for laying tiles, laminate or parquet boards. It is not advisable to lay roll coverings directly on the rough screed , since the slightest defects appear on them (finish leveling with a bulk mixture is necessary). If a solid board, adhesive parquet board or piece parquet is chosen as a covering, it is necessary to ensure high tear strength of the putty. A two-component epoxy putty is perfect for this purpose, but you need to carefully prepare the base - remove dust, degrease it, and sometimes prime it with a strengthening primer.
Formation of beacons
Beacons help maintain a uniform level during plastering work. The installation step is usually made so that it is no more than the length of the rule (100 - 130 cm). Galvanized slats, wooden blocks or mortar can be used as beacons.
Before installation, the appropriate locations must be marked. For convenience, you can stretch strings in these places.
In the places where the beacons are attached, small piles of mortar are glued in increments of 30 cm. You need to use the composition of the mixture that will then be used to level the ceiling.
A galvanized profile or bars are glued onto the solution. You need to press in until the level of the beacon reaches the level of the mark.
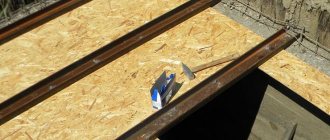
Modular raised floor
Modular raised floors help to quickly level out any differences in floor level and implement non-standard planning solutions. They are expensive and in apartments they are used mainly for solving non-standard problems, for example, constructing podiums of considerable height or laying under the floor ducts of a ventilation and air conditioning system based on low-power units.
The main parts of the raised floor are supports, stringers and slabs. The most common slab size is 600 × 600 mm, and the height of the supports varies from 50 mm to 1.5 m.
The supports can be made of plastic (hard PVC, polyamide), steel or a combination of these materials. Floor elements are mainly made from high-density chipboard with a thickness of 38 mm. To prevent the emission of formaldehyde, they are lined with aluminum foil along the plane and with PVC tape along the edges. The cost of a set of parts starts from 2200 rubles. for 1 m2.
A more environmentally friendly solution is slabs made of reinforced gypsum (on company websites you can find the name “Calcium Sulfate”), reinforced with steel sheets, but they are twice as expensive as chipboard ones.
Source
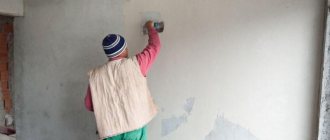
Leveling the ceiling with plaster
This material is used to eliminate large irregularities, differences of 2-5 cm. If necessary, reinforcement can be used to strengthen the structure. As with putty, careful preparation is required to ensure sufficient adhesion. After this, measurements are taken and markings are applied.
The first step in how to level a ceiling with plaster is laying the reinforcing mesh. This element is cut out in accordance with the parameters. To attach it, holes are drilled, and fastening is carried out using dowel mushrooms.
Then you should prepare the plaster solution by diluting the dry mixture in a proportion corresponding to the manufacturer’s instructions. The consistency of the composition resembles thick sour cream. The lowest angle is worked on first.
The mixture is placed on the mesh and pressed to fill the holes. The starting layer is placed to ensure greater adhesion of the mesh to the ceiling. To ensure evenness, it is better to make several layers, drying each one.
If the leveling process is completed, the last layer is leveled with a trowel. When preparing for painting, you should wait until the plaster has completely hardened. It is necessary to apply finishing putty and primer on top of it.
Is it worth installing the tension structure yourself?
Installing suspended ceilings is also considered the best way to level the ceiling. This method allows you to simultaneously organize the final surface finishing.
The process is carried out in several steps:
- First, marking is done. The location of the profile strips and the final ceiling height are determined.
- A person without extensive experience in this field should use the glazing bead method of attaching a baguette. To do this, holes are made in the wall and filled with dowels. Attention must be paid to the reliability of the fastening, which is designed for heavy weight.
- Now you need to fix the lamps. You need to think about the power of the lamps in advance. The wiring is laid in such a way as to avoid contact with the fabric after it is tensioned.
- The temperature in the room rises to 40 degrees. This allows the material to heat up and expand in size.
- Now the canvas needs to be secured in the profile. The process starts from the corner and spreads around the perimeter. Reliable fixation of the ends of the canvas is important. At the end of the action, all that remains is to trim off the excess.
- It remains to wait for the canvas to cool. Wrinkles that appear during the process are removed by local heating and smoothing.
This work requires a certain level of qualification and the availability of special tools. Considering the high risk of miscalculation in the absence of experience, it is better to entrust the matter to specialists.
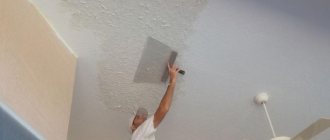
Ceiling putty
The putty can be applied with or without beacons. In most cases, putty is applied after plastering to complete the leveling for painting. If you apply putty without plaster, this will significantly increase the consumption of material.
The starting putty is usually applied in several layers. The first must dry before applying the second coat. After drying, the surface is treated with sandpaper. To do this, it is convenient to fix the sandpaper on a grater or wrap it around a block. With this tool you need to make circular movements along the surface of the ceiling.
Thin layer levelers
If there is a ledge, hill or slope on the screed made by the developer or the previous owners of the apartment, but the difference does not exceed 20 mm, for leveling it is advisable to use bulk solutions from ready-made mixtures, such as weber.vetonit 4100, Unis Horizon, Ceresit CN 68. They are easy to apply, that is, in fact, they spread over the surface themselves - you just need to help them a little with a spatula and expel the air with a needle roller. Such solutions dry very quickly, and after 4-12 hours the base can withstand foot traffic, and after 1-3 weeks (depending on the thickness of the layer) the coating can be laid.
Suspended ceiling
Mineral fibers, metals, chipboard or plasterboard are used as materials in the manufacture of suspended ceiling panels.
The installation process consists of the following steps:
- A frame made of metal profiles is installed.
- Ceiling panels are attached to the frame. Closed systems are completely covered with tiles, while open systems leave the edges of the system.
The suspended structure is secured by slats that hang on special tires. It is into them that the metal slats are inserted. The standard frame is a square sheathing, with slabs inserted into each cell.
The main advantages of this design are:
- Ability to level out large differences.
- Possibility of masking communications.
- Renovating one panel does not entail replacing the entire ceiling.
As for the minuses, the only one in this case is that such a design takes up approximately 20 cm of the entire ceiling height.
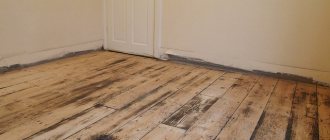
Floor on joists
When it is necessary to create a reliable base for a wooden covering and the load on the floor cannot be significantly increased, logs or (much less often) so-called modular raised floors are used. These structures make it possible to eliminate any unevenness in the ceiling, but with a significant additional loss of ceiling height - at least 50 mm (the minimum intrinsic thickness of the structure).
The easiest way to make logs is from high-grade coniferous timber and level them using plastic wedges. Aluminum products on adjustable screw supports will cost several times more.
The tongue-and-groove floorboard is attached directly to the joists (with this design, their cross-section must be at least 50 × 50 mm), and the parquet and parquet boards are attached to plywood flooring with a thickness of 16 mm or more. It is advisable to fill the space between the joists with expanded clay, mineral wool or soft wood-fiber boards - this will improve heat and sound insulation.
Cost and expense
The consumption of dry mixtures when plastering ceilings can be completely different. There are many influencing factors here, such as flatness of the plane and quality of cleaning. Focus primarily on the consumption prescribed in the instructions. As an example, consider the average value:
- plastering the ceiling with gypsum plaster has a consumption per 1 m2 of about 9 kilograms with a layer of 10 mm;
- for cement plaster the data is higher, on average almost 17 kilograms per 1 sq.m.
- Decorative dry and liquid mixtures have significantly lower consumption when plastering ceilings. About 5-6 kg per square meter. This is because there is no task of leveling the plane, you just need to decorate it. Application is made in a layer of 1-2 mm.
The cost of Rotband is 360 rubles. for 30 kg bag. The price of other mixtures is approximately in the same category; the domestic manufacturer always dumps a little. Liquid compositions for decoration can cost 2500-3000 rubles. for a 25 kg bucket.
Calculator for calculating the amount of dry building mixture for plastering the ceiling
The initial values for the calculation will be:
- Ceiling area. For a rectangular room, calculating it is not difficult.
What to do in more complex cases?
If the room has a special configuration, then you can apply different approaches to calculating its area. All this is described in detail, with the application of convenient calculators, in a special publication on our portal “How to calculate the area of a room”
- The planned minimum thickness of the plaster layer depends only on the specific conditions of the room being finished and the wishes of the owners. As a rule, a layer less than 5 mm is not applied when plastering.
- The amount of difference in ceiling height that needs to be eliminated by plastering.
- Master's qualification level. A professional will waste no more than 5% of the solution, but for a beginner, at first, even 15% of the solution may not be enough.
The resulting value will initially be expressed in kilograms. But dry plaster mixtures are sold in paper bags of 25 or 30 kilograms, and purchasing an open bag is great stupidity, since no one can guarantee the quality of the solution. This means that one way or another you will have to round up the amount of purchased composition up to the whole number of bags. This supply will still not be superfluous - all the repairs are still ahead! This is also taken into account by the calculation program.
Elimination of defects
Any gap in the floor is a “loophole” for liquids. In addition, heat “leaves” from the room this way. There is no point in explaining how important it is from this point of view to put the surface in order. Nowadays there are enough products on sale that can be used to properly repair any crack. Particular attention should be paid to the joints between the floor and the walls of the room, especially external ones.
If signs of the development of putrefactive processes are noticed, then it is necessary to carry out appropriate treatment of the affected area. There are also many formulations for this. We can cite the example of copper sulfate, which is often called a proven “folk” remedy.
We use drywall
The level of the ceiling base is determined. For greater accuracy, you can use a laser or water level. Marks are applied to the walls with a pencil or a special marker.
According to the marks on the walls, a frame system of profiles is mounted. The design of the frame system depends on the chosen ceiling design and its complexity. Ceilings made of plasterboard or gypsum fiber can be simple, multi-level or combined (with tension, mirror or glass systems).
Particular attention should be paid to the technical characteristics of the system
The frame is sheathed with sheets of gypsum fiber or plasterboard. The resulting technological seams between the sheets are covered with a special putty for tightness. A sickle bandage is glued to these seams, then putty is applied again. After waiting for the putty to dry, sand it well.
Floor extension
Leveling the floor using plywood along the joists
Pros: this method is most suitable for apartments on the first floors, since a layer of insulation can be placed between the joists. With this leveling there is no dirt, moreover, it does not require any drying time and will be ready for use immediately.
Cons: the method is quite labor-intensive, and also significantly raises the floor. In apartments with low ceilings, this will narrow the space.
Process technology
Laying the selected insulation in the cells between the joists
Leveling the concrete floor is mandatory for all rooms where it is necessary to get rid of slopes and unevenness. Depending on the wishes of the developer, available materials and the condition of the floor, you can choose the optimal method. All available options are quite accessible to anyone who wants to do this work themselves, and the efforts will pay off with a durable and beautiful floor.
Did you like the article? Save so you don't lose or share with friends!
Source
Expert advice
If you follow the plastering technology, you will achieve excellent results, and the recommendations of the experts will help you avoid difficulties in your work:
- to eliminate small unevenness on the ceiling, you can use ready-made plaster mixtures;
- If you use lime plaster, protect your hands and eyes;
- for better adhesion of surfaces, use a primer from the “Betonkontakt” series;
- if you need to apply a plaster layer more than 5 cm thick, install a reinforcing mesh.