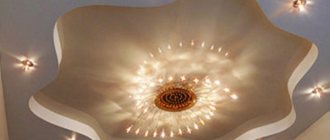
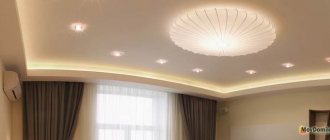
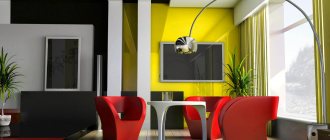
Two-level plasterboard ceilings with lighting
Ceilings made of gypsum plasterboard have completely replaced other types of floor finishing.
In recent years, you can often see two-level plasterboard ceilings with lighting in apartments. Having figured out the installation and studied examples of installing profiles, it is possible to make such a design with your own hands. The shape of the ceiling system can be either the simplest, consisting of rectangles or squares, or the most bizarre, made in the form of various curves and ovals. Before you do everything yourself, it is important to calculate and purchase the necessary materials, prepare tools and components so that nothing distracts you from the process.
It is worth noting that the work is not as simple as it seems, so it is better to invite a partner who is competent in repairs.
Additional Selection Considerations
When choosing spot lighting products for various types of floors (made of plasterboard, suspended or tensioned), you must, first of all, rely on the type of socket design the device has. The type of socket will determine the size of the light bulb that needs to be screwed into the socket. And the depth at which the device will be placed directly depends on this (if a built-in type is used).
Light bulb socket
Such devices have cartridges:
- E27 – designed for a standard light bulb, so it’s quite large;
- E14 - “minion”. Quite small;
- G4, G5, G9 – these bulbs have pins, which allows them to reduce overall dimensions.
As you can see, the standard sizes of cartridges have a direct impact on the dimensions of point models. We've sorted out the range of product choices. Now let's look at what devices need to be used in each individual case.
Where to begin
Before constructing a two-level plasterboard ceiling with lighting, you should think about the shape and arrangement of the tiers. If you don’t like the option of a flat ceiling panel with built-in lamps, you can find a ready-made one, which shows all the calculations for gypsum boards and consumables.
But most often you want to get a unique design, like no one else has. Then it’s worth making your own sketch, taking into account the interior of the room where it will be installed.
It is necessary to take into account all the details, taking into account the design.
A ceiling model with extended sharp corners in a room with soft oval curves of furniture or a high-tech design in a room with a classic interior will look ridiculous.
It is worth noting that such a ceiling is installed only in a room with high ceilings, otherwise the surface will press and the space will be significantly reduced.
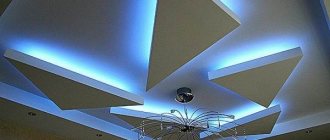
When installing two-level plasterboard ceilings with lighting in a room with high ceilings, you can install a system zoning the room using certain lighting techniques and multi-level structures.
It is necessary to pay attention to the microclimate of the room in which do-it-yourself gypsum plasterboard structures will be installed. For example, they are under no circumstances acceptable in damp areas such as the bathroom. Even slight wetting can lead to deformation of the plasterboard, after which repeated repairs become inevitable.
Recommendations for choosing lamps
Taking into account a few simple tips, choosing a lamp is not difficult. If you know the placement of points and the arrangement of furniture in the room, there will be no problems with calculating power. But there are a number of other criteria that should not be forgotten:
- Degree of moisture protection. For a bathroom, toilet or kitchen, it is better to choose models with increased protection against moisture, which are marked IP44.
- Type of light bulb used. It is better not to buy options with a traditional incandescent lamp, as they get very hot, which is undesirable for a stretch ceiling. Fluorescent and halogen ones are also not the best choice. The ideal solution is LEDs; they consume little energy and do not heat up much during operation.
- Appearance. The spotlight should be combined with the light of the ceiling and fit into the interior.
- If you need to shift the emphasis of lighting, it is better to choose rotating options.
Advice! Do not buy the cheapest models; their quality usually leaves much to be desired and their service life is short.
When choosing lamps, consider the type of socket and the ease of replacing the lamp; the easier it is, the better. Options with LEDs come without lamps; in this case, if they fail, you will have to buy new ones or disassemble and resolder the diodes, which is not very easy.
Methods for fastening load-bearing structures
There are ways to secure all surfaces of plasterboard sheets:
- floating design. It is mounted without a rigid connection to the walls, and is attached to the ceiling using special hangers;
- rigid fastening to the walls using load-bearing and guide profiles.
The result should be a durable ceiling structure that meets the requirements:
- reliability, safety and durability of plasterboard sheets;
- fire and electrical safety of installed lighting;
- the finished structure must fit perfectly into the interior of the room.
It is better to use lightweight drywall as materials. These are sheets with a thickness from 9 mm to 6.5 mm. The thinner the plasterboard, the lighter the entire structure will be, the less load falls on the fastening components.
For lathing and installation of a two-level ceiling, various metal (guide and load-bearing) profiles are used.
Illumination can be made using both spotlights and LED strip. The second option is used more often, since it has a number of advantages over other lighting:
- low power consumption with higher brightness (compared to other lighting);
- the least heating in comparison with other lighting devices;
- compactness. For the diode strip, there is no need to install volumetric structures; it is enough to remove it behind small thresholds or curbs during installation of the ceiling.
Why is the calculation carried out?
According to regulatory documentation (SNiP, SanPin), the lighting system in any room must comply with certain requirements, which primarily relate to the level of illumination. Each home or industrial premises must have its own lighting levels, which are implemented by different types of lamps (emergency, general, local, work and other purposes). All indicators of the degree of illumination for various rooms are given in SNiP. An example of the level of illumination that should be implemented in various rooms is given in the table.
Note! The required illumination level is shown in the table at a minimum level. Therefore, a slight upward adjustment is allowed.
Table. Indoor lighting level
Such standards were developed to ensure that people in the premises do not experience discomfort. To determine the optimal level of illumination for each specific room, the calculation must take into account a number of indicators:
- type and purpose of the premises;
- type of lighting (general, emergency, work or other purposes);
- type of lamps, as well as their location (on the ceiling, wall, work surface);
- type of light source. For lighting a home and industrial premises (security, emergency, work purposes), the calculation can use the operating parameters (power, etc.) of incandescent, LED, fluorescent and other types of lamps.
Types of light bulbs
However, it is not enough to know the above indicators. The calculation must also determine how many light bulbs and luminaires need to be used to create the level of illumination required by SNiP standards. And to find out, you need to find out what the distance will be between the lamps used. If you do not make such a calculation, then you are unlikely to be able to create eye-pleasing lighting in the room. Moreover, this calculation is most complex for industrial facilities when organizing emergency, work, general and other lighting options.
Materials and tools
Before you make a two-level plasterboard ceiling with lighting with your own hands, you need to measure the room and buy gypsum board with a reserve, since the sheet can be broken due to carelessness or miscalculated in size. Stock up on profiles in accordance with measurements and screws and dowels:
- the guide and ceiling profile have a standard length of 3 m;
- required estimated number of hangers for profiles;
- anchors with self-tapping screws;
- screws for metal;
- dowels of various lengths.
Tools you will need:
- metal scissors for cutting profiles;
- hammer drill if the walls are made of reinforced concrete (with a reliable drill or drill);
- level (you can get by with the usual one);
- pencils for marking, construction tape;
- drill or screwdriver with various attachments and drill bits;
- hacksaw and plane for processing the edges of plasterboard, square.
For those who have installed the frame of a single-level ceiling with their own hands, it will not be difficult to make a two-level ceiling, but it is better to start installing a gypsum board ceiling on two levels with simple structures, rectangular or square in shape, without complex bends.
Types of lamps and sockets used
Spotlights use several types of lamps. They differ in their operating principle:
- Incandescent lamps;
- Halogen;
- Diode;
- Luminescent.
The most common sockets to use are pin sockets. Sockets GX53, GU10, G6.35, G9, G4, GU4, GU5.3 are intended for spotlights.
Installation of a two-level structure
You need to start work with the first frame, then attach the second tier to it, while simultaneously doing the electrical wiring.
All work on installing the ceiling takes place in several stages:
- preparation of ceilings;
- marking the ceiling for the base of the frame made of profiles;
- installation of frames alternately, first of the first level, then of the 2nd;
- fixing drywall sheets and finishing them.
First of all, you need to decide on the ceilings. If there is a layer of loose plaster on them, it must be removed. There is no need to do anything else to prepare the surfaces.
Then the height of the corners of the room is measured. The beginning of work is the corner with the smallest height, this way the horizontal of the ceiling will be preserved, markings begin from it.
For profiles, a horizontal line is marked on the walls with a coated cord, and points are placed on the ceiling - places for hanging. Then profiles are installed around the perimeter; they must be leveled along the entire length of the room.
If not only the corners, but also the walls of the room are uneven, first of all the leveled parts are made horizontally, and the profiles are also mounted. The spacing of the structure is 60 cm. If the ceiling is fairly flat, then you can only install an outer box around the perimeter of the room, with a shelf for lighting.
If the ceiling is made double, then the lighting is usually mounted at the lower level, in a special niche made.
The width and brightness of the luminous flux depends on the shape of the shelf, the height of the side or its absence, but it is most often directed upward, so you should not limit yourself to LED indoor lighting. It is possible to install additional spotlights. This will help increase the illumination of the room and zone the space.
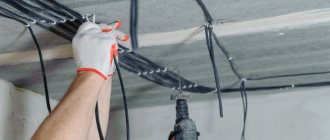
For additional lighting, the wiring is mounted in special cable channels. The wires are routed either to sockets or to junction boxes.
The assembled frame is covered with sheets of plasterboard. All joining seams and places where self-tapping screws are screwed in are puttied, allowed to dry and sanded. Before finishing the final cleaning, this procedure is carried out a couple more times, achieving an absolutely flat surface.
Having understood the intricacies of installing load-bearing structures, fixing gypsum boards and connecting lighting, you can get an exclusive ceiling option in the room.
Installation process step by step
To install spotlights in drywall, you will need to perform the following sequence of actions:
- Apply markings for future installation locations on the plasterboard structure. It is advisable to use measuring devices to ensure that the hole is centered.
- Select the diameter of the drill bit according to the diameter of the spots. It is desirable that it be a little larger, then the lamp will easily fit into the diameter of the hole.
- Turn off the power supply to the electrical network at the input panel if the connection and installation of electrical wiring has already been completed. If the power supply system for spotlights is not yet connected, you can skip this point.
- Drill a hole in the drywall or make one using any of the methods described above.
Make a hole in drywall
- Pull the power wires out through the holes and clean their edges.
Get the wires
- Make an electrical connection to the spotlight to the wiring line.
Connecting the lamp to the wiring
- Hide the wiring in the frame and install the soffit in the drywall, secure it with spring fasteners.
- Install an LED or fluorescent lamp into the socket. If necessary, secure with a spring pin.
Secure the lamp with a pin
Features of installing a single-level ceiling
Before starting work on the installation of the standard version of single-level tension fabrics, the craftsmen carefully inspect the following:
- the surface of the base ceiling for the presence of any protrusions and growths;
- the condition of the walls in the room and the places where they join the concrete sheet, for the presence of any voids or irregularities in them;
- the room itself for the presence of central heating system pipes and previously installed lighting fixtures.
Taking into account the results obtained, the buyer is offered several possible options for the design and installation of the ceiling sheet. If there are no protrusions on the walls or base floor in the room, the minimum distance from the ceiling for a stretch ceiling will be from one to four centimeters, depending on the dimensions of the mounting moldings and their location.
A significant influence on the minimum indentation is exerted by the lighting devices with which the room is illuminated; such a suspended ceiling with lamps built directly into the canvas increases it by the size of its own dimensions. In the case of placing lighting elements inside the space between the concrete floor and the decorative canvas, the distance from the ceiling for suspended ceilings is made even larger, taking into account the power of the lighting devices, the luminous flux of which can expose the ceiling material to excessive heating, which will lead to its deformation.
The presence of ceiling sound insulation in the room also affects the minimum indentation, the size of which greatly depends on the types of materials used to make its structure, namely:
- the lathing made of wooden blocks has a width of 2 to 3 cm;
- the frame made of metal-plastic profile has a width of 4 to 5 cm;
- the frame is made of aluminum profile, is the most compact and has a width of 1 to 2 cm.
In the case of installing any of the above structures, the size of the tension fabric fastening baguette is added to its width and thus the minimum distance of the decorative material from the base concrete ceiling will be obtained.
In addition, the size of the indentation, the space of which is consumed by the suspended ceiling, is influenced by various protrusions, both on the ceiling itself and at the places where it meets the walls.
In this case, the countdown begins from the largest protrusion on the ceiling or wall, which may also contain voids, especially characteristic of old buildings, as a result of which the wall moldings of the stretch ceiling will be attached even lower.
Can a luminaire be added to an existing lighting system?
The answer to the question is yes, but this cannot be done without dismantling the ceiling covering. Depending on the tasks assigned, it is removed partially or completely. With a harpoon attachment, the problem is easier to solve. The procedure assumes the following order:
- Dismantling the canvas using a special screwdriver.
- Applying markings on the surface of the base ceiling.
- Preparation and installation of embedded platforms.
- Re-wiring.
- Installing the canvas in place.
- Creating holes, using thermal rings.
- Installation of additional lamps.
Think in advance about the placement of lighting elements on the ceiling. LED lamps are a purchase accessible to everyone. Products are presented in large quantities on the Internet, in construction markets and in stores. The principles of working with lamps are the same. Connection takes a minimum of time and effort. But there are some nuances that cannot be avoided.
Sources
- https://HoroshijPotolok.ru/otdelka/ustanovka-svetilnikov-v-natjazhnoj-potolok-svoimi-rukami-kak-montirovat-kak-krepit-k-potolku-kak-provesti-provodku-pod-kazhduju-lampu-i- na-chto-obrashhat-vnimanie-pri-montazhe.html
- https://elektrika.expert/svetilniki/svetilniki-v-natjazhnoj-potolok.html
- https://220.guru/osveshhenie/svetilniki/montazh-v-natyazhnoj-potolok.html
- https://zen.yandex.ru/media/rmnt/osvescenie-natiajnyh-potolkov-vybor-i-montaj-svetilnikov-610bd3b18b5c8b6b3ddce6ae
- https://StroyGuru.com/remont-kvartiry/potolok/montazh-svetilnikov-v-natyazhnoj-potolok-svoimi-rukami/
Installation of two-level suspended ceilings combined with plasterboard
The so-called two-level ceilings, often consisting of combined materials, significantly change the height of the room downwards, where, for example, part of the ceiling is made of plasterboard, and the other part is made of tension fabrics, or from one tension fabric, some parts of which are installed on different levels relative to each other.
It makes sense to use a two-level ceiling design in rooms whose height starts from 2.5 meters, this is due to the fact that the installation of its structures takes a large number of centimeters from the ceiling, often amounting to about 30 cm to the lower level of the tension fabric. The most massive part of the combined two-level ceilings is occupied by a plasterboard box structure, with the help of which they are given a variety of wavy shapes.
With the help of this design, it is customary to hide various types of communications placed on the rough ceiling, namely:
- fire alarm sensors;
- electrical distribution boxes;
- components of ventilation;
- heating alarm line;
- arrangement of a hidden niche under the cornice.
The width of the plasterboard box can be from 15 to 30 cm, if a shelf is placed on it for additional illumination of the stretch ceiling.
Thus, the minimum distance from the rough ceiling covering will be about 17 cm, and the maximum can reach up to 32 cm.
Types of lamps by consumption
Designers recommend using energy-saving lamps and LEDs. They have a number of advantages: they last a long time, do not get hot and do not dazzle. However, these light sources cannot be used for all rooms.
If the lamp is made of durable, high-quality metal, then you can use an incandescent lamp. This would make sense in a year-round greenhouse where warmth is needed or in a basement.
220 V
Incandescent lamp. The glass bulb contains a spiral that heats up and produces bright light when current is applied.
Lamps are divided into types:
- painted, mirror, matte bulb;
- power – 25-150 W.
Matte or painted lamps are inserted into lamps in the bedroom or a separate area of the room for decoration.
The advantage is low cost, easy installation.
Disadvantage: it gets hot and breaks down quickly.
Energy saving
Halogen, fluorescent, LED light sources.
Halogen lamps are used as additional lighting for one area of a large room or as illumination of an object.
Indicators: power – 1-20 W, light output 15-22 Lm/W, operating life up to 4,000 hours.
If a halogen lamp is dirty, it will quickly fail.
Luminescent - have different shades of light. Are there any markings? in which the letter G denotes a design with pins, E – thread.
Characteristics: light output 40-80 Lm/W, power up to 80 W. Operating life up to 40,000 hours.
LED light source. It is based on a semiconductor crystal. The downside is that over time the crystal doesn't shine as brightly.
Characteristics: power up to 30 W, light output 120 Lm/W, operating life up to 50,000 hours.
The disadvantage is the high price.
Indentation dimensions when installing a two-level ceiling made of tension fabrics
The design of a two-level ceiling, consisting exclusively of tension fabrics, is a construction of fastening baguettes and special double-sided profiles, with the help of which parts of the fabric are placed at different levels, this also leads to different sizes of indentation from the rough ceiling.
In this type of stretch ceiling, the height of the indentation will depend on the width of the special profile used, which ranges from 8.5 cm to 15 cm. Thus, the structure of a two-level ceiling covering can be located below the level of the base concrete sheet at a distance of at least 9 cm, taking into account the thickness tension material.
When installing it, the fastening moldings of the lower-level canvas are fixed on the wall with an indentation equal to the width of the special double-sided profile, thus, the maximum height of the free space to which the suspended ceiling can be lowered, in cm from the base ceiling, is limited only by the desire of the owner of the room.
The main criterion in choosing the height of the indentation in the installation of a two-level ceiling is the general condition of the base rough ceiling, the evenness of the walls of the room and their density, as well as the presence of various types of communications placed directly on the ceiling and at the points where it connects with the walls.
How much does the ceiling drop in the case of other ceiling structures (for reference)
- The suspended ceiling will drop to the same distance as the suspended ceiling - 5 cm without overhead light, 6-10 cm with a chandelier and built-in lamps.
- A suspended panel ceiling with side lighting and fastening metal guides to the wall with liquid nails will eat up only 3.5 cm of space. In overhead light - standard 6-10 cm.
- Slatted ceiling - the shortest distance to the ceiling is 3-4 cm.
- The hemming option for finishing the ceiling space will take 3-4 cm off the ceiling height.
- Glue ceiling – about 1 cm.
Expert advice
Many specialists who have been installing suspended ceilings for a long time note the following points regarding the height of the indentations:
You should not mount baguettes to the walls, focusing solely on a small indentation. Very often, at the junction of the ceiling slab and walls, there are small niches in which electrical wiring is laid, and often the quality of the concrete in these places is very low, as a result of which the baguettes may not be securely fastened and will fall out over time. For these reasons, it is worth lowering them below the level of the concrete ceiling by 5-6 cm.
If you plan to provide additional lighting inside the stretch ceiling, the canvas itself should be mounted at a distance of at least 10 cm from spotlight diode lighting fixtures; this will protect the tension material, especially PVC film, from excessive thermal effects, which will increase the service life of the stretch ceiling.
If there is sound insulation made of mineral materials on the ceiling, it is necessary to mount the tension fabric, especially fabric, at a distance of at least 5 cm from the structure itself, this will significantly improve both the soundproofing of the room and will not allow condensation to accumulate on the inner surface of the tension fabric, which will allow sound insulation will last much longer.
Due to the fact that this type of finish involves many separate small parts, when attaching it, you can successfully control the height. As a rule, in the case of a normal level, the new coating will take from 5 to 10 cm. But here, as with a tension product, the unevenness of the walls at the fastening points, along with defects in the main ceiling, plays a significant role. Now all that remains is to putty everything and achieve a smooth surface.
Almost everything. The plasterboard ceiling with lighting is ready, all that remains is to install the lighting itself. And it can be different.
Now the excess pieces of gypsum board can be removed. They are cut level with the bottom edge of the profile, carefully cutting the paper and breaking off small fragments.
Distance between lamps, basic standards
In order for the room to be well lit and the ceiling to look beautiful, you need to follow several rules for the placement of lamps. Everything is simple here:
- From the wall to the edge of the spotlight there should be at least 20 cm. If you place it closer, then the main part of the light will go to the wall, which can only be useful if you need to highlight a painting, sculpture or something else. It is better to retreat from the wall by 25-30 cm, but in small rooms use the minimum norm.
- The distance between spotlights must be no less than 30 cm. This is the minimum acceptable value, which should be measured from the edge of the body, and not from the center. But it is better to place the equipment every 40-50 cm, this way you can provide good light and at the same time the ceiling will look neat. But you shouldn’t place spotlights at a distance of more than a meter.
- If there are seams on the stretch ceiling fabric, you cannot place the equipment closer than 20 cm from them. This reduces the reliability of the fabric and increases the risk of rupture significantly. If possible, retreat from the seams by 25-30 cm, plan the position of the lamps so that there is no empty space near the joint.
If on the packaging or in the instructions for the lamp there are standards for its installation with distances greater than those specified, you must comply with them. To roughly determine the location, it is worth making a simple diagram with a plan of all the lamps in the room.
Installing a second level on a plasterboard ceiling
Creating a two-level plasterboard ceiling with your own hands is done in two stages. First, the frame of the first tier is manufactured, which is sheathed with plasterboard sheets. And already on it, without finishing it, they build a second level. Example of installation of direct suspensions In the case of a low second level or its installation on a ceiling, you can do without vertical end posts.
In this case, a plasterboard blank is sewn to the guide profile attached to the ceiling. Next, a second guide is mounted to its lower part, into which the horizontal frame posts will be inserted. Scheme of installing a plasterboard ceiling in two levels. Another option for the second level is installing a box with a niche for hidden lighting.
But this problem can be solved simply by “releasing the edge of the drywall sheet beyond the frame. After laying the wiring, they begin covering the base of the second level. The tools for assembly are those that were used in the manufacturing process of the first tier. However, you need to purchase material after planning and calculating the size of the future second tier. Despite the apparent complexity, making a single-level plasterboard ceiling is quite simple. Make a frame from profiles, sheathe it, and then finish the ceiling with putty. What to do when you need to make a second level of plasterboard ceiling?
Design options
Conventional flat-type lamps with metal overlays are excellent for the office. To create coziness, various options made of colored glass, multi-colored plastic and crystal are more suitable. The main stretch fabric perfectly reflects light, and polyhedrons and pendant lamps with crystal decoration can be used for it. On a matte ceiling it is worth installing flat options in which the light will fall vertically down.
To decorate a suspended ceiling, a spotlight with a square shape is perfect. Design options make it possible to fit a strict form into a variety of design styles. Matte metal is appropriate for a loft or industrial style, a shiny finish is suitable for an urban classic style, and ceramic linings fit into Provence. Lampshades with additional lighting create additional accents of light.
How to make a two-level plasterboard ceiling with lighting with your own hands
The ceiling area must be thoroughly cleaned and leveled, primed if necessary . A primer is needed to reduce the likelihood of dust getting onto the surface of a plasterboard ceiling from the inside. In order to give the desired pieces the desired shape, the material must be moistened with water. Then the sheets become soft, pliable and can easily change their shape.
To simplify the work, it is better to treat the surface with a metal needle roller - this way the material will be saturated faster and it will be easier to bend it into the desired shape. First of all, marks are left on the finished and sheathed surface of the first level and on the walls for the construction of the second level . Marks are left only where the second level will directly pass - if it is located along the entire perimeter of the room, then marks are made on all sides.
Before you start building the frame, you need to make a diagram of it. In order to obtain all the data necessary for marking, you need to perform the following steps:
- perfect alignment of walls without large-scale construction work;
- freedom in self-expression - you can choose absolutely any pattern and shape of the ceiling;
- environmental friendliness;
- no dirt during installation;
- strength and functionality;
- versatility;
Two-level plasterboard ceiling with lighting
It is worth paying special attention to this important stage and doing everything carefully. It is necessary to set aside the distance from the lowest corner, moving down, the distance should correspond to the distance to the lowest level of the ceiling. Do the same by securing the plasterboard structure to the side rails. Then secure the corners along the perpendicular edges of the lower ceiling and the vertical inner wall. Putty the joints.
The only drawback can be considered the dust emitted upon contact with plasterboard sheets, which is harmful to human health. In general, the double ceiling will look very impressive and will become the main decoration of the interior, and a backlit solution will add sophistication. You will need a couple of profiles - UD and CD.
UD is a guide profile mounted both on the wall and on the ceiling, as well as at the fastening point of the side, if it is present in the center of the structure. CD is a more rigid, load-bearing profile from which the lintels and racks are created; the plasterboard sheet is attached to them. Fix the plasterboard sheets in the center by hanging corners and crosses. Make a skeleton to attach the drywall to.
Such fittings can be used for profile ties.
Technical advantages
A large selection of spot lighting characteristics provides a variety of functional features. But its positive qualities, first of all, depend on the quality of the device and its configuration:
- The presence of a uniform wide angle of illumination and the ability to control it;
- Safety in high humidity;
- Protection from dust, vibration, mechanical damage;
- Low power consumption;
- Remote control, which is convenient for high ceilings;
- Increased service life;
- Possibility of using different lamps;
- No noise, flicker or glare;
- Compact and aesthetically appealing.
Each user will find other additional benefits for themselves.
Two-level plasterboard ceiling with do-it-yourself lighting
There is another concept. For ceilings with three or more tiers, as well as for structures lowered from the draft ceiling by more than 30 cm, the frame has a real cascade device. In other words, each tier is independent in the horizontal plane and serves as the basis for the underlying one, and the structure itself resembles an inverted pyramid. This approach is very beneficial both from the point of view of saving profiles and from the point of view of reliability and overall solidity.
Do not forget that the finishing of multi-tiered ceilings involves the widespread use of corner and flat tapes to strengthen the seams. In the first case, these should be metallized paper tapes or corner profiles with perforations. Flat seams are covered with a special perforated tape.
In ordinary cases, a two-tier ceiling only imitates a cascade. The highest tier is usually not formed by a plasterboard structure; instead, the surface of the rough ceiling is used. This plane can be covered with a stretch ceiling. After assembling the frame and approving its final configuration, it is necessary to strengthen the sheathing of the horizontal planes.
This is done with straight hangers, and with very low ceilings - with knitting needles. The ends of the tiers are sewn up quite simply. Small fragments are screwed to the ceiling and edge profiles, as well as to the posts connecting them with a standard fastening pitch.
In places where fragments join, scraps of a rack profile that are not directly attached to the frame are placed under the seam.
Manufacturers of spotlights
Russian manufacturers – Ambrella Light, Donolux, Elektroatandart. The products meet a high level of quality and are designed for a wide price range.
Foreign companies specializing in the production of lighting systems include: ARTE LAMP (Italy), EGLO (Austria), Lightstar, LUSSOLE (Italy), Massive (Belgium), Novotech (Hungary).
Advice! When choosing a manufacturer, do not chase low cost. Good quality doesn't come cheap.
Compact and miniature assistants help not only to transform the interior. Their benefits cannot be overestimated, because the state of our vision, mood, and therefore health in general directly depends on proper lighting.
How to make a two-level plasterboard ceiling with lighting
It should be noted right away that for small apartments with standard ceilings, suspended systems of two or more levels are not acceptable. The average height of a single-level ceiling is 7-10 cm, while the thickness of a multi-level structure is often more than 20 cm. This depth of the suspension system is critical for rooms where the ceiling height is only 240-250 cm. A two-level plasterboard ceiling with lighting is the simplest option.
Once you have experience in carrying out such work, you can begin installing more complex structures with three levels and additional volumetric figures.
- level the base ceiling;
- improve the appearance of the ceiling surface in terms of aesthetics;
- fill the interior of the room with new details;
- create technical capabilities for hidden and decorative lighting equipment.
To install suspensions in concrete, dowels are used; to install suspensions in the first level, assembled from plasterboard, anchors are used. Drywall sheets are attached to the guides using self-tapping screws.
- ceiling markings;
- installation of guides and longitudinal profiles of the first level;
- covering the first level structure with plasterboard sheets;
- installation of the frame for the next levels;
- covering structures with decorative elements made of plasterboard;
- finishing work on ceilings;
- installation of lighting equipment or LED strip.
Without resorting to the expensive services of specialists, with the help of drywall you can turn your bedroom into a room of miracles. The maximum you need: materials, tools, a little imagination, patience and desire. Depending on the intended bend, the ceiling profiles of the second level need to be made of different lengths and heights, depending on the height and size of the ceiling.
Product range
Today, spotlights for ceilings (stretch, suspended and plasterboard) are divided into two types:
- built-in This is the most common type of spot lighting installations. The built-in device will become almost invisible. It will stand out only for its decorative part, and its entire structure, including the light source, will be placed inside the ceiling. The depth in this case will depend on the size of the built-in light bulb, as well as the type of structure used. Installation here is complicated by the fact that you need a correctly calculated depth, as well as a diameter for embedding into the ceiling surface;
Note! The built-in type of spotlight is often used when creating suspended and suspended ceilings (especially from plasterboard).
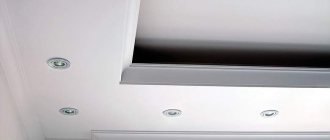
Built-in model
- overhead. It has a simple installation, as it is attached to the ceiling surface. In this case, the holes here are only needed to mask the wires. In this regard, they are more attractive than the built-in type of lamp. But they have a clear disadvantage - they protrude noticeably above the surface. They are used in situations where installing a built-in type of device would be very difficult or impossible.
Overlay dot model
When choosing a built-in type of lamp, you also need to know the design features of the various models. This determines what the final embedding depth will be. According to the design features, this type of lighting installations is of the following types:
- rotary. Such lamps can rotate and create a luminous flux at different angles;
Rotary model
- stationary (non-rotating). They provide light that comes exclusively downwards.
In addition, the dimensions of the device, as well as the depth of installation of different types (tension, suspended and plasterboard) will depend on the number of light sources. According to this criterion, two groups of spot lighting installations are distinguished:
- gimbals. The installation contains several sockets for screwing light bulbs into them (LED, halogen, etc.). Their sizes will be many times larger than those of single ones;
Cardan modification
- single. This is a standard version with only one light bulb. In this regard, the dimensions here will be minimal.
Single model
You need to know about all types of spotlights when, for their installation in the ceiling, the dimensions of the lamp are important, as well as the depth of its installation (if a built-in type is used).