What can I say, sometimes the electricians themselves do it wrong. What could this mean for you in future use?
For example, the fact that the next time you replace a burnt paw, you will simply get under voltage and get an electric shock. To avoid this, let's look at all the possible mistakes when doing this work.
Installing the chuck
To begin with, it should be noted that fastening the cartridge without auxiliary fixation is impossible for reasons of reliability and safety. The simplest installation schemes involve the use of a plastic sleeve with a hole in the central part through which the electrical wire is passed. But the fixation itself will be implemented not through a cable, but through a plastic screw provided as part of the bushing kit. The method of mounting on a metal pipe is also common. It is the most reliable, therefore suitable for installing heavy shades and chandeliers. In the usual configuration, the light bulb socket is mounted to the tube by screwing in, but before doing this, you need to pass the wire through the hole in the cylinder and make the connection. Next, the pipe is physically installed in the ceiling niche. This method is not only labor-intensive, but also suffers from distortion of the stylistic effect at the installation site. Therefore, it is recommended to use additional decorative overlays and masking components whenever possible.
Connecting the illuminator from an outlet
In a situation where the switch is installed in a new place (in the absence of a special niche), it can be mounted directly on the wall and powered from a nearby outlet. In this case, before connecting the lamp through the switch, it is necessary to extend the phase and zero from it, as shown in the photo below. In certain conditions, one phase is sufficient for this, since the neutral wire is already connected to the wall lights from the junction box.
Before connecting lamps with a switch from the nearest outlet, you need to familiarize yourself with the features of this procedure. The order of its execution looks like this:
- First, an indicator screwdriver is taken, with which the phase wire is determined and remembered, from which the wire is subsequently routed to the switch (it can be located either on the right or on the left).
- After this, the dangerous voltage of 220 volts is removed from the line, in which a switch is installed along with sockets, using an automatic machine.
- To be sure of its absence, it is advisable to check it with an indicator screwdriver.
- Before connecting the lamp through the switch from the socket, you need to remove the decorative cover from it, under which there are two contacts.
- A conductor of the required length is connected to one of them (phase) and routed to a single switch.
Upon completion of the preparatory procedures, the wire coming from the outlet is supplied to the switch mounted on the wall with the cover removed (it is connected to its lower terminal). Another conductor is pulled from the top contact towards the lamp, which is placed in a cable channel or tubular corrugation for aesthetics. In the same way, you can close the wire in the area from the outlet to the switch.
Connection diagram for a luminaire via a switch in a combined socket-switch unit in one housing:
If it is necessary to use spotlights in an apartment, it is assumed that they can be supplied with either a standard mains voltage of 220 volts or reduced to a safe level of 12 volts.
The specific connection diagram for spotlights is selected taking into account the type of illuminators used, designed for the appropriate voltage.
Before connecting spotlights, you should pay attention to the fact that the order of their switching does not differ from the standard method
Connection with power supply
When installing spotlights or LED strips, a transformer is additionally introduced into the circuit, reducing the voltage from 220 to 12 Volts. Now these devices are called power supplies, produced for various voltages and load power.
Connection diagram for a group of spotlights with one step-down transformer:
Connection diagram for a group of spotlights with a transformer for each light:
Usually, to connect spotlights, an electronic converter (aka power supply) is selected, which compares favorably with other devices with the following advantages:
- Small size and light weight.
- Built-in short circuit protection.
- Smooth increase in voltage when turned on, extending the life of the bulbs.
- Ability to regulate and maintain stable power supply.
In addition, these devices are characterized by extremely low noise levels generated during operation of auxiliary equipment.
We invite you to watch a training video on the topic: “How to properly install spotlights.”
Marking
In accordance with GOST, products with Edison threads are divided into three main types - E14, E27 and E40. The former are called “minions” and are used in microwave ovens and freezers, the latter in lamps, and the latter in organizing street lighting. The principle of operation is the same everywhere, and the differences are related to the design and dimensions.
There are markings on the cartridge body. When decoding, you can find out the characteristics of the product. E14 is installed in devices with a current consumption of no more than 2 A and a power of up to 440 W, E27 - up to 4 A (880 W), E40 - up to 16 A (3500 W). Each model is designed for 250 V AC.
What does it take to make a lamp?
In order to make a lamp with my own hands I needed:
- Tool
- screwdriver;
- drill for concrete - 6 mm;
- metal drill - 2mm and 6mm;
- heat gun - optional;
- screwdriver.
- Consumables
- automotive putty;
- spray paint - 2 contrasting colors;
- sandpaper with grit p80, p320 and p1000.
- Materials for the lamp body
- vase for small flowers;
- light bulb socket with E14 socket;
- wire with a switch - you can buy it, or you can find it in the garage/balcony among old unnecessary electronics. It is sold already assembled and the ends of its wires are soldered and ready to be fixed in the light bulb socket;
- a piece of threaded pipe - can be replaced with a plastic one;
- transition coupling 25 to 20 - you can do without it if you use the fastening method described in the previous publication, you can see it here;
- fitting - adapter nipple - required if you are using an adapter coupling.
Since I have many of the listed materials left over from the last build, I use them. You can do without some elements, for example, a metal pipe with threads, a fitting and an adapter coupling. And replace the car putty with cold welding. But cold welding is not so easy to process.
Repair of electric socket with screwless terminals
“E27” lampholders with screwless type contact clamps are intended exclusively for installation in lamps or other lighting equipment, but are sometimes characterized by incomplete compliance with the nominal cross-section ranges.
- cutting down the latch to the base of the electric cartridge body;
- manufacturing a brass or metal latch 0.5 mm thick and then bending the workpiece in accordance with a standard shape;
- the bent side is inserted into the bottom of the cartridge and the remaining section is bent in accordance with the contour of the holder;
- screwing the bottom of the cartridge onto the mounting tube and connecting the wires.
Electric sockets are rightfully one of the most important elements of any modern lighting devices. The type and design of the socket must necessarily correspond to the type of lamp, so you need to focus on the markings and take into account the quality characteristics of such a device.
Design
Electric cartridges have different designs, depending on the series of the device. Most often in everyday life, a model range equipped with Edison thread is used. It has a cylindrical body, inside which the remaining elements are contained.
Chuck design
Core
This is the bottom part of the cartridge, which has a wide base and holes for fastening. It may have various bushings and inserts in its design for removing the wire. Most often it is attached to the body of the chandelier.
Screw clamp
They look like threaded mounting strips. With their help, electric current is supplied to the core.
Pressure contact
Made of brass, most often it is a non-separable part of the device. Also responsible for supplying current to the light bulb.
Thread
The presence of a thread allows the use of various types of lamps - both incandescent and LED. It is most universal in the e14 and e27 cartridge models.
Frame
The cartridges can be equipped with a body made of various materials. Their characteristics and application possibilities depend on this. To figure out how to remove the cartridge from a chandelier, you need to know its design, including the type of housing. The following varieties are available for sale:
- Ceramic - made of heat-resistant ceramics, thanks to which they are able to withstand heating to high temperatures. As a rule, they are non-separable. Screw terminals are built into the base, with which connections are made. This is done using a regular screwdriver. The disadvantage of such cartridges is low strength.
- Plastic ones are unable to withstand high temperatures, which is why they are much inferior to ceramic ones. Designed for use with light bulbs no more powerful than 60 W. The design is usually collapsible, the contacts are located in the inner part. Connection to the lampshade is made using self-clamping terminals.
- Carbolite - characterized by increased strength and resistance to heat. They have a collapsible design; connection to the network occurs using brass contacts and a screw connection.
Screwless device
The most modern development is considered to be a screwless chandelier socket. It has special holes for the wire. Usually there are 2 pairs of them. A special spring mechanism tightly presses the wire that is pulled through them. The paired clamp system allows you to connect lamps from a chandelier with several lighting fixtures in parallel. When using energy-saving lamps, it is quite possible to connect 10 or even more electrical consumers to such a device. Use a flat blade screwdriver to remove the clamp. Next, the wire is inserted into the appropriate connector. After this, the screwdriver releases the brass spring. It will press the wire firmly against the contacts.
A special feature of such clamps is the requirement for the supply wires. It is difficult to insert a multi-core cable into the socket intended for it. Therefore, a solid conductor type of wire is required. Sometimes chandelier manufacturers specifically provide for the presence of stranded wire. This allows you to easily fit them into the clamp. This is the simplest type of cartridge. It will be much easier to change it. Its performance qualities significantly exceed other varieties. Therefore, it is one of the most preferred varieties today.
Having considered what a chandelier socket is, you can independently replace the failed product. Modern types of devices allow you to do this quickly and efficiently.
Mounting methods
If the cartridge fails, it must be replaced. Beginners are interested in how to do this.
The device is secured in the lighting device by the bottom part. The cable entry hole has a thread. The E14 cartridge is manufactured with a threaded entry - M10x1, and E27 - M10x1, M13x1 or M16x1.
There are several options for mounting the device: by a conductive cable, on a tube, using a sleeve or screwless clamps.
For conductive wires
Connecting directly to conductors is prohibited. First you need to securely fix the device in the chandelier. To do this, a nylon or polyamide sleeve is screwed into its bottom, which is equipped with a hole for wiring. Then the cable is secured with a screw. This is necessary to protect the conductor from bending or breaking.
How to connect old-style carbolite cartridges
This is the most common option. The cartridge resembles plastic and consists of a bottom with a hole for the cable, a threaded body and a ceramic liner for connection. To do the job correctly, you need to remember simple tips:
- It turns out which phase was live and which was zero. This is important for the safe use of lamps; you can check it with an indicator screwdriver. The phase is always connected to the central mount , this is due to safety reasons.
Zero goes to the side contact. The main thing is to fix the ends of the cable securely and prevent contact of bare parts. It is important not to confuse the phase and neutral wire when connecting. - If a three-wire wire is used for connection, it is important to place the ground correctly.
Most often, on the body of the chandelier there is a place for its attachment, indicated by the corresponding icon. Since it is located to the side, the length of the grounding conductor must be much longer. If there is no fastening element, the end is attached to any place on the body. Some ceramic sockets also have room for a third wire, which makes the job easier. The yellow-green wire (PE) is ground. - To securely fasten the stranded wire, you need to prepare it. To do this, the insulation is removed from the ends and loops of a suitable size are formed. In order for them to maintain their integrity and not become deformed, they should be treated with a soldering iron and the wires should be fastened together. This will ensure good contact and maintain the connection even if the cartridge is removed several times.
All collapsible options are connected according to this scheme; the design is usually no different.
The video clearly shows how to connect a light bulb socket to a PVA cable.
Errors during installation and operation
At the end, we will briefly summarize and make a selection of common mistakes that you should avoid when connecting and servicing a light bulb socket.
1Connecting the phase conductor to the threaded part of the base.
How it all ends was described in detail above.
2Do not forget to tighten the screws that secure the contact plates to the ceramic liner at the very beginning.
You can solder all the wires super securely, but if these screws are loose, then heating of the connection is still inevitable.
3Connecting multi-core wires without soldering or tinning.
4Connecting phase and zero to two adjacent contacts of the keyless chuck and creating a short circuit.
5 Squeeze-adjust the central plate in the carbolite cartridge when bending it, using a non-insulated tool.
Step-by-step replacement instructions
To replace the cartridge, you will need the following:
- terminal blocks designed for connecting wiring;
- insulating tape;
- screwdriver;
- construction knife with several different blades;
- indicator mini-tester;
- new base for replacement.
The replacement process is carried out in several stages. Below are step-by-step instructions using the example of a model for base E14.
Chuck replacement tools
Turning off the light on the dashboard
This needs to be done first. Since power outages are necessary, replacement should be done during daylight hours. If the breakdown occurs in the evening or at night, you can try to disconnect only the ceiling line. As a rule, wiring has such a distinction. If the input circuit breaker is turned off, the room is completely de-energized. In this case, you will need to either reschedule the repair until the morning, or arrange for illumination with a flashlight. If there is an internal shield, shutdown is performed by pressing one button.
Important! Turning off the power should only be done at the panel, and not at the switch that controls the lamp.
Disconnecting wires
According to electrical installation requirements, the circuit breaker must be installed on the phase line, in front of the chandelier. Then you need to check the voltage at the terminal block of the lamp with an indicator.
Power off
Remove the chandelier from the ceiling
It is possible to replace the structure without removing the chandelier, but such work will be very difficult. Moreover, you only need to disassemble the mounting of the lampshade to the socket. Most often these are terminal blocks or twisted wires. The procedure is as follows:
- It is necessary to remove all fragile components from the chandelier (shades, glass decorative elements, light bulbs).
- Next, disassemble the decorative cap and unscrew the locking screw that closes the wire twist under the ceiling.
- If the lamp is secured with a hook, it is necessary to disconnect the wiring and move it in different directions, after which the structure can be removed.
- If there is a strip under the decorative cap, use a screwdriver to loosen the bolts.
- After removing the chandelier, three strands of electrical wires will become accessible. You need to spread them apart and apply a layer of electrical tape to each.
Removing a chandelier from the ceiling
Note! On suspended and suspended ceilings, lamps are usually secured with disposable fasteners. It is recommended not to remove them when disassembling the lighting fixture.
You might be interested in Types of lighting
Disassembling the lamp
This is necessary to gain access to the cartridge. There are numerous designs and shapes of chandeliers, but each of them is equipped with a shade. It is this that needs to be completely removed to facilitate further work.
Removing the cartridge
To understand how to disassemble a faulty E14 light bulb socket, you need to determine its type and design of fasteners. The most common:
- New model with porcelain body. The cartridge is secured with two screws located at the base. To dismantle it, you just need to unscrew them with a regular screwdriver.
- Old model made of carbolite. Such structures have a lot of varieties - ceiling, wall, with a fastening mechanism, etc. To dismantle the socket, you will need to unscrew the lamp holder, unfasten the wires from the base and then unscrew the bottom or nut.
Removing the cartridge
Advice! After dismantling the cartridge, it is recommended to check the condition of the wiring. If damage or charring is found, it should be replaced.
A lamp lighting fixture for lamps of the E27 or E14 model can be repaired at home. To do this, you need to unscrew the cartridge and restore the damaged elements:
- If the cause of the problem is damage to the wiring, you should dismantle the chandelier, disassemble the socket and replace the wires connecting it to the network.
- Another likely cause of the malfunction may be loosening of the screws holding the conductors. To do this, dismantle the device and disconnect it from the wires. After this, the screws are tightened using a screwdriver.
- The central contact may become covered with soot over time, which also leads to the lamp turning off. To restore the functionality of the chandelier, you will need to clean its surface with a file or a sheet of sandpaper after disassembling.
- If the light bulb is screwed in with excessive force, the contact tongue may stick. To return it to its place, you will need to disassemble the structure and correct the element with a screwdriver.
Checking the structure for damage
Note! In some cases, the lamp cannot be removed from the socket because the base is jammed. When you try to unscrew it, only the glass part is removed. To disassemble these elements, you will need to unscrew the cylindrical part of the cartridge body, holding it from below. If this cannot be done, you can use pliers, hooking the base by the edge and turning it along the thread.
Mounting another cartridge
To replace the cartridge, you need to connect a phase to its central contact, and a zero to the additional one. To recognize the wires, you must first study their color markings.
The process of connecting conductors is the most critical stage when installing a cartridge. If you make any mistake, there is a risk of overheating and damage to the lighting fixture, as well as a short circuit. If the structure was previously supported by wire twists, they should be replaced with terminal blocks. Once the socket is assembled, the ends of the chandelier wires must be pulled up.
You may be interested in The problem of light bulbs burning out, how to fix it
When assembling the device, it is recommended to pay attention to the following factors:
- Ceiling chandeliers often fail due to oxidation, corrosion, or separation of the brass plates attached to the base. In this case, you can try cleaning them with a piece of sandpaper.
- All fasteners must be carefully inspected for displacement and contamination. All faults should be eliminated by tightening and cleaning, and only then install a new device.
Assembly after replacement
To install the chandelier back, you will need outside help. This process includes:
- Connecting the luminaire wires to the electrical network, taking into account the neutral and phase lines.
- Fastening the lampshade and screwing in the light bulb.
- Installation of decorative elements.
After the lamp is returned to its place, you should connect the voltage and make sure that the structure is working.
Security measures
To change the design yourself and avoid an emergency, you must follow safety regulations. They include the following:
- It is forbidden to carry out replacement without first de-energizing the network. If you neglect this rule, the risk of an accident is very high.
- If damage to the wires is discovered during dismantling, be sure to replace them (partially or completely).
- If the new cartridge is equipped with lead wires, you need to pay attention to the material they are made of. It is likely that the device has an aluminum conductor, and the lighting device is connected using copper (or vice versa). To connect such wires, it is advisable to use specially designed terminal blocks. As a last resort, it is permissible to carefully twist it and wrap it securely with electrical tape.
- Before removing the chandelier, you need to sketch or photograph its installation diagram. This will avoid incorrect connections and fasteners (which could cause a short circuit).
- Be careful when working with glass and ceramic elements. To avoid cuts, it is recommended to use gloves.
You can replace or repair the socket in an electric chandelier yourself. This does not require any special skills. It is enough just to follow safety precautions when handling wiring and electrical appliances, as well as perform consistent actions. When assembling the structure after completion of the work, you should responsibly approach the process of connecting conductors. If the work is completed without errors, the electrical appliance will emit light again.
A light bulb socket is an intermediate element used for a convenient and reliable connection between electrical wiring and a lamp. Often various decorative elements of modern chandeliers and lamps are attached to it.
How to replace a cartridge in a chandelier
After you are convinced of the presence of a malfunction, we proceed to active actions. To replace a part, you should study its design. The most common modifications of the cartridge:
- Domestic designs - base, carbolite E-27. The body consists of carbolite, dismountable, internal elements are porcelain. The cartridges are practical to use. In this case, the damaged individual unit is replaced.
- Chinese ceramic modifications, base E-27. Solid. Attached to the surface with several screws. The contacts are connected with rivets. If any component fails, the cartridge must be completely replaced.
- Domestic ceramic modifications, E-27. The collapsible porcelain case consists of two halves. The cartridges are street (with small lugs for fastening), end-mounted and suspended. Replacing/disassembling the product does not require any special skills.
- Plastic cartridges with end mounting type, E-14 base. The individual halves are secured with plastic latches. The power wires are secured with screw or spring clamps. For such products, the plastic thread running in a small depression has virtually no contact with the base. The aluminum base and brass plate oxidize, the space between them increases and contact disappears. Therefore, it is advisable to install a new cartridge.
Replacing the cartridge in lamps and chandeliers is not difficult. The most important thing is to show patience and attention, since almost all the parts are small.
Change or repair
If one or more light bulbs in a lamp do not light after replacement, this is most often caused by a faulty socket. The cause of the problem may be oxidation of the junction of the contacts with the light bulb base. You can check this without disassembling the entire lamp:
- De-energize the network by turning off the packager.
- Unscrew the light bulb.
- Using a flashlight, shine it into the cartridge.
- Inspect the ends of the terminals for the presence of carbon deposits, rust, and oxidation products.
- Clean the ends of the contacts with a fine file or screwdriver.
- The metal terminals may be loose and bent against the walls, so tighten them all the way and bend them back with a screwdriver.
All these procedures can be performed without removing the lampshade and dismantling its parts. If, during a visual inspection, it turns out that the contacts have fallen off, the wires have burned out, the holder body is cracked, partially broken off, or after all the above steps a working light bulb does not light up, you will need to completely replace the old socket in the lamp with a new one.
Connecting wires in a ceramic socket
The ceramic device is not a dismountable product, just like its contacts.
This is where the main disadvantages arise. These contacts are rolled and eventually weaken over time. As a result, heating occurs, followed by burnout or too frequent failure of the light bulbs themselves.
Such cartridges also have the sin of twisting the skirt itself along with the light bulb. After such a defect, it is better to replace it entirely.
Of course, you can initially solder the contacts in the folding areas or crimp the unscrewed skirt again, but the vast majority do not bother with this and simply buy a new one.
The main advantage of the ceramic cartridge is its simplified connection system. Everything happens much faster here.
Firstly, there is no need to disassemble the device itself into three parts. Secondly, completely unscrew the screws.
It is enough to loosen them slightly and insert the stripped wire core into the contact space.
Then tighten the screw with maximum force.
The basic elements of any table lamp.
First, let's look at what elements the lamp includes.
- The support element (the “leg” of the lamp) provides support for the light source.
- Electromechanical elements - cartridge, wires and their fasteners.
- Lighting part – reflector, lampshade, light source.
The electrical part is usually hidden, so decoration issues do not apply to it. But the other two parts are quite amenable to flights of fancy and can be made from a variety of materials.
But electrical elements are key in terms of safety. Remember that working with electricity requires a certain set of knowledge (at least minimal) and experience. Otherwise, you should not experiment with devices that are hazardous to health.
Connecting the lamp
Diagram of a simple table lamp
So, the electrical circuit of the lamp is simple. To assemble it you will need: a cartridge, a cable, a plug and a switch. If you want a lamp with adjustable power, then a dimmer is included in the circuit.
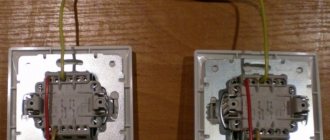
The most common cartridge is threaded E27. It is simple, reliable, and easy to buy. "Minion" E14 is also a good option. The main thing is to connect the cartridge to the wire correctly . The phase wire must come to the central contact of the light bulb base. With such a connection, the likelihood of a person being exposed to current is minimal.
The phase wire comes to the central contact of the base, the zero is in contact with the screw thread. You can secure the wires in the socket with a soldering iron (non-separable method), screws, terminals or clamps. Screw connection.
Terminal connection.
Connection with clamps.
The screws are tightened sufficiently to ensure a secure connection. In the event of a breakdown, such a cartridge can be disassembled and repaired. Terminals speed up and simplify the process. It is enough to insert the wire into the clamps with a little force: the internal springs will fix it and create reliable contact. The fastening of the wire in the socket must be reliable.
The wires for a homemade lamp must also be electrically safe. The simplest option is a round cable with a core cross-section of at least 0.35 m2 and double-layer insulation. (A good option is SHVVP 3×0.5, approximate price is 15 rubles per sq.m.). Places of connections, twists, and areas with the possibility of dampness are additionally wrapped with electrical tape. Mount the cable so that it is not strained in any position of the luminaire.
The Europlug is connected to the cable as follows:
Connecting the Euro plug
When connecting the switch , remember that the phase wire is broken.
Single-key switch connection diagram
How to connect a light bulb socket
Connecting a lighting socket to the electrical wiring of a house is carried out using one of two methods - detachable or permanent. In the first case (the method is called “screw”) fastening is carried out using a threaded screw or a special terminal.
Permanent fastening is associated with homemade soldering or press-fitting at the product manufacturer. The last procedure is relevant for elements of the G4-G10 series. Two insulated cables are pre-lead from them, the length of which does not exceed 100 mm. The elements are attached to the electrical wiring using a terminal block.
Ordinary electric
First you need to understand the assembly procedure of a conventional electric cartridge. A ceramic liner is made, onto which a brass plate is pressed, used as the main contact. On the other side of the liner there is a steel plate; a screw is screwed to it, ensuring reliable fastening of the plate to the liner. The same screw also performs another function - current flows through it to the main contact.
When tightening the screw, use a lot of force, which is due to its participation in the transmission of electric current from the cable to the light bulb. The same sequence of actions is used to attach the second brass plate, after which the main contact is bent so that it is level with the side ones.
Next, form rings on the conductors, thread them through the bottom and secure them to the steel plates. If the cartridge is used in an electrical circuit with a stationary switch, the wire transmitting the phase should be connected to the central contact. To check the reliability of contact, you need to install the light bulb in the base and make sure that when it rests on the side contacts, the main one bends by at least 2 mm. In case of less deflection, the main contact bends upward.
A cylindrical body is attached to this structure, then the cartridge can be used. Select light bulbs by matching the markings on both products.
Cartridge with terminals
When connecting electrical wiring to modern sockets, screw clamps on terminal blocks are used. The approach significantly speeds up the process of connecting and installing an electrical device.
The body is made of plastic, monolithic. Using a special rivet, the wires that supply the base are attached to the body.
Note! The main disadvantage of a product with terminals is the impossibility of repair, so if it fails, you need to completely replace the cartridge with a new one. Among the standard sizes, the most popular are the E14 and E27 model series, which are also used in conventional electrical products.
Screwless electric
The most modern design involves the presence of special holes on the cartridge body - usually four (grouped in pairs). Wires are pulled through the holes, fixed with brass contacts using a spring mechanism. Pairwise connection of contacts simplifies the parallel connection of light bulbs in chandeliers or lamps. Electric current is supplied to the first cartridge, and subsequent ones are connected to it using jumpers.
Important! In this way, you can connect many housekeepers that consume a minimum of electricity.
The products are characterized by simple and quick connection - strip the end of the wire and insert it into the correct hole on the socket body with a clamp fastening.
Many chandeliers and lighting fixtures use thin stranded wires. It is unrealistic to ensure their reliable fastening in the body of a screwless cartridge. Choose chandeliers with serviced wire ends or solder an alloy onto the multi-core cable yourself so that the wire becomes single-core. Tinned ends are easier to insert into the contact of a screwless product.
If you don't know how to use a soldering iron, there is another way. Before inserting the stripped end of the cable into the hole, place a metal rod there that is larger in diameter than the wire itself. A nail and a screwdriver will do. Pull back the spring contact and insert the stranded wire into the hole without any problems. Remove the nail (rod) so that the contact clamps the wire strands. The same method is used for dismantling. Pull the cable lightly to check the connection is secure.
Advantages and disadvantages
Advantages of this cartridge:
- ease of disassembly and assembly
- time-tested reliability
- contact pads are fixed with screws
Firstly, if necessary (burnout, melting), they can be replaced. Or simply tighten it when the contacts loosen and the connection heats up.
By the way, these screws need to be tightened initially, even before directly connecting the wires. This will extend the life of the socket and light bulb significantly.
In 90% of cases, the light bulb stops shining because the central contact heats up and its plate-shaped area begins to bend, gradually moving away from the lamp base.
Flaws:
- inconvenient connection to screw terminals
To ensure good contact, you will have to unscrew them entirely from their seat.
Moreover, if you have a non-Wera screwdriver with a bunch of additional “chips,” then this screw often falls out and rolls into the most inappropriate places.
Although experienced electricians do without completely unscrewing the screws and bending the neat rings on the copper conductors. The entire connection is made much easier.
The veins are stripped a little more than usual (2-3 centimeters), and the screws are only loosened. Next, place the vein under the washer with the screw and make a turn strictly in the direction of tightening the thread.
This is necessary so that when tightening the screw, the ring does not unbend, but rather tightens even better.
After this, bite off all the excess protruding behind the bolt with side cutters. You should end up with some kind of half ring.
All that remains is to squeeze it with platypuses to a full ring.
It is not yet possible to tighten such a connection. It should “play” in its seat.
Take the second wire and do the same procedure with it. Only then can the screws be tightened as far as possible. As a result of such a connection, there is no need to unscrew anything, make some rings in advance, guessing the diameter of the bolts.
All this is adjusted directly on the cartridge itself. Saving time and labor costs is obvious.
The only disadvantage of this method is that the wire consumption will be a couple of centimeters more than usual.
Repair of electric cartridges
Electric cartridges of the E series can be successfully repaired, since it is possible to disassemble them. In the G series cartridges, the parts are connected using rivets and in case of breakage they have to be replaced with new ones.
Repair of electric socket with screwless terminals
When renovating an apartment, a neighbor had to remove a chandelier from the ceiling. When she unscrewed the union nuts from electric sockets with screwless contact clamps to remove the lampshades, all the cylindrical parts of the sockets became detached from the bottoms and hung on the wires. The chandelier only lasted six years with incandescent bulbs. It became apparent that the heat had caused the plastic to become brittle and the latches had broken off. I decided to repair the electric cartridges.
First, I sawed off the remains of the latches to the level of the pads in the cylindrical base of the electric cartridge. In the photo on the left there is a broken latch, and on the right it is adjusted to the required size.
The new latches were made from 0.5mm thick sheet brass. A cut strip of brass equal to the width of the broken latch was bent to the shape shown in the photograph. The latch can be made from any sheet metal, such as iron or aluminum.
The curved side of the strip was inserted into the bottom of the cartridge from the side of the rounded part. The straight section of the strip was then folded around the remaining holder of the broken latch, as shown in the photograph.
After installing the homemade latches, the bottom of the socket was screwed onto the decorative tube in the chandelier.
After connecting the electric leads to the cylindrical part of the cartridge, it was secured to the bottom using new latches. The self-made latches performed the task perfectly, firmly holding the cylindrical part of the cartridge. Now the latch will never break off.
Connecting the electric cartridge
Connection contacts The screw also acts as a current conductor. For this reason, it should be screwed securely to ensure good contact. The second brass plate is installed in a similar manner.
Rings need to be formed on the conductors. They are threaded through the bottom and attached to steel plates. When connecting the cartridge through a standard switch, the phase is connected to the central contact. The neutral wire is connected to the side contact
It is important to follow the markings when connecting wires
Connecting a cartridge with terminals
Terminal cartridge There is a new type of cartridge. In them, the wires are pressed using terminal blocks. This installation method allows you to speed up the installation of light bulbs in chandeliers.
The body is made of plastic and is monolithic. The contacts are fastened on the inside with rivets. The disadvantage of such cartridges is the impossibility of repair if they break.
Chucks are available with terminals with E14 and E27 sockets.
Connecting a screwless electric chuck
Devices with screwless connections are easy to install. Inside there are brass springs that are used to pinch and secure the conductors. The housing has holes, usually two pairs.