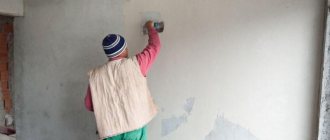
Anyone who has at least once encountered an apartment renovation knows that painting the ceiling is a particularly difficult stage. It is incredibly difficult to paint it properly the first time - usually either bald spots remain, or stains, or drips. All these imperfections are especially visible after the paint has already dried. Many people decide to apply a second coat, but this always only makes the situation worse: no matter how many times you paint the ceiling, bald spots will still remain.
It is noteworthy that this problem occurs not only among beginners, but also among more experienced builders, and it can be very difficult to deal with it. On the Internet on various forums, users very often ask the question, how can we finally get rid of this scourge? Let's look at this further.
How to get rid of bald spots, stains and streaks on the ceiling
Creative wall painting
Using the same principle, you can create a unique pattern.
You just need to use your imagination, and you can turn ordinary stripes on the walls into a herringbone, diagonal stripes, checkered pattern, or whatever your heart desires. For example, if you prefer thin stripes, then cover the wall with a base color. Then apply masking tape and apply a layer of the second color. After removing the tape, you will have a wall painted with pinstripes.
You can stick the tape in the form of squares or diamonds. How you glue the tape will be the pattern you get. Here everything depends only on your imagination.
So, this completes our painting work.
If this is your first time painting striped walls, it won't hurt to practice on a piece of plywood first. This will give you the opportunity to evaluate the quality of the paint and the result of the color combination. Next, you can safely start painting the walls.
Tags: DIY
Category: Home renovation
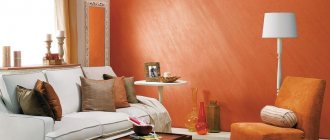
Decorative stripes are a very popular room decoration technique.
It sets a certain rhythm, adds dynamics and makes the interior more alive
Stripes in the interior are a game of contrasts that attract attention. You can implement such an idea as striped walls yourself.
1Required materials and tools
If you decide to make your walls striped, you will need:
- Paints of selected colors Roller for painting walls and ceilings 12 cm Masking tape 5 cm
In addition: level, masking film, paint tray
2Sequence of actions
Scheme of the drawing on a scale of 1:10, which you can do with your own hands. Step 1 On the wall in the color of double stripes, use a ruler and a pencil to mark a horizontal line on which we measure the width of the stripes we need - three times 5 and once 10 cm. Step 2 K previously marked Apply a level vertically to the points on the wall and carefully draw lines corresponding to the edges of the strips. Step 3 Carefully seal the places that should remain in the color of the wall with masking tape 5 cm wide (equal to the width of the strips). Step 4 Paint the narrow strips between the glued tape with a roller. When the paint has dried, cover the wider stripes with the next color (in our case, white). Step 5 After a few hours, repeat the painting
When the paint is dry, carefully tear off the masking tape, revealing the straight edges of the stripes
Stripes add variety to the interior design of a room and adjust some of its proportions. Let's imagine two more patterns of patterns of vertical and horizontal stripes, designed in shades of cream, beige and brown.
3Effects obtained using decorative stripes
- Stripes that are correctly selected to the size and proportions of the interior space create a regular rhythm and graphically organize the space. A vertical pattern on the wall visually “stretches” the room in height, therefore, it is great for rooms with low ceilings. Painting walls with horizontal stripes is an easy way to improve the visual proportions of an overly narrow room. It will be perceived wider, but the ceiling will visually appear lower. Small strips are more suitable for small rooms; walls with a large surface are better divided into wide segments. A frequent, pulsating pattern drawn over a large area can cause nystagmus in a person, so it is better limit yourself to applying it to one wall or its fragment.
Such “touches” on the walls, like stripes, can be used in almost any interior.
At the same time, the colors of the stripes can be either from the same color range or contrasting. When creating your interior, do not be afraid to experiment. Sometimes the most daring design solutions look especially elegant and beautiful!
print advice download pdf files
Want to receive more useful tips?
- Choose the color and width of the strip. Paint the walls yourself. Make the markings yourself.
First of all, you need to determine what surface the stripes will be applied to.
For example, this will be a wall painted with water-based paint or enamel. The surface on which the strips are applied must be prepared: it must be cleaned of dirt and dust, the wallpaper must be well taped, the walls must be evenly plastered, primed and thoroughly dried.
Painting walls with stripes #8211 is a very painstaking work, where it is very important to properly prepare the surface before painting, the final appearance of the composition depends on this
An example of applying stripes for painting walls.
Bad paint
“Bad” materials include not only the cheapest ones, but also those with expired shelf life. Yes, paints have a shelf life, albeit a long one. But it decreases after opening and can be up to a year. If the expiration date has expired, the paint may either not harden or, as in our case, streaks may appear.
Important! After the expiration date, many paints emit toxic fumes.
Solution: do not use old materials and carefully inspect the jars before purchasing them for opening.
How to make an Ombre effect on a wall?
Way to make the Ombre effect No. 1
- Choose a dark paint color.
- Paint the bottom half of your wall.
- While the wall is still damp, use a water spray to wet the top of the wall.
- Use a large sponge to brush the paint up the wall.
- Scoop paint as needed from the middle and bottom of the wall, using a sponge to blend the color.
Way to make the Ombre effect No. 2
- Choose three shades from the general palette. One dark, one medium and one light.
- Cover the entire wall with a light color, and then paint the bottom quarter of the wall dark.
- Paint two more stripes of the color above - one stripe of medium tone and one stripe of a lighter mixture of medium + light paint.
- While your wall is still wet, take a dry brush and blend the edges between the colors until they look like a piece of art.
Examples of painting walls in Ombre style:
If the monochromatic coloring of the walls makes you sad and makes you openly yawn, and various Venetian plasters seem like hello from the last century, then gradient painting of the walls will be the solution to all these problems. The ombre style is created for those who need brightness and unusualness.
A gradient (aka ombre) is a smooth transition of one color to another, from dark to light, and vice versa. The peak of popularity of the gradient was the 70s of the last century. The toga was used everywhere, be it furniture, clothing, home textiles. Nowadays, ombre is gaining its former glory at the speed of light, and painting walls using this technique has become a trend in room decoration. And such demand is completely justified. Ombre can liven up any interior without much effort.
When painting walls with a gradient, dark colors are often placed at the bottom, and light colors are pulled up. Due to this solution, it seems that the floor is more stable and monumental, and the ceiling turns out to be much higher, more spacious and airier than it actually is. WITH ceilings over 3.5 meters high, you can safely experiment in any direction of interest. If you are mentally prepared for such bright and spectacular changes in your interior, then you can safely start painting.
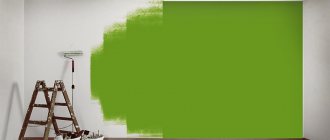
How to paint a ceiling without streaks?
1. Create optimal lighting. It is better to paint in daylight. All “unpainted” areas should be clearly visible.
2. To successfully paint the ceiling without streaks, it is necessary that the room has normal or high humidity. Take care of this. Experience shows that successfully painting a ceiling in summer is much easier than in winter when humidity levels are low. The drier the air, the faster the paint dries, which makes it impossible to roll it out efficiently over the entire surface.
3. It is necessary to prepare well. Remove everything from the floor so as not to maneuver between the rubble. After all, it takes time, and you have to work quickly. For the same reason, craftsmen prefer to paint the ceiling with a roller with an extension rather than using a stepladder.
How to paint a ceiling without streaks? Work quickly and energetically!
4. The paint must be diluted with clean water to a very liquid consistency.
5. Don’t squeeze the roller too hard. The ribbed surface in the ditch is not for squeezing, but for even distribution of paint over the coat. The roller should always be saturated, so dip it in paint often.
6. Do not forcefully press the roller when starting to paint the ceiling. The roller should be rolled over the surface, and not rubbed or pressed.
7. Paint is applied not in stripes, but in squares, especially if the room is large. Work in W-shaped (zigzag) movements, evenly distributing the paint over the sector. You should not dwell on one square for a long time. We made a few movements, made sure that the entire surface of the area was processed, and moved on to the next square. Roll out the border of the squares while they are wet. Therefore, the work must be dynamic and continuous!
We start with a zigzag, then distribute the paint over the square using diagonal movements.
We start the second square with a zigzag and immediately roll up the border between the squares with the same diagonal movements. Fill in the second square, move on to the next, etc.
8. Immediately after applying the first layer, you should carefully inspect the ceiling in bright light. If there are unpainted areas, you need to quickly roll them while the surface is wet. After drying, you need to inspect the result again. If the paint doesn't adhere well, you can try applying a second coat. But if there are problems after the second one, you will have to start the work all over again, that is, sand and prime several times.
How to paint walls with stripes of three colors?
If you are planning stripes of several colors, and they are adjacent to each other, you can do this: simply stick the tape on the base color, then paint each strip a different color, and then remove the tape. You will get stripes of different colors with dividing stripes of a base color, having a width equal to the width of the tape.
The wall is painted with multi-colored stripes with dividing light stripes
You can work using a different algorithm so that there are no dividing stripes:
Painted with stripes without dividing stripes
The lightest tone is chosen for the base layer, and the darkest of the three colors is chosen as the third color, applied last.
On a note
- With gloss and semi-gloss paints the result is more unpredictable. With them, more often than with matte paint, obvious stains remain.
- On a snow-white ceiling, any nuances are much more noticeable than on a cream or beige one. If you doubt your capabilities, lightly tint the paint.
- Know that the larger the surface, the higher the likelihood of getting a questionable result. Therefore, do not be surprised if in a small bedroom the ceiling turns out like in the picture, but in a large living room you cannot look at it without tears.
- Paint quality matters! You can save money on wall paint, but you need to buy the best for the ceiling! After all, he is much more picky.
- Don't strive for absolute perfection. Painted surfaces are almost never flawless. The main thing is that in bright light, stripes, stains, smudges and stains are not noticeable.
Painting walls with a roller with a pattern
To decorate a wall with an individual repeating pattern, you will need a special roller. It can be purchased at a hardware store or made by hand using a clipper (artistic skill required). Simply dip the tool in the paint coating and run it along the wall. Make sure that the layer is sufficient, otherwise the pattern will gradually fade.
Decorating a wall with images using a double rollerSource dekordelisi.com
Rollers with such attachments are sold separately.
Different attachments for the roller with a patternSource oshtukaturke.ru
Selecting one wall with “honeycombs”
Honeycomb painting will help highlight the interior and make it unique. It can be done using a pre-drawn template. Many people first prepare the surface: create a pattern using adhesive tape, and then start painting. It is better to make such patterns multi-colored, alternating light with dark tones. Amber from top to bottom is allowed.
Painting walls with a picture of honeycombSource etsy.com
Complex geometry
Geometric shapes with many shapes are best used for one wall. Since very often mistakes are made during the continuation of patterns on partitions: the seams are deformed, the size is distorted. To organize a colorful ornament, you need to paint one by one. Draw figures and wait for them to dry. Next, apply the next part of the composition.
Geometric multi-colored pattern on the entire wallSource pinterest.ru
Paint drips
To imitate long drops, you will need a thick syringe and paint that matches the color of the interior. Start your composition from the ceiling. Fill the syringe with paint and release it onto the wall using gentle pressure. There is no need to adhere to symmetry here. You can dilute a certain amount of smudges with a color of the opposite shade.
Imitation of paint drips in a modern interiorSource obzor-review.blogspot.com
Circles in the interior
A dark background and bright multi-colored circles will add grace and contrast to the room. Usually this design is carried out in the sofa area
This makes it possible to concentrate attention on the recreation area. The design turns out interesting if the circles are designed in the form of connected rings
Circles on a gray wall backgroundSource prueba.negociostec.org
Immerse yourself in a nautical theme
Decorating a bathroom requires attention. It is not enough to simply paint the walls in a room. They can be diversified with marine life and algae. If it is not possible to make the drawing yourself, use cardboard templates. It is advisable to create sketches in the sink or bathroom area. It is also acceptable on the side wall near the toilet.
A marine theme is a good idea for painting bathroom walls. Source bringly.ru
Painting in different colors
Walls are often painted in several colors. Usually two close shades are used, but abstract motifs are also used. Broken lines along the wall create the illusion of volume.
Painting walls in different colorsSource gr-lepnina.ru
Rainbow bright shades are also welcome. They are usually used to decorate halls and living rooms.
Painting walls that matches the interior style of the room Source sovetproraba.com
Various decorative painting effects
The effect of marble, bark beetle and other design options look good in corridors, large bedrooms and living rooms. Brown or gray shades are often used for such rooms.
Variations of textured surface paintingSource ro.decoratex.bizA decorative paint coating can be applied over the finished pattern created by templates. Such effects look great in rooms with high ceilings.
Plain painting of a textured wallSource lumetri.ru
Causes of defects and their elimination
Local painting of the ceiling or eliminating defects on the entire surface will correct many problems that arose as a result of mistakes. Remember, any traces of too thick paint are simply smoothed out with pumice or sandpaper and repainted again. Similarly, they get rid of wrinkles that appeared as a result of applying a thick layer of paint. The ceiling is cleaned, puttied and painted.
Paint stains
If after painting the ceiling there are streaks or streaks left, the reason is as follows:
- The roller is not selected correctly.
- Low quality paint was used.
- Incorrect technique was used when using the roller.
- Also, stains appear due to differences in tones of the surface being painted. This happens if the corners were painted with a brush, and the main plane with a roller. As a result, the coating will be darker in the corners. The same applies to the combination of working with a spray gun and a roller or brush.
- Sometimes stains appear if pigment has been added to non-tinted paint or its dosage has been incorrectly selected in the case of tinted paint.
Important! Stains and stains often appear due to uneven absorption of the coloring composition by the surface.
To avoid this problem, be sure to prime the surface before painting. Pay special attention to the corners and joints of the planes. Use high-quality coloring compounds with a high content of pigments. Alkyd paints help protect against this defect.
Design options
Plain walls are chosen for discreet interiors; such walls serve as a neutral canvas for expressing style in pieces of furniture and accessories.
Painting in two different colors
Painting walls in two different colors serves as a rational technique to visually enlarge a room, change the perception of the geometry of asymmetrical walls, or simply focus on one wall. One wall can be painted with two different colors.
Painting in different colors (more than two)
Painting with several colors in the same range or a combination of contrasting colors will become an independent decoration in the interior. This could be stripes, vertical or horizontal separation of walls, or painting all 4 walls in different colors. Within one room, it is better to make one color the main one, and leave the remaining 2-3 colors as auxiliary ones.
In the photo, one of the walls is painted in three colors with uneven stripes using a geometric technique using masking tape.
Stencils
You can make your own designs using stencils and templates by cutting them out of paper and attaching them to the wall. You can also draw boundaries for the design using masking tape glued to the dried base color.
Striped design
Stripes of paint stretch or expand walls and change the perception of a room depending on the location, color and frequency of the stripes.
Patterns and ornaments
Suitable for a child’s room, you can draw a house, a fence, trees, ethno ornaments, monograms on the walls of the child’s bedroom interior.
They can be organized or chaotic, created with a brush on wet walls.
Cracks or craquelure effect
They are created using acrylic painting and craquelure varnish; the more varnish, the deeper the cracks. When applying, the roller must be held vertically so that the cracks are uniform.
In the photo, the accent wall of the bedroom is made using the technique of cracked paint with a backing that matches the tone of the walls.
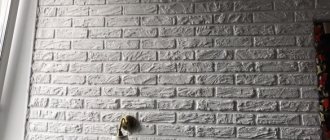
Under the brick
An imitation of brick can be made using plaster on a lined wall and traced seams along the wet material. After the plaster has dried, apply 2 layers of paint.
Painting with squares
Can be done using templates or masking tape. Squares can be plain or colored, of different sizes and positions on the wall.
Texture design
It is created by painting walls with textured paint, which contains acrylic particles and starch. It comes in dry and liquid states, and can also be tinted. Apply with a regular or textured roller. For interior design, special textured paint for interior work is suitable.
Gradient and ombre
Suitable for visually enlarging the ceiling if the dark color near the floor fades into white. A gradient or smooth transition of color can be horizontal or vertical, with a transition to the adjacent wall. It is created with 2 or more colors, where at the junction of the colors, using a dry roller or brush, the dark color is stretched onto the light area in one direction.
The photo shows a partition wall painted using the ombre technique with a smooth, smoky transition of gray to white closer to the ceiling.
Using a textured roller or sponge
Effects using a textured roller or sponge are made on a uniformly painted wall, creating the effect of watercolor, bark beetle, waves, cracks, velor or mosaic.
painting
Artistic painting using ethnic techniques, depicting a view of nature, animals and reproductions will become an individual feature of the interior with wall painting.
Design with moldings or panels
Creates the effect of niches or furniture facades, adding volume. Molding can be colored or white, made of wood, duropolymer, or gypsum.
No ground surface
The base surface (or rather its absence) also very often interferes with the process. The liquid part of the paint is absorbed by the surface, while the thick part will cause streaks.
Or it happens that the surface itself is not primed, which also causes this problem.
Solution: Use a primer surface and level the walls well before applying it.
Width and color of stripes in the interior
Thin stripes are good because if they are not very contrasting, then from a distance they practically merge, becoming monotonous. But as you get closer, the stripe becomes obvious. Non-contrast thin stripes do not ripple or strain, but at the same time cope with their task of visually increasing the height or width of the walls.
If thin stripes have contrasting colors, severe effects arise for a person: simply put, it dazzles the eyes. You may even experience dizziness and nausea, not to mention permanent fatigue.
Does it ripple? Ripples. But some people like it!
Therefore, if you prefer wallpaper with small stripes or paint walls with narrow stripes, choose non-contrasting colors. And vice versa: when choosing contrasting shades, make the stripes wider.
Consider this when choosing striped wallpaper for your interior or when planning painting. A narrow strip is suitable for a child’s room for a lethargic, passive child prone to melancholy - such walls will activate and tone him up. Colors can be bright, but not too contrasting. The following striped combinations are suitable for children: yellow and green, yellow and blue, orange and blue, lilac and green, purple and khaki, purple and yellow. These colors in stripes can be diluted with stripes of beige, chocolate, white and other neutral shades.
Narrow bright stripes on the walls are suitable for the living room, where they like to throw parties, and for any other room where the energy of movement and dynamics is needed. But for the bedroom and living room, which serve more for relaxation than for entertainment, it is better to give preference to decoration with a wide strip of delicate colors.
Please also note that against the background of the energetic stripe, other interior objects will be lost. If, for example, you have a luxurious antique table, do not put it against a bright striped wall - the table will not be as impressive against its background.
As for the location of the strips, there is one important rule: if the height of the wall is greater than its length, a vertical strip should never be used. Otherwise, the room may turn into a “well”
And, of course, we remember the axiom: vertical stripes make the room taller, horizontal stripes make the room wider, but lower.
Horizontal striped wallpaper and a huge mirror made the bedroom visually very spacious, but a little low
How to solve the problem yourself?
If the cement-based finishing mortar has separated from the aerated concrete, then the only correct solution will be to completely clean the surface and apply new plaster.
Important! Experts recommend first plastering the walls from the inside, and only then proceeding with installation work on the facade.
Plaster also comes off due to constant changes in the level of humidity in the room. To eliminate cracks, it is necessary to change the moisture level to the optimal level using a special device.
A crack due to poor-quality composition of the mortar requires special attention, since to eliminate it it is necessary to clean off the entire layer of plaster.
If the mixture is applied in hot weather, the walls should be protected from drying out quickly. To do this, wipe them with a damp cloth from time to time.
The crack can be repaired only with the same solution that was used to plaster the walls. The air temperature should not fall below +6 degrees Celsius, and the air humidity should remain at 80%.
Source
Step-by-step process for creating a horizontal transition
Horizontal ombre is the most popular, great-looking room design. It is possible to paint a wall with such a smooth transition from one tone to another using a brush or roller.
But when using them, you will also have to solve the issue of polishing the shade transition, and this will take a lot of time and labor. In the absence of good construction skills, the result will not be as neat as we would like.
The best quality results can be achieved by using a spray gun. It has a function for adjusting the intensity of the supply of coloring compounds, which allows you to create a natural “halo” of a lighter tone on the treated area. It can be used as a border between different colored areas. That is, this tool is functional and easy to use, so we will consider the process of painting walls with graduation using it.
The ombre technique using it includes the following steps:
- First, the paint (according to the type) of the main color is diluted with a viscometer to the desired consistency.
- Next, paint of the same brand is diluted in the same way, only white.
- In the next step, colored and white paints are mixed together until they are homogeneous and as light as possible.
- Then the resulting composition is poured into a spray gun, after which the entire area is painted. This will be the base color. After completion of work, the tool should be washed thoroughly.
- At the next stage, unlightened paint is poured into a clean spray gun, after which you will need to apply a dark stripe at the bottom of the wall. The painted area should not exceed one-fourth of the entire wall height. When the upper part of the strip is created, in order to smooth out the boundaries for a soft transition of tones, you will need to move the spray nozzle away from the plane to the required distance. Also at this stage, a smaller supply of coloring composition can be achieved by reducing the passage on the locking needle.
- Then the spray gun is washed again and refilled with lighter paint. To avoid damaging the wall at this stage, you first need to work on the cardboard with the sprayer. The purpose of this is to achieve this by adjusting the paint supply or changing the distance of the sprayer relative to the plane of a lighter color than it is at the upper border of the first dark stripe applied. After selecting the desired tone from the cardboard, you can move on to painting the walls directly. In this case, you need to apply a lighter stripe over a darker layer up to half its height. The upper edge of the second stripe is also made lighter, as is the “halo” of the first.
- The next, final stripe should be applied in the same way. In this case, the paint should be slightly darker than the base color in which the wall was originally painted. At its upper boundary, you will also need to create a “fog” by adjusting the distance of the nozzle from its surface. It should smoothly transition to the base color towards the ceiling.
Using the same principle, color transitions are created horizontally and diagonally. Of course, painting with this technique may not work the first time. To perform correctly, you need to get good at it. That is why it is advisable to first repeat all the steps described above on a large piece of cardboard that imitates a wall plane.
Painting walls using the ombre technique is a new trend in interior design. It looks, without a doubt, very impressive. But the best part is that you can create gradient wall painting yourself! We offer you step-by-step instructions.
Ombre, or gradient, is a smooth flow of different shades of the same color from light to dark and vice versa. Ombre dyeing was popular in the 1970s. Then you can often come across a lamp, bedspread or pillowcase made using the gradient technique. In 2014, ombre fashion returned. Now this technique is increasingly being used on walls. If you can't find it, buy paint and create a gradient effect yourself.
So, to paint the walls with your own hands using the ombre technique, you will need:
- 3 buckets of paint in different tones (for example, if you want a pink ombre, use fuchsia, strawberries and cream, and marshmallow paint)
- Roller and spacious bath for it
- 2 brushes (with hard bristles and softer ones)
- Self-adhesive paper tape
Ready? Let's get inspired and start painting!
Stains and stains on the ceiling after painting: how to fix?
So, we figured out the reasons. In the future, this will help us not repeat mistakes. But what to do now, when the ceiling is already painted, and there are terrible stripes, stains, and smudges on it? How to bring it to mind?
The only sure way is to sand (sand) the entire ceiling until the surface becomes uniform and rough. Don’t worry, there won’t be a lot of dust and dirt, because only a layer of paint is removed. The skin should be relatively fine. You need to work quite carefully so as not to touch the putty layer.
Then you need to wipe the ceiling with a damp cloth and inspect the surface in bright daylight. If the ceiling has become smooth and uniform, you can start priming. If the surface does not inspire confidence, you should use finishing putty, applying it in a thin layer. After drying, light sanding again.
The next stage is priming. It is important to buy a quality primer for painting. It is better to prime several times - at least twice. Each time you need to let the surface dry completely.
When the ceiling looks perfectly even and smooth, like a mirror, you can begin painting.
Remember: if the base has streaks, spots and unevenness, all this will be noticeable even after painting! Therefore, before you take up the roller and paint, make sure that the ceiling is in perfect order. If in doubt, prime again.
How to deal with stains from old leaks on the ceiling? These areas require special treatment. First you need to thoroughly clean and wash them, wait until dry. Then treat with a biocidal solution (for example, Fongimur). Do not wash off the product! After this, use a universal blocking primer. It blocks stains from appearing through putty and paint.
Gradient wall painting
Purpose and features
Coloring with a transition creates depth and dynamics.
A gradient is a smooth transition from one color to another, in which a clear boundary between these shades is not visible. The style that uses coloring with a transition is called ombre.
At the same time, transitions can be observed not only in the design of walls, they are also used in furniture decoration, in the colors of curtains and curtains, bed linen, in other decorative elements or shaped parts of room decoration. This technique is used to give the interior dynamics, a certain element of movement, as well as for the visual effects of increasing space and creating depth and color relief.
Ombre involves the presence of transitions in various decorative details.
If we look at the natural environment around us, we will immediately notice that clear lines and geometricity are alien to it, as are identical repeating forms. Also, we will not be able to find right angles, squares, permanent borders and strict colors. Everything seems to flow from one state to another, the transitions are barely noticeable, the boundaries are blurred and changeable.
The photo shows that gradient transitions are familiar and natural.
This picture is familiar to us; we ourselves are not constancy and can change over time. However, the objects we create contrast with this picture: our rooms, pieces of furniture, houses, roads, cities - all have regular shapes and right angles. To somehow smooth out this contrast, a gradient painting technique is used in interior design.
Transitions can be quite abrupt.
The direction of the gradient can be horizontal, vertical, diagonal, diverging or mixed.
By placing dark and light areas in different zones, you can achieve the following effects:
- By darkening the bottom of the wall and lightening the top, the effect of vertically enlarging the room is created, the ceilings seem higher, and the floor seems more reliable and powerful;
- By darkening the upper part, the impression of a receding perspective is created, and the room visually expands. The boundaries between the floor and walls are a little blurred, especially if the color of the flooring is light;
- By darkening the corners and lightening the middle of the wall, the room loses its rectangularity a little, becomes rounded, and it may seem somewhat narrower. The interior becomes more contrasting and prominent;
- By lightening the corners and window areas while darkening the middle sections of the walls, the room expands and becomes lighter. The contrast drops and the lighting becomes more positive and brighter;
- Diagonal and wavy transitions introduce more dynamics, the room becomes less strict and geometric, straight lines and angles are visually smoothed;
- Spot painting with a transition in diverging directions is used in cases where it is necessary to repair a small area of the finish and make the boundaries of this area invisible. This method also allows you to “break” the rectangular geometry of the walls and adds depth to them.
Lightening the top of the wall with a vertical gradient makes the room appear taller.
Ways to make transitions
The light bottom makes the room wider, while the height of the ceilings seems a little smaller.
You can make a transition from one shade to another in different ways, so before you paint with a transition, you should choose the method that suits you. This can be spray painting with a transition, using a spray gun, using a roller or brush followed by polishing the edges, using the trimming technique with a sponge or brush, creating sharp edges and other techniques.
Making a border invisible using a brush is quite difficult.
The most effective way to paint with a transition with smooth “flowing” boundaries is to use a professional spray gun or airbrush. This tool allows you to regulate the intensity of paint supply during the finishing process; moreover, the specificity of applying the coating is such that the stain has a natural halo of a lighter shade, which can be used as a border between different colored zones.
The spray gun creates a natural border with a smooth change in color intensity.
When using a brush or roller to paint, you will have to decide how to buff out the paint transition, and this can take a lot of time and work, because it is not so easy to get your hands on, and damaging the walls in your own home is not the best option. The most difficult thing to do is to paint with a transition to a silver color, since it is very difficult to evenly distribute aluminum shavings.
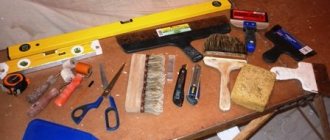
Required Tools
It would seem that there is nothing complicated here. We all have some idea of what tools are used for painting work. But, nevertheless, let's dwell on this in more detail so that you don't suddenly forget anything. Here is a short list of those same tools:
- paint container (painting tray or bucket),
- two rollers - for priming and for painting,
- brush. It is needed for working in those areas of the ceiling where a roller cannot reach,
- rubber gloves - I think everything is clear here.
Naturally, when performing painting work, the main tool is a roller. When you choose it in a store, pay attention to its quality: if even a little lint falls out of it, then this option will not suit us.
By the way, a foam or velor roller is also not suitable for painting. The foam rubber will leave bubbles, and the velor material will not be able to absorb the required amount of paint. In such cases, stripes remain on the ceiling.
Therefore, you should choose a roller with medium-length pile. And, for ease of use, it should be equipped with a long handle. We figured out the tools. Now about painting.
Striped ideas for your interior
Combination. A not very wide bright stripe, as already mentioned, can make the interior dynamic, energizing, and invigorating. Even too invigorating, and therefore unnerving and annoying. Therefore, it is better to combine such striped wallpaper or such painting with a plain finish. Dynamics will be introduced into the interior, but at the same time it will remain quite calm.
In general, striped wallpaper is great for combining with plain wallpaper partners, the color of which can match the color of one of the stripes or be a mixture of colors present in the stripes (for example, yellow-blue stripes and green plain wallpaper). Also, striped trim can be combined with any neutral-colored trim.
You can make a whole wall striped or just a fragment, the so-called wallpaper insert. For example, the entire wall is painted in one tone, and individual sections of the wall are painted with stripes or covered with striped wallpaper. These areas can then be framed with moldings, baseboards or decorative strips.
In children's rooms for toddlers, stripes can be combined with a floral print, with polka dot wallpaper or with a child's pattern. In general, a stripe goes well with a floral ornament, but one thing must be restrained - either the stripe or the ornament. Only one print should dominate!
Ruffled striped wallpaper in the interior in combination with a delicate floral print. The stripe clearly dominates...
An original solution: combining horizontal and vertical stripes on one wall. It is believed that this allows you to get both “striped effects” at once: raising the ceiling and slightly expanding the room.
Let's use the ceiling. Sometimes, when decorating the walls with stripes, they also touch the ceiling - all or only a part. If the strip from the walls extends to the ceiling, their height may seem endless. In addition, it is quite original and can become one of the highlights of the interior.
Stripes on the walls and more. It is customary to support striped walls with something else striped. These could be striped sofa cushions, striped floor vases or bed linens. You can support the stripes on the walls with striped upholstered furniture, a rug or curtains. You should not introduce too many striped objects - this will make the interior tacky and garish.
The stripes on the furniture, curtains and carpet should match the stripes on the walls in size (at least approximately), color or rhythm. A match in one parameter is enough, but the colors must still be combined.
It is also possible that this is a complete coincidence. In this case, curtains or upholstered furniture are first purchased, and then the walls are painted with exactly the same stripes.
Striped wall decor. If you want to add dynamics to the interior or make the room more elegant, but are not ready to renovate, you can simply add striped wall decor. A panel covered with striped fabric is ideal for this. We wrote about how such panels are made here.
The striped panel can be hung on the wall or placed on the floor, leaning against the wall.
Another option: stick striped wallpaper on a section of the wall and frame it. A very simple solution: buy a large frame or several medium frames and place pieces of striped wallpaper in them. Add a few striped sofa cushions and the interior will radically change!
peeling putty when painting the ceiling
Question about painting.
The ceiling is prepared, primer before putty, putty 2 times + sanding, then primer before painting. We paint the ceiling. After passing with a roller, the putty begins to peel off in some places. It turns out to be “real invited holes.” Please advise what were the mistakes when preparing for painting? materials: snow putty, cerizin_concentrate primer.
The ceiling was poorly prepared before puttying. Primer?
2Taruts dirty, dusty, greasy base before puttying, poor primer
cerizite primer about the bases before puttying 50 to 50, also primed with ceresite. after drying, the ceiling surface had an ideal primer film and had a “shine” in the sun.
Taruts wrote: it had a “shine” in the sun.
This means that the surface has been “reglazed”. The putty did not adhere well to the “glass” and was wound around the roller when painting
But this shouldn't have happened. It seems that you did not follow the instructions for diluting the primer; people often want to make it “fatter.” So it (the primer) was not absorbed. The penetrating primer should not have any shine or film; it should all go into the base. It is from this film that the putty flies off. The primer needs to be diluted according to the instructions and poured into some kind of canister and take from there as much as you need, and not prepare it anew each time and do not leave it in a bucket, the water evaporates and the concentration increases. It’s even better to buy ready-made.
Source
Manicure options with stripes
There are many options for manicures with stripes. Depending on your imagination, you can create any combination of stripes - thin or wide, horizontal or vertical, contrasting or similar in color. You can make lines on your nails using any of the above methods.
Monochrome manicure with stripes
This manicure with stripes can be said to be a classic version, which is most often performed in black and white, beige, gray, or varnishes that are close to each other in tone. Here, too, one color of polish is used, and the unpainted area of the nail acts as an additional shade.
The number, width and location of stripes can be any. The simplest style is one or two thin stripes along or across the nail. Also, stripes can be made at any angle and intersect them
But here it is important to make it clear which color remains the basis of the entire manicure.
Original manicure
For this manicure you will need strips of foil of any color. At first glance, this may seem like a rather complicated process, requiring time-consuming and diligent work, but in fact, the finished strips are simply glued to the dried coating in any order and secured with a transparent topcoat.
You can use a plain or gradient coating as a base. There is also the option that the drawn lines will act as boundaries between several shades of varnish used in manicure.
Black and white stripes
A simple manicure with stripes that will suit any look. It can be done using a thin brush, or you can also glue stencils in the form of adhesive tape or special tape. On short wide nails it is better to draw thin vertical stripes, while on long nails you can allow horizontal lines. There is also an option to implement them diagonally. The peculiarity of this design is that the stripes must be the same width, or that they be placed at the same distance from each other.
Contrast manicure
The peculiarity of this manicure lies in its maximum simplicity. It is enough to choose shades of varnish that will contrast with each other. These can be combinations of a dark coating and light stripes, and vice versa, as well as bright colors that are not similar to each other - red and black, red and green
When creating such a manicure, it is important to rely on your imagination, because in this version you can play with many combinations
Shiny stripes
To realize the idea of such a manicure with stripes, you will need a shiny varnish of a thick consistency or ready-made glossy ribbons in a silver or golden shade. Such stripes will look advantageous on a dark, plain surface.
If you want to make stripes with a brush, then preference should be given to varnish with fine shimmer. The most effective option is a matte background and shiny stripes, as well as when the lines act as a border between two varnish colors.
Manicure mesh
To recreate such a manicure, you will need stencils, which must be glued in such a way as to create a grid of thin stripes. It can be placed diagonally or along the nail. The mesh can be white, black or bright colors
Thin - will dilute the monochromatic coating, giving it lightness, and thick, on the contrary, will draw attention to the nails, where a manicure with stripes in the form of a grid is their main decoration
Whichever option you choose, there is always room for imagination. In the video below you will see how you can decorate a simple manicure with graphics on one nail.
Types of defects
If the painting technology is violated, various defects may occur, some of them are listed below:
- swelling;
- peeling;
- drips;
- joints;
- rust or oil stains;
- crocodile skin;
- brush marks;
- roughness;
- a network of cracks on a painted surface;
- dull spots;
- manifestation of a colored layer of old paint;
- low hiding power;
- delay in drying;
- long lasting release.
Roller selection
The roller is a cylindrical roller rotating around an axis, which is fixed to the handle. A special material is wound onto the cylinder, which is removable. Rollers of different sizes and with different materials can be attached to one handle-holder - woolen fabric, polymer material, artificial or natural fur.
The following types of rollers are distinguished:
- With short artificial pile;
- With fur covering;
- Universal fur rollers;
- Foam-coated;
- With relief patterns and designs.
Any type of roller must be of high quality, since it has a direct impact on the surfaces being painted. If there is a need to increase the working area, you can additionally purchase a rod with a screw handle and a high-quality replacement nozzle. A well-chosen nozzle allows you to reduce paint consumption. If you plan to paint smooth surfaces, then use a roller with a pile half an inch long, and for rougher surfaces (for example, putty walls, wallpaper for painting, textured plaster, textured ceilings, etc.) I use a roller with a length of ? inches. For semi-gloss paints, rollers with any pile can be used.
As for the paint container, it is recommended to use not a paint tray, but a large bucket with a hanging grid to drain excess paint. This container is more convenient because it is more stable and can hold more paint. Small paint trays can come in handy if you need to do some minor painting, such as contouring.
In addition to the roller itself, you will also need to stock up on brushes, since a roller is not very convenient for painting the joints of walls with the ceiling and floor, as well as corners and places near radiators. Brushes must be of different sizes and of good quality, otherwise their bristles will fall out and remain on the paint.
Recommended Posts
Recently viewed by 0 users
No registered user is viewing this page.
Test: What IKEA item does your kitchen need?
10 storage ideas for a tiny kitchen that are very easy to implement
7 problems in your kitchen that need to be addressed immediately
The best articles on the IVD website
Are you a professional architect or designer?
IVD. Repair and finishing
Are you a professional architect or designer?
The IVD.ru website is a leading Internet project dedicated to the issues of reconstruction and interior design of residential premises. The main content of the site is the archive of the magazine “Ideas for Your Home” - exclusive author’s articles, high-quality illustrations, practical tips and lessons. A team of professionals is working on the project in close collaboration with famous designers, architects and leading publishing experts.
On our website you can choose comprehensive design solutions; view detailed reviews of the market for construction and finishing materials, furniture, machinery and equipment; compare your own ideas with design projects of leading architects; communicate directly with other readers and editors on the forum.
Are you a professional architect or designer?
Source
Choosing a coloring composition for finishing gypsum boards
When finishing plasterboard ceiling surfaces, painting is most often used. When choosing a material, and before painting a plasterboard ceiling, it is necessary to exclude oil paints. They create an impenetrable film on the surface; after 4-5 years they will begin to crack and crumble, especially since there are more environmentally friendly compositions.
The industry offers a large range of paints for plasterboard materials. For ceiling surfaces made of gypsum plasterboard, the best option would be:
- water-based paints that have a wide color palette, good covering ability, breathability, and are easy to maintain. The only drawback is that the surface needs to be renewed periodically. They are not durable, but they are also inexpensive;
- water-dispersed compositions are moisture resistant and retain their original appearance for a long time. Easy to care for, they can be washed using detergents.
All water-based compositions, when painting plasterboard ceilings, dry quickly and do not have a strong chemical odor.
When subsequently painting the surface, no additional preparation is required.
Before painting a plasterboard ceiling in any room, you should decide on the composition of the paint and find out for which rooms it is intended. Based on the composition of water-based paints, they can be divided into:
- silicate with a mineral composition are best suited for damp areas such as the kitchen or bathroom. Before painting a plasterboard ceiling with silicate paint, it does not require antifungal or other treatment;
- acrylic - have good covering ability. Suitable for any premises. They have excellent abrasion resistance, that is, they can be washed with detergents and a sponge;
- acrylic with latex are easy to use, easy to care for, vapor-tight, and resistant to various types of stains. The only drawback is the high cost;
- silicone paints have absorbed the best qualities of all previous compositions. In addition, they are capable of covering small unsealed cracks (no more than 2 mm). Excellent vapor and moisture resistance allows them to be used in rooms with changes in temperature and humidity. Treatment with antiseptics and antistatic agents is not required.