Are you faced with the task of leveling, raising or insulating the floor and you don’t know how to do it? Then you have come to the right place, because today we will look at how a floor is installed on joists and talk about its advantages and disadvantages. This technology has been used by people for a very long time, but it has still not lost its relevance. Of course, there are situations when it will not be possible to apply it - what we are talking about, you will understand after reading the entire article. So, let's go!
Floor on joists
Distance (step) lag for floors made of boards, plywood, OSB: tables, calculations
In order for the floor covering to serve for a long time and be durable, the floorboards not to creak or bend underfoot, you must first correctly calculate all the design parameters, including at what distance to lay the floor joists. The correctness of this calculation will determine not only the durability of the floor covering, but also the amount of material used for it, and therefore the cost of the work.
- What determines the choice of lag?
- What should be taken into account when making calculations?
- An example of calculating the distance between floor joists
- Lag pitch depending on floor covering
- What can an error in calculations lead to?
We stock up on materials and tools
So, in order to build a high-quality and durable floor that provides comfortable living conditions in a private house made of timber, you will need the following materials:
- A beam with a section of 100x150 mm is used as a log.
- A beam with a cross section of 50x50 mm will be needed for laying the subfloor.
- QD professional slabs - thickness depends on the distance between the joists.
- Boards for the subfloor - relatively cheap boards about 15-20 mm thick or even just durable plywood are suitable.
- Insulation - the greater the thickness, the better its heat and sound insulation properties, but the price also increases.
- Vapor barrier material.
- Waterproofing material.
- Nails and screws.
- Wooden plinths.
The work becomes much easier if the master has at hand not only all the necessary materials, but also high-quality tools. At a minimum, it must have:
- hacksaw,
- meter,
- hammer,
- screwdriver or screwdriver,
- miter box.
When everything necessary is stored, construction can begin.
What should be taken into account when making calculations?
When performing the calculation, the following factors are taken into account:
- thickness of the flooring material (chipboard, boards, etc.);
- approximate step between floor joists;
- expected specific maximum load on the floor.
All these parameters will determine the cross-section of boards, timber and other lumber used to construct the floor.
When calculating what distance should be between the floor joists, it should be remembered that the outermost joists cannot be placed further than 30 millimeters from the walls; an allowance must be made for this in the calculations.
As a result of calculations, the result is usually not a whole number, but it should always be rounded up so that the actual number of lags does not turn out to be less than the calculated one. Otherwise, the strength of the floor structure may not be sufficient, especially considering that such savings will be completely insignificant compared to the likely risk.
The cheapest floor joists can be found at sawmills, followed by online construction stores.
When it comes to floor installation, it is not recommended to save too much. The logs must have not only a suitable cross-section, but also sufficient density. If you make the lag step for a floor made of boards too large, the boards will begin to sag and “play.” Likewise, if the distance between the joists for an OSB floor is made greater than acceptable, then the slabs will begin to crumble and crack.
Soundproofing of interior partitions
We use Technoacoustic slabs 50 mm thick with double-sided plasterboard sheathing on a metal or wooden frame.
- We install the wall frame (wooden beams or metal profile) with a distance between the beams inside of 580-590 mm.
- On one side we cover the wall with OSB sheets, fiberboard or plasterboard.
- We lay stone wool.
- We lay the second layer of insulation with a seam spacing of 150 mm.
- We cover the insulation with sheets for finishing. We fix the sheets to the frame.
Attic insulation
Roof insulation between rafters is the most common method of thermal insulation. It can be done outside or inside.
- We lay the roof covering.
- We ensure good ventilation of the structure due to a 50-80mm wide ventilation gap separating the insulation from the final roofing covering. It is also necessary to install ventilation holes on the eaves, overhangs, ridges, and ridges and protect them from sliding snow.
- We prepare the hydro-windproof outer layer of the system by laying hydrofilm on top of the rafters.
- We lay insulation (for us it is TECHNONICOL Rocklight) in the space between the rafters. We make sure that the width of the insulation is 10-15% greater than the distance between the rafter legs. For example, if the width of the insulating board is 600 mm, then the distance between the rafters should be 580-590 mm.
- We sew an additional sheathing of timber with a cross section of 50*50 mm across the rafters.
- We lay the second layer of insulation with the joints spaced at least half their length.
- We cover the insulation with a vapor barrier film. We roll it out horizontally and fasten it with a construction stapler.
- We fasten the film sheets with acrylic tape for tightness.
- We lay the bases for finishing (leveling bars, OSB sheets, plywood, drywall).
Still have questions? Ask them to us in the comments.
Watch detailed video instructions on our YouTube channel:
An example of calculating the distance between floor joists
The distance between the floor joists under the board can be relatively large, since a thick board is a stronger material than, for example, thin plywood. Accordingly, thinner finishing materials will require more frequent placement of lags.
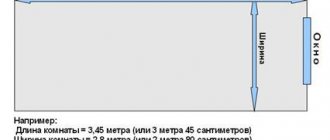
For clarity, consider an example of floor arrangement with the following data:
- room 12 meters long;
- use of 100x180 mm timber for logs;
- using 30mm boards as a finishing coating.
Table of distance between floor joists under the board:
According to the table above, for a 30 mm board, the optimal distance between floor joists should be 50 cm.
Let us denote the total number of beams by the letter “k”. Then the total width of all joists will be ( 100 mm * k ). The distance between the wall and the outer beams will be 30 mm . Accordingly, the step between adjacent lags will be ( k - 1 ). The distance between all elements will be ( 0.5 * (k - 1) ).
Calculating the distance between floor joists begins by determining the pitch between the beams using the following equation:
length of the room = total width of the beams + sum of the distances between the beams + distances from the walls
12 m = 100 mm * k + 0.5 * (k - 1) m + 30 mm * 2
It is important to bring the equation to a unified number system. As a result we get:
12 m = 0.1 m * k + 0.5 * (k - 1) + 0.03 * 2
Remembering the school algebra course, we solve the equation:
12 = 0.1 * k + 0.5 * k - 0.5 + 0.06; 12 + 0.5 - 0.06 = 0.1 * k + 0.5 * k; 12.44 = 0.6 * k; k = 20.7 pcs.
Since the number of beams can only be an integer, it is rounded up, that is, 21 beams .
The sum of all the gaps between the lags will be:
12 - 21 * 0.1 - 0.06 = 9.84 m
You need to divide the resulting amount by the number of gaps, and we get the distance between adjacent lags:
9.84 / (21 - 1) = 0.492 m
Thus, we were able to establish at what distance to lay the floor joists in this example - 0.492 m or 49.2 cm.
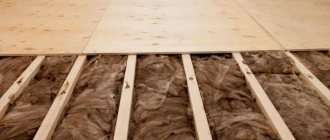
Insulation technology
It is best to consider the insulation of the floor along the joists visually, with options for installing various types of heat insulators. But first, a series of preparatory work should be carried out with the wooden structure.
During long-term use, wooden elements could be exposed to moisture or mold, which leads to a deterioration in their performance properties. Therefore, they are carefully checked and, as necessary, restoration work or complete replacement is carried out. This procedure is not required when laying new floors.
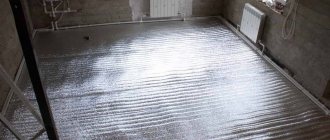
After this, you can begin installing the insulation. Regardless of its type, the subfloor is waterproofed first. Often it is also made of wooden boards; it is much less common to find a soil base. In the latter case, the beams are attached to the walls of the building and to the ground using special supporting structures.
After checking the condition, you can begin installing the thermal insulation layer. The general scheme is the following design.
The order of work is as follows:
- Formation of the internal waterproofing layer. To do this, you need to use special mixtures. It is best to treat the base before its installation - in this way you can ensure maximum impregnation with the waterproofing compound. Most often, bitumen mastic with the addition of polymer components is used for this. It is necessary to treat both the outer and inner surfaces of the flooring.
The use of rolled materials is not recommended. During operation, a condensation film may form between the boards and the film, which will be absorbed by the wood. The reason for this phenomenon is the temperature difference between the foundation plane and the inner surface of the board. Often the dew point is located right here, which leads to condensation in winter.
- Installation of lag. If load-bearing wooden structures have not yet been installed, they must also be treated with protective waterproofing material. During their installation, the optimal distance between the lags should be taken into account. It depends on the width of the span and the size of the installed beams.
What can an error in calculations lead to?
What could be the consequences of incorrectly selecting the cross-section of the lags and calculating the distance between them? If the floors are laid on a concrete base, then the most important thing in this case will be the size of the step between the lags, which directly affects the behavior of the floor covering. If you attach a chipboard board to joists that are installed too sparsely, it can sag and even break. If ceramic tiles are placed on top, they will crack or fall out. The boards will simply “walk” and sag. Any of these options will require rework.
Preparation for installation
The procedure begins with creating a big mess with your own hands, that is, with dismantling the old floor.
- We completely free up the entire floor area.
- Checking the old coupler. We remove all exfoliated pieces and repair the cracks. We tap the swellings to detect cavities underneath them. If we find it, we open it up and clean the floor slab down to a solid monolith.
- We carefully remove debris and dust, preferably using a vacuum cleaner. The apartment must be clean.
- Next, we eliminate all found defects in the subfloor. First we prime them and wait for the primer to absorb and dry. We fill the flaws with cement-sand mortar evenly with the general surface. A ready-made repair compound sold in hardware stores is also suitable. After drying, prime again.
- Using a level, we calculate the highest surface point in the room. We make a mark - this will be a guide for future work.
USEFUL INFORMATION: Have you chosen tiles for your bathroom? Don't forget the grout for the seams
Calculation of Logs for the Floor of a Frame House Without a Calculator
Dear comrades, are you sure that you are interested in calculating the joists for the floor of a frame house? It is the calculation, as a process of selecting the material, width, height and length of the future floor joist (floor). With constant selection of these parameters manually or in a floor joist calculator. Sure? But I am not at all sure of the advisability of spending so much effort when it is possible to obtain the desired result in a simpler alternative way.
The whole point is that when building a frame house, a small range of standard building materials is used. And one of these standard building materials is a board of sizes 200x50 (195x45) and/or 150x50 (145x45). Among more modern materials that are analogues of boards, the situation is similar; their sizes are standardized and very similar to the sizes of boards.
Thus, the so-called calculation of the logs of a frame house turns into just a choice of two parameters: the material of the logs and its length. And no calculators!
- What does incorrect calculation of floor joists for a frame house lead to?
- Calculation of logs from boards for the floor of a frame house
- Calculation of logs from an I-beam for the floor of a frame house
- Calculation of logs from LVL timber for the floor
How to properly insulate a veranda from the inside and from the street - keeping the warmth in the extension
The country veranda (closed and open), if desired, can be converted from summer to winter, i.e. from cold to warm. From the veranda you can make an entrance hall, a corridor in the house, a full-fledged room or a winter garden, a greenhouse, in general, a warm room that can be used all year round. Therefore, it will be useful to learn how to insulate a veranda for winter living. Below are step-by-step instructions with photos, drawings and diagrams.
How to insulate a veranda from the inside and outside
Which side to insulate the veranda - from the inside or outside
Insulation of a cold veranda begins with the choice of insulation and its installation location. As a rule, the veranda has a beautiful external and internal decoration. And deciding which side to hide under the insulation is not easy.
To make a final and informed choice, we offer arguments in favor of one or another type of insulation.
Insulating the veranda from the inside
- can be performed in any weather;
- free access to surfaces at any height;
- in one approach you can insulate all surfaces: walls, ceiling, floor.
- requires dismantling of the existing coating;
- the freezing point shifts into the wall, which leads to its destruction.
Insulating the veranda from the outside
- the way of life caused by repair work is not disrupted;
- all garbage remains outside the veranda;
- maintaining the veranda area;
- shifting the freezing point in the insulation, which reduces the rate of destruction of walls, and the walls can accumulate heat;
- veranda decoration. A veranda covered with OSB boards or plywood can be transformed after insulation and subsequent finishing.
External insulation of a wooden veranda made of timber or logs will protect the wood from getting wet, preserve the interior of the extension, and make it possible to update the facade. Among the disadvantages: deprivation of the opportunity to observe the condition of the log veranda from the street.
How to insulate a veranda - materials
With the existing variety of thermal insulation materials, the choice still remains difficult. However, among those that have proven themselves well:
Penofol
Flexible foil insulation Penofol can be used as an independent thermal insulation material or in combination with other types of insulation.
The material is environmentally friendly, thin, has low vapor permeability, is easy to install and is fireproof. Among the disadvantages: softness, small thickness.
Styrofoam
A rigid, lightweight material that does not change its properties over the period of operation. Easy to install using both frame and frameless methods. Disadvantages: interesting for rodents and flammable.
Note. Insulating the veranda with polystyrene foam saves the owner from installing a hydro and vapor barrier, because polystyrene foam has practically zero hygroscopicity and vapor permeability.
Expanded polystyrene
It has all the advantages of foam plastic, and is also very durable and easy to cut. Cons: poor sound insulation, destroyed at high temperatures (over 100°C), does not burn, but does not self-extinguish.
Mineral wool
Flexible (soft) insulation with low thermal conductivity, non-flammable, durable in compression (for dense types) and tensile, provides excellent sound insulation, and is resistant to temperature deformation. Mineral wool is resistant to chemical and biological activity. Disadvantages: it requires a frame, over time it loses density (cakes), which means its thermal insulation properties decrease.
Basalt wool
According to the characteristics, the material is identical to mineral wool, while being environmentally friendly.
Polyurethane foam (PPU)
Polyurethane foam insulation is available in three varieties:
- Dense (hard, rigid) panels
- Flexible (soft) plates
- Inflatable (sprayed)
Among the advantages: light weight, ease of installation and application, resistance to chemical and biological activity. Cons: expensive, deteriorates from mechanical stress, subject to aging when exposed to ultraviolet radiation.
Flax, tow, moss
Materials designed to insulate a veranda made of timber and logs without disturbing the appearance of the building.
Flax, tow, and moss are absolutely environmentally friendly, but difficult to install. In addition, they are desirable prey for birds that use materials to build their nests.
Synthetic insulation for construction
Polymer insulation eliminates the disadvantages inherent in natural materials. For example, building a veranda using warm house technology.
Do-it-yourself insulation of the veranda to the house
When planning to insulate a veranda, you need to remember that insulating only one surface will not give the expected result. After all, heat evaporates from it in different directions.
Insulation of the floor on the veranda
Reducing heat loss and retaining heat as much as possible can only be done using an integrated approach; first, let’s look at how and with what to insulate the floor on the veranda
1 way:
we remove the boards of the existing floor and the subfloor (as well as floor coverings: linoleum, laminate);
pour expanded clay between the joists;
re-lay the floor.
Method 2:
We dismantle the floor covering or carry out work on the existing floor. Then it will serve as a rough coating;
we install 50x50 wooden blocks on the joists or on the subfloor;
lay a vapor barrier film;
lay insulation (for example, mineral wool). We make sure that there is no free space between the frame and the insulation. If there is one, it must be filled with scraps of material and blown out with foam;
Cover the material with a vapor barrier or penofol on top. The foil part of the material faces the inside of the room. The joint is glued with metallized tape (for example, Izospan Isospan).
installing flooring.
Additionally, you can insulate the foundation of the veranda.
Insulation of the veranda roof
A significant part of the heat is lost through the roof of the veranda (heat loss from the roof depends on the design and material). How to insulate a veranda roof - from the inside or outside? A simple pitched roof does not have an attic, which makes it difficult to move around. To perform insulation, you need to dismantle the roofing material. Therefore, the roof of the veranda is insulated at the construction stage or from the ceiling.
Insulation of the veranda ceiling
It features the same sequence of actions as floor insulation. Only the work has to be done under the shed. This creates some difficulties when installing insulation.
How to insulate the ceiling on the veranda - methods
Method 1 – frame
you need to dismantle the ceiling covering, if it is plasterboard, and replace it with plywood or OSB;
a hydrobarrier film is attached to the ceiling surface;
for soft insulation, a frame is made of timber (the thickness of the timber is equal to the thickness of the insulation);
Insulation is installed between the frame beams.
the insulation is covered with a vapor barrier film;
the ceiling is decorated with plasterboard or lining trim.
Method 2 – frameless
Suitable for polyurethane foam and rigid insulation. In this case, the insulation is installed directly on the ceiling. Then the surface of the ceiling needs to be puttied.
Insulation of veranda walls
It can also be done in two ways: framed and frameless. The work is carried out in the same order as when insulating the floor.
How to insulate a wooden veranda
Many people are interested in the results of external insulation. The natural beauty of wooden lining will be hidden under a layer of insulation. Professionals recommend dismantling the existing trim, performing insulation, and then installing the lining in place. At the same time, you need to perform dismantling carefully so as not to damage the lamellas. However, some of the lumber will still have to be replaced. You can even out the difference in shades between the old and new lining by sanding the board.
Insulation of a wooden veranda in a house made of timber and logs
It is carried out by hammering natural insulation into the cracks (caulk, sealing cracks between logs).
Insulating a house using the “warm seam” technology - video
If a veranda made of timber has lost its attractiveness, then insulation occurs by installing a frame outside the extension. Insulation (thermal insulating material) is inserted inside the frame and covered with facing material (for example, lining, siding).
Insulation of veranda windows
Wooden windows can be insulated if they are protected from the outside of the building with film. At the same time, it is necessary to leave space between the window and the film. This gap (air cushion) will prevent the accumulation of moisture and destruction of the wooden frame. The film is attached to the frame using a construction stapler. The disadvantage of film insulation is that the transparency of the window is reduced, so it is removed during the warm season.
Note. Users advise that when insulating windows with film, stuff the slats onto the frame, and then attach the film to them. The film will be removed in the spring, but the slats will remain. Thus, the tree frame is not so damaged when installing/dismantling the film.
What does incorrect calculation of floor joists for a frame house lead to?
The Internet is full of reviews about how floors in frame houses sag, creak and spring. There are a lot of tearful texts and videos on this topic.
Thanks to this profanity and populism, a widespread opinion has already formed that a frame house is bad.
Despite the fact that there are a lot of negative reviews, they do not contain one important detail - a true story that in fact these frames were built either by defectors from advertised companies, or by the hands of crooks from crews found in unclear places.
Just as there is no clear explanation of what to pay attention to when installing the floor of a frame house as a whole and what parameters of the lag for the floor of a frame house are important in particular. Many people try to do the right thing, but...
...for example, I don’t like everything in these videos. To put it mildly…
Actually, this article will show the simplest way to calculate floor joists and talk about the main parameter that affects the quality and reliability of the floors of a frame house.
What determines the distance between the posts of a frame house for insulation?
The distance of racks in a frame house should be planned based on several basic indicators.
A comprehensive solution to this issue requires taking into account:
- dimensions of plywood sheets or OSB sheets with which it is planned to sheathe the frame of the house,
- dimensions and type of insulation selected for organizing thermal insulation of a frame structure,
- how the premises and upper trim in the frame house will be finished.
Taking into account all these components will help you use materials in the best way and will make it possible to minimize waste, and, therefore, help you save money.
In addition, this approach is aimed at finding opportunities to minimize time and labor costs when building a house using frame technology. We can say that when starting to determine the pitch of the racks, you should first imagine how you plan to make the “pie” of the frame wall itself; this also requires reliability, like floor joists.
Calculating the distance between posts in a frame house
Let's consider the main calculation options.
- If the walls are planned to be erected and made from building materials such as plasterboard sheets and OSB, and cotton filler (ecowool, glass wool, etc.) is chosen as insulation, then the pitch of the racks will be calculated based on the overall dimensions of the plasterboard or OSB. Cotton filler is quite plastic and its dimensions are not important in this case.
However, in this case we use two sheathing materials - plasterboard and OSB. What distance between posts in a frame house should I choose and the dimensions of which of these materials should I be guided by? In this case, it is recommended to focus on the size of the plasterboard sheets, while the OSB boards will have to be cut taking into account the deformation gap.
- In the event that harder, non-plastic materials are used for insulation, for example, basalt insulation, and the external and internal finishing will be made of OSB sheets and lining, respectively, then the distance between the posts of the frame house will be calculated based on the dimensions of oriented strand boards and insulation . Considering the deformation band of the basalt slab, which is 50 mm, the distance between the posts will vary taking into account a gap of 50 mm.
The length of the lining, as a rule, does not affect the distance between the posts, since this cladding material can be attached to an additional wooden sheathing specially designed for it.
- Insulating a frame house with foam plastic when calculating the pitch will require focusing on the dimensions of the building material, since trimming foam blocks can be quite a tedious and wasteful job.
Standard sizes of racks and window openings
Foam sheets can be attached in two ways
Plank frame
The frame of a house made of boards requires a different approach to calculations. In this case, regardless of the chosen type of finish and insulation, the distance between the racks will directly depend on the dimensions of the board used.
So the step between 50x150 mm boards used as supports should not exceed 650 mm. If you use a 50x100 mm board. – the maximum distance of supports will be 400 mm.
Therefore, several factors must be taken into account in pitch calculations. The distance between the posts of a frame house will depend on the insulation used, the chosen cladding, and even on what the posts themselves are supposed to be made of.
Calculation of logs from boards for the floor of a frame house
The most common and affordable material used to install floor joists in a frame house are boards. Standard sizes of boards that you can buy at any retail outlet in our vast country:
- 200x50 (195x45)
- 150x50 (145x45)
Several important notes on the procedure for selecting lag parameters for the floor of a frame house using tables:
- due to the fact that it is extremely difficult to find real dry planed calibrated boards on the Russian construction market, when purchasing materials, special attention should be paid to the quality of boards for floor joists (beams),
- I certainly hope that you will not place tanks, cars and other important multi-ton household utensils on the floors of your frame houses, but just in case, the table shows the log parameters for a fairly high load - 300-400 kg/m2.
| Board size | Distance between joists (center) | Maximum span length |
| 150x50 mm | 400 mm | 3480 mm |
| 600 mm | 2850 mm | |
| 200x50 mm | 400 mm | 4240 mm |
| 600 mm | 3460 mm |
As you have already noticed, the main parameter that we select is the span length. In other words, the distance between the supports - the load-bearing walls of a frame house.
It should be understood that the width of the board is 200 (195) or 150 (145) in the case of using a log of this size in the ceiling of the first floor directly affects the thickness of the insulation. That is, when using boards as joists, the maximum insulation of the first floor floor will be 200 mm, which is not so much in modern times. It is also obvious that this thickness of insulation is completely unsuitable for energy-efficient houses.
These conclusions smoothly lead us to the need to use other, more modern materials in ceilings.
Attaching the joist to the bottom trim
Beams are installed on the bottom trim so that 50 mm remains to the edge on each side of the log. Next, I install the strapping beam and secure everything with nails using hammers.
At the same time, the lag is attached to the lower frame by obliquely hammering nails. I secure the strapping beam by direct hammering.
Of course, using self-tapping screws as fasteners is more practical, but not all types can withstand shear loads. Also, with oblique fastening, chipping of the edges of the joists is possible, and this is unacceptable.
The logs are secured to the intermediate supports (pillars) using studs with nuts or fastening shoes in the shape of the letter U.
I build it myself - I guarantee 100% quality
I do all the work personally, I have my own team
At first I was involved in roofing, but I have been building frame houses for more than 12 years now.
Building materials without extra charge
I will bring all the materials to you at the purchase price (compare my estimates)
99% of satisfied customers who recommend me to friends
in 17 years there was only 1 warranty case (fixed within 2 days) You can safely search for reviews about me on the Internet by the name of the site or by Mikhail Stepanov
Calculation of logs from an I-beam for the floor of a frame house
The invention of the wooden I-beam had a huge impact on the architecture and design of frame houses. Primarily on architecture. The ability to cover large spans with the help of a lightweight, durable structural element that has parameters identical to those of the board (width, height) is in great demand among architects and designers of frame houses.
Look how much the span length has increased compared to a regular board.
| Beam size | Distance between joists (center) | Maximum span length |
| 240x65 mm | 400 mm | 4500 mm |
| 600 mm | 3930 mm | |
| 300x65 mm | 400 mm | 5350 mm |
| 600 mm | 4700 mm |
In this case, I-beams:
- have more stable dimensions and quality,
- have less weight and are therefore more convenient to install,
- They have a large width while maintaining the quality of the product, which makes it possible to effectively insulate the ceiling of the first floor.
The only factor limiting the widespread use of wooden I-beams in the construction of frame houses is their price.
Another undeniable advantage of I-beams is that they allow you to place engineering systems and communications directly in the ceiling.
To do this, round or rectangular holes are cut into the OSB of the I-beam.
How to lay insulation
Thermal insulation materials are laid in this way. A layer of roofing material is spread on the subfloor. A layer of sand 3-5 cm high is poured onto the roofing material and leveled. A plastic film is placed on top of the sand - the thicker the better. The film is attached to the base of the floor with a construction stapler or small nails. Penoplex is the next layer of coating, it has thermal insulating properties and absorbs sounds well, is environmentally friendly, can be installed effortlessly and is perfect for roof insulation. A vapor barrier is placed on top of the foam layer with a stapler (without gaps and an overlap of 10-20 cm) and a layer of chipboard is made. Next, the finishing floor is laid.
We invite you to watch a video on how to insulate a floor in a wooden house using Rockwool stone wool (Rockwool)
Calculation of logs from LVL timber for the floor
LVL (Laminated Veneer Lumber) is a very durable composite material consisting of wooden lamellas glued together.
It resembles very thick plywood and has a similar manufacturing process.
Using this structural material, you can build very interesting and beautiful wooden buildings, both externally and from the point of view of engineering solutions.
But, in this article we are talking only about the floor joists of a frame house. And my opinion is that in a frame house it is advisable to use LVL beams in single copies as a support beam for the floor.
Use where it is necessary to cover very long openings. And no other way. By the way, the solution in the photo above seems to me unreasonably expensive and unnecessary.
Due to the fact that LVL timber is an exclusive solution, there will be no tables on it. LVL timber is almost always made individually for each opening and each ceiling.
WE'RE BUILDING A BATH. PART 4: Floor joists and frame
Last time we talked about the foundation and the timber frame. Now we are building frame walls from laminated lumber. Before construction, we treat the material with fire and bioprotection.
Preparation: Laying the floor joists
The dimensions of the log are 5*20 cm or 8*20 cm. This is the basis for the frame. Each lag is placed on a strapping beam. The logs rest on the entire width of the strapping beam.
We select the distance between the lags based on the size of the insulation that will be used for the floor. For example: the width of the slab insulation is 60 cm. Then the distance between the logs is 59 cm. This will eliminate the occurrence of cold bridges at the junction of the insulation and the logs.
Wall assembly
The walls CAN be assembled vertically, but it is more convenient to do this in a horizontal position on the floor beams.
Assembling the wall begins with marking the first board. This board is the bottom frame to which we will attach the frame posts. We choose the distance between the racks in the same way as the distance between the lags. If the width of the insulation is 60 cm, then the distance between the racks is 59 cm.
When installing the racks, be sure to ensure they are vertical using a level.
Important: fastenings for racks in a frame house are nailed. Self-tapping screws are less durable fasteners and are not suitable for load-bearing structures.
Space for windows and doors
Be mindful of window space. Where there will be a window, the frame posts are torn to the height of the window.
- We install an unloading crossbar above the window, which cuts into the upper part of the window opening directly into the racks. A transom is a support beam that is mounted horizontally directly above the window. The crossbar is mounted so that in winter the opening does not deform due to snow load;
Red - unloading bolt. Green - braces.
- window and door crossbars can be replaced with a single crossbar along the entire length of the frame wall. This option is even better because it makes the load on the beams uniform along the entire length of the wall;
- the pitch between the racks in places with windows may change downward.
Upper harness
After the racks are attached to the bottom trim, we mount the trim from the other edge of the racks. This will connect the posts together. This is the top trim. After this, we install the second top trim. It is needed to connect (tie) the walls. Between the first and second top trims, insulation is laid - jute.
brace
An integral part of the frame wall is the brace. It gives the wall rigidity and resistance to lateral loads. While the wall is lying on the floor, we apply the board to the racks at an angle of 45-60 degrees. We mark the intersection of the rack and the future brace. At the intersections, we cut out recesses in which the brace will be located. After the brace “lays down” in the prepared recesses, we fasten it to the posts with nails.
Raising the walls
After the wall is assembled, we lift it and fix it with temporary bevels to the lower frame. We do the same with other external and load-bearing internal walls.
Wall connection
We connect the walls with second upper strappings. To do this, the trim of one of the walls is made shorter, and the trim of the other is longer. This way we get an overlap of the second top trim onto the first trim.
We assemble external and internal load-bearing walls. We will install the internal partitions later on the pre-finishing floor covering. The next stage is the rafter system of the bathhouse.
Log functions and requirements for them
Joists are used as a base for flooring in various situations. Such structural elements are in demand when constructing a subfloor, on pillars and interfloor ceilings. Each option deserves special attention.
Base for subfloor and joists on pillars
The logs used as a base for the subfloor are mounted on the existing floor. They are made on a concrete base, earthen floor, or other surface. The main function of these structural elements in this case is to increase the service life of the rough and finished floor, preventing its deformation and destruction.
PHOTO: pol-exp.com Special attention to the construction of the subfloor
In some cases, logs are mounted on support pillars located in the basement of the house. Their main function is to transfer the load to the foundation of the building. They take on the load absorbed by the floor covering during the operation of the building, and then transfer it to the supporting pillars.
PHOTO: dsk-stolica.ru Logs transfer the load to the foundation
Interfloor joists
During the construction of some buildings, logs act as elements of interfloor slabs. They perceive static and dynamic operational loads, and then redistribute it between other floor elements.
Increased demands are placed on such structural elements. The cross-sectional area and the distance between the supporting elements deserve attention.
PHOTO: i.ytimg.com Increased demands are placed on the ceiling
Briefly about lags
At all times, wood was considered the most valuable building material, because it has a number of unique qualities and characteristics. Currently, there are many alternative materials made, including from wood waste. Similar analogues have proven themselves well for the construction and repair of walls and interior partitions, but for creating floors, wood is best suited.
In essence, joists are large pieces of edged timber that are laid on a cement screed and covered with a finishing floor covering on top. As a rule, a layer of insulation is laid in the cells between the joists, and wires and communication pipes are also hidden in them. The floor of this design is quite warm and very reliable.
You can list the following advantages of lag:
- Floors on joists have unique thermal insulation properties, since the insulation placed between the joists does not let cold air into the room. This is a good option for insulating floors in multi-storey and private houses.
- The noise-insulating properties of the floor are achieved by laying an additional layer between the joists.
- The load experienced by the foundation can be distributed evenly thanks to the floor on the joists. This way you can significantly increase the service life of the foundation of the house, because the impact of the foundation on the ground will be uniform.
- Leveling function. Laying floor joists allows you to very quickly create a perfectly flat base for subsequent tiling or laminate.
- The strength of the logs allows them to carry loads of up to 5 tons per 1 m2.
- Laying joists on a concrete floor does not present any significant difficulties.
- It is much cheaper to build a wooden floor on joists than to install a system of warm or self-leveling polymer floors. However, the result of the work will not be any worse.
Lathing materials
Various materials that have a sufficient level of strength under load, a low deformation coefficient, and must be smooth can be used to construct the sheathing.
The choice is most often made in favor of:
- wood;
- metal;
- reinforced concrete;
- plastic;
- a compound based on synthetic resins.
Mostly coniferous wood is used for lathing. Beams made of pine, spruce, and fir are cheaper than elements made of larch. But the latter has higher strength and resistance to rotting processes.
PHOTO: s.sakh.com The tree is most widespread
Floor insulation in a wooden house
It is necessary to insulate not only the floor on the ground floor in order to avoid the penetration of cold from a cold basement or ground, but also preferably the interfloor ceilings. After all, insulation materials are also excellent sound insulation, which will make your home quiet, warm and cozy. How to independently insulate the floor in a wooden house will be discussed below. We will consider the installation technology, give recommendations on the choice of materials, and pay attention to the subtleties and possible errors.
So, in a wooden house, the floors are most often insulated between the joists. A log is a wooden beam intended for laying roofing sheets or floorboards on it. The joists are mounted on a ready-made old floor, or sheathed underneath so that insulation can be laid between them. It is also possible to insulate the floor without logs. In this case, a denser insulation material is used that can withstand the load of furniture and people in the room.
Choosing insulation for a wooden floor
Let's consider two options for insulation: with and without the use of logs. When insulating floors between joists, low-density material is used. It is best to use rigid slabs of rock basalt mineral wool. This is an environmentally friendly, non-flammable material with high thermal insulation properties. The density of such materials should be from 25 to 40 kg/m³. We do not recommend using slag wool, glass wool or mineral wool with a density less than 25 kg/m³. Such materials are not pleasant and convenient to install, have less thermal insulation, lose their thermal insulation properties over time and have a short service life. We categorically do not recommend using polystyrene foam at all, as it releases harmful substances.
The leaders in the production of insulation from rock basalt mineral wool on the Russian market are the companies Rockwool and Isorok. Their range includes both rigid insulation boards and mats. Mats can also be used for thermal insulation of wooden floors, but insulation in slabs is easier to install and is easier to use. Therefore, we recommend considering the following materials: Light Butts Scandic and Izolight L. Also an acceptable economical option would be Euroizol insulation - IZOL LIGHT. These materials are made from natural material (basalt rocks without the addition of metallurgical slag) and a synthetic binder. They have a pleasant to the touch, homogeneous structure without foreign inclusions. They will not cause allergic reactions or skin irritation during installation.
By choosing cheaper analogues, you risk not only your wallet (because repairs will be inevitable in a matter of years), but also your health. Often cheap materials crumble, and the airborne suspension from the insulation can settle on the nasopharynx and lungs, causing allergies and other negative health effects. This is not to mention the fact that the quality of thermal insulation of such floors will be significantly lower. The proposed materials will last up to 100 years or more! The cost of thermal insulation takes up a very small part of the cost of the entire house, and the difference in price between good insulation and cheap ones can save you a very small amount compared to all construction costs. So is it worth saving on such an important component of the house as thermal insulation?
The main reasons why calculating the distance between lags is so necessary
The need to calculate the distance between the logs is dictated by ensuring a sufficient level of strength and durability of the structure being formed. A correctly performed calculation will allow you to avoid the characteristic creaking and deflection of floorboards when walking. In addition, the number of logs to be laid and, consequently, the cost of construction work directly depends on the selected distance. With a minimum distance, the strength will increase significantly, and with it the costs. At maximum, difficulties may arise directly during operation.
Attention! The main reason for the need to calculate the distance between the joists is the search for the optimal value that allows you to create a high-quality and reliable floor covering at minimal cost.
PHOTO: stroimpilim.ru The distance should be optimal
Insulating the floor in a summer house: a step-by-step guide
Floor insulation is a complex and time-consuming process. This article will discuss in detail one of the flooring options and the entire process of its thermal insulation.
Task: there are logs 100 by 150 mm, the distance between the logs is 60 cm, it is necessary to properly insulate the floor.
First you need to determine for which house (winter or summer) the insulation is being done. For a summer house, a large thickness of insulation is not needed. 50 mm is enough. With a winter house (or a permanent home) everything is much more interesting. For normal insulation you will need at least 150 mm of insulation. Although the thickness of the insulation depends on the location of the house, for example in the southern regions of our country, the thickness of the insulation can be reduced to 100 mm. Standard insulation has a thickness of 50 mm, therefore they must be laid in two or three layers. However, if desired, you can find insulation with a thickness of 100 and 150 mm.
Step by step guide
Let's move on to the stages of insulation, which are the same for summer and winter houses.
Firstly, it is necessary to cover the floor from below with a moisture-proof film: isospan or glassine, to prevent moisture condensation. Izospan is better: it is more resistant to impacts, but more expensive. Glassine, in its properties, resembles paper, and besides, it smells of oil.
Secondly, you need to make a subfloor. You can nail inch boards to the bottom of the floor, although it is better to attach them with self-tapping screws. Fastening with self-tapping screws does not require a lot of space (try swinging a hammer under the house), and boards fixed with self-tapping screws better resist mechanical stress (they are more difficult to squeeze out).
The question is often asked: is it necessary to coat subfloor boards with special products to prevent rotting? Answer: if the space under the house is well ventilated and there is no direct contact of the boards with moisture, then there is no need to coat them.
Thirdly, it is necessary to lay insulation in the space between the joists. The thickness of the insulation is determined individually, but, for example, for a winter house in the Ryazan region, it should be at least 150 mm. Although if you have a warm underground floor, then the thickness of the insulation can be reduced, but in general, the more, the better. As long as there are no cold bridges, otherwise all the insulation will go down the drain. Lay the insulation so that it fits snugly against the joists. There should be no gaps. Since the distance between the logs is 60 cm, the insulation will have to be cut lengthwise. But it is precisely this distance (60 cm) that will allow you to avoid sagging of the floor covering.
Fourthly, we tighten the logs from above with isospan or glassine.
In the future, the technology for insulating summer and winter houses will be slightly different. And not only due to the thickness of the insulation layer.
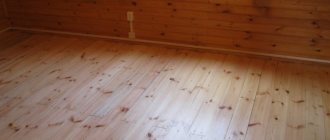
In a summer house, you can immediately lay the floor covering on top of the logs covered with film. People often ask, is it possible to lay OSB on the floor? Answer: it's better not to do this. OSB can warp and break under load. What can I say, OSB is pressed through even by shoes with stiletto heels. It is recommended to use a floorboard. In the future, various types of floor coverings (for example, laminate) can be laid on it.
This completes the insulation of the summer house.
In a winter house you can use the following trick. Air is one of the best insulation materials. Therefore, onto the logs already covered with a moisture-proof film, we nail 5 by 5 cm bars on top, and then lay the floor covering on them. The flooring is no different from that of a summer house. This way, you get an air gap between the insulation and the coating, which will provide additional insulation.
What to consider when making calculations: initial data
To correctly calculate the required number of lags, the following values will be required:
- The thickness of the floorboards or slabs that are planned to be installed in the future.
- Maximum operational load per square of floor surface.
- The distance between the walls or the number of support points.
Attention! This data is sufficient to calculate the maximum pitch between the logs and the cross-sectional dimensions of each element.
PHOTO: smetadoma.com Room dimensions - initial data
Filling the screed
There are two options for further work.
- Make a screed, simultaneously bringing the surface to one level.
- Level the joists using small plywood spacers.
It is very advisable to make a screed in any case. The question is how much effort and resources will be required for this.
- If the difference in the level of the base is small, then filling with mortar is more profitable. If the result is correct, the logs are placed directly on the floor.
- If the difference reaches 5 cm or more, then the screed is made three centimeters long and the lags are installed on chipboard substrates or even on bars.
When the screed has stood and gained strength, we continue arranging the floor. We spread plastic film or waterproofing material on top of it. We glue the joints with tape.
The smell from the basement often penetrates into apartments on the ground floor. To prevent such an attack in the future, we additionally treat the screed with bitumen diluted with diesel fuel. You will have to wait three days for the smell to dissipate. But for many years you will forget what the smell comes from under the floor. By the way, this solution is a powerful antiseptic.
Correct calculation of the distance between floor joists with your own hands
Calculation of stacked elements involves sequential determination of their length, transverse dimensions and pitch. By following the recommendations below, you can easily find all the relevant parameters.
PHOTO: 4.bp.blogspot.com You can lay logs in different ways
Length calculation
To determine this parameter, you need to know exactly in which direction the laying is being done. The length of the logs in this case will be numerically equal to the length or width of the room minus 2-3 cm. In this case, it will be possible to avoid deformations that the assembled structure may be subject to when the air temperature changes.
PHOTO: pol-exp.com The length of the logs is slightly less than the dimensions of the room
To make floor joists, it is preferable to use solid lumber. However, this is not always possible. In this case, they resort to merging two elements. They do this in half a tree. To ensure sufficient rigidity and strength, galvanized plates are used.
In this case, the following rules are adhered to:
- To locate the splice point, select some kind of support. A support column is desirable.
- Splice points on adjacent joists should be staggered.
PHOTO: lestnitsygid.ru Extension occurs in different ways
Section calculation
There are usually no problems with determining the length of one element, but calculating the cross section can cause serious difficulties. When choosing the thickness, be sure to take into account the material of the element and the characteristics of the floor being installed. When calculating the cross-sectional dimensions, the greatest load and the distance of the support points are taken into account.
PHOTO: content.foto.my.mail.ru The cross-sectional size is selected individually
For two-meter spans, choose bars with a cross-sectional size of at least 110x60 mm, for three-meter spans - 150x80 mm, for four-meter spans - 180x100 mm. The longer the span, the larger the cross-sectional size of the timber being laid should be.
The cross-section of the laid timber, as a rule, has a rectangular shape. To ensure sufficient strength and rigidity, it is laid on the edge. Thanks to this technique, it is also possible to minimize the amount of material used.
PHOTO: remontnik.ru Transverse dimensions of boards may vary
If the log calculation is made for a technical room, the requirements may differ. In this case, the load-bearing capacity of the supports must exceed 300 kg/m2. The actual load is determined by calculation, based on what equipment will be installed and how much area it will occupy.
If metal or reinforced concrete is used to make supports, the cross-sectional dimensions of the joists can be much smaller. Such elements resist external influences better than wood.
PHOTO: laminatnapol.su The thickness of metal joists is less
Lag pitch depending on floor covering
When determining the pitch between the logs, the parameters of the boards that are planned to be used for the flooring are taken into account. The greater the thickness of the boards being laid, the larger the step between the lags. So, if the thickness of the boards being laid is 2 cm, the step can be 30 cm. Increasing the transverse dimensions to 2.5 cm allows you to place the elements at a distance of up to 40 cm, at 3 cm - up to 0.5 m. When performing calculations, you can use the average formula : every additional 0.5 cm of transverse dimensions allows you to increase the pitch by 10 cm.
Sometimes OSB or plywood is used as flooring. In this case, the calculation procedure changes. The panels have great rigidity. If their thickness is 1.5-1.8 cm, the step is taken equal to 0.4 m. With a thickness of 2.2-2.4 cm, the step increases to 0.6 m. The sheets are attached to the logs at three points: in the center and around the edges. The sheets are laid on the joists in such a way that adjacent panels touch in the middle of the support.
PHOTO: chudopol.ru The step under plywood is smaller
Installing floors on joists
Now let's take a closer look at how the floor is installed on joists.
Preparing for work
Preparations for work involve more than just purchasing materials. This also includes purchasing the necessary tools and processing the base with materials. Let's talk about everything in detail and in order.
Work tool
There is nothing special here; almost everything can be found at any home craftsman. The rest can be purchased, rented or found from friends.
Table 1. Required tools
| Tool, photo | Description |
Roulette | When setting lags, accuracy and consistency are important. It is necessary to check the distance between them, otherwise problems may arise with the installation of the rough coating and its operation. If the distance is too large, the floor will sag. You can add other marking tools to the tape measure: a carpenter's square, a long ruler (guide) and a pencil. |
Hand saw for wood | Both the joists and the flooring material will need to be adjusted to the required dimensions. In many cases, a hand tool will be sufficient. Even if you plan not to use it, you should still have it in reserve. |
Electric jigsaw | While you can cut bars and boards with hand tools, this will not work with sheet material. For plywood, and even more so OSB boards, you cannot do without a power tool. It must have a powerful motor and a convenient cutting guidance system so that the work proceeds quickly and accurately. Advice! Buy several replacement wood files, as they may burn out during intensive use. Do not buy cheap consumables from Chinese manufacturers, as they are extremely unreliable. Pay a little extra and take products from the same Bosch company. |
Stationery knife | This tool is an indispensable assistant for any installation work. In our case, it will be useful when laying mineral wool for insulation. |
Hammer | The hammer drill is also extremely versatile and comes in handy almost always. It will be useful to us when we need to permanently tie the logs to the base with anchors. |
Spray | In certain cases, both the base and the logs themselves are recommended to be treated with special impregnations. They can be applied with a brush or roller, but it is most convenient and quick to do this with a sprayer. This device also allows you to significantly save fluid consumption. |
Screwdriver | The flooring is securely attached to the joists. Self-tapping screws, or less often nails, are used for this. In the first case, you will not be able to do without a screwdriver. It is worth purchasing a tool with good traction so that it can cope with wrapping long hardware without any problems. |
Additionally, you may need other tools, for example: a hammer, a nail puller, a steel knife, etc. Here everyone looks for themselves, depending on the situation.
Examples of calculating logs for a wooden floor
Knowledge of theory does not always allow you to apply it in practice. In this case, it is worth getting acquainted with an example of calculation for various buildings.
PHOTO: etk-fashion.com The calculation procedure depends on the type of house
Standard panel house
Let's give an example of a calculation for a room measuring 3x5 m. The base screed serves as a support. Adjustment is provided using clamps. For the construction of the subfloor, 20 m thick plywood is used. The decorative covering is laminate.
Guided by the reference data, we take a step of 30 cm. For a span of 3 m long, we select a beam with a cross-section of 150 × 80 mm. The gap between the wall and the outer joists is 50 mm. The required number of elements is found from the equality 300 × (x-1) + 80 × x + 2 × 50 = 5,000. After the calculations have been performed, it can be found that x = 12.1 beams. The found value is rounded to the nearest integer. If the operating load is small, 12 beams are sufficient. Otherwise, you can accept 13.
PHOTO: show-master.am The number of joists is selected taking into account the load
Frame building
In this case, the initial data is the step between the floor beams, equal to 1 m. The remaining parameters are taken to be the same as in the previous example. Using reference data, it can be established that with a plywood thickness of 20 mm, the logs should be located in increments of 0.3 m. In this case, the beams are located at a distance of 1 m from each other. In this case, first the logs are attached to the sides of the beams and leveled. Then beams are placed across the primary logs in increments of 0.3 m.
The length of the primary beams is taken equal to the length of the beams - 3 m. Their cross-section should not be less than 200 × 150 mm. For a room 5 m long, the required amount of x is found from the equality:
300×(x-1)+ 150x+2×50=3000
After solving the equation, you can find x=5.3 pieces. The value is rounded to 4 or 5 depending on the expected load. Additionally, an adjustment is made for increased load, which depends on the operating conditions of the frame house.
PHOTO: stroiremdoma.ru For frame framing, the calculation is different
Insulation materials
The veranda is a great place for relaxation, family tea parties and friendly gatherings. In the warm season, the terrace becomes the most popular part of the house and a great opportunity to gather dear people together. However, with the onset of cold weather, the idyll ends - no one wants to sit on a cold veranda. But the situation can be easily corrected - all you need to know is how to properly insulate the veranda. By the way, proper insulation will not only preserve the usual comfort, but will also help protect the corners of the extension from the formation of black spots that occur under the influence of low temperatures.
Content:
- What is the best way to insulate a veranda?
- How to insulate a wooden veranda?
- Tools and building materials
- We insulate the floor
- How to insulate walls?
- How to insulate the ceiling on the veranda?
- How to insulate a summer veranda?
- Features of insulation from the outside
- Veranda: photos of insulated options
- Video: how to insulate a veranda
What is the best way to insulate a veranda?
The range of thermal insulation materials is quite wide, so the selection process remains more relevant than ever. Meanwhile, there are samples that have proven themselves best. These are the ones you should give preference to when purchasing.
The leaders in the number of positive reviews are mineral wool and polystyrene foam. A profitable way to insulate a terrace, and even save a significant amount. To improve the created effect, a foam pad is used. Metallized sheets reflect cold street air and prevent precious heat from escaping. Penofol is a high-tech heat insulator consisting of foamed polyethylene covered with aluminum foil. This material can be used both in tandem with other thermal insulators and alone. Of course, the first option is more effective, because allows you to use the benefits of protective raw materials to the maximum.
How to insulate a wooden veranda?
The problem of how to insulate a cold veranda begins to worry the owners of country cottages with the onset of the first frost. Will you really have to leave the tradition of relaxing on the terrace until spring? Not at all - warm yourself up and continue enjoying life!
Tools and building materials
- insulation (penofol, mineral wool, expanded polystyrene, etc.);
- polystyrene foam (thickness at least 10 cm);
- nails, hammer, nail gauge;
- scissors, hacksaw;
- tape measure, pencil;
- scotch;
- paint, brushes;
- putty knife.
We insulate the floor
If you are thinking about how to insulate a plank veranda, but don’t know where to start, then experts advise that the first step is to protect the floor. Some people mistakenly believe that it is not necessary to insulate floors and that you can limit yourself to just the walls and ceiling, but this opinion does not correspond to reality. If there is no continuous foundation strip, then the question of how to insulate the floor on the veranda takes on a different meaning. Defining.
The seams between the boards are puttied, then painted and punched with penofol on the underside. The inside of the floor can be insulated with polypropylene-based linoleum or felt-based carpet. Arranging a second floor is considered a more complex, but also more reliable method. It is used as a rough version, followed by installation of thermal insulation and finishing coating. The only thing, keep in mind that this will significantly reduce the ceiling height.
How to insulate walls?
How to insulate a veranda from the inside? If this problem is relevant to you, then get ready for the fact that you will have to completely replace the wall cladding. The boards are removed using a nail gun. To prevent the tool from leaving marks, place a piece of cardboard under it. The more carefully you remove the old boards, the easier it will be to install new ones. One of the simplest solutions is to attach insulation with a foil layer (10-15 mm thick) to wooden brackets, and finish the walls with MDF panels on top.
If the walls are brick, then it is necessary to make a sheathing of transverse wooden beams with a section of 25x40 mm. In this case, the insulation used is thicker - 25-30 mm. It must be cut into strips and laid between the beams. There should be no gaps.
The following method is no less popular. After carefully measuring the area, penofol is cut into pieces of the appropriate size. Leave a couple of centimeters at the top and bottom for folding. Cover the walls with material and secure the edges with tape. Next, polystyrene foam is laid on top of the penofol. The panels should fit together as tightly as possible. In narrow, hard-to-reach places you will inevitably need pieces of non-standard shapes and sizes, which can be cut using an ordinary hacksaw.
Nail the trim. If the thickness of the insulation is chosen correctly, then the boards will not bend and “sit” perfectly. The final stage is painting the trim and replacing the ceiling plinth.
Mistakes made when calculating logs for plywood and their consequences
Typical mistakes that are made when calculating lags for plywood include too wide a pitch, insufficient number of lags, and incorrect section dimensions.
The negative consequences of such errors include:
- the appearance of cracks in plywood;
- deflection of plywood;
- damage to the decorative coating;
- unevenness on the surface of the finishing coating;
- destruction of supporting elements.
PHOTO: e-stroy.pro If there are errors during operation, problems will arise
How else can you calculate the size and number of elements for installing a floor using joists?
Not everyone is able to perform the calculation on their own. In this case, you can use alternative options. There are various ways to find the required values, each of which deserves attention
Online calculators and computer programs
Many users turn to online calculators and specialized programs in this case. To calculate the lag parameters, their number and step, you just need to fill in the corresponding cells. The program will display the final value.
PHOTO: itemy.ru Online calculators simplify calculations
Average tables
There are many reference tables containing information relevant to users. In them you can find the recommended cross-sectional dimensions depending on the span length. Based on the selected lag parameters, the pitch between the panels to be laid is selected. The obtained values are averaged and do not allow us to estimate the real load on the supporting elements.
PHOTO: expertbrusa.ru Average tables can be useful