Supply and exhaust ventilation units are efficient, reliable and durable. But! They are expensive.
Therefore, many homeowners, faced with a lack of clean air in their apartments, try to solve the problem on their own. They build forced ventilation with their own hands. The seemingly simple task of “how to properly make forced ventilation” is fraught with many pitfalls. It is not enough just to select powerful fans and lay inconspicuous air ducts. It is necessary to calculate all elements of forced ventilation, their proper placement and layout.
About forced ventilation
in a private house, ventilation equipment is usually placed in the attic.
The air flow generated using mechanisms and supplied to the room is called a forced ventilation system. In the direction of air movement it can be:
- supply;
- exhaust;
- supply and exhaust.
By air delivery method:
- with air ducts;
- without air ducts.
Many apartment owners limit themselves to forced ventilation, when the air supplied by a fan creates increased pressure. This enhances the displacement of exhaust air through centralized ventilation ducts.
Another way to improve air exchange is forced exhaust ventilation. The outlets of the ventilation ducts in the kitchen, toilet and bathroom are equipped with exhaust fans. They create rarefaction in the air. To make up for the shortage, air enters the apartment through vents or air supply devices.
On the upper floors of high-rise buildings, the above methods rarely fully satisfy the need for fresh air.
The most effective is a forced supply and exhaust ventilation system. In which both the supply and exhaust of air are provided by mechanisms. Assembling it yourself is not so difficult, especially if you use our tips.
Purpose of the roofing element UP
Diagram and overall dimensions of the passage unit for a soft roof.
The unit for the passage of the ventilation duct through the roof is marked UP; in the standard version there are 11 items. For difficult operating conditions, this additional element is designed and manufactured individually. The pipe passage through the roof is regulated by GOST 15150, which determines the diameter and dimensions of the structure.
With the help of a roof penetration, only cold air is removed; for chimneys, structures made of fire-resistant materials are used, the dimensions of which are controlled by other SNiP standards.
When choosing a control unit for an air duct through the roof, they are guided by the degree of dust, temperature differences, gas contamination, and humidity of the transported air mixture. The additional element of the passage of the air duct through the roof is fixed to the roof's load-bearing frame (lathing or counter-lattice). Shown in Fig. 1.
Forced ventilation device
the snail fan is very powerful, but noisy.
A forced ventilation device in an apartment or cottage is a combination of elements for various purposes, which all together perform one task:
- Air intake grilles. They protect air ducts from mice, insects and debris. Attached to the outside of the air ducts;
- Filters. Cleans the air from dust and fluff. Especially thin ones even deposit plant pollen. There are many modifications of filters of different shapes and degrees of purification;
- Air valves. Necessary for adjusting the air flow supplied from outside. In the cold season, protect the system from icy gusts of wind;
- Fans. Create a constant air pressure in the ventilation ducts;
- Sound absorbers. These are materials that absorb mechanical noise and aerodynamic noise in air ducts;
- Heaters. They heat the supply air in winter;
- Ventilation ducts or air ducts are pipes through which air moves;
- Automatic block. When doing forced ventilation in a private house with your own hands, as a rule, this unit is neglected. Automation controls the system, turns fans and heaters on and off. The most advanced modifications change the speed of the blades.
Bathroom fans: types
There are two categories of hoods on the market: axial and centrifugal. In design, they differ significantly from each other, although they perform the same function.
Axial
The design is simple - it is an electric motor with a bladed impeller mounted on its shaft. The blades are tilted inward towards the motor. They create pressure, generating a flow of air that moves along the axis of the device. Hence the name - axial.
Such models have great power and quiet operation. They are often installed in bathrooms and toilets.
Centrifugal
The operating principle of this fan is significantly different from the previous one. The design has an impeller, which drives air not along the axis, but across it, throwing it towards the walls of the housing. That is, everything happens under the influence of centrifugal force. Hence the name.
A flow is formed inside the device, which moves in a spiral, which is why these types are often called radial. A snail is added to the design of the hoods, facilitating the movement of air masses. The devices are not the most powerful, but they work quite quietly.
Selecting a forced ventilation scheme
- Combined. With such a system, forced exhaust is combined with natural air supply or vice versa. The most widely used ventilation device in an apartment or private house. Installation is quite simple and does not require special care. We have already mentioned the disadvantages above.
- Forced supply ventilation with cooling requires the introduction of an air conditioner into the system. Such equipment is installed directly on a riser or a private house; it is quite expensive and cumbersome.
- Forced supply ventilation with air heating. The easiest way to organize it is to install a recuperator. It will save energy costs by using the heat from the exhaust air. The downside is that the recuperator is quite expensive.
- Supply and exhaust forced ventilation with recirculation. Exhaust air is filtered, partially mixed with street air and returned to the room. Such a forced ventilation device is quite complex, so only experienced craftsmen undertake to do it in an apartment with their own hands.
Expert advice
Tips from experts on equipment selection and installation:
- If you choose a strong and durable hood, take a closer look at models made of stainless steel and aluminum.
- If you choose a fan with high power and too much air flow, this may lead to blockage of the air duct. This will cause all the smell and smoke to spread to other rooms.
- Ventilation ducts and air ducts should be cleaned periodically. Please consider this before choosing.
- If the kitchen is more than 15 square meters, two ventilation ducts are installed. One will serve to fill with fresh air, and the second will serve for exhaust.
- It is important to consider that the decorative grille and valve sometimes reduce the speed of air movement by 10 times. In this regard, do not opt for a device with minimal power.
- When choosing a hood, take into account the volume of air that needs to be purified within an hour. We take the volume of the kitchen, multiplying the area by the height, multiplying by the air exchange rate (12) and multiplying by 1.3 (minimum reserve coefficient). This way you will get the performance of the hood.
- When determining the dimensions of the hood, take into account that the area of the air intake should correspond to the area of the working surface of the stove, or better yet, exceed it.
- How to take into account a comfortable noise level? 20 decibels is like the rustling of pages, 25-35 is about like a loud whisper, 50 dB is the noise level like during a normal conversation, 89-90 is like the noise of a passing motorcycle or a hair dryer when drying, 110 is like how it works drill or hammer drill, 130 dB is already exceeding the pain limit.
- When choosing a hood, the question may arise: do you need lighting? They are automatic, touch-activated or with a button. Experts believe that the presence or absence of lighting does not in any way affect the main tasks of the hood, so when choosing, be guided solely by your budget and your own taste. Focus on how the hood design will fit with the interior design.
Calculation of forced ventilation
compact installation for forced ventilation
If you are planning to make forced ventilation in a private house with your own hands, you should first carry out calculations. Quite complex calculations are required for forced supply and exhaust ventilation:
- Performance;
- Power and number of fans;
- Noise level;
- Air duct cross-section;
- Power and types of auxiliary devices: heaters, recuperators.
Before doing forced ventilation, it is important to carry out the calculations correctly.
Calculation by multiple
This is one of the main quantities used when calculating a forced ventilation system. The air exchange rate shows how many times the air in the room should be changed in 1 hour. For example, a multiple of “2” means that the air will change twice in an hour.
Air expansion table according to SNiP
| Purpose of the room | Temperature in winter | Exhaust air volume or multiplicity |
| Outflow | ||
| Bedroom, living room | 20 | 3 cubic meters of air per 1 square meter of living space in a room |
| Shared bathroom | 25 | 25 cubic meters per hour |
| Toilet | 18 | 25 cubic meters per hour |
| Bathroom | 25 | 25 cubic meters per hour |
| Pantry | 18 | 1.5 (multiplicity) |
Calculation by area
selection of the cross-section of the air duct
This calculation is suitable for home craftsmen who decide to assemble the forced ventilation of a private house or apartment with their own hands. Calculation of forced ventilation averaged for rooms with a height of about 3 meters: air flow per 1 sq. meter of total area is 3 cubic meters per hour.
Calculation of the area of ventilation ducts
The cross-sectional area of the air ducts is also very important for the effective operation of the forced ventilation system. The cross-sectional size is affected by the volume and speed of exhaust air.
Now we choose with our own hands which type of hood: forced or natural, which is better for ventilation. In the first case, the air speed should be about 3.5 m/second, in the second - about 1.5 m/second.
To select the correct cross-sectional area of the air ducts, use our diagram.
Fans for bathrooms and toilets in the 220pro.ru catalog
Our store offers well-known and popular brands of household bathroom fans:
| Soler & Palau | Blauberg | Fresh | Era | Vents | MMotors JSC |
Let's divide them into groups and get to know each other better.
For a city bathroom or standard-sized bathroom, the most popular type of exhaust fan is a model with a power of up to 100 m3/hour
The catalog contains:
Surface-mounted axial fans
Soler & Palau
| SILENT-100 CZ SILVER DESIGN-3C | SILENT-100 CZ GOLD | SILENT-100 CHZ | SILENT-100 CMZ |
| ECOAIR DESIGN 100 H (with humidity sensor) | ECOAIR DESIGN 100 M (with cord) | ECOAIR DESIGN 100 S (basic model) | EDM 80L |
| SILENT-100 CZ | |||
| Power 65-95 m3, noise 26.5-33 dB, the basic Silent model has a check valve and quiet running bearings (CZ), other models can optionally be added - timer (R), humidity sensor (H), cord switch (M ). | |||
Blauberg
| Aero Still Vintage 100 | Aero Still 100 | Aero Still 100 T | Sileo 100 |
| Power 84, 97 cu.m. meters, noise level 25 dB, additional options include cord switch and timer. | |||
Era
| FAVORITE 4 | COMFORT 4 | DISC 4 | E 100 S |
| OPTIMA 4 | |||
| Power 80-90-95-97 m3, noise level 35 dB. Models with additional options have additional coding 01 - power cable and switch, 02 - traction motor, C - check valve. | |||
MMotors JSC
| MM-100 S (basic) | MM-100 S OK (with check valve) |
Power 60 cubic meters, noise 25 dB, ultra-thin models with a thickness of 4 cm.
Duct axial fans
For installation in a round air duct, duct models are used. Among low-power ones we offer Bulgarian MMotors JSC
| BO 90 | BO 90T |
Power 50 m3, noise 36 dB, operating temperature +100-150°C.
Centrifugal fans
Due to the design and the creation of additional traction, such hoods, even at low power, are more efficient than axial ones. They cost more, so they are taken less often. Although the “usefulness” of a centrifugal fan quickly pays for its cost.
The main operating mode is minimum speed and minimum energy consumption. The hood works great for a long time in the background for routine cleaning. When the humidity rises, the maximum mode is switched on and the air in the bathroom is quickly replaced.
Among the centrifugal ones we offer a fan from the company Era
| SOLO 4C era |
Three-speed, capacity 42/64/100 m3, noise level 25.8-30 dB, equipped with a check valve and filter. Suitable for wall/ceiling installation and vent mounting.
In new houses, with large apartments, townhouses and cottages, the bathrooms are more spacious and for cleaning they are equipped with hoods with a capacity of 100 to 400 m3 per hour
The 220pro.ru catalog presents the following models:
Axial fans for wall or ceiling
Blauberg
| Aero Chrome 100 | Aero Still Vintage 125 | Aero Still Vintage 150 | Aero Still 125 |
| Aero Still 150 | Deco 100 (ceiling) |
Power 102, 154, 254 m3, noise level 31-33-38 dB, all models have a check valve, additional options are indicated by letter markings, T - with a timer, ST - with a cord and a timer. Ceiling ones have a power of 105 cubic meters and a noise level of 37 dB.
Soler & Polau
| SILENT-200 CRZ (with timer) | SILENT-300 CHZ (with timer and humidity sensor) | EDM 200C | Decor 200С |
Capacity 175, 180, 280, 320 m3, noise level in the SILENT series 35-36 dB, in other models 42-47 dB.
Era
| ERA 5S | ERA 6C (with check valve) | SLIM 5 | SLIM 6-02 (with pull cord switch) |
Capacity 140-183, 250-290 m3, noise level 30-33, 36-38 dB.
FRESH
| PAX Norte (quietest model at 17 dB) | INTELLIGENT White | INTELLIGENT Black |
Capacity 110-132m3, noise 17-22dB. New generation fans. Equipped with a smart control system, speed switching mode, and sensors. They can work automatically using a built-in program or run in the selected mode via a smartphone or computer.
Duct hoods
Blauberg
| Tubo 100 | Tubo 125 | Tubo 150 | Turbo 100 |
| power 137, 245, 361 m3, noise level 38-39-40 dB. | two-speed, power 170/220 m3 per hour, noise level - 27/32 dB, wall or ceiling mounting. | ||
Soler & Palau
| TDM100 | TDM200 | TDM300 | Silentub 100 |
| power 110-200-300 cubic meters, noise 40-45 dB, suitable for short round air ducts and for installation in a ventilation hole in the wall. | power 100 cubic meters, noise 37.5 dB, for short round channels and for wall mounting. | ||
Era
| PRO 4 | PRO 5 | PRO 6 |
productivity 115, 195, 320 cubic meters per hour, noise from 32 to 36 decibels, mounted on a wall or ceiling, both exhaust and air supply work.
Vents
| iFan D100/125 |
intelligent, maximum power 106 m3, in quiet mode - 72. noise level 31 dB (22 in quiet). Basic humidity control, timer, additional speed control - motion sensor operation. Suitable for non-stop ventilation at a capacity of up to 40 m3/hour.
Air distribution
The efficiency of forced ventilation in an apartment assembled with your own hands is often reduced due to poor air distribution.
With well-planned air distribution, there are no “dead zones” with standing air in a house or apartment. The lower the air exchange rate, the higher the likelihood of this phenomenon.
For inflow into the living room, install 2 supply distributors on the side of the outer wall, and 1 or 2 exhaust distributors on the opposite wall.
The best air distributors for forced ventilation systems not only quietly supply air to the room, but are also discreet. The simplest distributor is a metal plate drilled for a “colander”. Having thought it through and calculated well, you can make holes directly in the air duct.
You can hide the supply openings behind curtains, under a sofa or closet, or between ceiling levels. Exhaust grilles should be placed as high as possible.
The ratio of inflow and exhaust depends on the nature of the room and the lifestyle of the household. For example, in a living room for smokers, the exhaust fan should be more powerful than the supply fan. This creates a vacuum in the air and prevents smoke from penetrating into adjacent rooms.
The ventilation of the kitchen and other rooms with high humidity levels is calculated using the same principle.
Preparation for installation
Proper ventilation is well thought out from the very beginning. Errors made in calculations will then be practically impossible or too expensive to correct. It's better to do everything from the very beginning.
A wide variety of materials can be used to cover the base. There are no special building standards. But the design of the ventilation system or pile foundation must be calculated in accordance with the weight of SNiP and GOST. Otherwise, the house will not last long, or it will simply be uncomfortable to live in.
When designing a home ventilation system, it is important to consider this:
- The presence of a stove or fireplace in the room.
- Each room and the cottage as a whole.
- Population.
- The need and type of air filters that should be built into the system.
- Individual architectural features of the building and much more.
According to standards, the entire volume of air in the living space of a house must be exchanged at least once per hour (air exchange coefficient “1”). For utility rooms, basements and corridors, this coefficient is reduced to “0.2”.
In the kitchen, the air should be replaced at a rate of 60-100 m3/h depending on the type of stove. And if it is a gas stove, then it must be changed at the rate of at least three times per hour for the volume of the kitchen space. In bathrooms and toilets, the air exchange rate should be 25-50 m3/hour.
For internal drains, ventilation should be carried out separately using a vent pipe from the general riser pipe. It is also recommended that the ventilation duct above the stove operate separately. But it will not be possible to combine the duct from it and the bathroom into one shaft. This can lead to amber sewer leaking into the kitchen.
When preparing the structure, it is also necessary to take into account the size and power of ventilation ducts, the power of the heating system and the size of fans. You need to calculate many parameters. And they all must be accurate and flawless, otherwise the ventilation efficiency will not be what we want.
For a small one-story house with several rooms, you can do similar calculations yourself. Take the volume of the premises and multiply it by the appropriate coefficients and add the air exchange volumes for the kitchen and toilet.
However, it is best to order ventilation design for a large house from specialists in this field with appropriate engineering qualifications. Here the cost of error may be too high.
Selection of equipment for forced ventilation
an approximate set of components for home ventilation
When starting to make forced ventilation in a private house with your own hands, you can choose one of the options:
- Inexpensive systems assembled from disparate components;
- An improved forced ventilation system in an apartment, often containing a recuperator.
Most home craftsmen with skills opt for the second option. It is better to overpay for high-quality equipment and install it, saving on installation.
Installation location
distribution of exhaust fans in the kitchen
The location for the ventilation unit should be as far as possible from bedrooms, children's rooms and recreation rooms.
Options:
- Kitchen;
- Hallway;
- Balcony.
It’s much easier for owners of private houses; they also have attics. And the neighbors are far away.
Equipment with good sound insulation is almost inaudible behind 2 closed doors.
Hole in the wall yourself
It's quite difficult to do, but possible. To do this you need a hammer drill, a few days of free time and the hands of a hero. In fact, this is not an easy task, if you have never made such a hole, it is better not to start drilling a load-bearing wall in your home. Unlike diamond drilling, when working with a hammer drill:
- a lot of dust will be generated that will cover the entire room.
- the hole will not be even, so you will have to dilute the cement mortar and cover the voids.
- a funnel is formed at the exit photo No. 1
- you can burn the hammer drill
Finding drillers with diamond drilling equipment is not difficult, look on Avito in your city.
Average price 3000 rub.
If you want drilling work to take place in the kitchen without dust and dirt, order drillers who deal with home ventilation. Ventilator base. As a rule, on Avito there are builders who are used to drilling in houses under construction, and ventilation workers in apartments that are ready to be renovated, so they have additional equipment for collecting dust and dirt when drilling walls.
The average price of drilling without dust and dirt is 4000 rubles
Air balance
When calculating forced ventilation, a positive balance should be maintained. This means that the volume of supply air is greater than the volume of exhaust air.
The main rule: air moves from clean rooms (bedrooms, living rooms) to dirty ones (kitchen, bathroom).
If it is customary in the house to tightly close doors with baseboards, you need to equip them with grilles for ventilation. Then the air can circulate freely from room to room.
Air is supplied and removed mechanically into enclosed spaces.
The ratio of supply and exhaust in premises for various purposes.
| Purpose of the room | Innings | Outflow |
| Living room | 200 cubic meters/h | 200 |
| Bedroom | 250 cubic meters/h | 200 |
| Corridor | — | 50 |
| Kitchen | 100 cubic meters/h | 150 |
| Combined bathroom | 50 cubic meters/h | autonomous |
| Total (required minimum) | 600 cubic meters/h | 600 |
Staircase designs on bowstrings
This is a simplified version of the porch, especially for a small country house. A support made of bars is attached to the bowstrings. For metal beams, we leave a few degrees of inclination, and then weld them.
Thus we get a forged porch. And for wooden beams we nail a support. At the same time, we make cutouts on the bowstring in half of the board and insert steps into them.
DIY forced ventilation
You can assemble a completely professional ventilation system with your own hands.
For ease of assembly and fastening, you will have to replace the double-glazed window facing the balcony. The new one should be 20 cm lower, and close the resulting hole with a polyurethane foam insert.- Carefully cut the 125 nipple into the polyurethane foam. If you do this correctly, you don’t even have to seal the insertion point.
- Away from the PPU insert, we install an FVK or FV filter at 125. The window on the loggia will serve as an air valve.
- We connect the filter to an NK type electric heater using a semi-rigid hose. The distance between the filter and the heater can be any. The heater should be placed away from flammable surfaces or its body should be insulated. The case can heat up to 70 degrees, and the cover will have to be removed periodically.
- Attach the fan at a distance of 250 mm from the electric heater. To make it work silently, insert it into the box and fill it with polyurethane foam. Before doing this, strengthen two sections of the air duct and provide a power connection.
- Next, we install a direct air duct in the apartment with our own hands for forced ventilation, where the air flow will be leveled, and install a sound muffler. 60 cm will be enough, but if there is a place better than 90 cm. The total length of the forced ventilation system, assembled with your own hands, will be about 150 cm.
- The air supply to the rooms will be through air ducts into which 10 x 15 cm grilles are cut, at least three for the entire forced ventilation system in the apartment. If the length of the air duct is more than 5 m, you should use a galvanized pipe.
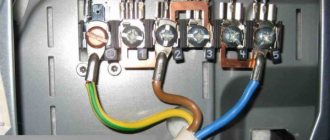
- We automate the forced ventilation system in the apartment. To do this, we connect the temperature controller according to the diagram using a three-wire cable. All electrical equipment is equipped with circuit diagrams that need to be used. A duct temperature sensor is installed in the middle part of the air duct, no closer than 1.5 meters from the electric heater. The equipment is powered from a standard electrical outlet.
As you can see, it is not too difficult to make forced ventilation in the house. The scheme we presented is suitable for a two-room apartment. Properly done forced ventilation will work with an open window or good exhaust hood. As a hood, it is enough to install a household fan with a power equal to the supply fan into the ventilation grille of the bathroom.
Which hood to install in the kitchen of a private house
Before you learn how to install a hood, you need to determine what types of devices there are and what filter system they are equipped with. In order for the cassettes to not only eliminate unpleasant odors, but also to collect oily particles, their design must include padding polyester or non-woven lining. Filters of this type are disposable. Reusable cassettes are made of aluminum or steel; special fat solvents are used for cleaning them.
There are also carbon filters that not only trap soot and fats, but also neutralize unpleasant odors. The disadvantage of such products is that they are disposable. According to the design features, hoods come in the following types:
- hanging;
- dome;
- built-in;
- island;
- retractable.
Flat
Hoods of this type attract buyers with their small size and simplicity of design. Since they do not have a chimney, they can be attached to the bottom of a wall cabinet. If the size of the device is not enough to cover the stove, you should pay attention to retractable models. Such products are suitable for rooms with small areas.
Flat hoods work on the principle of air recirculation. They absorb it using fans, clean it, and then return it to the room. As a rule, such products are equipped with carbon filters.
Built-in
This type of hood is also a recirculation type. Since the device can be installed inside a wall cabinet, it is unobtrusive and blends harmoniously into the interior. The body has a cubic shape with a retractable panel for greater air capture. First, the hood is installed in the wall, and then the cabinet is hung.
Dome
A device of this type is distinguished by a large volumetric shape resembling a hemisphere or trapezoid. The design allows you to install powerful fans and several filters. Therefore, experts believe that hoods of this type are the most effective. Cleaning can be recirculation or through a connection to a ventilation shaft. Such products are installed in rooms where there is no access to fresh air.
Number of sockets
How many minimum outlets are required in the kitchen?
Here, follow the rule - for each stationary kitchen appliance, plan your own socket + 2 blocks along the edges of the countertop + 1 piece near the dining table.
In addition, it doesn’t hurt to mount one socket immediately under or near the switch at the entrance to the room.
The area with switches usually remains uncluttered, and a free point where you can take voltage (for example, for a vacuum cleaner) is never superfluous.
Now mark the points on the apron for connecting non-stationary devices. Place at least two pieces on each part (right and left) of the kitchen.
This will include an electric kettle, blender, mixer, etc.