The gutter helps protect the roof and walls of the house from excess moisture. Nowadays it’s easy to purchase your favorite drainage system in a store. Well-known brands offer protection from moisture, and specialized companies offer installation guarantees.
The costs for this are considerable, the amount comes out to be large. You can purchase a drainage system in a store and save on installation. Better yet, make such a device yourself with a little effort and knowledge.
Materials for homemade gutters:
- plastic bottles;
- sewerage pipes;
- tree;
- galvanized metal sheets;
- copper metal sheets;
- profiles for drywall;
- ceramic drainage.
Purpose and functions of drainpipes
An external drain is a structure made of open gutters that collects water from the roof and discharges it into vertical drain pipes. In places where the system ends, liquid collection vessels are installed or storm drains are equipped.
Main functions of gutters:
- Protective . Drains water from the base and walls of the house.
- Cumulative . Stormwater can be collected in a container for irrigation.
- Decorative . A homemade beautiful drain will decorate a gazebo or cottage.
Industrial drains are made of galvanized steel and special plastic. Their cost is high. Plus elbows, corners, funnels, plugs, the price will increase several times. Finished products have one advantage - they are assembled like a construction set. Knowing how to install gutters if the roof is already covered with roofing can save a lot of money. Homemade drains are made from scrap materials, and their service life does not differ from ready-made structures.
On a note! If you approach the matter correctly, select the material and components, then a self-made drainage system can replace the main drainage system.
What function should the drain perform?
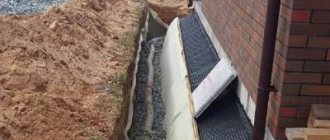
Regardless of what material the drain is made of, it must protect the foundation and base of the house from rain and melt water.
A drainage system is necessary for collecting and discharging rain and melt water
Waterlogged soil can cause premature deterioration of building masonry materials or subsidence of the foundation. Reducing the load-bearing characteristics of the foundation is a very big problem. It can only be noticed when cracks appear on the facade walls of the house. Restoring the strength of the foundation is very difficult and expensive; such work can only be performed by professionals. But they are not able to give a 100% guarantee that the measures taken will achieve the goal. All other functions of drainage (collection of rainwater into a container, decorative decoration of the facade of a building) are considered secondary and do not have any impact on the duration and safety of operation of the building.
Option for organizing drainage
Prices for gutters
Gutters
Materials used for homemade drains
To make a drainage system for a shed or a country cottage, you can use simple materials that you have on hand.
Drainage protects the building from the destructive effects of moisture Source diy.obi.ru
To make a drainage system you can use:
- galvanized steel;
- sewer pipes;
- PVC;
- tree;
- plastic bottles.
It is more convenient to make a tin drain using a bending machine. Cut galvanized steel sheets with allowance for seams. Bend the edges to join. Roll out the parts, make seams by hand, or use a seaming machine. Narrow the pipe at one end and install a riser.
PVC pipes are easier to assemble. The joints are connected as in a sewer system. For the gutter, the whole part is divided into several identical parts. You can give the riser the desired configuration using shaped elements.
A plastic spillway is a budget and simplest option. Connect 1.5-2 liter bottles into a pipeline of the required length, first cutting off the bottom and neck. Seal with sealant. For the gutter, make trays, fasten them with wire or a stapler through the holes made with an awl.
Do-it-yourself drainage installation from scrap materials Source onduline.ru
A wooden drain is mounted from boards that are attached at an angle of 90 degrees. They are connected with an overlap into the gutter so that water does not flow through the holes. The bottom is covered with construction film. Installed on brackets with a slope. The water drainage pipe can be made of PVC, tin corner, or wood. For wastewater, make a ditch at a distance of 150 cm from the wall and fill it with broken bricks and crushed stone.
Attention! It is necessary to give the gutter a slope of at least 2 mm per 100 mm and cover the joints, treat the wood with a special agent that prevents rotting. Such a drainage system will serve the home owner for a long time.
A homemade drain for a cottage is a good option used when installing storm drains. Gutters can turn out not just beautiful, but also original. Any imagination can be realized when creating a design for reliable protection of households from wastewater.
Material for gutters
The selected material must be strong, durable and resistant to environmental influences - precipitation, temperature changes and ultraviolet rays.
To one degree or another, these requirements are met by:
- Galvanized sheet steel is a budget option, actively used to create gutters for drainage systems. Its disadvantage is that it is not very strong; the structure can be damaged with a crowbar when cleaning ice.
- Metal with polymer coating. They are excellent for buildings whose roofs are covered with metal tiles, since it is easy to choose a material that matches the color. Resistance to low temperatures and corrosion make steel gutters with a protective polymer film a good choice. The only negative is the noticeable noise that occurs when water passes through the gutters.
- Painted sheet steel. Such structures will require periodic renewal of the coating. Not a very good choice for houses covered with a soft roof - abrasive particles falling into the gutters along with rainwater will gradually destroy the metal.
- Plastic. Durable and corrosion-resistant material, products from which are quite easy to assemble. The design is resistant to ultraviolet radiation and is not destroyed by abrasive particles or acid precipitation. Doesn't make noise.
- Copper and zinc-titanium alloy. They are distinguished by durability, strength and reliability, but are very expensive.
Drainage design for a private house
The drainage system consists of different functional elements, each of which serves its purpose.
Drainage design for a cottage or household Source krasivydom.info
To understand how to make a roof drain in a private house, you need to know what parts it consists of :
- A gutter is a semicircular pipe mounted along the roof of a building. It is used to collect wastewater and is installed at an angle to the drain funnels.
- Couplings - used to connect corner and long gutter parts.
- A funnel for receiving water is mounted on a gutter for discharging waste into the drain pipe. A grill is installed in the funnel to protect it from debris.
- The drain is installed vertically to the gutter and collects water coming from the funnel. It must reach the sewer system and end with a hole for the waste to exit.
- The elbow or outlet has a bend so that there is a small distance between the flowing water and the building.
- Clamps or brackets hold the east pipe and gutter in place.
Attention! Components are selected and calculated individually, taking into account the size of the roof and climate conditions.
Types of structures
In multi-storey buildings and structures with flat roofs, internal drainage is installed. The liquid is collected in a funnel from the roof surface and enters a riser located in non-residential premises, staircases or corridors. At the lowest point, the system is connected to the city storm sewer through a closed outlet running underground. Water flows from utility networks to nearby reservoirs.
In private low-rise construction, an external drain is used, where the system is located outside the building. Pipes, gutters and funnels are attached to external walls. Such structures are easy to maintain and repair. From the pipes of external drains, liquid is discharged through open outlets, which are above-ground concrete gutters or grooves along the perimeter of the blind area. They are closed on top with protective grilles. Read more in the article storm drainage for a private house, where we examined all the options in detail.
Rules for installing a drainage system
Not only a professional can perform a high-quality drain installation. Understanding how to make a drain and following some recommendations, you can do the work yourself:
- The heavier the pipe, the closer the hooks should be located . Plugs, hooks and drain funnels are installed in advance, before installing the gutter. When arranging drainage for the roof of a house, it is better to use gutters made of copper; they are the most durable. The only drawback is the high cost. For a small country house you should not use expensive components.
Features of installing a house drainage system Source peredelka.tv
- The method of connecting the pipes depends on what the gutter is made of . For PVC products, cold welding is used.
- Steel gutters are cut with a metal cutting tool . A hacksaw is the most practical option.
- The gutter and additional parts are assembled on the ground before installation . The installation of drainage systems should be carried out by several people to help secure the structure to the roof.
On a note! When designing a drainage system for a building with your own hands, take into account the diameter of the pipes and gutters, the location of the water intake and drainage elements, and the amount of materials.
Some features of polymer systems
Compared to metal drainage structures, polymer systems are attractive due to their cost-effective installation and simplified assembly.
Meanwhile, plastic has the properties of changing structure under conditions of fluctuations in ambient temperature. Therefore, for anyone who decides to make a drain for the roof of a private house with their own hands, these properties of the material should be kept in mind and an installation technique that compensates for thermal expansion should be used.
Compensation for thermal expansion/contraction is achieved, for example, by incomplete insertion of the smooth ends of the pipes into the socket parts. Also, loose tightening of the rim of the fastening clamps releases the axial displacement of the parts as a result of thermal expansion.
It is advisable to limit the use of glue when installing drainpipes; use it only on one part of the connections. Installation of socket connections should be carried out in the socket position with the “up” direction.
The design of the mounting element, which provides compensation for thermal expansion. Used in the assembly of gutters. Similar design solutions are used on other parts
Almost all manufacturers of modern drainage systems have taken into account the properties of plastic and produce shaped parts (expansion elements) adapted to temperature changes. The body of such parts indicates the temperature scale according to which they are mounted in the system.
The influence of temperature may cause deformation of the plastic. Therefore, it is necessary to comply with installation standards and the distance between fasteners. Compliance with the rules is a guarantee of installing a high-quality roof drainage system.
In this material you can familiarize yourself with all the advantages and disadvantages of plastic and metal gutters.
Drainage from plastic sewer pipes
You can make drainage with your own hands from different materials. The most popular option is plastic sewer pipes. This material has a number of advantages :
- relatively low cost;
- a large selection of adapters and pipes, various parts for fastening;
- the ability to cut pipes yourself;
- light weight, which facilitates transportation and installation;
- long service life.
The positive characteristics of plastic sewer pipes attract many owners of private houses and country cottages and dachas. The main condition is to properly design the drainage system.
Installation of a drainage system from sewer pipes Source fasad150.ru
See also: Catalog of companies that specialize in sewerage, water supply and drainage systems
When considering the question of how to make a roof drain with your own hands from plastic pipes, you should not forget about preliminary calculations. To determine the size of the gutter taking into account the expected rain flows, you need to calculate the effective parameters of the roof. If such calculations cause some difficulties, average values can be used. To do this, you need to prepare the following components of the drainage structure :
- PVC pipe 50 mm for the drainage system;
- cylindrical product 100-110 mm for gutters;
- adapters for connecting the listed parts - outlet diameter 50 mm, inlet diameter 110 mm.
For plastic sewer pipes, you will need to split them into several pieces of equal size. You can cut the product using a hand saw, electric jigsaw or grinder. The last option is preferable, but a number of features of the work must be taken into account.
On a note! When cutting a pipe with a grinder, the plastic will stick to the casing, you need to remove the protection. It is better to use a special mask. Or purchase a disc for working with PVC products. To connect tees and gutters, the pipes do not need to be opened completely: leave 150 mm at the edges.
Common installation mistakes
In the absence of experience, the following mistakes are most often made:
- Failure to comply with the slope of the gutters. The recommended rate is from 3 to 5 mm per 1 linear meter. If the indicator is higher, water simply will not get there; if it is lower, areas of stagnant water and debris will form, and unscheduled drainage cleaning will have to be carried out. To correct such a defect, you have to break part of the roof.
- Saving on the number of brackets. The consequence is that an overly flexible structure becomes less resistant to wind loads, with a high risk of damage and breakage. For drainage from plastic, fasteners are carried out in increments of 50 cm, from iron and other metal - every 60 cm.
- The couplings are not connected correctly. The consequence is that leaks occur in such areas. Do not neglect the use of rubber seals and you need to seal the joints with sealant. It is recommended to double fasten the brackets (on both sides).
Craftsmen do not recommend purchasing materials for drainage from different manufacturers, since the installation process may reveal inconsistencies between elements and lack of tightness of the structure.
Drainage system made from plastic containers
The simplest and most budget-friendly option for making a roof drain with your own hands from scrap materials is straight-shaped plastic 1.5 liter bottles. It is easy to accumulate the required amount of material. You will also need brackets and wire.
Drainage from plastic containers can be installed quickly and is inexpensive Source yandex.net
For work you will need the following materials and tools:
- stapler for furniture and staples 10-10 mm;
- screwdriver or drill;
- construction and installation knife;
- wire;
- thin drill;
- plastic containers.
Detailed instructions on how to make drainage systems from plastic containers :
- Determine the length of the drainage system. For convenience, you can design a drain. The main part of the container is 15-20 cm. Such bottles are not suitable for structures longer than 5 meters.
- Clear containers of labels and stickers.
- Cut off the throat and bottom. For the gutter, cut the bottle into two parts.
- The gutter is mounted in plastic containers using a furniture stapler. The container is joined with an overlap of 150 mm and secured with 2-3 brackets. With a rotating system, the bottoms serve as plugs.
- The gutter is attached to the roof. Drill holes in the lid at a distance of 20 cm. Make holes in the gutter with an awl. Thread a wire through them to secure the drain to the roof.
- Drainage is also made from plastic containers. Cut off the throat of one, and make cylinders from the others. A container without a neck is an adapter in which a hole is made for attaching the gutter.
Ready drainage system from plastic containers Source legkovmeste.ru
We perform calculations correctly
When calculating the required amount of materials, we take into account the following points:
- The standard length of gutters is 3 m. Their footage corresponds to the length of the cornices.
- One funnel is needed for each gutter.
- The number of brackets is calculated by dividing the length of the cornice into segments of 50–60 cm (this is the step with which the fastening will be carried out). Before calculating, it is recommended to leave a margin of 5 cm from the edges of the cornice.
- If the funnel is placed near the corner of the house, then one holder (bracket) is enough; when installed in the middle of the wall, two are needed.
- Each pipe branch requires two plugs.
- You will need two upper and lower elbows to assemble the riser outlet.
- If the overhang of the roof eaves is more than 25 cm, you will have to buy two pieces of pipe to connect the elbows. When suspended up to 25 cm, the knees are simply connected to each other.
- Number of pipes for the riser. To calculate it, take the distance from the ground to the cornice minus the length of the outlet and a distance from the ground of 40 cm.
- To fasten the risers you will need two main brackets and additional ones every 1.5 m.
Calculations for houses with an attic and veranda are carried out in a similar way.
Drainage system made of polyethylene and wood
The starting material for this design is a thin board, the length of which is equal to 2 perimeters of the roof overhang. Then you can proceed to the manufacture of the drainage system.
Instructions on how to make a gutter for a drain with your own hands from wood :
- Connect the boards in pairs at an angle of 90 degrees using nails. Make gutters that match the length of the walls of the building (connect the parts with an overlap).
- Make fasteners for installing the gutter using wire rod or boards. The best option is not wire - but a piece of lumber. For them, you will need to cut out the triangular grooves necessary to fix the gutter.
- Install brackets at the corners of the wall and secure with nails . Install narrow channels to drain drains from the roof of a private household, ensuring that their edges are overlapped.
- Adjust the gutter - tilt it and lay down a polyethylene film, securing it with nails, tape or buttons.
Arrangement of a wooden drainage system Source krysha-expert.ru
A wooden gutter is suitable for drainage. The length of the structure should be 250 cm. The purpose of installing a drainage system is to discharge wastewater into a drain or ditch 0.3 meters deep. Be sure to fill it with crushed stone or crushed brick.
Attention! When digging a ditch, an appropriate slope is made, due to which precipitation is diverted from the surface of the wall of a private household to a distance of at least 150 cm.
A drainage system for a wooden cottage will last a long time if you use a silicone sealant rather than polyethylene for reliable sealing. Before this, the wood is treated with a preservative.
Features of installation of elements
The installation time of the drainage system depends on the stage of construction/installation work. During the construction of the building, it is installed before the covering is laid. During the period of repair, if it was not planned to change the roof, installation is carried out at any time, but the gutter brackets in this case are attached to the front board, and not to the rafters.
Until recently, only under-roof fasteners existed. Today you can find different types of hooks and brackets that allow you to collect drainage before and after installing the roof.
The general installation algorithm looks like this:
- The location of vertical pipes is determined taking into account the placement of doors and windows. Usually these are the corners of the building or the center of the facade (if the length of one wall is more than 18-20 m).
- Funnels are installed at the lowest point of the gutter.
- Brackets are installed. The main holders are placed 10-15 cm from the funnels, the rest - at the same distance of 40-60 cm from each other.
- The gutter is placed in the brackets taking into account the expansion of the selected material.
- The gutter connectors are mounted between the brackets maintaining a distance of 10-15 cm.
- The gutter is connected to the funnels. If the gutter consists of several parts, it is more convenient to first assemble them and then fasten them along a conventional line that continues the roof. The distance is about 1 cm from the edge of the roof.
- Corners and caps are installed. If the angle of the roof is not straight, adjustable parts are selected and cut along the turning lines. This is how bay windows are treated.
- Pipes are installed 3-8 cm from the wall of the building. Plastic or metal clamps are attached to secure the drain to the facade.
The distance from the final drain to the blind area is from 15 cm, to the ground - from 25 cm. If installed lower, there will be a risk of ice forming inside the pipes, which can lead to rupture.
There must be a distance of at least 3 cm from the wall to the pipes so that the surface does not become damp. To bypass architectural elements or change the direction of drainage, a 135-degree elbow is acceptable.
Relatively recently, adjustable brackets have appeared on sale. With their help, you can adjust the bending radius by tightening the screws
Installation of plastic drainage is carried out at temperatures from +5 degrees and above. The construction of a metal system can be carried out at any time that is safe for roofers, regardless of temperature indicators. Once installation is complete, the system is ready for use.
DIY gutter made of galvanized steel
Setting up a metal wastewater drainage system requires certain experience and knowledge. For the manufacture of drains, sheet roofing steel 0.5-0.7 mm is used. It cannot be less than 270 g per square meter.
To construct a drain you will need the following tools :
- marker for marking;
- scissors for working with metal;
- pliers;
- mallet and hammer.
Tin pipes are a simple part of the drain structure; making them yourself is very simple. To do this, you will need thin tin or galvanized steel sheets.
Practical and reliable drainage systems made of galvanized steel Source stroy-podskazka.ru
Gutter protection: heating and mesh
If there are large trees around your home that shed their leaves for the winter, then there is a high probability of a clogged drainage system. To avoid this, there is a special element - a grid. It is installed in the gutter and prevents debris from entering there.
Fig. 13.
The mesh prevents clogging.
An important modern improvement to traditional storm drains is the heating of gutters and gutters. It works in a similar way to cable heated floors. With its help, ice and snow are removed, which ensures the operation of the system in the off-season and during thaws.
Installation of a do-it-yourself drainage system
When all the details of the drainage structure have already been prepared, proceed to assembling the drain. Installation of rainwater drainage systems can be carried out using different methods; the choice of method depends on the fasteners and the season when the installation work is carried out. It is advisable to do drains before covering the roof.
Do-it-yourself drainage system installation Source sip-roof.ru
The most successful and reliable option is installation on an external crossbar or rafter. This way you can protect the fasteners from rain using a cornice strip. If there is already a roof, use another method of arranging drainage.
Detailed instructions on how to make a drain from sewer pipes with your own hands and other materials :
- First, brackets are installed to support the gutters. They are mounted at a distance of 55-60 cm, and the level should decrease towards the release of precipitation.
- The holders are mounted so that the roof overhang extends to 1/3 of the semicircle. The other 2/3 will collect water draining from the roof.
- Brackets are mounted on the eaves strip at a slope. Install the holder located higher. Mount the bracket located at the very bottom (the slope is increased by 5 mm every meter). If you do not maintain the slope, the water will not drain well and leaks may form.
- The installed brackets are fastened with rope, and a line is drawn on the surface of the facade along the twine. Other supporting parts are mounted at the required distance, placing them along the line.
- Install the gutter and place a plug on the top edge. At the joints of the pipe and the gutter, make a hole for the funnel and install it.
Upon completion of the above work, they proceed to the installation of drains. Clamps are used for fastening to the façade surface. If there is a sewer pit on the site for precipitation, the pipe is led to it. When draining wastewater into the ground, the pipe is placed at a distance of 30-35 cm above the soil.
General tips for installing metal gutters
When installing a metal drain, you need to follow some rules:
- cut elements with metal scissors or a hacksaw with fine teeth;
- remove protective films before installation;
- Place the end caps on the smooth part of the gutter;
- use profiles and fasteners recommended by the manufacturer;
- set the number of funnels corresponding to the calculation;
- maintain the distance between the brackets and clamps;
- leave a gap of 50-100 mm between the pipe and the facade;
- The junctions of the gutters should be reinforced with brackets; the distance from the joint to the fasteners should not exceed 150 mm on both sides.
Installing gutters yourself will help save the budget allocated for building a house. With proper selection of elements and installation, the system will last at least 10 years.
Useful tips and tricks
To prevent the drainage structure from clogging, nets are installed on the gutters. They do not interfere with the collection of precipitation, but protect the pipes from leaves.
Correct installation of drainage systems is the key to proper operation of the system Source sense-life.com
In ready-made drainage systems, such protection is included in the kit, but when making drains yourself, you need to do it yourself:
- you will need a metal mesh;
- Having cut it into strips slightly wider than the dimensions of the gutter, it is attached to the drainage elements using clamps.
The drainage system must be constantly cleaned of dirt and debris. Even a mesh will not provide reliable protection. Accumulated debris can make it difficult to remove precipitation, causing blockages to appear in the pipes. Water will begin to flow onto the facade of the building and wash away the foundation.
Where should water be directed to the lawn or drainage?
Creating a full-fledged storm sewer and making special drainage is quite an expensive pleasure, accompanied by a large amount of excavation work. Therefore, they often prefer to drain water into the lawn. Depending on the soil and frequency of precipitation, this may be justified, but in some cases it leads to waterlogging of the site, especially on the north side of the building.
Fig. 12.
Scheme of storm sewer organization.
If the soil is saturated with sand and the water level is low, then rainwater will drain away quickly. In this case, diversion into the lawn will bring more benefits to the latter. If the soil tends to retain it, then it is advisable to make good drainage.
To organize drainage, rainwater inlets must be installed under each drainpipe and connected to a well or pit.
Briefly about the main thing
Do-it-yourself roof gutters can replace a finished structure. The main thing is to follow the technology for installing the drainage system. The reliability and proper operation of drainage systems depends on the accuracy of measurements. A drain made according to all the rules will cope with the task and will last for a long time.
Different materials are used to make roof gutters: PVC, sewer pipes, galvanized steel, wood, plastic bottles. The process of installing the structure is similar in each case. Detailed instructions for installing drainage systems will help you complete the work without the involvement of a specialist.
Ratings 0
How to secure vertical drainage elements
It is best to provide for the fastening of drain pipes at the stage of laying the walls. But even after completion of the work, no one forbids installing fasteners.
When performing installation, observe the following rules:
- Start installing drain elements from the bottom.
- Drill holes in the walls to install clamps.
- On the lowest clamp, install an elbow with a cut edge, and if the drain is carried out into a storm drain, then use a regular drain element.
- Fasten subsequent elements using a separate clamp in increments of no more than 1.8 m. If the length of the element exceeds 2 m, then it is necessary to install another clamp.
By following the installation rules, you can ensure the strength and tightness of the structure. In this case, the drainage will be reliable and will last a long time. Good luck to you in your construction activities.