Home › Ventilation › Ventilation commissioning
You can order commissioning of the ventilation system by calling in Moscow: +7(499) 350-94-14. We design and supply ventilation systems throughout Russia. We ask you to send your written application by email or through the form on the website.
- Commissioning task
- Types of commissioning work
- Scheme of organization of commissioning works
- Air flow adjustment
- PASSPORT of the ventilation system (air conditioning system)
Send an application and receive a CP
- Prices
for commissioning of ventilation
Commissioning work is the final stage of installation of ventilation and air conditioning systems.
We carry out commissioning work, which includes testing of any systems or equipment components in residential or industrial buildings, as well as checking the equipment’s compliance with projects and regulatory documents.
Purpose and types of ventilation
Installation of a ventilation system is considered a very important stage in the arrangement of a room.
Such a system is designed for the following tasks:
- Effective purification of the air inside a building from various impurities and pollutants that appear as a result of human activity.
- Ensuring normal air circulation for a stable supply of fresh and pleasant air masses to the room.
- Heating or cooling air.
Before starting installation work, you need to determine the appropriate type of system that will match the properties of the room. Also, when choosing a specific option, it is necessary to take into account the purpose of the hood.
The following types of ventilation equipment are available on the market today::
- Supply and exhaust. It is considered the most common and recommended type, which is suitable for both a standard city apartment and an industrial building. The system is equipped with powerful filter devices that prevent the penetration of foreign odors from the street and dust. It is quite difficult to carry out the work of installing supply and exhaust ventilation with your own hands, but it is quite possible.
- Supply. Unlike the previous type, supply systems are only capable of removing air, doing this naturally. Equipped with a conventional or more expensive fan, the unit can additionally warm up and supply fresh air to the room.
- Exhaust. Used in technical rooms where there is high humidity, for example, in the kitchen. The system operates on the basis of powerful ventilation devices. Their operating parameters are determined by the features of the building.
When choosing the ideal option for your apartment, you need to consider a number of factors. These include: the specifics of the premises, the properties of the environment, as well as the financial abilities of the owners.
In some cases, to balance the microclimate, it is necessary to install additional and expensive devices, so experts recommend choosing combined models.
Systems with recuperator
The supply air can also be heated using a recuperator. These devices are divided into two types:
- Rotary recuperators operate using electricity. A rotor element is mounted inside the cylindrical housing, which continuously rotates between the supply and exhaust air valves. The size of this type of recuperator is quite large. Efficiency reaches 87%.
- Plate recuperators consist of plates that are joined together. Fresh air and “exhaust air” pass through separate channels towards each other. They do not mix, the cold supply air is heated by the warm exhaust wind flow. Such recuperators are compact.
Drafting
It is not difficult to understand how to make ventilation in a room with your own hands. The main condition for successful installation is the preparation of a high-quality design of the future system.
It consists of several stages:
- Calculation of accurate air exchange rates.
- Comparison of the obtained parameters with the layout of the room.
- Layout of ductwork on each floor and in the ceiling area.
Before installing all ventilation units, you need to pay attention to the number of meters of exhaust and supply pipes, as well as the diameter of future air ducts. Power indicators are determined in a simple way: the area of the room is multiplied by 12.
Experts recommend adhering to the following air supply proportions: 3 m3/hour for each square meter of room. To determine the required power of the supply unit, it is enough to multiply the area by 3.
We recommend that you read: How to install a ventilation grille for a ventilation duct in the kitchen
In addition to classic equipment, combined models are sold on the market, combining several local functions at once. Among them :
- Ventilation and air conditioning. Such systems are capable of performing high-quality air exchange with subsequent cooling of air masses. For full operation of the installation, it is necessary to equip an additional cooling section, which is connected to the refrigeration mechanism.
- Ventilation and heating. In this case, it is necessary to install a recuperator - a special controller that conducts two air flows. With its help you can achieve maximum savings in electrical energy.
Any design and installation of a ventilation system is accompanied by certain financial costs, especially if the necessary work is performed by a professional specialist.
The final cost indicators are determined by the following conditions:
- Dimensions of the apartment and its intended purpose.
- Number of residents.
- Placement of housing in relation to the cardinal directions.
- Size and number of window openings.
By comparing all the listed parameters, you can simplify the choice of equipment when installing ventilation yourself. For example, the average price for installing a system in a two-room apartment with several windows facing north will be about 40 thousand rubles.
Connecting a duct air conditioner
The Mitsubishi Electric SEZ-KD35VAQ.TH inverter was chosen as a duct air conditioner.
- Cooling capacity - 3.50 kW
- Power consumption (cooling) - 1,010 kW
- Energy efficiency (EER) - 3.61
- Air flow (max.) - 660 m3/h
- Heating capacity - 4.00 kW
- Power consumption (heating) - 1,130 kW
As the experts on the forums rightly warned me, the power of this air conditioner is not enough to quickly cool 3 rooms with a total area of 55 m2. Of course, such a system will not be able to quickly cool an apartment, but in constant operation it does an excellent job of maintaining a comfortable atmosphere (Moscow region, windows facing west). In summer, the air conditioner is turned on around the clock at medium speed, at night I increase the temperature to 26 degrees. I installed a separate meter on the air conditioner line - it turns out to be approximately 10 kW/hour per day.
The air conditioner is built into the system according to the following scheme:
- at the entrance there is a small “traffic light” with two inputs of 200 mm each
- the first entrance takes air from the corridor
- the second entrance is connected to the supply ventilation channel from the street
- at the outlet of the air conditioner there is a “traffic light” with 4 outlets of 160 mm each
- To balance the air network, there are iris regulators on two short branches
- Additionally, the air conditioner was bypassed with a 200 mm pipe from the inlet to the traffic light. This mode is used for winter operation, so as not to drive the air flow through the air conditioner
Installation photo:
Technical task
At the ventilation design stage, the first thing you need to do is draw up technical specifications, specifying the requirements for the volumes and functions of air exchange in each part of the room. Depending on the purpose of the room, the parameters of the exhaust system may vary.
To successfully and correctly implement installation, you need to follow these principles :
- Living rooms, gyms or living rooms. These rooms require an uninterrupted supply of fresh air, since there are always people in them. The optimal volume is determined by the number of people living or present. There may also be requirements for the microclimate, namely the temperature and humidity of incoming flows.
- Bathroom, laundry room and restroom. There must be natural ventilation here, which will remove exhaust air during operation of mechanical systems.
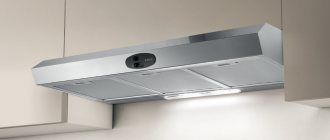
- Kitchen. This part of the room is considered technical and is characterized by a constant increase in humidity. In addition, gas and food odors accumulate in the kitchen, so they need to be removed quickly and efficiently. For such purposes, a multifunctional forced hood is used.
- Corridor and hallway. The purpose of a hood in such a part of the house is to ensure the free movement of air masses and balanced air exchange.
- Pantry. The room is equipped with natural exhaust hood.
- Boiler or furnace room. These rooms require regular removal of combustion products through natural ventilation, that is, through a pipe.
Also, autonomous ventilation systems must be present in work areas such as garages and workshops. The power and operating parameters of the equipment are determined by the area and purpose of the room.
The terms of reference are drawn up independently or with the help of third-party specialists. The latter option involves concluding an agreement with professional craftsmen who must follow established standards regulating the frequency of air circulation.
What standards exist for ventilation systems?
Recommended air exchange parameters depend on various conditions and are prescribed in the relevant regulations, which must be taken into account during design. In general, for domestic premises, when rooms for different purposes are concentrated on one floor, the following amount of air should change in an hour:
- office – 60 cubic meters;
- common living rooms or halls – 40 cubic meters;
- corridors – 10 cubes;
- bathrooms and showers – 70 cubic meters;
- smoking rooms - over 100 cubic meters.
In living rooms, air mass exchange is calculated per person. It should be more than 30 cubic meters per hour. If the calculation is made based on living space, then the standard is 3 cubic meters per 1 meter.
For non-residential premises, the average standard is 20 cubic meters per meter of area. If the area is large, then ventilation systems include a multi-component system of paired fans.
Optimal scheme
There are many schemes and methods for installing a ventilation system in a house. They are selected taking into account the interior decoration, area and other features of the building.
We recommend that you read: What is an anemostat?
The optimal option must comply with the drawn up technical specifications, and also take into account a number of recommendations :
- No extra nodes. The hood must have a minimum number of elements and parts that can fail at the slightest impact.
- Ease of maintenance and repair. Ventilation must be placed in such a way that a technician can service it and repair or replace parts at any time.
- Ease of use. The daily operation of the system should be understandable for premises owners who have neither the skills nor experience in this matter.
- Backup solutions. In case of failure of the main components in the building, backup solutions must be present.
- Invisibility in the interior. When designing a ventilation system, it is necessary to take into account the aesthetic part of the work. Any units and components of ventilation should not spoil the overall concept of the interior style.
At the stage of financial calculations, it is important to pay attention to both the initial investment in the purchase and installation of equipment, and to regular costs related to maintenance and electricity costs.
Advice from professionals
Automation is necessary for ventilation systems not only because of ease of use and high efficiency, but also because of the ability for the operator to independently regulate certain processes, which current technology can easily cope with. That is why you should not neglect the installation of such equipment. Contact companies that not only offer automatic systems, but also provide all accompanying services: design, installation, configuration and repair of equipment.
We must not forget that each device present in the automatic ventilation system must have its own set of necessary documents: passport, instructions and connection diagram. Be sure to ensure that all of the listed items are present. Automatic ventilation systems are an excellent solution not only for private homes, but also for commercial organizations. This is due to the fact that to work with such devices you will need no more than 1-2 operators (an entire department with personnel is simply not required). Thanks to this fact, you can seriously save on personnel.
Sources
- https://TopVentilyaciya.ru/ventilyaciya/avtomatika-sistem-ventilyatsii.html
- https://sovet-ingenera.com/vent/oborud/shhit-upravleniya-ventilyaciej.html
- https://stroy-podskazka.ru/ventilyaciya/montazh-avtomatiki/
- https://rina.pro/napravleniya-deyatelnosti/sistemy-avtomatizacii/general-ventilation
- https://ventkam.ru/ventilyatsiya/avtomatika
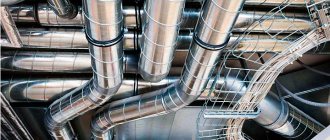
Materials and main steps
Any installation work is impossible without the use of individual materials. These include:
- Flange tires.
- Self-tapping screws, anchors and other fasteners for ventilation.
- Ventilation pipes.
- Reinforced tape.
- Hairpins.
- Different sized corners.
When installing ventilation yourself, you must follow a certain sequence of actions. First of all, you should prepare the listed materials and tools, and also determine the scope of future work.
Next you need to mark the surface. The supply units are fixed at a height of 50 cm from the level of the floor covering, the exhaust units - 15-30 cm from the ceiling. The next stage consists of making holes 1.5–2 cm wide larger than the cross-section of the pipeline, as well as subsequent cleaning of the surface from contaminants.
After completing the above steps, all that remains is to install and secure the fans. Their diameter must correspond to the cross-section of the pipes. The optimal thickness is 1-2 cm less than the thickness of the pipe. Ultimately, the pipes are fixed, and all the resulting voids are filled with polyurethane foam.
Equipment is installed in all rooms using similar principles. After successful installation and installation of the exhaust system, a decorative grille should be placed on the end of each pipe.
Supply ventilation combined with duct air conditioning (part 1 - electric)
I would like to share my experience in designing, installing and operating my own supply ventilation system combined with a ducted air conditioner.
The system was assembled in 2012-2013 and has been in constant operation since then.
The article is divided into two parts:
- The first part describes the classic scheme of supply ventilation using an electric duct heater
- the second part talks about the controversial experience of converting the system into a water heater powered by a common house heating system
Specialized premises
Features of ventilation manufacturing directly depend on the functions and specifics of the room where it will be installed. If the natural type cannot provide effective air exchange, you will have to install a forced one. This variety is suitable for specialized rooms such as the bathroom, kitchen and toilet.
We recommend that you read: Hood for geyser
When installing important components of the future system, you need to be guided by certain requirements :
- Kitchen exhaust units should handle as much of the free space above the hob as possible, but not block the exhaust grille at the top of the wall.
- To reduce the electricity consumption when a bathroom fan is running, you need to connect it to a light switch. In this case, the device will start only when a person is in the room.
- The ventilation of the bathroom is equipped with a special box, which is connected to a common shaft, and check valves are installed on the fans. This way, air flows from the toilet and bathroom will not mix.
- Bathroom models should be as reliable as possible and resistant to high humidity. Experts advise using devices mounted in a polypropylene or acrylic case.
- When purchasing a silent fan, it is important to understand that such devices operate much quieter, but they consume a lot of electrical energy.
Conclusion
Work with the ventilation system for residential premises begins during the construction of a house or major renovation of an apartment. In this case, it is necessary not to rush, but to provide for everything as much as possible, because alterations in the future will be associated with large expenses.
All you have to do is choose from three main types of air exchange systems and install them in the right place. The video in this article will help you find additional information on this topic.
Did you like the article? Subscribe to our Yandex.Zen channel
Arrangement in a brick house
Most modern houses are equipped with combined supply and exhaust systems, as they are more efficient than conventional types. The exhaust ducts are fixed in the main walls with a minimum thickness of 38 cm. One room can have from 1 to 3 such ducts, and when choosing a suitable model, the architectural design of the building is taken into account.
When installing a hood in a private brick house, you need to adhere to the following recommendations :
- The optimal parameters of the ventilation channel are 13 x 13 cm. It is better to build such a space during the laying of the wall structure.
- The inlet from the room to the channel is located under the ceiling.
- To bring the hood to the roof, it is necessary to arrange a pipe with a height of at least 50 cm above the ridge. If this rule is not followed, cravings may worsen.
- The optimal thickness of the channel walls is 2.5 bricks. If they are thinner, the air duct system will cool down, which will prevent the natural discharge of exhaust air to the outside, but will lead to cold masses being drawn in from the street.
Experts advise installing exhaust ducts in the central part of the building. In order for the air to flow out freely, you need to make overflow passages in the door structure or leave a gap of 2 cm in diameter between the door and the floor covering.
When performing installation work in a brick house, you can additionally buy a wall fan and secure it at the base of the air duct. Bearing-type models are characterized by maximum strength, but during operation they create a lot of noise. Bushing devices operate almost silently, but their cost is much higher.
It is quite difficult to install ventilation in a private house or apartment. But if you follow simple rules, this problem becomes solvable.
Principle of operation
Heated ventilation is simple.
Air masses coming from the street go through several stages of processing:
- First they enter the air intake equipped with a grille. It traps large debris and prevents insects and contaminants from entering the system.
- Air is supplied into the channel and enters the internal housing of the device. Here it goes through several stages of purification. A filter system is installed inside to remove various small contaminants and dust. To prevent the wall from freezing, the air duct is made of insulated plastic pipe. Sound insulation is also used, which makes the device operate quietly.
- Then the air masses are fed into the heater. Here they are heated to a predetermined temperature. Its level is constant and maintained automatically.
- Warm air passes to the finest filters, where fine dust, allergens, odors, etc. are removed from it.
- Purified heated air masses are supplied to a fan, which directs them into the room.
- To control the air supply, a remote control or a unit mounted on the wall is used. The device is installed quickly, within an hour.
Operating experience
Electricity consumption observations:
- November 2012 - 613 kW/h (it was a warm month)
- December 2012 - 1208 kW/h
- January 2013 - 1128 kW/h (not a full month - we left for the New Year)
In terms of air flow, I kept it at a minimum of approximately 150-200 m3/hour for the entire apartment. Overall I'm pleased with the result.
There is no noise from the grilles - that is, none at all.
To make sure that the ventilation is working, I pasted New Year’s rain on the grilles (to the delight of the cat).
It was a hot week in May 2013 - I started actively using the air conditioner in cooling mode.
- In the supply mode, the flow rate is about 300 m3/hour (100 m3/hour per room). The speed at the exit from the gratings is 1.2 m/s
- When the duct air conditioner is turned on at maximum speed, the flow rate is 600 m3/hour, of which 300 m3/hour is from the supply air and about 300 m3/hour is recirculation. The exit speed from the gratings is about 3 m/s.
Subjective observations during operation of the air conditioner:
- The temperature at the outlet of the grates is about 11 °C.
- It is impossible to quickly cool an apartment with such an air conditioner (about 3.5 kW in cold weather). But if it constantly works at minimum speed, then the apartment is quite comfortable (air outside + 28).
- The main comfort, in my opinion, is achieved not by lowering the temperature (does not exceed 2-3 degrees), but by reducing humidity.
- The noise from the supply grilles is not annoying even at night. The grilles perfectly regulate the air flow; you can make it so as not to direct children onto the beds.
- At an outlet speed of 2-3 m/s, the flow of cold air passes under the ceiling through the entire room and there is no draft.
Disadvantages:
- Since the recirculation air intake is made near the air conditioner, there is a significant flow of air under the door in the rooms. When the interior doors are open, this is not noticeable, but if the door is closed, it is noticeable.
- The temperature in individual rooms cannot be adjusted. In the evening it’s nice in the eastern room, but I’d like to cool the western room a little more.
Air filtration
For fine air purification I chose the Systemair FFR 200 cassette filter.
I planned to use filter elements:
- class G3 BFR 200 Coarse. With a flow of 300 m3, the losses on the new filter are 20 Pa. Replacement is recommended at a pressure loss of 170 Pa.
- class F7 BFR 200 ePM1. With a flow of 300 m3, the losses on the new filter are 75 Pa. Replacement is recommended at a pressure loss of 250 Pa.
The latest BFR 200 ePM1 filter separates 60% of PM1 size particles (0.3 to 1 µm according to ISO 16890). And it has a very decent price of 98.00 EUR.
After a year of operation, I was puzzled by the issue of replacing the filters. I decided to look on the market to see what analogues there are.
Option 1 - buy filter material and sew the filter yourself.
- I took apart one old filter and made a pattern - sheet size 350x2000 mm.
- I ordered sheet filter material class G5. For comparison I took several different materials: NF300/1, NF400/P, NF500/PS
- Below is a photo of the material: Progressive density material. The outside is loose, the inside is very dense.
- The NF300 is very similar to what the original filter was made from. It bends easily and it is easy to sew a filter out of it.
- NF500/PS is very dense, even hard. It will not be possible to make something similar to the original out of it.
- NF400/P is just what you need
Option 2 - order the filter assembled.
- At the same time as the material, I ordered an assembled filter of class F6 according to the following specification FVK-233-233-300-4-F6/20.
The workmanship is excellent, it fits perfectly in the original FFR 200 case. I decided for myself that I would order it - this is a 2-3 times savings compared to the original.