The owner of a private house or cottage is trying to develop the surrounding area. And at the same time, it is important to make the site not only aesthetic, but also practical. Therefore, considerable attention is paid to garden paths. Fortunately, there are different options for garden paths. They differ in cost and production time, service life, appearance and complexity of the device. What can paths in the garden be made from? From almost everything. And we will briefly talk about the most interesting solutions in the article.
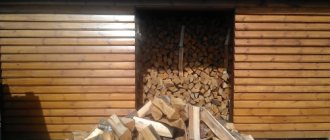
Path made of pallets in the garden
Are you planning to arrange wide paths in your dacha? And at the same time, do you have the opportunity to buy old pallets inexpensively? Then there is a great way to quickly and easily do the job yourself without spending extra money.
Of course, it won’t be possible without preparation – no one has canceled the marking and excavation work. But before laying the sand and gravel base, you will have to cover the bottom with geotextiles or roofing felt. They protect wooden pallets from moisture and prevent grass from growing on the path.
The pallets themselves also need to be prepared. First of all, look for damaged slats (if old pallets are used) - they need to be replaced. It might even make sense to disassemble one and use it as spare parts for the rest. In addition, do not forget to treat the entire surface with an antiseptic, and it is advisable to cover the lower bars with mastic - this will significantly extend the life of the track.
The rest of the installation is simple. The main thing is to ensure that the pallets are the same height and that there are no differences between them.
Along the edges of the future path around the dacha, logs with a section of 100x100 mm or 100x150 mm are laid. Pallets are placed on them, which are fixed using self-tapping screws. Thus, the pallets form a single path and will not move under load. As you can see, making them yourself is not difficult.
Video
Ideas
pallet track 1
pallet track 2
pallet track 3
Temporary paths
This is the simplest and cheapest option for arranging paths on the site. Unfortunately, it is also short-lived, so it is suitable only as a temporary measure - for example, for the period until normal paths made of tiles, boards or saw cuts are laid in the garden.
Important: for this type of track there is no need to prepare a bed! Bark, twigs, sawdust or shavings are poured without removing the soil!
This option is filling with bark or sawdust. Waste obtained from removing bark from trunks, large chips, bast, sawdust and shavings of various sizes are excellent for avoiding “trampling” dirt in a damp, low-lying area. The thickness of the backfill depends on how large the elements are used, but in general it is at least 3...5 cm. The backfill gradually dries out, is crushed under the weight of users and pressed into the ground. Subsequently, you can arrange a permanent path directly on this flooring.
With finely chopped bark (hardwood), with the addition of sawdust or shavings, you can make a more aesthetically pleasing path. This material is often used for mulching the soil; it is sold in gardening stores ready for backfilling.
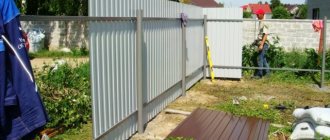
In order for the path to remain within the specified limits, it is necessary to arrange a fence - from wattle fence (photo above left), boards or panels (right) or dense green spaces (bottom left).
Execution sequence:
- remove large debris, branches, and stones from the route. If the soil is very uneven, it is advisable to level the ground by removing large protrusions and filling in potholes;
- install fencing elements along the edges of the future path - treated with an antiseptic, coated with resin or burnt boards, wattle fence, large stones;
- fill the bed of the path with the prepared material. If there are fragments of different sizes, larger ones should be placed downward and smaller ones upward, thereby leveling the coating.
Good to know: if the path is not being made on a temporary basis, it is necessary to make an arched profile of the path by adding soil (sand, crushed stone) to the middle and compacting it. You can also make an embankment over the entire area, thereby raising the path above the level of the surrounding soil. In this case, installation of a fence is mandatory.
From the raised path, during rains and snow melting, water will flow into the ground, thereby ensuring the relative dryness of the embankment and ease of use of the path.
Tire track
However, it is not necessary to wait until the tires are recycled and you will have to pay a lot of money for the rubber track made from them. Some craftsmen make paths near their dachas from tires! You can get them at service stations and tire companies, and completely free of charge - the employees will even be grateful if you save them from unnecessary junk.
True, you will have to work hard with tires. First of all, they need to be cut into strips. If you plan to do this yourself, you need to know that you should cut along the edge - then the rubber will easily straighten and be even. After this, the tire is cut into strips of the required width. When enough material has been prepared, installation can begin. Of course, to do this you need to dig a place for the future path and arrange a cushion of sand and crushed stone. And on very heaving soils, you can also organize a cement screed. On normal soils you can do without it.
Now the tire belts themselves are leveled. To do this, they are nailed to slats or boards impregnated with an antiseptic or coated with waterproof mastic. Already in this position, a path is laid out of them. It is important to ensure that there are small gaps between the strips through which water can easily drain from the path, allowing it to dry quickly after rain.
Video
Ideas
garden path made of tires 2
garden path made of tires 3
garden path made of tires 4
Design solutions
Landscaping of a garden plot begins with a site plan, on which permanent and temporary buildings are marked, and the location of green spaces is indicated.
To create an aesthetic and useful space when arranging garden paths, it is recommended to adhere to simple rules of landscape design:
- Paths should connect all areas used by the owners. Short paths that end at random places create a feeling of unfinished decorative work.
- Paths with natural bends for entering a recreation area or going around flower beds and flower beds look harmonious. Chaotic waves from the paths visually overload the landscape.
Paving stone paths - For large gardens, wide walking roads are provided so that two people can easily walk along them side by side or special equipment can drive through them.
- If the garden has a symmetrical layout with geometric shapes, then the paths are made straight. The landscape style, close to the natural arrangement of plants, is designed with curved lines of paths.
- In places with slopes, it is advisable to form steps for safe passage.
- For paths that are used year-round, technologies are used that differ from the methods for creating summer walkways.
A beautiful path made from sawn wood.
The size of the paths can vary depending on the purpose - the main passages are made wide, and the auxiliary paths can be narrower. It is possible to use various methods of creating coatings and combine a variety of road materials in one landscape space.
Path at the dacha made of bottles
If we talk about budget paths at the dacha with your own hands, then it’s worth mentioning the option made from bottles. These can be plastic or glass bottles; some craftsmen lay out paths from plastic corks! Such paths are not afraid of temperature changes and high humidity, are durable and easy to use.
The bottles are pre-washed, cleared of labels and filled with water, sand or soil so that they do not deform under load. By the way, this is a great opportunity to get rid of the soil that appeared as a result of digging a trench - often there is nowhere to put it.
First, a trench is dug - the depth is about 30-40 cm. The bottom needs to be compacted and formwork built on the sides. Gravel, crushed stone or broken brick is laid at the bottom. Then there is a layer of geotextile or roofing felt - so that the grass does not grow and spoil the appearance of the path. A cushion of crushed stone and sand is poured on top of it. Bottles can be installed either vertically (neck down) or horizontally (neck towards the edge of the path). They are adjusted as closely as possible to each other. The gaps are filled with a mixture of dry cement and sand, and then watered with water from a watering can. Once the concrete has cured, you will have a strong, durable, cheap and attractive garden path.
Video
Ideas
Country house path made of bottles 1
Country house path made of bottles 2
Country house path made of bottles 3
garden path at the dacha made of bottles 4
Preparatory work
Before you begin any work, you should spend a little time and draw the location of the paths on your site.
If you are good with a computer, you can use CAD programs.
If you do not have such skills, you can use a pencil and paper and draw a rough plan of your site with buildings. After this, it is worth noting the location of the desired tracks.
Recommendations for choosing quality material
If you want to buy and lay out a flagstone garden path yourself, then consider a few tips:
- The stone deposit must be in the same climatic conditions as the masonry site, otherwise it will negatively affect the durability of the coating.
- The color of the flagstone is no less important. Dark green is considered the most durable, while light yellow crumbles quickly. The surface should be in muted tones.
- The choice of thickness depends on the purpose and method of paving. For pedestrian areas, 1.5 cm is enough, for laying access roads - from 4 cm and above. When laying on cement, the thickness can start from 2 cm, and to create a path on sand, this figure must be multiplied by two.
- The texture of the stone is also important. A smooth, rough surface is optimal.
- It is better to buy raw materials from one batch - the shade of each slab will be approximately the same. But stone from different batches can differ significantly in color.
- The material must be dry. If stored for a long time in a damp place, it will quickly begin to crack and crumble.
To roughly calculate how much material will be needed for garden paths, it is worth considering that one ton 4–6 cm thick is enough for 10 m2.
Useful tips
The classic option for making a garden path is the use of plastic covers. Naturally, you will need a lot of them, all identical in appearance, in order to maintain a certain style. It is recommended to prepare the base from sand. You need to compact it as thoroughly as possible, then the path will surely last a couple of years.
An alternative to tires is the use of broken tiles, which remain in abundance after most repair work.
It is very important not just to lay it out, but to position it in such a way that the surface looks as attractive as possible. Most often, a sand base is prepared, and when forming a mosaic, they act as creatively as possible
But it is important not to forget about the ease of use of the path and the fact that all its parts should have the same height. The pieces of tile must be separated by at least a small gap, and after laying they are connected with cement mortar.
Some craftsmen act differently: they start by pouring cement into the required strip, after which they begin laying the broken tiles. But this method requires the ability to work quickly and complete certainty with the design of the surface, since there is not much time to come up with it after preparing the mixture.
It is best to use paving slabs from factory materials, especially since their use does not require significant experience. If desired, such a coating can be made with your own hands.
This will require vibration machines. For 1 sq. m of coverage needed:
- Bucket of cement (grade not lower than A-Sh-400);
- Three times more sand;
- 0.2 kg plasticizer;
- Coloring agent if necessary.
It is unlikely that it will be possible to create spectacular tiles without dyes, and their consumption is relatively small, so it is unwise to save on such reagents. Experts recommend preparing for work not one, but at least two or three forms for obtaining tiles in order to radically speed up the process. The solution in the molds is compacted using a vibrating table or vibrating platform, and when the workpieces acquire the required strength, they can be used immediately.
There is a scheme that does not require compaction, but it involves the use of a large form. Immediately place the container in the chosen location, pour the prepared mixture into it, making sure that no voids appear in the material. It is permissible to combine dyes of different tones, “tailoring” the appearance of the tile to the general perception of the site.
In most cases, the tile itself becomes attractive enough to satisfy aesthetic tastes.
If the goal is to speed up the work process as much as possible, you will have to abandon paving slabs and other materials and use reinforced concrete slabs. All actions will be reduced only to choosing the right places and laying the slabs. The coating is not the most aesthetically pleasing, but it is very durable.
When preparing the path, take care of the design of the curbs. They help make the border clearer and avoid destruction of the coating. Without a border, you can lay concrete slabs or natural stone with elaborate geometry. But sand, gravel and pebbles necessarily require external fencing.
If you prefer a rustic style, it is advisable to decorate the path with wood. It is best to create curved structures using natural stone, and brick will look ideal if there are buildings made from it nearby. Lovers of original ornaments and patterns should choose paving stones of different tones. Gravel and pebble solutions are optimal in a garden with a pond.
Concrete and brick are compatible with each other. Pebbles with wood, gravel with natural stone can also be combined into an attractive ensemble. Laying gravel and small pebbles requires pre-treatment of the soil with herbicides and covering it with plastic film or agrofibre. The external border is made of tiled or brick.
When laying a stone path there is a secret - it is better to choose those stones that have at least one flat edge. After filling the voids between the blocks, the path should be watered, sometimes it is necessary to sprinkle it with sand a second time to close the remaining gaps.
When laying paving stones, standard technology involves preparing a trench 200 - 250 mm deep. If the thickness of the coating is more than 6 cm, it will inevitably rise above ground level, which requires the use of curbs. Paving stones, even with the most insignificant defects in appearance, quickly deform and lose their characteristics.
Marking
The initial stage of arranging paths is marking the route. To do this, fill the contours of the future path with chalk or sand along the entire length and required width. The width is set slightly larger than the size of the path itself for installing formwork, curbing or installing a drainage system. They study the route again, assessing the convenience and adequacy of the track width.
It is important to take into account the view that opens from the path, think about where the water supply and electrical cables will run
To do this, they walk along the future route several times, visually representing the size of adult plants along the path, so that as they grow, they do not interfere with traffic, and the roots do not destroy the road surface. The path should be at least 2 meters away from large trees. If there are no green spaces yet (or they have not yet grown), the contour of the crown in an adult state is outlined with sand. Dimensions can be found in plant growing reference books.
It can be difficult to imagine a particular plant in the future. Then use the following technique. Place large stones, boxes, or drive a stake at the planting sites (this will help with visualization). After approval of the route, the paths begin to lay out the finishing material.
Preparation for paving
Before you start paving, you should carry out preparatory work: draw a detailed sketch to scale, and then calculate the sand consumption and amount of material. To calculate this volume, you need to multiply the area of the path by the thickness of the sand layer, which is 0.25 m. To be safe, add another 10%, then you will definitely have enough sand not only for the base, but also to cover unaccounted for uneven ground, and there will also be some left for subsequent work.
The technology for laying paving slabs is quite complex, but if we are talking about a small area, you can pave it yourself. It should be remembered that the paved area should not disturb the natural flow of water. Therefore, it is necessary to provide for such points as the slope of each layer and drainage along the surface of the tile.
The location of the future garden path is marked using “beacons” and twine. The turf layer is removed by approximately 30 cm according to the markings. The soil is leveled and compacted using a vibrating plate, after which sand is poured into the bottom of the prepared excavation in a layer of 20 cm. The sand must be evenly distributed over the entire surface of the excavation, and then thoroughly compacted using a tamping apparatus. Two iron pipes can serve as guides when leveling the sand cushion. Any path should have a slight slope on both sides of the center line or to one side from any edge so that rainwater does not stagnate. In areas with uneven terrain, it is necessary to provide steps or stairs.
Using a spirit level, a slope of approximately 2% is created. After this, a second layer of sand about 5 cm thick is poured and carefully leveled using the rule.
| 1. First of all, you need to accurately determine the shape of the future paths and select soil to a depth of 30 cm. | |
| 2. Sand is poured in a layer of 20 cm and thoroughly compacted using a tamping device. | |
| 3. Two iron pipes can be used as guides when leveling the sand bed. | |
| 4. A second layer of sand 5 cm thick is poured on top and carefully leveled using the rule. | |
| 5. In places where new paths adjoin existing ones, it is necessary to level them to the same level. | |
| 6. You can use plastic profiles as an edge, cutting them with a fine-toothed hacksaw. | |
| 7. The edge profile is laid exactly according to the shape of the path and secured to the ground with long nails. | |
| 8. If standard size stones are not suitable, they can be cut using a chisel and hammer. | |
| 9. The snail-shaped pattern on the forks of the paths should be laid out from the middle. | |
| 10. To avoid protruding beyond the edge when paving the main surface, the edge stones are laid first. | |
| 11. To place the drawing exactly in a certain place, you will need a steady eye and patience. | |
| 12. After all the cobblestones have been laid, it is necessary to pour sand or fine gravel into the joints. | |
| 13. After filling the seams, the stones are driven into the sand cushion using a tamping device. | |
| 14. After this, you must carefully fill all the seams again with sand or fine gravel. |
Herbal and mixed
Before creating a grass path, you need to select suitable grass that is resistant to trampling. The varieties of such grasses should be tough, such as fescue, ryegrass or meadow grass. Several species need to be sown at once. You can buy ready-made mixtures immediately, mixtures for sports lawns or playgrounds. The seeding rate should be increased by 50-60% of the rate indicated on the package.
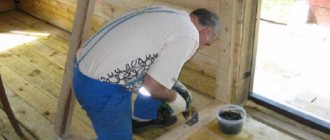
First you need to prepare the soil by carefully digging it and clearing it of weeds. The depth should be equal to a bayonet shovel. The prepared soil is fertilized with compost to a thickness of 4-5 centimeters. By the way, you need to clear the ground of weeds with a rake or your hands; under no circumstances using herbicides, because they will not allow lawn grasses to grow.
It is advisable to carry out all work on preparing, cleaning and fertilizing the soil in the autumn.
And in the spring you need to level the soil. The soil is leveled using wooden pegs, which are driven along the contour and center of the future path. A flat board is placed on the pegs and checked with a level. You need to add soil according to the established level. The added soil is thoroughly compacted, preferably using a roller.
Before sowing, the seed mixture must be mixed with sand so that the herbs are distributed evenly; then actually scatter the seeds over the surface of the paths and walk with a rake. Then the earth is compacted using a wooden roller.
When young grass is growing, walking on the paths is strictly prohibited. You also need to water the seedlings regularly and very carefully using a sprayer. After all, a powerful jet from a hose can simply wash away the seeds and damage young plants. It will be possible to use the path for its intended purpose only at the end of summer.
This type of path requires careful regular maintenance; it needs to be watered on time, the grass cut, and fed with fertilizers.
Grass paths are also laid for vehicle access. But in this case, first they design a special “trough” for the soil and the plants themselves, and then they cover it all with lawn trellises.
Since green paths have many disadvantages, experienced craftsmen combine a grass path with a stone path or can lay another one next to the green path, for example from paving slabs.
To create a grass path you need to spend much more time and effort than when laying stone or sand paths.
Styles
The same finishing material in a certain context can be a participant in retro styles and the most modern trends in landscape design at the same time. If you want to create a garden in a certain style, you should adhere to the following rules.
To decorate a site in a Mediterranean style, choose pebbles, tiles and sand. Country style goes perfectly with natural wood flooring. Forest areas are landscaped with paths made of stone, cobblestones and wood cuts. It looks interesting to use crushed bark to fill paths.
Art Nouveau especially loves floral decor and rounded, smooth lines. Eco-style prefers paths made of sand and stones, covered with fine gravel (without curbs, almost invisible in the landscape).
Wood and stone are traditional materials used for centuries to create paths
Today they are given special attention.
A striking example of a combination of a variety of materials is the high-tech industrial style in landscape design. It combines glass and metal, concrete and plastic, water and stone. These materials can be arranged randomly or symmetrically. The main thing is the presence of a clear geometric pattern. The paths are strictly straight, the turns have a strict pattern. The coating avoids texture, the color scheme is restrained and monochrome. The most popular coatings are made of concrete and marble filling with inclusions of glass elements edged with metal. The aquatic environment is presented in an original way in this technological design.
The design of paths in the Japanese style has the same striking uniqueness. If the high-tech style sharply distinguishes the natural environment and the human environment, the Japanese style includes humans in the natural landscape. The finishing materials here are natural stone and wood, plants and streams. The paths are combined with bridges and recreation areas in a classic Japanese style.
Great importance is attached to natural stone. The stone has a deep philosophical meaning and is a symbol of original ethnic design. The entire garden or a separate section of it is decorated with appropriate plants. The paths have smooth curves, the surface is decorated using pebbles, crushed stone and flat boulders.
The width can be arbitrary: from very narrow paths for contemplative solitary walks to wide dry rivers. Flat and smooth paths are combined with yielding rapids boulders.
Let’s take a closer look at what materials can be used in the construction of country communications.
Natural stone
At the moment, natural stone is still considered one of the status and practical materials for various coatings.
Marble, sandstone, and granite are used. Based on the preferences of the owners of the site, a stone in a light or dark shade is selected. Stone alleys have a variety of shapes, but require professionalism when laying them.
Stone that is laid in plates is incredibly in demand. It's called flagstone. An identical and affordable option is considered to be imitation natural stone, which is offered on the market in a wide range of products.
The stone alleys look great, harmonizing with the trees and shrubs growing on the site. Natural stone goes well with pebbles.
Among the advantages of stone are durability of use, a high degree of resistance to mechanical influences, aesthetics, and a variety of textures and configurations. The disadvantages include a fairly high price, slipperiness when the surface is wet, and coating with a crust of ice in cold weather.
Motives
Landscape architects often try to adhere to common themes in their work. Therefore, it is important that both paths and open areas or courtyards meet the same requirements. Style is also directly related to the motive, but more often it implies subordination to the architectural canons in which the house is designed. For example, a cobblestone street will look out of place next to a house in the Art Nouveau style, and a marble courtyard is too pompous for a brick cottage. If the theme of your garden is based on color, its shades will be used (for example, for raspberry - from light cherry to beige, for blue - from lilac to purple). You can also combine individual colors. For example, if your living room is decorated in blues and yellows, it's natural to expect the same color motif on the adjacent patio, with a yellow-orange path stretching beyond it, running into the distance, into the depths of the garden. And in the fall, nature itself will add yellow and orange tones. And the sky above us is blue! It is not necessary to achieve color harmony in landscape materials: it is important that they are combined with planted flowers and green spaces. There are many options here: for example, black slate looks very impressive against the background of yellow and blue flowers, and red brick emphasizes the purity of white. The dominant motif can subjugate both the entire territory of the garden and certain sections of it. For example, roses are often planted separately, with border paths drawn between them.
Clinker brick
Along with paving stones, clinker bricks are used for paving garden paths. High strength and surface roughness make it possible to successfully use it for these purposes. Clinker brick is a special brick made from refractory clays, which are sintered at much higher temperatures than required for the manufacture of conventional building bricks. It is very durable and can withstand heavy abrasive loads well.
Clinker bricks are available in a wide range of colors. Unlike concrete paving stones, brick is not painted. The color of the ceramic is the result of mixing natural clays without adding any artificial chemical components. The iron content affects the brightness of the red top, the presence of calcium gives the clinker brick a yellow tint, and acid during firing gives a blue tint. This brick does not fade in the sun.
Any design can be made from paving stones