Home » Building a house
We are building a house
Vladimir 03/28/2020
47614 Views 3 comments
SavingSavedRemoved 10
When choosing gates for arranging the entrance to the courtyard of a private house, preference is increasingly given to sliding (sliding) structures. They are practical, durable, and easy to automate to open and close without leaving the car. Using the drawings of sliding gates and instructions for their arrangement, you can make and install the structure yourself.
Advantages and disadvantages of sliding gates
Before moving directly to the analysis of the topic: how to make sliding gates yourself, it is necessary to outline the pros and cons of this design.
Advantages:
- ease of opening, not requiring much effort;
- reasonable cost of the product;
- easy to automate;
- there is no need to fix the gate in the open state; the wind will not close it, like swing gates.
Flaws:
- for manufacturing it is necessary to purchase special fittings; you can make them yourself, but the quality of the product can only be guaranteed by a highly qualified specialist;
- rollback will require space;
- a solid foundation is poured under the gate itself, which increases material costs.
Accessories for sliding gates
As for the section for sliding gates, its length is calculated using the following formula:
L = H x 1,4,
where L is the length of the gate, H is the clear width of the gate opening.
The increasing coefficient can be 1.33, but not less. Why is this particular section length chosen? In principle, it is equal to the length of the gate itself. The thing is that the design has a so-called shank. It acts as a counterweight to the gate structure itself so that it does not collapse during the moving process. And the displacement itself with a shank is much easier.
If the sliding section falls within this size range, or is larger, then you can safely manufacture and install sliding gates. If the area of the territory does not allow this, then you will have to choose a different type of entrance gate.
And a few more subtle points regarding the shank:
- if the width of the gate opening exceeds 5.5 m, then the tail should be made not triangular, but rectangular;
- in this case, the length of this part of the gate structures should be made in the range of 45-50% of the size of the opening width.
On the left is the shank, not covered with finishing material
Features and technical characteristics of the recoil mechanism
Gates with a sliding design solution are used for entrance barriers to personal plots, park areas, outbuildings, industrial zones, etc.
Such models operate on the principle of moving fence panels to the side along horizontally located guides. The design allows you to save space on the site. Sliding gates differ in size, operating principle, and equipment.
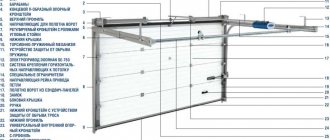
To assemble the gate you will need the following components:
- frame;
- canvas;
- gate;
- load-bearing beam;
- roller bearings;
- web catchers;
- automation.
Roller supports are necessary to ensure smooth movement of the web along the guide beam of the frame. The supports move on supporting trolleys. Depending on the size and weight of the gate, roller bearings are divided into several types:
- eco - designed for sashes up to 5 m in length;
- euro - for canvases up to 7 m in length;
- max - rollers are designed for large sashes up to 9 m in length.
Supports for rollers are necessary to stabilize the position of the canvas when moving and fix the sashes in case of damage to the foundation.
Fabric catchers are specialized clamps that are installed below and above the rack. Catchers allow you to hold the gate leaves in the “closed” position.
The guide beam is installed in the upper or lower part of the frame frame. It is used to install rollers, with the help of which the canvas moves when closing or opening the gate leaves. The guide bar supports the main load of the enclosing structure and allows the doors to move without coming into contact with the ground.
An automated control system ensures comfortable operation of sliding gates. The control system includes an electric drive that controls the opening of the gate using a remote control.
Advantages of using a recoil mechanism:
- ease of operation;
- smooth movement of the valves;
- durability of mechanisms;
- possibility of setting up remote control of the gate;
- silent movement of the shutters;
- reliability of design;
- ease of maintenance;
- the possibility of arranging an ergonomic space;
- aesthetics of the design solution;
- versatility of use, because installation can be performed on a garage, entrance area, etc.
Opening for sliding gates
Let's start with the fact that usually the opening is limited by two pillars made of brick. For sliding gates, you will need to insert three 60x60 mm mortgages for each post. Mortgages should be located on the vertical plane of the pedestals located towards the yard. The hermits will subsequently be attached to them. It is optimal if you install a steel pipe in the pillars, to which the embedded parts will be welded.
Requirements for brick pillars:
- they must be assembled vertically;
- high strength of the structure, so that during operation of the sliding gates the pillars do not wobble or collapse;
- they are collected on a foundation, the depth of which should be below the freezing level of the soil in the construction area.
Attention! If the pillars are one of the types of metal profiles, then mortgages are not required in them. The guards will be welded to the posts.
Complete opening for sliding gates
See also: Catalog of companies that specialize in the installation of metal structures.
Gate foundation
Before you make sliding gates yourself, you need to figure out how they will open. Their design will include fittings, which are rollers attached to the lower supporting beam of the gate. They will move along the rail. The latter is a base with high load-bearing capacity.
To prevent the rail from moving or shifting, it is concreted in the ground. That is, they are building a foundation. The simplest and most reliable option is a strip foundation.
Its dimensions:
- length – half the width of the gate opening;
- depth – 1-1.5 m depending on the type of soil at the construction site;
- width 40-50 cm.
They begin digging a trench from one of the pillars, towards which the rollback will be made.
A channel with a width of 10-16 mm is usually used as a rail. Reinforcement with a diameter of 10-14 mm is welded to it, from which a reinforcing frame is formed.
Construction of a strip foundation for sliding gates
The following operations are performed next:
- install the channel and the reinforced frame welded to it into the trench so that its upper plane is at the level of the final finishing of the territory of the summer cottage: paving slabs, asphalt, paving stones, etc.;
- the channel is aligned strictly horizontally;
- the rail must be pressed against the post;
- if necessary, formwork is installed for the part of the foundation protruding above the ground;
- the trench is filled with concrete;
- After a week, the formwork is removed, and the foundation can be loaded through another.
Ready foundation for sliding gates
Guide beam
The device is also called a channel channel. Manufactured from steel profiles in a factory. This is a complex geometric shape that is impossible to recreate in artisanal conditions. This is a beam, the length of which is at least 5-7 meters, the metal is at least 3.5 mm to 5 mm thick. This is one of the main parts that ensures the correct operation of the entire structure.
To make this design, you need an iron pipe and the following tools - an angle grinder, a tape measure, a welding machine, drill bits and a drill.
The length of the beam is 1.5 times longer than the width of the gate. The beam must support the weight of the entire bulky structure, so it must be very strong and rigid. If the beam bends, the gate will jam and will not open. The basis can be a square profile or a square pipe. A longitudinal incision or groove about 1 cm wide is made.
The pipe is cleaned of rust and scale, and the surface is sanded. If there is a welding seam, it must be made sideways. If it remains at the bottom, then it will be an obstacle for the rollers, they will jam, the gate will not open well, and there will be no easy movement.
Manufacturing the supporting frame of sliding gates
Let's move on to the main section of the article - how to make sliding gates for your dacha yourself, that is, we will deal directly with the assembly process.
Please note that components for assembly can be purchased separately or in ready-made kits. For example, examples of such ready-made kits for assembling sliding gates can be found at the manufacturer of gates and components "ALUTECH"
First of all, you need to make a frame. For this purpose, one of the types of metal profiles is used. Today craftsmen give their preference to profile pipes. It is easier to work with, plus, this material has low mass but high load-bearing capacity.
The frame is assembled from two frames inserted into each other. The outer one will serve as a supporting structure, the inner one is used for cladding and increasing the rigidity of the overall product. Therefore, for the first it is better to use a pipe with a cross-section of 60x30 mm, for the second 40x20 mm.
Variant of sliding gate frame diagram
First, the outer frame is assembled. Before welding sliding gates, meaning a frame structure, you need to decide on the dimensions. Everything is clear about the length; this was written above. As for height, the optimal size range is 1.8-2.0 m.
Therefore, the profile pipe is cut to these dimensions, taking into account the required quantity. Please note that the lower guide should have a length equal to the width of the opening, plus 40%. The top one should be equal to the width of the opening. Two vertical posts are also cut off, as well as an inclined element that will form the shank.
Now you will need a flat area where all the cut pipes are laid at their location and welded to each other by electric welding.
If you ask a master how to make a sliding gate yourself, he will draw your attention to the following requirements for the frame:
- all corners of the structure must be straight;
- the door leaf itself must be in the same plane without distortions or curvatures;
- the seams are made continuous.
Frame made of external and internal frames
Other kit items
The main thing in the design is the beam and carriages. A limiter is made from a metal plate to hold the sash. If the gate is large, then a limiter with 4 rollers. For standard gates, 2 rollers are enough.
Catchers are used for fixation after closing. Made from concave plates. It is important to choose the right metal thickness.
Rubber and plastic are the main materials used for factory plugs. Homemade plugs are made from scrap materials. You can simply seal the ends by welding.
Gate installation
Let's move on to the next stage - how to install sliding gates:
- It is necessary to install the carriages included in the sliding gate fittings. There are two of them. They must be located at the maximum distance from each other within the length of the shank.
- We insert the rollers into the frame guide.
- We install the frame on the carriages, align and weld the latter to the channel located in the foundation.
- It is necessary to weld spotwise so that there is an opportunity to level or correct something. If everything is fine, cook with a continuous seam.
- Next, we weld the upper support rollers and one end roller. And also catchers: upper and lower. Both of these fittings are attached by welding to the flashing - this is a profile pipe, which itself is welded to the gateway post embedded parts. If the post is a pipe or channel, then go straight to it.
Installation of carriages for sliding gate fittings
And some nuances that you need to know when implementing the task - how to make sliding gates with your own hands:
- the end roller has a standard size of 110 mm, so the front carriage is installed taking this value into account, away from the opening;
- the far carriage is installed so that it does not knock down the plug;
- the larger the span between the carriages, the better, but without much effort;
- the rolling roller is mounted so that when the gate is opened, it rolls onto the lower catcher, in this way it reduces the load on the gate in its closed state;
- Today, manufacturers of fittings for sliding gates offer carriages with adjustable platforms, with their help you can adjust the height of the gate within a small range and eliminate distortions.
Video description
The video shows how to install sliding gates with your own hands, step by step:
At this point, we can assume that the answer to the question of how to make sliding gates has been given in full. Of course, there are many additional nuances that you need to pay attention to. But, as practice shows, each master with extensive experience has his own approach to the implementation of the task. Therefore, anyone who solves the problem of how to make sliding gates with their own hands must understand that the quality of the final result is experience in carrying out construction operations of this type, plus skills in working with tools: an electric welding machine, an angle grinder, and others.
Height-adjustable carriage
Dimensions
In my opinion, the optimal dimensions of the sash are a height of 2 meters and a width of 4 - 6 meters. A two-meter height will eliminate the manifestation of inappropriate curiosity on the part of passers-by; The sash width of 4 meters will allow a truck with sand or building materials to enter your yard quite safely. Increasing the sash width to six meters is useful in cases where the width of the street forces you to enter the yard at an angle.
Having decided on the dimensions, it is not difficult to build drawings of the gate with your own hands.

