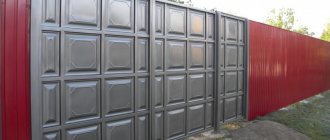
Swing gates with a wicket are a common trend, designed to make it easier for people on foot to enter and exit. In private properties, the practice of installing swing gates with a built-in wicket is widespread. Installing a gate is fraught with some difficulties: it requires separate posts, fastenings, locking and bolting mechanisms.
Forged version in the country
Installing a gate with a wicket in the structure itself is almost more difficult than installing separate columns and placing the wicket separately. This choice all depends on personal preference.
Types of swing gates
The use of swing gates with a wicket is a common practice for arranging the entrance to a fence made of any type of material, if its height allows for the installation of a truly functional gate.
Photos of swinging metal gates with a wicket can be found on the website of any manufacturer that works with metal or other barriers.
Conventional design
The demand for the design is easily explained if we remember that they can be used in several common variants.
In any private building, country mansion or holiday village you can see many options. And even glossy home improvement magazines always feature glamorous interiors with photos of metal swing gates with a wicket.
Only these structures are certainly massive, forged, equipped with additional devices and decorative elements, when looking at which it is difficult to immediately imagine their price.
At a private house
Budget options
Simpler options, seen on the way home or in a holiday village, may look like this:
- swing gates for a dacha - a simple and affordable option made of wood, corrugated sheets, metal pipes or even corrugated sheets on a frame and a simple earthen gate;
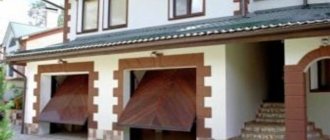
- swing garage doors in the private sector or garage cooperative, consisting of two leaves that open 90 degrees (the most common case is a painted metal garage door);
- Garage doors with a gate usually open onto the courtyard of a residential building. In this case, it is intended for the use of a permanent garage as a pantry or storage space (this ensures the convenience of the inhabitants of the yard, who are not disturbed by the wide open massive doors);
- street gates with a wicket made of corrugated sheets are often simply an improved version of the old design in which a doorway was made (this is typical when the fence area is small, remaining after the division of the territory of one owner into two independent ones);
- Fire-resistant swing gates are equipped with additional fire-fighting materials and are often found in houses where the owners have recently changed. Sometimes they prefer to be made to order by a construction company in new buildings and cottage villages;
- A new fence is usually built from corrugated sheets, which provides separate dimensions for a wicket and gate or a joint structure;
- in small enterprises and warehouses, the territory of which is limited by a fence, you can also see this type, but in terms of strength and size, industrial swing gates are already installed there;
- in a wooden picket fence or plank fence you can see structures professionally made with your own hands;
- The production of swing gates in the village is often made even from wicker doors, where branches or reeds are used as materials for production.
In the village
Homemade automation - is it possible?
If you really want to, you can make an automatic gate opener yourself. Especially for amateurs, this business will become a real hobby. This is especially true for those people who want to save money.
In any case, the basis of such a drive will be the mechanism that is installed on the gate from the satellite dish. It, in turn, is equipped with a worm gear. As a result, this will completely replace the conventional electric drive.
Drive for swing gates
The satellite television system in its design has a rotating mechanism (this applies to old-type systems). This mechanism is an electric motor that can be used for installation on swing gates. As for the worm gear, its operating principle is similar to the drive. But as for the first option (worm gear), it is more profitable, since a voltage of 36V is sufficient for its operation; conventional magazine drives require a voltage of 220V.
Speaking from the safety point of view, the use of such a step-down transformer plan is more profitable. Moreover, if the voltage increases, then the opening/closing of the gate leaves increases. However, with prolonged increased voltage, the mechanism may fail.
Assembly
So, to assemble homemade automation, take 2 drives from a satellite dish in working condition. Give preference to those that have long stems.
This mechanism can be purchased at a relatively low price from a specialized company. Plus, you will need to buy a remote control and a transformer with a power of 36–40V.
The remote control will act as a signal to the electric drive to open/close the gate through the leaf. This system can also be installed on garage doors. The remote control range can reach up to 50 m. The entire drive is assembled within 6 hours. To ensure that all automation works properly, supplement it with a current relay. It will prevent possible damage in case a stone or other object gets under the gate leaf. Automation will return the doors back. If the relay is missing, then after several times the motor may burn out and the door leaf may become unusable.
This is how you can make your own automation for swing gates. If you do not have the opportunity and desire to do all this, then you can buy a ready-made mechanism.
Classification
Swinging garage doors are quite rarely found with a gate, even if they are located in the yard. Sometimes owners prefer to make a separate side entrance and open the gates only when vehicles leave. This design occurs if the garage has a large area and is built of stone.
Swinging metal gates with a wicket inside the structure are quite a rare occurrence.
If the financial situation of the owners allows, they order a design for the entrance of the author’s work.
Installation drawing
Such developers are concerned not so much with the functionality of the gate as with the visual impression it makes.
Here, a gate is not only an additional way to create a unique individual decorative effect, but also a good option for a built-in electronic bell or intercom.
The sizes of swing gates vary depending on the material and height of the fence. These are important indicators. The drawing of swing gates must take them into account.
It shows the frame of swing gates with cuts to correctly install bulky structures. Let's consider one of the drawing options for such a design.
Frame diagram
Lungs
The concept of lungs can be divided into two semantic categories. The manufacturer considers lightweight designs to be simple designs that do not require special materials and mechanisms. These are double-leaf gates that open manually without fancy locking mechanisms.
The second category includes differentiation by weight. Lightweight structures include gates made of corrugated sheets, metal profiles, polycarbonate, transparent lattice gates made of metal rods or durable polymer.
In the city
To lighten the weight and at the same time reliability, it is envisaged to manufacture combined structures from materials of different types - practical, often equipped with construction ones in a matter of hours.
The concept of metal swing gates with a wicket can also imply a lightweight version, in which metal rods with a wide gap are covered with corrugated sheets or corrugated sheets, opaque or colored polymer.
Installation diagram of pillars and frame
Gates where there are no decorative elements, or they are placed only on the outside and are minimal in nature, can also be called light.
Heavy
Buying heavy entrance swing gates with a wicket inside is always much easier than making them yourself. The greater the weight of the structure, the stronger the supporting pillars should be and the stiffer the supporting frame should be, ensuring that there is no deformation or distortion during operation.
Forged version
Installation of heavy production facilities made of especially strong metal is often carried out with the help of special lifts or devices, because even several people lift them with great difficulty.
DIY assembly process
Those who associate homemade gates with not very attractive and unreliable structures think incorrectly. Often the opposite is true. When manufacturing such structures, the owner has the opportunity to create an access system to the site that best meets his requirements both in terms of safety and aesthetic characteristics.
The manufacturing process of such gates involves two main stages:
- installation of posts for securing gates;
- installation of gate leaves.
The listed steps can only be carried out in this order. But after installation, the racks will have to be allowed to stand for at least 7 days . To prevent this time from being wasted, you can start welding the gate leaves.
Installation of pillars
For the role of structure racks you can choose:
- Wooden beam with dimensions 100×100 mm;
- Brick or natural stone. The latter is more suitable for finishing due to its non-standard dimensions;
- Concrete pillar. You can buy a ready-made version or fill it at the work site;
- Profile pipe. When calculating the pipe cross-section, take into account the above recommendations.
The simplest method for installing poles is to drive the pipe to a depth of approximately 1.5 m . It not only requires a minimum of time, but also provides significant savings in material due to the absence of concrete costs. If necessary, you can always replace the stand. But when using this method, it is necessary to set the level correctly and then the structure will not turn out skewed.
The second method involves fastening the pillar using concrete mortar. In other words, you will need to prepare a foundation for the base of the gate.
Considering that the first method is more understandable and is unlikely to cause difficulties, the second option will be considered below.
With this method of installing racks, you must adhere to the following algorithm of actions:
- The first step is to dig a pit at least 1 meter deep. The easiest way to do this is with an earth drill, the diameter of which should be at least 200 mm, which will be sufficient for a pipe with a cross-section of 100×100 mm.
- When calculating the depth of the pit, it is necessary to take into account the level of soil freezing in the region where the work is being carried out. When determining the width of the sides, pay attention to the quality of the soil and the size of the supports used.
- A sand and crushed stone cushion is made for concrete. Its optimal height is no more than 200 mm. It will help avoid deepening the post and provide a base for concreting.
- The pillar is installed, then it is leveled using a building level.
- A concrete solution is prepared and poured into the dug-in post.
- After installation, concrete pillars must be allowed to stand for at least a week. The concrete must harden well. During this time, it is recommended to periodically wet the concrete with water. Although cracks in such a small area pose less of a danger than those occurring in the foundation of a house, they are also undesirable.
- If you decide to use brick or concrete instead of a pipe, then it is recommended to make the same recess for it (one meter).
- To ensure high reliability of the rack, it must be strengthened with reinforcement. You should first remove 2-3 reinforcement embeds for subsequent installation of hinges.
After this, they move on to the second stage.
Types of gates
They are built into the gate complex or mounted between individual pillars. The variety of finished gates is simply amazing. Existing species can be differentiated according to different characteristics, and this must be taken into account before purchasing. Buying and even making a gate with your own hands is much easier than subsequently exchanging, returning or redoing it.
A simple example for a summer residence
Wooden
The most common and economical type, allowing the use of inexpensive environmentally friendly material. The only drawback is its fragility and the need for constant care.
The photo shows design options for a summer cottage.
Wooden structures
From corrugated sheet
They can be made as a temporary or permanent option if the fence is constructed from the same material. Often, doors made of corrugated sheets also include combined ones, in which PFL is used as a means to close the gaping gaps between the rods or components.
Forged
Durable, decorative, solid or made of twigs, with guaranteed long service life. They are considered especially reliable and at the same time extremely decorative. The disadvantages of forged ones include their rather high cost.
However, if the owner has a welding machine, there are no problems in making it yourself, especially if you choose the right material and draw up a preliminary diagram.
Forged elements
Wickets of any type are differentiated into types according to the following characteristics:
- according to the material of manufacture: wooden, forged, from metal rods or metal sheets, corrugated sheets, metal profiles and even wood composite and wooden picket fences;
- by the presence or absence of a threshold or canopy in the supporting frame (if it is built separately or embedded in swing doors with a gate - this point is of no small importance, as well as the intention in arranging the canopy);
- according to the size of the door (standard - 1x2 m, but sometimes it is 140 cm in height);
- according to style features (only in metal it is possible to make forged swing doors in about 10 of the most commonly used styles, but real professionals also create options in different styles from profiled sheets);
- doors can be of different designs: solid, half, made of rods with closed gaps, simple rectangular, with a rounded top, or even in the form of an object or animal;
- by the type of attachment to the gate or support post, which largely determines the category of the gate (swing and forged, swing insulated, solid metal, made of corrugated sheets, etc.);
- by type of shutter device, presence of an electronic lock or intercom.
Sketch of forged products
Not every type of gate and wicket can be easily and hassle-free equipped with your own hands. There are a lot of nuances, especially in complex types, which are known only to those who are constantly engaged in the installation and installation of different types of fences and entrances to the territory of the land plot.
Product sizes
Schematic representation of the dimensions of the gate leaves and the material required for them
Ideally, the gate should be built together with the fence. But there are times when there is a need to widen the passage, or old products have broken down, then before making new structures it is necessary to make calculations as accurately as possible.
And it is desirable that the stylistic solution fully suits the fence. If, for example, the fence is made of brick, then bricks will definitely have to be used for the gate posts of such a fence. If the garden fence is low and made of boards, then the option of decorative high wrought iron gates is unlikely to harmonize with such a fence.
When taking measurements and calculating the material, the coverage of access roads should be taken into account. If there is asphalt, concrete or tiles at the entrance area, then it is enough to leave a gap of 5 cm. And when the garden path is overgrown with grass, then it is better to leave a gap of 10 cm for the smooth opening of the doors.
It is also advisable to provide a gap between the sashes in order to level out the slight displacement of the pillars over time.
Installation of a built-in gate
Using the example of a wooden model or one made from corrugated sheets, you can see that this process is quite simple, especially for those who have already been involved in installation and construction.
Sketch for making it yourself
It is better to entrust swing insulated structures to specialists, even if they are made of corrugated sheets, but you can do the door yourself:
- installation can be carried out on a wooden frame or on pipes made of corrugated sheets. The material is selected according to the thickness of the sheet and the strength of the gate on which the structure will be attached;
- a welded or screwed frame in its simplest form is a rectangle with one cross member in the middle and two oblique ones - in the upper and lower squares formed (a wooden one can simply be placed on self-tapping screws and fastened with metal corners);
- a canvas of the required size is attached to the mounted frame, in which holes are made for the lock and handle;
- the finished structure is inserted into a cut-out opening, which already has a pipe for its fastening with metal loops, and is screwed with bolts or welded;
- if necessary, a bolt (latch and hinges) is attached to the fence and door.
DIY installation diagram
The gate, if it is cut high into the fence, can be equipped with a deck so that those entering do not have to step over the threshold.
The video shows how to weld hinges with your own hands.
This allows you to make the entrance to the yard convenient, especially if there is a small canopy over the structure, under which you can hide in the rain while the lock is being opened.
Tools for work
Tools for making gates with your own hands
To mark and coordinate the plane, verticality during welding and installation, you will need a tape measure, level, construction angle, pencil or core.
Other tools:
- electric or arc welding with a set of consumables;
- screwdriver, Phillips screwdriver
- angle grinder (grinder) with a steel wheel and a cleaning disk;
- hammer, pliers;
- drill.
Land work will require a bayonet shovel, a crowbar, and an ax. To mix concrete you need a concrete mixer or a trough or a shovel. Painting is done with a spray gun or using a roller and brush with a cuvette.
What else to consider
You definitely need to think about the safety of the finished structure and process it accordingly. A special film with a pattern is produced for corrugated sheeting, which protects it from damage. You need to choose a medium thickness of the sheet: a thin one can easily come off the fastenings, and a thick one will put unnecessary stress on the hinges.
Scheme for manufacturing
Tips for choosing material
Pipes used for the manufacture of pillars and gate leaves
The choice of material has a direct bearing on the size of the entrance group, the weight of the structure and many other factors, including natural ones.
But according to experts, a profile pipe with a cross-section of 60*40 mm, where the metal thickness is 1.5 - 2 mm, is more often used for the frame of the sashes. A pipe with a cross-section of 40*20 mm may also be suitable, it all depends on the weight of the casing.
The cross-section of the pipe for the support pillars also depends on the weight of the structure, but it is better to be guided by the knowledge of specialists who claim:
- for a total weight of the valves not exceeding 150 kg, you can use a pipe with a cross-section of 80*80 mm and a metal thickness of 4 mm;
- above 150 kg and up to 300 kg - it is advisable to use a 100*100 mm pipe with a thickness of 5 mm;
- above 300 kg, a pipe of 140*140 mm, with a thickness of 5 mm, is used.
Regarding the hinges, you can choose any mechanisms - adjustable or non-adjustable, but the material from which they are made must be of high quality so that the mechanisms can withstand the weight of gate leaves made independently.
Price
A swing gate 4 meters wide with a door made of single-sided sheet metal with fittings will cost an average of 13,500 rubles.
Gates and doors made of corrugated sheets 4 meters wide with a hinged strip - their price today starts from 16,300 rubles.
Garage doors with a door made of corrugated sheets 4 meters wide and 2 meters high - their cost starts from 18,500 rubles.
Fence with brick pillars
The price for turnkey installation of wrought-iron garage doors with a door 4 meters wide and 2 meters high – from 32,000 rubles.
Drilling holes
While fence posts can simply be hammered in, this method is not acceptable for gates. The load-bearing posts under the gate must be dug in and concreted, as their reliability is much higher. Regardless of the height of the structure, the recommended digging depth is 1.2-1.5 meters, that is, below the soil freezing line. This depth will provide maximum stability and protection against soil heaving. If you dig the posts shallowly, after freezing the soil can push them out, which will lead to breakage of the gate.
So, in the marked places you need to drill or dig two holes. It is desirable that their width is only slightly larger than the cross-sectional width of the pillars, then the consumption of concrete is reduced, the soil is less loosened and the durability of the installation is increased. If the width of the post is 80 millimeters, then the width of the hole should be about 100 millimeters.
Post hole
Typical error
When you attach gates to brick supports with your own hands, one characteristic mistake is made. Mortgages are welded directly to a metal post in order to secure the future gate. But only two pillars should have mortgages; they are simply not needed on the rest. The gate will not be highly reliable, since it simply will not be held in place by small sections of brick from which a metal rod sticks out.
To install the gate when the pillars are made of brick, you need to first make a layout and mark those pillars that will become the main support of the gate. The gates are mounted using electric welding, which is cheaper than gas welding. It does not form an influx of metal.
If the doors open outwards
If we compare them with each other, then both linear and lever ones are suitable for externally opening gates. But based on the price, preference, of course, falls on a linear electric drive. The only thing to consider is the method of attaching the drive to the pole when opening from the outside.
In most cases, the drive is attached to a brick, which can quickly crumble. It’s worse if the drive is mounted to an almost destroyed pole. Under such conditions, the automation will disappear along with part of the pole.
Automation for internal opening
Taking this into account, such a pole requires additional reinforcement. For example, you can weld a metal frame around it. Next, the drive, which opens outward, is set to manual mode, and the mounting brackets are attached to the gate by welding. If you are using a linear drive, then after welding, open the gate completely and leave free movement up to 1 m. After this, check the movement of the leaf and the correct operation of the drive. If everything works properly, then you can connect the automation and connect the engine.
All automation and remote control are configured according to the attached instructions. If one of the doors opens in the wrong direction, then just move the wire in the connection. But if you follow the connection diagram, then no problems should arise.
External gate opening
So, it is important to make the right choice of the necessary automation, taking into account which direction the swing gates will open. From this article you learned that it is possible to make automation yourself. An easier option is to purchase a ready-made kit. But one thing is certain, regardless of the choice you make, having automatic gates will make your life easier. Therefore, when building a gate in a country house, think about what method of opening it will be - automatic or manual. If you have your own experience in installing automatic gates, then write comments on this article.
Do you need mortgages?
There is no clear answer to this question.
If it is decided to weld them in advance, the installation site must be carefully marked. I provide two of them for the gate, and three for the gate leaves. Brick laying is carried out in such a way that the mortgages are located directly in the seam being formed, and are symmetrical relative to the top and bottom of the supports. In this case, all work must be done extremely carefully. Only individual people can cope with such a task. Mortgage in a brick pillar
An alternative option is to weld the elements directly during the bricklaying process. To do this, the bricks are laid to the required height, and then the mortgage is fastened in any convenient way. This can be done using bots, a clamp, or simply welding the element to the support
This version of the sash design allows everything to be done not only very accurately, but also very beautifully, which is important for finishing the supports, which many people decide to do on their own. Subsequently, it will be possible to paint the protruding elements with paint of the same color as the brick to hide traces of installation work
Option for attaching to a finished pole
If the support is installed and the brick is laid, then you can secure the support in two ways:
- Through the clamp. In this case, the completely finished post is “encircled” by a frame-collar welded from a corner. Sometimes it is placed in the form of three rings, placed at equal distances relative to each other along the entire length of the support;
- To the reinforcement bars. To do this, using a hammer drill, fairly deep holes are drilled, the diameter of which is slightly larger than the transverse dimensions of the reinforcement. Work begins from a point located on the seam of the brickwork. Next they move down, positioning the drill at a certain angle. Reinforcement is driven into the holes prepared in this way.
Both options allow you to slightly increase the strength of the mounted structure. However, in this case, the appearance of the mounted structure significantly deteriorates. This can only be avoided by following the technology for installing support elements.
Laying fence posts: technologies
In most cases, fence posts are made of 1.5 or 2 bricks, the cross-section is 380*380 mm and 510*510 mm, respectively, and the height is up to 3 meters.
The masonry is carried out with bandaging (offset) - the seam of the bottom row is overlapped by the “body” of the brick lying on top. The standard seam is 8-10 mm. The diagram for laying columns of one and a half and two bricks is in the photo below.
Brick pillars of 1.5 and 2 bricks
Laying pillars: work order
Cut-off waterproofing is spread on the finished foundation. It can be roofing material in two layers, but it is better to use waterproofing with bitumen mastic. This layer is necessary so that the brick does not “pull” moisture from the soil. If wet brick freezes, it quickly begins to crack and crumble. Therefore, waterproofing is necessary.
According to the dimensions of the pillar, a solution is applied to the waterproofing in a layer of slightly more than 1 cm. Bricks are laid on it according to the diagram. They are leveled in vertical and horizontal planes by tapping with a special rubber hammer. Craftsmen can use the handle of a trowel, but in this case, the remains of the mortar can fly off the surface of the trowel, dirtying their hands and the brick, and it is difficult to wipe off the cement.
Ceramic brick absorbs moisture very quickly, so if you hesitate a little, it will be difficult for you to “put” it in place. To ensure that the solution retains its plasticity longer, the brick is dipped in water for a few seconds before laying. The same maneuver makes it easier to wipe the solution from the surface (it is removed immediately with a dry cloth).
We hit with a hammer
The second row is laid in the same way: the mortar is spread on the bricks, the bricks are placed on it, but with a bandage - unfolded so that the seam is blocked. Level again. Then take a tape measure and check the dimensions of the laid rows. Even a small displacement of 1-2 mm is eliminated. Tap the end of the brick (called a “poke”), moving the bricks closer. Then, if the side edges were not coated, fill the vertical seams. All subsequent rows are placed similarly.
If there is a void between the inner reinforcement pipe and the brickwork, it is filled. If the distance is small, you can use masonry mortar; if the void is significant, to save space you can fill it with crushed stone, compact it, then pour it with liquid cement-sand mortar.
Masonry under the rod
This type of masonry of pillars has long been tested, but for beginners, when making it themselves, it is difficult to maintain an even seam. Another problem is that the solution comes out of the seam, staining the surface. It doesn't turn out very nice. To make the work easier, we came up with a laying under the rod. Take a square metal rod with a side of 8-10 mm, cut it into pieces, 10-15 cm longer than the dimensions of the post.
Bar layout
Having laid the first row, a rod is laid on it along the edge of the brick. Fill the area with a small amount of solution, with a larger layer being made closer to the pipe. Then, running a trowel along the rod, remove the excess, clearing the rod of the solution. But at the same time, the slope of the solution is maintained. They place a brick and level it. At the same time, the rod prevents it from settling too much, and we control the position of the other end with a level.
Apply the solution to the side edge under the rod
Then take a short piece of rod about 10 cm (for a vertical seam), place it along the butt, apply the mortar with a trowel to the side of the laid brick, also removing the excess along the rod. The second brick is placed and leveled. After the level is set, the seam is pressed from above with a trowel, and the vertical rod is removed.
We take out the rod, holding the seam with a trowel
This is how all the bricks are laid out in a row. Then the rods are removed and proceed to the next row. This technology for laying brick pillars allows you to control the seams and make them neat. Even a novice amateur mason can fold a pillar this way with his own hands.
It is only important to control the parameters of each row during the process
Video lessons
A more complex version of a brick pillar - twisted with a screw
Features of working with ceramic bricks
If the doors open inward
It is believed that opening the gate into the yard is a standard scheme. Therefore, any drive will be suitable for this project. So, if the support pillars are made of steel, then it is preferable to use a linear drive. It’s a completely different matter if you have brick supports and swing gates are located in the center of the column. In this case, a linear actuator is not suitable. You will have to install and buy a lever electric drive. The automation itself is mounted on poles, and the levers will allow you to open swing gates, even if the distance from the pole to the gate is 200 mm.
Advantages and disadvantages
You can use any filling for the frame that is in harmony with other objects.
Installation of swing gates attracts many homeowners with its simplicity. To install such a structure, it is not necessary to have complex construction skills. Other advantages include:
- strength and reliability of the structure;
- possibility of installing a gate;
- low financial costs;
- high maintainability - if the canvas sag or insufficiently strong hinges are selected, the system can be easily restored to proper condition;
- Possibility of installation in an opening of any size.
In winter, it is necessary to clear the surrounding area of snow so that the doors can move freely. The design can also cause difficulties when driving on a narrow street.