In the variety of modern finishing materials, a new composition called “microcement” and “microconcrete” has increasingly come into view. Manufacturers and sellers cite many advantages of this coating, especially highlighting its wear resistance, strength and high adhesion (grip) to any surface. In this article we will discuss all the issues related to this decorative plaster.
Microcement Reapol-S – decorative plaster
Microcement affordable price from 350 rubles/sq.m, large selection of colors, always available in stock, buy with application.
Easy to apply. Water resistance. Vapor permeability. Antistatic. Impact resistance. High resistance to mechanical loads. MICROCEMENT REAPOL-S is an innovative material for the installation of floor and wall coverings in the “techno” and “loft” styles with a thickness of 0.5-3.0 mm. Due to its high adhesion to most materials and elasticity (flexibility), Reapol-S can be applied both to mineral substrates (concrete, sand-cement mortar, aceid, cement-bonded particle board, plasterboard, etc.) and to wood composites (OSB, plywood , chipboard). The coatings formed, after hardening, are distinguished by their excellent decorative appearance and wear resistance. Can be used on floors with high traffic volumes from carts and forklifts.
| Quantity | up to 16 pcs | 17 pcs | 100 pieces |
| microcement Reapol-S (finish) 3 kg | 1350 rub. | 1150 rub. | 1050 rub. |
Buy REAPOL-S microcement at the best price with delivery to your city: Moscow, St. Petersburg, Yekaterinburg, Nizhny Novgorod, Kazan, Samara, Chelyabinsk, Omsk, Rostov-on-Don, Ufa, Perm, Volgograd, Voronezh, Saratov, Togliatti , Tyumen, Izhevsk, Barnaul, Ulyanovsk, Vladivostok, Khabarovsk, Yaroslavl, Makhachkala, Orenburg, Tomsk, Kemerovo, Astrakhan, Ryazan, Naberezhnye Chelny, Penza, Lipetsk, Tula, Kirov, Cheboksary, Kaliningrad, Kursk, Ulan-Ude, Stavropol, Tver, Ivanovo, Bryansk, Sochi, Belgorod, Arkhangelsk, Vladimir, Sevastopol, Chita, Kaluga, Smolensk, Volzhsky, Kurgan, Orel, Cherepovets, Vologda, Vladikavkaz, Saransk, Murmansk, Tambov, Grozny, Kostroma, Novosibirsk, Krasnoyarsk, Ryazan, Minsk.
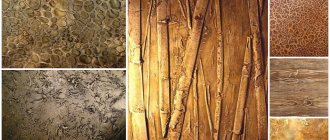
IN THE PHOTO: Samples of loft plaster textures made of microconcrete and microcement Reapol-S, which can be viewed in our office at the address: Moscow, Cherepanov Proezd, 6, building 1, office 1,2
IN THE PHOTO: Boutique object in the Marriott Hotel, Moscow (Novy Arbat 32). The walls are covered with decorative plaster microconcrete Reapol-S.
IN THE PHOTO: Object restaurant “Greenhouse”, Aktau, Kazakhstan. The floors are covered with decorative plaster microconcrete and microcement Reapol-S.
Do you want to make walls and floors in your office, restaurant, cafe or apartment in a modern loft style?
Do you want a decorative coating for concrete: microcement microconcrete that will serve you for a long time?
Call us right now (calls within Russia are free)
We will be happy to advise you, calculate and supply all the necessary materials!
Micro concrete floor in an apartment
Micro-concrete floors in apartments are no longer uncommon today. Seamless plaster on the floor is being used by more and more admirers of the Loft, Minimalism and other decorative styles, and those simply wanting to save on floor finishing. Happy apartment owners are increasingly abandoning porcelain stoneware, laminate, and parquet in favor of lightweight, seamless coatings. And this is not a tribute to fashion, but a calculation based on the advantage of micro-concrete over jointed coatings. Microcement can be applied to the floor in a new apartment, sometimes without preparing and leveling the base. A microcement floor in an apartment does not require a plinth. Of course, the junction of the floor and walls is not ideal, but this problem can be easily eliminated with a small fillet of sealant.
In modern apartments, semi-dry screeds are increasingly used. It is smooth, but not always strong (usually made from a cement-sand mixture of no more than M200 or M150). Such a screed will not exceed 12-15 MPa in strength, and for an apartment you need at least 20 MPa. If you make your own screed, then use mixtures with a grade strength of at least M250
If you decide to make a micro-concrete floor in your apartment, you can order it from our company. At the same time, you will receive the most optimal conditions and an affordable price for the work. To do this, call us and receive detailed advice on the coating and a free visit from a specialist to inspect the screed.
Microcement and microconcrete - Top 10 arguments FOR
Microcement and Microconcrete are one of the newest finishing variations. The minimum coating layer is no more than 3 mm. They do not require special preparatory work of increased complexity. Microcement can be easily applied to existing coatings such as ceramic tiles, glass and plastic.
Microconcrete for floors and walls has been widely used and continues to gain popularity. This finish is ideal for fans of the strictest minimalist interiors. Gradually, microcement begins to create significant competition even for incredibly expensive materials such as porcelain stoneware and marble. There are 10 main arguments in favor of microcement and microconcrete:
- Versatility. They can be applied to almost any surface in terms of structure and purpose. Can be used as a base to create stunning mosaic floors.
- Adhesion. The material has excellent adhesion to other substances, fits tightly on all kinds of surfaces, and does not come off over time, unlike other materials. There are no strict requirements for the condition of the base surface. It should only be dry and leveled.
- Structure. Microcement is characterized by a unique 3-layer application method. The first layer is a primer. It is firmly bonded to the surface being treated. Then there is a decorative layer, which forms a unique structure. The whole thing is completed with a finishing layer that protects the plaster from abrasion and moisture.
- High strength. Microcement is famous for its high level of resistance to mechanical damage. Therefore, it is often used as a finishing layer. Mixtures are available for sale for use in high traffic areas. In addition, the material is resistant to wear, scratches and chemicals.
- Wide palette and large selection of textures. The color range of the material is quite extensive and amounts to 36 colors. This allows you to bring various design ideas to life. Microcement can be applied either as a structural coating or as a perfectly smooth matte or glossy texture.
- Economical consumption. The thickness of the microcement coating is no more than 3 cm, so the mixture is used quite economically. This also reduces the load on structures.
- Time and ease of application. Application of the solution requires a minimum of time, which allows you to process about 50 m2 during a working day. You don't need any complicated special tools. The material is applied manually, which ensures a unique, unique result every time.
- Waterproofing qualities. The smallest particle size of microcement completely prevents the penetration of moisture and vapor. This explains the popularity of the material for finishing surfaces in the kitchen, bathrooms and other rooms with high humidity.
- Fire safety. The uniqueness of the material lies in its ability to perfectly withstand high temperatures. The surface covered with it retains heat well and is quite pleasant to the touch.
- Easy maintenance. Microconcrete does not require special, expensive maintenance. It is enough to periodically wipe the surface using water and a neutral detergent.
Reapol-S mixtures are applied either independently or in combination of several different mixtures. Experts recommend their combined use, as this significantly reduces the risk of creating a coating of inadequate quality. Joint and sequential application of solutions allows you to achieve the highest possible decorative and technical properties.
Application work – for wall and floor
Microcement is often sold as a dry white powder with a polymer liquid binder. Therefore, you need to prepare a solution. To do this, the liquid is poured into a plastic bucket, where the color is added. Usually the mass is painted gray or black. The powder itself is added to the liquid colored mass. Everything is mixed with a drill with a mixer attachment. The solution is ready for use.
For good adhesion, the base of the wall is covered with a layer of primer. A primer with quartz filler is used, as it is best suited for textured decorative plasters. The surface should be as level as possible, because the solution will be applied in a thin layer, which will make all defects visible.
The first layer is applied with a trowel “to tear off”. It should be applied as smoothly as possible. The movements of the trowel should be short and multi-directional to form a pattern. The drawing itself will appear later. The second layer is applied after the first has dried in a similar way. When applying the second layer, the movements should be as if we were trying to rub the solution into the first layer. As a result, a complex pattern will begin to appear.
After the second layer has dried, sand it with sandpaper. We remove the accumulated dust and sand the coating with a sanding machine. After this, you can apply varnish, which will not only even out the color, but also reveal the design. The varnish is applied with a foam roller, which is first rolled out in order to apply the mixture in the thinnest possible layer. After this, the coating will be ready.
How to make your own mixture
There is a large selection of microcement manufacturers on the market. Ready-made compositions differ in color and impregnations that are included in it. If you need to create a solution with certain technical parameters, experts recommend purchasing a white base and adding the necessary additives to it yourself.
Tinting
Microcement is used as a finishing decorative layer. Tinting allows you to give it the required shade. The colors of the coatings directly depend on the interior design. Specialists carry out tinting in two ways:
- Change in color of the mixture. The pigment in dry or liquid form is introduced into the induced solution. It is recommended to add no more than 5% of the color from the total mass. If a concentrated color is used, then no more than 1% of the total mass. After this, the composition is thoroughly stirred until a uniform color is obtained.
- The second method involves impregnation with acid pigments. The paint is dissolved in water and applied to the dried layer with a furry mitten.
In some cases, tinting with glezal with the required shade is allowed. The composition is applied over microcement.
The choice of color in the interior is one of the important aspects when creating a design project.
Types of microcement
There are two main types of microcement:
- one-component (mixed only with water), dehydrated acrylic resin is added to the composition in powder form (due to which it partially loses its properties);
- two-component (A – dry composition in powder form, B – liquid resin component).
There are several modifications of the microcement mixture in the lines of the main manufacturers.
For example, the Spanish company Topciment offers the following types of two-component microcement for decorative plaster:
- Microcement base - used mainly for applying a base layer under other types of microcement mixtures, gives a “lumpy” rough surface (can also be used for applying a top decorative layer). Consumption for two-layer coating per meter is 2.0 kg, grain size up to 0.5-0.6 mm.
- Microdeck is more suitable for floors of rooms, for example, stairs, corridors, where there is the most intense traffic. Consumption per meter square – 1.0 kg, granules up to 0.2-0.3 mm.
- Microfino is used for finishing ceilings and walls. The mixture forms a silky, pleasant surface and has a streaky effect. Consumption – 0.5 kg per meter square, granules – up to 0.125 mm.
- Microstone - the material is ideal for facade and other external surfaces (verandas, terraces, loggias). Grains up to 0.4 mm, consumption – 2.0 kg per square, forms an anti-slip coating.
- Aquaciment M, XL is used for the base (first) and finishing layers of pool coatings (category M is for outer edges). It has an anti-slip effect (category XL - for internal surfaces) and smoothness. Consumption 3.0 and 1.8 kg/m2, respectively.
Popular manufacturers
The list of the best manufacturers may differ in different reviews. However, some companies move from one list to another with the best reviews and optimal price-quality ratio:
- Forza by Goldshell. The manufacturer produces a decorative mixture to create a coating with the effect of smooth concrete. Suitable for use in rooms with high humidity. Does not require special surface preparation.
- Reamix. Russian manufacturer. Positions microcement as a decorative two-component putty. The product is available in two packages - the dry solution itself and the pigment.
- Efdan. Latin American manufacturer, pioneer in the microconcrete production market. Delivers a first-class quality product.
- Senideco Senibeton. Produces a white product. For tinting, liquid or dry pigment is used. It is produced in three modifications, differing in the degree of grinding (very fine, fine and coarse). It has a high setting and drying speed. The disadvantage is the fear of low temperatures.
- Stop&Meeus. Belgian manufacturer. Supplies white microcement in 16 kg packages. To give the desired tone, colors are used. The composition sets quickly. Has a high degree of adhesion. Does not require the use of a primer for wall treatment.
The choice of high-quality microcement must be approached responsibly
Microcement (microconcrete) is a modern multifunctional material for creating base and finishing coatings. Due to its high strength and wear-resistant characteristics, it is used in construction, for external and internal work. With the addition of coloring pigments, it allows you to create a surface that will look harmonious in the interior.
Was this information useful to you? Share in the comments!
Application stages
Work begins with the preparation of materials and tools. This list will include:
- special primers - if you want to play it safe, prevent capillary suction or blocking of the vapor barrier;
- two-component polyurethane-based varnish;
- impregnation for layer-by-layer connection;
- rubber trowel – the composition is applied and smoothed with it;
- spatula-sponge – indispensable in leveling layers;
- a trowel made of stainless steel, having a beveled edge and rounded edges - it is used to apply and level;
- a brush with natural bristles - if you need to apply a primer to the ceramics;
- short pile roller for varnishing;
- mixer.
Technology of applying microcement in stages.
- Preparation. If we are talking about a field, you need to strengthen the surface of the base and reinforce the edges of the steps. The main thing is that the surface does not raise questions about strength, is smooth, without differences and cracks larger than 2 mm. There should also be no stains on it, as well as dust or traces of rust. The base must be primed and dried twice. Stone, cement, concrete, as well as brick must be moistened before applying microcement. Tiles, porcelain tiles and laminate surfaces are degreased and cleaned. Chipboard and gypsum board are primed with sand compounds.
- Application. If this is a floor, you need to do this: there will be 3 layers in total. The first is a reinforcement mesh that is not afraid of alkali, base microconcrete and polymer. The second and third layers are decorative microcement, color and polymer. Walls and ceilings are not always reinforced. The base layer for them is continuous putty (as they say, “to tear off”). And the finishing layer is smoothed with a metal tool. You can smooth it both wet and dry. You can grind with abrasives and polish.
- Finishing. This is applying varnish. Instead, special functional impregnations and waxes can be used.
Step by step plan.
- The surface is prepared, primed if necessary, and the composition is mixed.
- A thin base layer, no more than 2 mm, is applied to the surface with a trowel.
- A dry sponge spatula levels the surface. They go over the layer again with a metal trowel so that a small pattern begins to appear.
- After an hour, the surface is smoothed with a wet sponge. And again leveling with a trowel, but without polishing (this may cause the appearance of dark spots).
- After a day, you can walk over the surface with a sander.
- The surface is thoroughly washed with water and wiped. She should be left alone for a day.
- Time to apply a protective sealant to the surface - do it with a roller.
- After another 12 hours you can apply varnish. This is usually done with chaotic wrist movements.
If the finishing is carried out in rooms with a high level of humidity, the instructions will contain one more point: after laying the second decorative layer, sanding it and removing dust after drying, the surface is treated with a waterproofing layer.
To learn how to apply microcement, watch the following video.
How to apply microcement
In principle, this material is applied in the same way as other decorative plaster.
Required Tools
As a rule, only two tools are required for work:
- putty knife;
- trowel.
They apply the mixture and then level it. If we are talking about flooring, then knee pads would also be useful.
Application stages
First, you should prepare the working surface. Since microconcrete is applied only in a thin layer, its leveling plays a huge role. Because decorative plaster is simply unable to hide defects. If it is equipped with a glossy finish, then the flaws will become even more striking.
Some manufacturers try to claim that their product does not require a primer. But you still shouldn’t skip this stage. A primer is especially necessary if finishing a smooth surface such as chipboard or tile. Probably everyone understands that it will significantly improve grip on the base surface.
The solution is prepared according to the instructions. Before applying, mix it thoroughly.
As a rule, the plaster layer should not be thicker than 1.5 mm. Moreover, they distribute it over the surfaces as evenly as possible. The joints are smoothed out with special care. If you plan to carry out glossing, then polishing does not need to be done.
If micro-concrete is used on the floor, then it would be useful to use an auxiliary fiberglass mesh. The material is applied in two layers. Moreover, each of them must dry for at least a day.
In order for the plaster to acquire the necessary qualities, it is treated in two layers with a fixing impregnation, that is, a protective varnish. It also gives the finish a glossy finish. If the room is dry, then this protection is quite enough. If it is wet, then it is better to use a polyurethane varnish.
How soon can I use the floor after it is installed?
We recommend that you do not walk on the floor at all for the first 2 days, or very carefully and with bare feet. Avoid impacts, dragging of furniture and spills of liquids. The decorative coating contains Portland cement, and it gains strength gradually over 28 days, so in the first month we must take special care to avoid damage. Particular attention should be paid to factors such as humidity because they affect the drying process.
If you still have questions, we will be happy to answer everything. Contact us for a free on-site consultation.
What is microcement
As we have already noted, microcement is a type of decorative plaster. It contains two main components:
firstly, cement mixed with finely ground quartz sand;
When working with micro-concrete, it is especially important to apply a protective varnish coating to it. This is necessary to ensure its moisture resistance and close all the smallest pores in it.
The varnish can be either acrylic or epoxy.
If the base mixture is white cement, then painting it will not be difficult. But it is necessary to use special dry dyes.
Required Tool
The selection of tools for applying decorative microcement plaster is determined by the viscosity of the material.
It cannot be applied using a tool that has a large working surface area, since it will be difficult to “pull” the material with acceptable evenness.
For work, it is most convenient to use a container that will fit the entire package - then you will not have to calculate the amount of sealer relative to the dry mixture. A mixer attachment for paint or putty is quite suitable for mixing.
Material Specifications
Finding microcement is not difficult. The manufacturer always indicates its name on the packaging. Foreign companies call the material “Microcemento”. In Russia, these products are just becoming popular, so it is better to choose decorative plaster from a European manufacturer. In this case, the material will be of high quality and with the same characteristics, regardless of the brand under which it is sold.
Decorative cement-polymer plaster microcement is applied in the thinnest layer. It is recommended that the layer thickness be 1-1.5 mm when working with walls and ceilings. If you apply the coating to the floor, its thickness can reach 2-3 mm, but no more.
Average consumption per 1 sq.m. is 0.5 kg (powder), but this will require another 250 ml of binder polymer liquid. If we take into account the mass that is already ready for application, then it is worth considering that about 1 kilogram of solution will be needed per 1 square meter of wall. This is for applying two layers.
What is microcement
Microcement is characterized by such properties as strength, high adhesion and water resistance. Modifying polymers, which are added to the finest cement material (particle size 6-8 microns), help the material achieve all this. The solution is applied in thin layers, just like Venetian plaster. And in appearance, the two coatings are very similar (in one case, marble chips are used as a filler, and in the second, cement flour is used).
Microcement is applied in several layers, which also helps improve its water resistance. For the same reason, the material can be used on the floor or wall in the bathroom instead of tiles. As for adhesive properties, this decorative plaster can be applied to the following surfaces:
- tree;
- plastic;
- stone
- concrete;
- drywall;
- glass;
- metal;
- ceramic tile.
It is worth understanding that the possibility of applying microcement to the floor is due to two more of its positive aspects. The material has high impact strength and abrasion resistance. So you don’t have to worry about damage due to mechanical stress. By the way, thanks to its positive properties, decorative microcement plaster is often used even in swimming pools or when finishing facades.
On what surfaces can microcement be used?
The microcement mixture creates a durable, seamless surface. Many years of practice have shown that the solution is easy to apply and firmly adheres to such types of materials as:
- cement;
- drywall;
- concrete;
- plaster;
- stone;
- plastic;
- metal;
- ceramics;
- glass.
Due to the high level of adhesion, the mixture adheres firmly to horizontal and vertical surfaces. During work, microconcrete can be laid on tiles without prior removal.
The material has the ability to firmly adhere to almost any substrate
Disadvantages and possible problems
Although microcement decorative plaster creates a beautiful coating with many positive properties, this does not mean that there are no problems with it.
- Many people forget that they need to work “wet”, which is why visible joints appear. This error can result in a coating that is not uniform to the touch.
- Microcement itself does not create a smooth and beautiful coating. This requires not only a special application technique, but also special materials, which will entail additional waste. Special wax, pigment paste and other materials are not cheap.
- All flaws in the application of the solution will appear only after the varnish is applied to the coating. Until this moment, it is difficult to understand what went wrong. But after the varnishing procedure everything will become clear. Unfortunately, by this time it will be too late to correct the errors.
Design
Microcement has gained great popularity not only because of its reliability and ease of use, but also because of its ability to create aesthetic effects. The coating provides stylistic unity to the interior, ideally combining the texture and shades of the bathroom finishing with the texture and color of the sanitary ware. The possibilities of microcement are extensive. It can be used to cover any surface. It also exhibits good adhesive properties to metal and wood. Concrete, brick and foam block masonry are the best base for microcement.
Application of microcement
Microcement does not require prior removal of tiles, even smooth ones, and can be applied over them. Therefore, energy and time for repairs are saved.
Surface preparation
Preparation of the base (floor and walls) may vary slightly. So for the floor (and steps of stairs) it is necessary to use high-quality material for the underlying screeds, strengthening the base surface, and reinforcing the edges of the steps. In general, the prepared surface should be strong, smooth, and free of cracks and differences in height of more than 2 mm. It must also be cleaned of stains, dust, and rusting objects. Before applying the microcement composition, the base is primed and dried twice.
Concrete, cement, stone or brick are moistened before application. Tiles, porcelain tiles, and laminated surfaces are degreased and cleaned. Drywall, chipboard and other similar substrates are primed with penetrating compounds containing sand.
Floor coating
Microconcrete is applied to the floors in three layers and the first of them must be reinforced. The diagram looks like this:
- 1st layer - alkali-resistant reinforcing mesh + base microconcrete + polymer;
- 2nd and 3rd layers - decorative microconcrete color + polymer.
Application technology for walls and ceilings
Walls and ceilings may not require reinforcement.
Application is similar to standard technology:
- the base layer is performed by continuous puttying of the surface “to tear off”;
- If the freshly applied mass loses its raw gloss, the finishing layer is smoothed with a metal trowel.
Smoothing can be either wet or dry, grinding with abrasives and polishing is allowed. If you want to create a rough texture, apply a pattern with a trowel. The final finishing is carried out by applying varnishes or special impregnations and wax.
Basic application technology:
- Surface preparation.
- Surface primer (quartz primer is most often used).
- Preparation of the solution: pour the liquid component into the container, mix it with the pigment (some dyes are diluted with water), add the dry mixture, mix with a mixer.
- Apply a thin base layer (1-2 mm) with a trowel.
- Use a sponge spatula (dry) to level the surface.
- The layer is smoothed again with a metal trowel, adding a slight pattern.
- After 2-3 hours (for tiles and Edfan mixtures - at least 24 hours), apply a second layer of 1-2 mm with a trowel.
- After about an hour, smooth the surface of the layer with a wet sponge.
- The khatem is smoothed again with a metal trowel, but not polished so that dark spots do not appear.
- At the finish (after 24 hours), the layer is sanded (can be done with a sander).
- Rinse thoroughly with water, wipe and leave for a day.
- Apply protective sealant to the plaster with a roller.
- After 12 hours, the application of varnish begins.
The application technology greatly depends on the manufacturer's recommendations.
For example, the simplest technology we know is the following:
- prepare the surface;
- prime the surface with quartz primer;
- apply the first layer while simultaneously forming the future pattern;
- Apply the second layer to the scratch and smooth it;
- varnish the surface with chaotic movements of the brush.
In damp areas
In the case of places where water constantly gets in, before applying microcement finishing, it is necessary to make protection against capillary entry of moisture from the wall material. If this is not done, the backwash of water from the rear will cause the plaster to peel off. How to do this, read the article about Moisture-resistant plaster.
The top of the coating is also protected from water penetration. For this purpose, impregnations or polyurethane varnish are used. For surface protection, Hydra is considered the most effective. Such products are applied after the laid solution has dried.
Sequence of finishing (total thickness 2 mm) of a bathroom or bathroom:
- apply the first (base) layer, after drying, sand and remove dust;
- lay the second decorative layer, also sand and remove dust after drying;
- apply a Hydra waterproofing layer;
- impregnate the waterproofing with polyurethane impregnation (1 or 2 layers);
- after drying, coat with polyurethane-based varnish (1 or 2 layers).
Microcement coatings can be washed after 2 weeks. This is done in a gentle manner until the material gains strength. But even after that, it is not recommended to use alkaline aggressive agents. Street coverings can be washed with water from a hose. You can renew the floor covering with acrylic polymers.
Types of microcement
Among the range of products of modern manufacturers there are several varieties of microconcrete:
- Aquacement. Contains special moisture-resistant components, as well as substances that protect the coating from the effects of salts and chlorine. Suitable for cladding swimming pools, saunas, bathrooms, and any other rooms with high humidity levels.
- Microdeck. The strongest microcement. It is used for pouring floors in areas where the load is highest. It has a slightly larger structure than standard material.
- Microbase. It is used to decorate floors in a rustic style, as it has a rough appearance and roughness. It can also serve as a base for installing any finishing coatings.
- Microstone. It is a cement-based decorative plaster with a coarse texture. After drying it resembles natural stone.
- Mikrofino. Well suited for wall decoration, it is a type of decorative plaster with a particularly fine texture.
Aquacement 2K207 for finishing swimming pools
Also, all types of microcement can be divided into one-component (for their preparation you only need water, and acrylic and other resins are already included in the composition) and two-component (contain dry powder and liquid resin, they must be combined before application).
Areas of application
Microconcrete is intended for internal and external work. It is suitable for finishing rooms with increased load, floors, columns, stairs. In terms of wear resistance, the material significantly exceeds parquet, marble, tiles, and laminate. Today, in terms of its parameters, it is second only to porcelain stoneware.
Due to its high moisture resistance, the mixture is used for finishing bathrooms, swimming pools, and countertops. The solution is used for walls in the hallway, living room, kitchen. The peculiarity of the texture allows you to create a marble finish.
Microcement has also become widespread in underground construction and well repair. It is used to decorate any solid base, suitable for reinforcement and installation of heated floors.
Microconcrete is used as a finishing for external and internal work
Description of species
All types are divided into one-component and two-component. In the first case, only water is needed to mix the solution. Resins (including acrylic) are already contained in cement. And in two-component types, the user needs to independently combine the liquid resin and dry powder.
- Aquacement. This product necessarily contains special moisture-resistant components that strengthen the composition of the substance and protect decorative plaster from chlorine and salts. This micro-concrete is convenient for treating the walls of swimming pools, bathrooms and saunas. In short, all rooms in which there is an increased level of humidity.
- Microdeck. Of all types of microcement, this is the most durable. They are used to fill floors in those areas that experience the highest load. The structure of this type will be larger than the structure of standard microcement.
- Microbase. If your task is to decorate floors in a rustic style, you won’t find a better material than this. It is deliberately rough, rough - what is needed for rusticity. Microbase is also suitable as a base for any finishing coating.
- Microstone. This decorative plaster consists of cement, which has a coarse texture. When the mixture dries, the coating closely resembles natural stone. A good, budget solution for those who don’t mind high-quality imitations.
- Mikrofino. This type is mainly used for wall decoration. This is a decorative plaster with a very fine texture, one might say elegant. Today, this option is often used in studio apartments and spacious hallways. Inexpensive, reliable, textured.
Coloring decorative plaster for concrete
Microcement and Microconcrete Reapol-S have a rich range of colors, which makes it possible to create unique textures, imitation of marble and masonry. A wide variety of colors and different textures allow you to bring to life even the most incredible design ideas and projects. Applying the solution manually adds exclusivity to the surface. It is impossible to create two absolutely identical surfaces.
The standard palette of Reamix concrete plaster contains 60 shades. Here are just a few color options: pistachio, turquoise, graphite, olive, beige. In our catalog there is also microcement of different colors, which you can buy at an affordable price. The solution can be applied both to create a structure and to create a smoother, matte or glossy surface.
STANDARD COLORS OF DECORATIVE PLASTER MICROCEMENT MICROCONCRETE MANUFACTURER CATALOG
Color selection by a designer – 7,000 rubles. | Rent/buy a fan of flowers – 5,000 rubles.
CATALOG No. 1
CATALOG No. 2
Pros and cons of microcement
It is not for nothing that the material is considered universal - it is easily applied to most types of building materials, and at the same time reliably adheres to them. Other advantages of microcement are:
- Suitable for external and internal use, suitable for walls, floors and ceilings;
- is resistant to mechanical damage, shock, scratches, and chemicals;
- resists abrasion, compression, has sufficient bending strength;
- does not allow moisture to pass through, does not deteriorate even from direct contact with water;
- Available in different colors and can be easily tinted, so it can be matched to any interior;
- leveled to smoothness, matte and shine or applied with a certain texture;
- aesthetically pleasing, not inferior to tiles and even natural stone, while being cheaper;
- does not require any special preparation of the base;
- has no joints or seams on the surface;
- does not involve the use of expensive tools or automated devices;
- prevents the formation of mold and fungal plaque;
- produces a minimum amount of construction waste during operation;
- due to its small thickness, it practically does not add weight to building structures;
- is an environmentally friendly material;
- easy to clean with regular water and detergents;
- fireproof, resistant to heat;
- highly plastic, easy to apply and level;
- has a long service life;
- does not give off a smell, work can be carried out indoors, and also does not absorb different “odors”;
- does not cause an unpleasant “cold” sensation when touched;
- due to superplasticity, it is not afraid of vibration, and is not destroyed by shrinkage of buildings;
- capable of strengthening weak foundations.
Despite the huge number of advantages, microcement also has some disadvantages. The strength of the material is great, but due to the thinness of the layer, heavy objects and furniture cannot be moved on the floor finished with it. When diluting a solution, especially a two-component one, the accuracy of the proportions is very important. Failure to comply with component standards leads to a violation of the strength and service life of the coating.
Other disadvantages of microcement are:
- difficulties with applying the composition, painstaking work;
- short life of the mixture after dilution;
- the need for quick joining of sections strictly before setting begins;
- the need for no differences in the base of more than 2 mm, as well as for the purchase of additional materials - varnishes, impregnations;
- the presence of low-quality counterfeits of microcement in stores.
Impregnated microcement floor
Accessories that add style
Each kitchen cabinet is stylish and beautiful in itself. But you can give it a special and unique character by adding decorative elements to it. One of these types of methods is unconventional handles, another is the original materials used in the cabinets.
The cheapest and simplest solution is a ready-made set of kitchen furniture, which includes a cabinet under the sink and wall kitchen cabinets. Kitchen base cabinets are usually combined with a countertop - this can also be included or you can buy one yourself.
It's worth taking advantage of stores that offer individual kitchen cabinets for assembly into kits. This solution is even many times cheaper than custom-made kitchen furniture, the advantage of which is that a specialist adapts the furniture to our needs.
Also, pay attention to the functionality and ease of opening doors - you shouldn’t skimp on this. The most typical are hinged doors in kitchen cabinets. The cheapest opening system - hinges connecting the cabinet to the body - costs about 150 rubles, and for other mechanisms you will pay up to 1,500 rubles. They should be used when there is enough space in the kitchen.
However, side cabinets are difficult to open in corners where two doors collide and in tall and wide furniture. A hinged door is found in low and wide hanging cabinets where traditional opening would be awkward and where regular doors look disproportionate. This method of opening cabinets, however, is more expensive.
In order not to be disappointed in microcement
One of the advantages of microcement is that it itself is a decorative material: there is no need to glue wallpaper on the surface of the walls or lay tiles on top of the coating. At the same time, microcement can open up all its possibilities only if the material is of high quality and is correctly applied professionally. It is not easy to apply viscous material even on a horizontal plane. Plastering a vertical wall surface with microcement requires special skills when applying the solution. A sufficiently high speed of finishing is also necessary before the solution hardens. Coating textured surfaces also requires skill.
As a result, we will formulate the main criteria for the successful acquisition of microcement:
- All the advantages of the product can only be appreciated if it is used correctly: application must be carried out by professionals.
- To buy microcement, you need to remember the connection between price and quality. Low price should not be the deciding factor for a purchase.
- Individual selection of colors and textures will ensure a harmonious combination of the bathroom interior with the overall design of the apartment or house.
Fill out the form and we will call you back to answer any question about materials, cost, timing; inspire you to make the best decision and help you make the right choice!
Fill out the form and we will call you back to answer any question about materials, cost, timing; inspire you to make the best decision and help you make the right choice!
