Is the source of water supply for your home a well located right on your garden plot? Agree, it would be great to have an autonomous water supply so you don’t have to carry a bucket several times a day. Or have you already thought about installing a water supply system in your dacha from a well on your own, but you don’t have the proper experience and don’t know where to start?
We will tell you how to bring water into the house and what you will need for this. Our article presents the basic schemes for organizing the automatic supply of water from a well, and describes the process of implementing such schemes step by step.
With the help of a pumping station and modern building materials, you can try to build a plumbing system yourself. To help with the description, we have provided step-by-step photos that describe in detail each of the stages, recommendations for maintaining the water supply system, and useful videos about the rules for doing the work yourself.
Preparing for work
Before you take on such important work, you need to think carefully about a few things:
- in what mode do you want to supply water - winter or summer, only for irrigation or also for drinking;
- what are the possible volumes of water consumption - how large is the area, how much water is needed daily for irrigation, are there any greenhouses and how much moisture will they require for irrigation;
- what source of water supply can you choose - your own well, a centralized one or a well that is on your site or not far from it. To do this, it’s a good idea to take a map of the area or ask your neighbors where they get water for irrigation and other purposes;
- what are the characteristics of your climate - is there a risk that the water in the well will dry up in especially hot months, is a backup source needed in these cases;
- what are the features of the internal structure of the site, where it is necessary to stretch the pipes, and where you can use a regular hose;
- is it planned to supply clean drinking water to the house and utility rooms;
- finally, the budget for all work - how much do you have.
IMPORTANT. The price factor, of course, is important, but not decisive. The fact is that such an important job as making your own water supply system at your dacha from a well is not done for 1 year. You are making an investment for a very long time, and if you skimp on the quality of materials and mechanisms, you can later overpay on their repair and replacement with others.
Laying a pipeline from the well to the house
So, before backfilling the earth selected from the walls of the well, the pipe connecting the well to the house is usually also laid.
A trench for laying a water supply system - it is usually laid in a straight line, trying to avoid turns.
- As already mentioned, for this purpose a trench is dug, preferably at a depth below the freezing level of the soil, with a width of 300÷500 mm. A gravel-sand backfill approximately 100 mm thick is placed at the bottom of the trench.
The laying route is usually taken along the shortest distance, that is, they try to do without a large number of turns, or even without them at all.
- The next step is to drill a hole in the wall of the well through which a pipeline pipe will be passed into the container.
- The next step is laying the route. For these purposes, it is best to choose a polyethylene (HDPE) pipe with a diameter of 32 mm - this is usually sufficient for optimal system performance in a small house.
HDPE pipes and fittings for them are an excellent “constructor” for creating a water supply system from a well
Prices for water pipes
Water pipes
In addition to the pipe itself, connecting elements will be required to install the water supply system - these are fittings, bends, tees, transitions, etc. Compression fittings are easy to use and do not require special equipment for installation.
The number and type of components for installing the water supply system will depend on its design.
Large diameter corrugated double-layer pipe can be used as a protective casing when laying a pipeline.
- To protect the water pipe from mechanical stress and accidental damage, it is recommended to pass it into a casing pipe, which is laid along the entire length of the pipeline. A corrugated flexible pipe or even just a larger diameter HDPE pipe can be used as a protective case.
By the way, just one piece of advice from experienced craftsmen. The cost of HDPE pipes is low, so it is advisable to lay two pipes at once. One of them will be in operation, the second - just in case, but in the event of an accident, switching to the “backup line” without resorting to large-scale excavation work and searching for the damaged area will be as easy as shelling pears.
Thermal insulation shell - half-cylinders made of polystyrene foam. After installation, they can also play the role of a casing that protects the pipe from mechanical damage.
- The role of a protective casing can also be played by a thermal insulating shell made of polystyrene foam (PPS) or polyethylene foam (PEF). The option with PPE is somewhat more expensive, but is more durable and much more convenient to install, as it has a certain flexibility.
An example of a diagram for laying a water pipeline from a well to a house. It clearly shows the connecting nodes of the pipe sections, the location of the cable part - powering the submersible pump and heating the entrance area to the house.
- If you plan to use a submersible pump to collect water, it is recommended that the electrical cable running from it to the power supply point be laid in a separate corrugated insulating tube that will run parallel to the water supply.
The outlet of the water pipe into the well shaft. The illustration clearly shows the protective casing through which the water pipe is passed.
- The passage of the pipe through the wall of the well is usually arranged at the level of laying the entire water main. The hole being drilled should not be located at the junction of concrete rings, since when drilling concrete, the edge of one of the parts may develop a serious crack, which will disrupt the overall tightness of the structure.
- An important task is sealing the passage. There are several relatively simple options.
Thus, a hole in a concrete wall can be “cultured” with a thermal insulating tube made of foamed polyethylene. The section of this tube is secured by filling the space around it with foam. This penetration will protect the rigid water pipe from damage when it comes into contact with the concrete edge of the hole. True, there is still no complete certainty with sealing, and this option is best used at the entrance of the pipe to the house.
A hole in the wall prepared for passing a water pipe through it. This device is used when there is no need to resort to perfect waterproofing. For example, the passage of a pipe through the wall of the foundation (basement).
Another option could be a coupling specially designed for sealing holes, selected according to the diameter of the pipe and the hole drilled for it. The procedure for performing its installation is shown in the picture below.
One of the options for passing a pipe through the wall of a well.
Most often, they resort to installing a through passage, the space between which and the walls of the hole is filled with a sealing compound. Then, both outside and inside the well, sealing elastic linings are installed, which are pressed through wide washers with nuts that are screwed onto the squeegee. Then the pipe approaches the outside and lowers it to the water inside.
One of the most affordable options for sealing the passage of a pipe through the wall of a well is the use of a squeegee.
- An area that requires special attention is when the pipe rises from depth to the surface and passes through the basement of a building or through an unheated basement. In this area, the water supply requires additional insulation or even heating, which is also shown in the diagram presented earlier.
What does an autonomous water supply consist of?
When you were able to clearly answer all the questions above and have drawn up a rough plan of action, you need to figure out what the constituent engineering elements of a water supply system are. Essentially, these are the pipes themselves, as well as the mechanisms for injecting them onto the surface:
Pipes of different diameters
Taps and fittings (connecting parts) for installing pipes into a single unit
Mechanisms for pumping water various types of pumps (their choice mainly depends on the required volumes of water supply
Electric motors for pumps
If it is necessary to heat water (for use at home) - water heaters
Filters for mechanical (coarse) and deep water purification (you can’t do without them if the water is used for drinking purposes)
You will also need working tools and materials for attaching pipes to surfaces, additional protection (insulation) of pipes for use in winter.
In general, a do-it-yourself country water supply system from a well should look like this as a single system.
And the schematic diagram of the system looks something like this
TAKE NOTE. If you are making water supply not only for plants, but also for supplying water to the house, then it would be better to allocate a special room for the water metering unit. A small closet with an area of 4-5 square meters will be enough. It is optimal to do it in the house itself so that the temperature inside is acceptable all year round. This way you can constantly monitor the pressure level, water supply volumes, and also quickly troubleshoot possible problems.
Instructions for water supply installation
In order for the system to work productively, uninterruptedly and not require frequent replacement of elements, during installation it is necessary to think through each stage. Let's try to figure out what needs to be given special attention.
Image gallery
Photo from
External part of the water supply system
Construction of external water supply
Internal wiring of autonomous water supply
Connecting plumbing fixtures
Stage #1 - determine the requirements for the condition of the well
Water supply in its simplest form, using a pump and a hose, can be organized from any well - concrete, wooden, assembled from rubber tires. To set up a stable system that will work for years, serious preparation will be required.
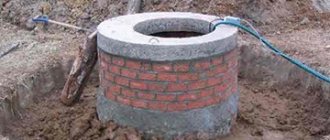
Let's assume that at a dacha, a well made of concrete rings is the most popular option, which many choose because of its affordable cost and convenient installation method.
Sealing and insulation of a well made of concrete rings must be done during the construction process - there is no need to pump out water, it is easier to seal joints and seams
To begin, you need to carry out the following activities:
- seal seams;
- provide external protection - drainage and thermal insulation;
- install a bottom filter.
For external sealing, roll materials, deep impregnations and concrete mixture are used, for internal sealing - liquid glass. To seal the connecting part of the rings, ropes made of natural materials or self-adhesive tape Rubber Elast .
To prevent the rings from moving under the influence of frozen soil, which increases in volume in winter, the upper part (at least 2 m) is dug in and wrapped in a thick waterproof film or geotextile.
Then the outside of the shaft is lined with heat-insulating material, after which the trench around the well is covered with a thick layer of sand (40-50 cm) and a clay castle is built.
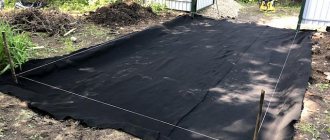
To protect against silting, install a bottom filter, which should stabilize the base but allow water to pass through.
We recommend using Dornit - a durable geosynthetic material, which for reliability is covered with a layer of crushed stone (10-15 cm). The edges of the material are fixed around the circumference with galvanized steel tape on dowels.
Image gallery
Photo from
Digging a well shaft
Insulation of a concrete well shaft
Filling a pit with a well
Waterproofing inside the well
Stage #2 - finding out the nuances of pipe laying
Cast iron and ceramic products are a thing of the past; water supply is easiest to construct from lightweight and wear-resistant polypropylene (PP) and polyethylene (HDPE) pipes for outdoor use.
Both varieties tolerate temperature changes well and are elastic enough to withstand mechanical loads. They can be connected to each other using a welding machine or fittings.
HDPE pipes for water supply installation are connected to each other using tees, compression fittings, clamping couplings, butt or electrofusion welding
Recommendations for choosing diameter:
- a cross section of 25 mm is used exclusively on short pipeline branches, maximum 10 m;
- for 30-meter communications, products with a diameter of 32 mm are suitable;
- if the line exceeds 30 m in length, a 38 mm section must be used.
Given the additional pressure produced by the pump, pipes with a diameter of less than 32 mm are not used at all.
The order of pipe laying is as follows:
- we dig trenches (the depth depends on the level of seasonal soil freezing typical for the region plus 30 cm);
- at the bottom we arrange a dense sand cushion at least 20-30 cm thick;
- lay pipes , connect them to the source and pump;
- We carry out testing - supply for 1-2 hours under pressure and without it;
- We produce sand backfill - 15-20 cm;
- fill the trenches with soil and level them.
When laying a pipeline above the seasonal freezing level, a heating cable is used. Automation for adjusting and turning off the power supply must be separate (4-5 A).
At the same time, we monitor the slope of the main line - it should be the opposite, that is, directed towards the well. Thanks to it, in case of conservation, the water is drained.
Stage #3 - carry out internal wiring
Installation of internal pipes can be done in two ways: sequential and manifold. The first is suitable for houses with insignificant simultaneous use of disassembly points.
Branches go from the main pipe to the taps, and if you use 2-3 points at once, the pressure will weaken. With the collector method, each point of use is equipped with a separate supply line, so the pressure level remains the same.
The internal water supply wiring diagram can be simple or complex (as in the picture). The number of devices, parts and connecting elements depends on the purpose of the water supply system
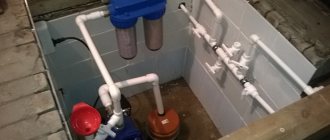
The beginning of the wiring is in the sleeve laid in the foundation of the house, where the external main is introduced, and a shut-off valve is installed here. Next, the pipe leads to the hydraulic accumulator.
The pressure gauge is connected with a brass fitting, which is also used to install the pressure switch. The filters must be secured together with the fitting. If a pump supplies water instead of a pumping station, you need to install a storage tank.
What types of water pipes are there?
Water pipelines in a dacha most often do not function all year round, but only in the summer. They can be used not only for irrigation, but also for drinking, if the water in the source and the condition of the pipes are satisfactory.
Summer
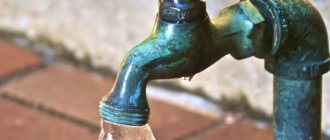
This is the simplest option, familiar to every summer resident. You can assemble it alone, it won’t take much time. Typically, a rubber hose is connected to a special branch pipe coming from a central source. The pressure is regulated by a tap and in the old fashioned way by narrowing/expanding the hose itself.
Often, summer residents connect to the main pipe not with rubber hoses, but with their own plastic pipes, which are stretched along the entire site in pre-dug recesses. Special racks are also created from vertically located pipes near those parts of the site that need additional watering (for example, near greenhouses).
Special nozzles are used for pipe branches. which allow you to cover almost the entire area of the garden, if the pressure at the source allows.
NOTE. For summer water supply systems, it is best to purchase pipes made of lightweight materials (polypropylene), since most often summer residents bring them only for the season, and then disassemble them and take them back, because in winter, abandoned property can be stolen by summer house thieves. If you still decide to leave them assembled, be sure to thoroughly drain all the water, because otherwise, when it freezes in winter, it may damage the integrity of the pipes.
Winter water pipes
Winter water supply options are more complex than summer ones, since they provide the site and house with water all year round. They have the following differences:
- the water source must contain sufficient volumes, and the water itself must not freeze in winter;
- pipes must be additionally protected from low winter temperatures, for example, using polystyrene foam
- the house must have a water heating installation;
- The source of water supply must also be protected from frost.
Do-it-yourself measures for insulating a country water supply system for the winter
What materials are wells made of?
Usually, after excavation work, a column of various types of building materials is installed in a well shaft, after which crushed stone and sand are poured into the bottom to filter and purify the water from clay impurities.
The traditional material for installing wells is reinforced concrete rings of various diameters and heights. The most suitable for installation are their varieties with an internal diameter of 1000 mm and a height of 890 mm (according to GOST 8020-90) with a lock. To ensure high strength characteristics, they are made from heavy concrete, which is used to fill the reinforcement.
To seal the shaft, many use concrete slabs with a hatch, which is covered with a light polymer lid.
The main advantages of concrete rings are low cost, long service life, reliability and strength.
More modern columns for shallow wells are sections of double-layer corrugated pipes of large diameters (Korsis, Pragma), the main material of which is low-density polyethylene (HDPE). They are much easier and faster to install, but the high price of corrugated pipes hinders their widespread use.
One of the main areas of application of polymer pipelines is the restoration (renovation) of partially destroyed concrete and contaminated well shafts.
In the retail chain you can find polymer sand rings produced by some commercial companies. They have an internal diameter of 960 mm, a height of approximately 200 mm and a wall thickness of 40 mm. They can be used to assemble a prefabricated shaft of almost any height. However, these products, due to their high price and insufficiently reliable sealing between the ring fragments, are not widely used in everyday life.
Other exotic and labor-intensive options for constructing domestic wells - laying out a shaft from a log frame, brick, building blocks, filling it with concrete - due to their impracticality, have not found application in everyday life.
Related article:
What kind of sewer rings are used in individual construction. This article discusses in detail the types of existing well rings and how concrete and plastic wells are installed.
Rice. 3 Water supply to a private house from a well with a storage tank
Where to get water from, or how to choose a source of water supply
After you have studied all the elements of the future water supply system, and also drawn a diagram specifically for your site, you need to decide on the source of the water supply. In a country house, unlike a city apartment, there are several options:
Centralized water supply
The most convenient and obvious option is centralized water supply. This option is the cheapest because you do not need to install a pump or purchase additional tools to pump water and control its pressure level.
Essentially, you need to dig holes, lay pipes, strengthen them in the ground, connect them to each other, and the system is ready for watering. Of course, the central water supply system also has its weaknesses:
- This is usually a summer option - it does not function in winter;
- ordinary water is poorer in the content of nutrients than artesian water (if you have a well on the site);
- finally, the central source may be too far away, and it will be more expensive to run pipes across neighboring fields than to make a water supply system in the country with your own hands from a well.
Often there is no centralized water supply nearby at all - and then there is no need to consider this possibility.
Mine well
If you have a well on your property or a neighbor with a source of good, clean water, you can consider yourself very lucky. Such plots are not found very often, and they usually cost more.
The well, in addition to the outer part with a gander and a stone support, has an internal base. This is a trunk that allows water to reach the surface and the aquifer itself, where natural water is contained.
The well itself can be located at different depths, and depending on this parameter there are:
- A well “on limestone” - it lies deeper and is reliably separated from groundwater. In this case, it is necessary to filter the water much less, and in terms of the content of microelements it is much richer than a well “for sand” and even more so than chlorinated city water.
- A “sand” well is located higher and most often contains a lot of mechanical impurities (sand, small stones, soil). However, this does not prevent it from being used for watering. But for drinking, a filtering process is required.
NOTE. If you live in regions with poor quality water (too hard, with excess iron, magnesium salts, etc.), then before designing a water supply system for your dacha with your own hands from a well or other local source, be sure to conduct preliminary research. To do this, you need to send water samples to the nearest laboratory and ask for a comprehensive analysis of the content of inorganic and organic substances. If heavy metals are detected, then such water will be unsuitable not only for drinking, but also for irrigation. In this case, the only option is centralized water supply.
Well
The well ensures the rise of water that lies shallow (usually up to 12 meters). In all other cases, a well must be drilled on the site. This option is much more expensive in terms of effort, money, and, of course, time. However, the result is worth it - thanks to the well, it will be possible to ensure a year-round supply of water to both the site and the country house.
You can compare a well and a well and feel the difference in this diagram.
Indeed, usually the depth of the well is several times greater than the well. But there is a lot of water there, and it is much cleaner and healthier.
Advantages of autonomous water supply
Residents of megacities who are not puzzled by the problem of private water supply may be surprised to learn that the well water supply system has many advantages.
The largest is contained as a liquid. It has almost spring purity - its composition is completely free of harmful impurities such as chlorine or rust.
The second advantage concerns saving the family budget - you freely use natural resources without paying monthly bills.
And another nice bonus is control over the operation of the system. For example, you can independently regulate the pressure or lay pipelines to a garden plot or flower bed.
The simplest diagram of water supply from a well shows the location of the storage tank: it is mounted in the upper part of the house, under the roof
Many doubt the feasibility of installing a water supply system from a well to a house, arguing that a water supply system with a well would be much more efficient.
Perhaps, but if you have a strong, deep well with a sufficient water level in your dacha area, there is no need to drill a well for the following reasons:
- registration of permits for an artesian well, drawing up a project and drilling work take a lot of time;
- the cost is high and not everyone is happy with it (about 130 thousand rubles for a well up to 30 m);
- setting up a well system is a little easier (especially the summer version);
- the presence of a well does not require permission from government agencies.
If minor repairs or cleaning of silting are required, it will take much less effort and money than cleaning a well.
In case of temporary power outages, there is always a backup option - a bucket on a rope or a special lifting mechanism (the narrow borehole does not allow the use of improvised devices).
The construction of a well or artesian well depends not only on the desires of the homeowners, but also on the depth of the aquifers, as well as on the composition of the soil
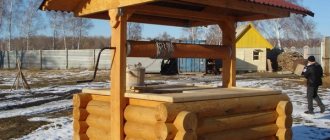
There are a number of difficulties, but they can be solved. For example, an old wooden structure becomes unusable over time - it is better to replace it with concrete rings.
If the structure has lost its tightness and allows water and domestic waste to pass inside, it is necessary to thoroughly seal the seams on both sides, internal and external.
Let's start making a country water supply system
So, the design and determination of the water supply source are behind us. Now you need to understand how to make a water supply system at your dacha with your own hands from a well. This process can be divided into several stages.
Installation of pumping equipment
The pump is a very important element of the water supply system. You need to choose it very responsibly. Again, you need to proceed mainly not from the price, but from the following factors:
- technical parameters of the mechanism (especially power);
- energy consumption;
- noise level during operation;
- degree of protection from moisture and temperature changes;
- job guarantees;
- manufacturer's reputation.
Depending on the method of lifting water from the source, different types of pumps are distinguished:
Surface pump When building a water supply system in a country house with your own hands from a well, it is most often used. It is intended for shallow wells (up to 7-8 meters). There are 2 types of mechanisms:
- A centrifugal pump rotates water using one or more wheels. Due to centrifugal forces, water jets reach the edges, from where they go through special tubes into the main pipe of the system. In most cases, the device’s power is about 4 cubic meters per hour, and this is quite enough for summer watering of the garden and garden.
- A vortex pump works by creating cyclic vortices of water, resulting in flows rushing to the surface. Its power is approximately the same as that of a centrifugal one.
A surface pump is always installed in the house. A special pipe runs from it to the well, through which water flows to the surface.
Video: how to install a water supply system with a pump yourself
The device has a number of advantages:
- reasonable price;
- low energy consumption;
- mobile (they can be carried and placed in different places).
However, if you need to make winter water supply on your own at your summer cottage from a well, then a surface pump will not work - it does not have sufficient power to cover all water needs: from deep wells (from 10 meters), the device will not be able to lift water to the surface.
Submersible pump
This mechanism is designed for deeper water (usually up to 20 meters). It can be used in both wells and boreholes.
The mechanism is reliably protected by the housing from water ingress and has a power approximately the same as that of a surface pump (4 cubic meters per hour).
However, unlike a surface pump, a submersible pump is installed directly at depth on a special base.
At the same time, no noise from its operation will be heard in the house, and thanks to a different operating principle, it can lift water from a greater depth than a surface pump.
Video review of a submersible pump for water supply
A comparison of these two devices is shown in the figure below.
Automatic pumping station
Finally, a pumping station is often used. It differs from the first two devices in that the electric motor itself and the hydraulic system are located in different departments. A gasoline or diesel generator is used as an energy source.
The system is installed on the surface and connected to the well with a special pipe, as shown in this diagram.
The system always contains filters of varying degrees of purification, so the water it pumps out can be used at home for drinking, cooking and other household purposes.
All elements of this system are shown schematically in the figure.
NOTE. When purchasing an automatic station, first determine the location for it. It is always mounted on the surface, and for each station there is a maximum distance to the water source. This important parameter must be taken into account.
Video review of an automatic pumping station for organizing water supply in a country house.
Well waterproofing
Why do you need to waterproof a well?
Judging by books and films, wells used to always have crystal clear water. And the wells themselves were built from the simplest materials. We don’t undertake to judge how true this is, but in any case, there is no arguing with the deterioration of the environment in recent decades. And this cannot but affect the quality of water. Therefore, high-quality waterproofing of a well is more important today than ever. Without this, it will be of little use as a source of drinking water.
Properly carried out waterproofing is the key to obtaining high-quality well water.
Waterproofing a well is necessary for several reasons:
- In order for the water in the well to be clean and suitable for drinking, it is necessary to completely prevent the ingress of surface groundwater into it. That is, located above the water surface in the well. This refers to soil (ground) moisture that is absorbed when precipitation falls or snow melts. And also the so-called “overwater” - unstable aquifers located close to the surface.
Water from the surface layers could not undergo high-quality ground filtration, and it should be prevented from entering the well through its walls.
Both can be saturated with decaying organic matter, contain microorganisms dangerous to the human body, petroleum products, compounds released into the atmosphere with industrial and automobile exhausts, chemicals used on agricultural land, and many other substances that make water unsuitable and even extremely dangerous for drinking.
- Any material from which the walls of a well are built requires protection from the chemical aggressiveness of soil moisture. By the way, concrete is no exception in this regard. Over time, under such influence, it becomes porous; cracks, chips, and areas of looseness may appear in it. Such shallow groundwater can seep into the well.
Waterproofing of joints between reinforced concrete rings of a well.
- In addition, if the well is built from concrete rings, which is practiced everywhere, gaps will inevitably form at the joints. If waterproofing measures are not taken, these seams become an entry point for contaminated ground moisture. The same applies to technological holes made in the walls and intended for connecting the pipeline.
Applying an external waterproofing layer
Prices for bitumen mastic
Bitumen mastic
The best option would be to carry out all waterproofing work at the well construction stage. This approach provides more opportunities to achieve high quality results.
External waterproofing can be applied to concrete rings both before they are installed in the pit and after installation.
Waterproofing bentonite rubber cord.
Well, as a waterproofing material for the gaps at the joints of the rings, you can use the sealing bentonite-rubber cord “Barrier” or “Gidroizol”. This elastic material tends to expand when exposed to moisture, reliably sealing the junction line of the structural parts.
When choosing waterproofing for a well, it is necessary to comply with special requirements, which somewhat limit the possible range of materials. It is clear that the materials should not pose a danger to both human health and the environment.
External waterproofing
Materials for external waterproofing work differ significantly from those that can be used for application inside a mine.
- For the external protection of a well built from concrete rings, in most cases, roll waterproofing made on the basis of bitumen is used - this can be the familiar roofing material or more modern materials. In addition, to secure the canvases, you will need special mastics, also made on a bitumen basis.
- Instead of bituminous materials, a special deep penetration waterproofing solution can be used - this is the second option for external protection of the well tank.
- Another method is shotcrete using non-shrinking or expanding waterproof cement mortar. However, for such processing one cannot do without special equipment and without the skills to work with it. In any case, you will have to invite a team of specialists. It cannot be said that this method is popular in the construction of wells.
You can resort to shotcrete concreting of the outer surfaces of the well walls. But this technology is not cheap, it requires special materials and equipment, and the involvement of specialists.
- To prevent atmospheric precipitation from entering the well, a reliable clay castle is created around it, which diverts rainwater away from the walls of the well. A good owner, in addition, high-quality blind areas will be concreted around the well.
To carry out external waterproofing of the walls of a well using any of the above methods, it is necessary to carry out preparatory work consisting of the following steps:
— If the well has been in operation for more than a year, then its outer walls will have to be cleared of soil to the maximum possible depth, which should be at least 3000÷4000 mm.
— After the walls are freed from soil, it is necessary to inspect the entire surface. If damaged, loose areas of concrete are found, they must be removed using a hammer drill or jackhammer.
Cleaned outer wall of the well.
— Then the surface must be cleaned and washed from dirt, fragments of destroyed concrete, accumulations of mold and salt deposits. For this purpose, metal brushes (for example, attachments for an electric drill or grinder), chisels, spatulas and other hand tools are used. Then, all the dirt is washed off with water under high pressure - mini-washes are well suited for this. After the walls have dried, they must be carefully inspected again and dust removed from the surface as much as possible.
— If, after removing weakened loose concrete, part of the reinforcing belt of reinforced concrete rings is exposed, then traces of corrosion should be removed from the metal parts and then coated with an anti-corrosion compound.
As a rule, simultaneously with digging up the walls of the well, a trench is also dug for laying a pipeline from the well to the house. If installation conditions allow, the pipe should be placed at a depth of approximately 300÷500 mm below the soil freezing level. This way there will be less hassle with its insulation or heating.
Having completed the preparation, you can proceed directly to waterproofing the walls of the tank from the outside.
Waterproofing using roll material
Waterproofing using roofing material or its analogues is carried out as follows:
- A primer is applied to the concrete, which will ensure high adhesion for the materials. It is especially necessary to treat areas where loose areas of concrete were removed. The best option for primers are compositions like “Betokontakt”.
- After the soil has dried, it is necessary to repair the damaged sections of the walls, making them as smooth as possible. Potholes, cracks, and large cavities are sealed with concrete mortar having a thick consistency. To quickly set and dry the concrete, PVA glue is added to it. After carrying out the repair work and waiting for the solution to dry, the surface must be primed again.
At the same stage, a hole is usually punched for laying a pipeline into the well shaft.
Waterproofing a well using roofing felt.
- The next step is to apply a coating of bitumen mastic to the walls, onto which the first layer of roofing material is glued. It is recommended to make two or three such layers. Roofing felt sheets are fixed with an overlap of 150÷200 mm. The seams of the last outer layer of material are additionally coated with mastic.
Some owners refuse roofing felt, using only mastic for waterproofing. But this is not recommended, since such bitumen-based coating may crack over time from contact with the ground, and all the work will be done in vain.
Prices for roofing material
Ruberoid
Waterproofing external walls with deep penetration impregnation
When choosing a special deep-penetrating hardening impregnation for waterproofing, no other primer composition is required. This solution performs two functions at once: it strengthens the concrete walls and makes them waterproof.
- The first step is to prime only those areas that require repair with cement mortar.
- After the soil dries, the damaged sections of the well wall are repaired. For this, a cement-sand composition with the addition of PVA or, better, a special repair composition is also used. An example of such a special repair composition is CERESIT CN-83.
For repairing damaged or worn concrete surfaces, a special composition is well suited - dry construction mixture “CERESIT CN-83”
- When the repair patches have hardened, the walls must be moistened.
- Now you can apply a deep penetration waterproofing compound to the surface. One-component impregnations such as, say, Penetron, Elakor-PU Ground, Neogard and others are suitable for work. The characteristics of these compositions must directly indicate that they serve to strengthen the waterproofing (waterproofing) of concrete surfaces. The applied composition is absorbed into the structure of the material, and upon drying it crystallizes, completely clogging its pores, thus making the wall waterproof.
Some deep penetration impregnations by themselves make concrete completely waterproof
- After waiting 72 hours, a second layer of impregnation is applied to the surface.
- During the drying process of the impregnation, the walls should not be subjected to mechanical stress.
Prices for deep penetration primer
Deep penetration primer
* * * * * * *
In any case, the outer surfaces of the well walls should be covered with waterproofing up to the top edge. When the work is completed, the space around the well between its walls and the wall of the pit is filled with gravel-sand mixture to a level just below the freezing line of the soil, approximately 100÷150 mm.
At this stage, a pipe is laid from the well to the house. This stage will be discussed in more detail below.
Waterproofing the internal surfaces of the well
If external waterproofing of a source of drinking water is impossible for some reason, then in this case it is possible to protect the well from the penetration of groundwater from the inside.
With this approach, special attention should be paid to waterproofing compounds. They must be completely safe for human health.
As an example, consider products.
Coating waterproofing mixture.
"AQUAMAT-ELASTIC" is a cement-polymer elastic two-component mixture. This composition is applied by coating. The mixture is an environmentally friendly material that does not in any way affect the quality of drinking water.
Composition with increased elasticity and high adhesive capabilities.
"MEGACRET-40" is a repair mixture consisting of cement supplemented with polymer modifiers. This composition has high adhesive properties and does not shrink. The material is easy to apply, so even a master without plastering experience can handle the job.
This composition is able to quickly and reliably plug the resulting leak.
" AQUAFIX" is a cement mortar that hardens very quickly, which occurs under the influence of water. The material is used to install a “hydraulic plug” in places of possible or identified leaks. Excellent for sealing cracks and potholes formed in walls during the period of operation, as well as for sealing joints of concrete rings.
Work on internal waterproofing is carried out as follows:
- The first step is to pump water out of the well in use using a pump, so that the upper joint of the lowest concrete ring is exposed. While work is being carried out, it is necessary to ensure that the water does not rise above this level.
Internal waterproofing of a well - treatment of joints between concrete rings.
- Next, the surfaces are inspected to detect damage, dirty deposits, as well as areas of loose concrete.
- The next step is to clean the damaged areas from the loose layer to the “healthy” concrete. The cracks should be widened to a depth and width of 25÷30 mm, concrete fragments should be removed from the gaps with a metal brush.
- The gaps at the joints of concrete rings also need to be widened to a depth of 30÷35 mm. If a leak is discovered during cleaning of cracks and joints, it must be immediately sealed with a “hydraulic plug” from the “AQUAFIX” composition.
- Next, the wall surfaces are cleaned of dust and dirt. All extended cracks, joints, potholes, as well as cavities formed in the concrete, are closed with MEGACRET-40 mortar, which is leveled flush with the main surface. After completion of the repair work, the well is left until the composition completely hardens.
- The next step is to apply AQUAMAT-ELASTIC coating waterproofing to the walls. Before carrying out this procedure, the surfaces must be moistened. The composition is diluted to such a consistency that it can be applied with a wide brush.
- The composition is applied from bottom to top of the container in two layers. The second layer is applied only after the first one has completely dried. There is no need to moisten the walls before applying the second layer. Complete hardening of the composition occurs after a day.
After such waterproofing has completely dried, it becomes completely neutral for drinking water.
Installation of water supply in the house
If you intend to live in a country house permanently, then the next stage of building a water supply system in your country house with your own hands from a well or other source will be the installation of an indoor water supply system. It is important to choose the pipe material. Classic metal ones have given way to plastic and metal-plastic. The main reason for this is that modern materials have a number of advantages:
- they withstand temperature changes;
- resistant to constant action of moisture both inside and outside (water corrosion);
- They are not subject to air corrosion.
You need to work with pipes using a special soldering iron, which can be purchased or rented at a very reasonable price.
Video: how to work with plastic pipes correctly.
NOTE. When purchasing pipes, try not to skimp on length. The fact is that when working with them, the cut must be made based on the calculated length plus 8-10 centimeters, which will be spent on welding.
Installing pipes is not very difficult, but requires care. First you need to draw up a detailed diagram for supplying the system to supply all parts of the room - kitchen, toilet, bath, bathhouse (if available). You can mount it either on the lower path or on the upper one. This way is especially convenient if you plan to make a suspended ceiling, under which it is convenient to hide all communications.
After installation is completed, it is necessary to install a special device that will regulate the pressure in the pipes to avoid ruptures. We are talking about an expansion tank. It automatically takes some of the water if there is increased pressure in the system, and releases it back if the pressure drops. The operating principle is shown in this diagram.
Typically, the tank can hold up to 100 liters of water, and this is quite enough for an autonomous water supply. Externally, the device is mounted to the wall in the utility room.
Insulation of wells and pipelines, backfilling
Now that the pipeline through the site has been completed and the end of the pipe is lowered to the water in the well, you can move on to insulation measures.
First, from the lower frost line to the main surface of the soil, insulating material is fixed or sprayed around the walls of the well - this can be polystyrene foam, polyurethane foam (spraying), polyethylene foam. Less often - mineral wool, since it is not all good with moisture resistance. You will also have to provide waterproofing separately for the insulation, and this is unnecessary trouble and expense.
Insulation of the well to the level of soil freezing.
- Instead of mineral wool, polyurethane foam can be used, which is sprayed onto the surface. As a rule, a specialist with special equipment is invited to carry out this process, but you can insulate the surface yourself using polyurethane foam, which is applied to the moistened walls. Moisture will increase the adhesive properties of the materials, and the foam will adhere well to the concrete.
- Foamed polyethylene is the most affordable material both in price and installation. It has excellent flexibility, so it is easy to wrap around the well. The material can be secured using moisture-resistant plumbing tape. Additionally, the canvas can be secured with wire. For insulation you will need polyethylene having a thickness of 10 mm, which is mounted in two layers.
Insulating a water pipe in a ditch using an expanded polystyrene panel.
- In cold regions, it is advisable to provide additional insulation by laying a layer of insulating material on top of the pipeline - this can be a 100 mm thick expanded polystyrene panel. The material is inexpensive, and this measure will protect the water supply in case of any abnormal frosts.
- After insulation is completed, backfilling of the previously selected soil around the well and ditch continues. For backfilling, a sand-gravel mixture is also widely used, which is recommended to be used to fill the trench before laying the soil there.
The backfill will inevitably shrink over time, so do not rush into concreting the blind areas - it is better to do this in a few months.
Options for arranging a clay “castle” around a well.
- One of the effective ways to additionally waterproof the outer walls of a well is to create a clay “castle”, which can protect the area around the walls of the shaft from the effects of precipitation.
The clay seal is installed at the stage of filling the sand-gravel mixture and soil into the space around the well after it has been waterproofed and insulated. The recommended dimensions of this compacted clay layer are clearly shown in the diagram above.
Laying a clay castle around the well.
In this case, concrete blind areas are built on top of a clay castle.
Installing filters
Finally, the final stage of building a water supply system in a dacha with your own hands from a well consists of installing a water filtration system. Purification of water for drinking and domestic purposes should always be multi-stage. In practice, this means installing several filters - mechanical and deep cleaning:
- A carbon filter is used at the first stage of cleaning. It filters out fine particles of sand, soil, silt, and vegetation well, which natural water certainly contains. Its principle of operation is simple - passing through it, water leaves impurities on the surface of the coal.
- Fine (deep cleaning) filters carry out multi-stage filtration using several cartridges made of special materials that perfectly separate harmful substances from water - oil residues, iron cations, heavy metals, fertilizer residues (nitrates), as well as pesticides, chlorides and other chemicals. The choice of one device or another depends on the chemical composition of the water specifically at your source.
IMPORTANT. Please note that any carbon filter is designed for a specific water pressure. Therefore, before purchasing it, if you doubt what the maximum pressure in your pipeline may be, it is better to measure it in test mode for several days, either increasing or decreasing the load. This will allow you to accurately learn about the operating characteristics of the system under high load conditions and choose the right carbon filter. And don’t forget one more important detail - the filter is used to purify only cold water.
Typically, these filters consist of several removable cartridges that need to be changed as they become clogged (the service life is always indicated in the instructions).
Video: installing filters during the construction of a country water supply system
How to properly maintain the system
Failure of one of the water supply components will leave the entire house without water. To prevent this from happening, you need to follow some rules :
- Clean the pump regularly and change gaskets on time. Monitor the integrity of the power cable.
- Having noticed impurities in the input, it is necessary to check the sealing of the well shaft.
- Install pressure gauges to monitor pressure.
- Do not skimp on filters that can filter out solid particles. This will protect the system from mechanical damage.
- Use relays and other automation that can turn off the system and protect it from destruction even in your absence.
Modern automation Unipunp Source unipump.ru
Installation of a water heating system
Finally, there remains one more important step - it is necessary to provide heating of water for household needs. For this purpose, water heaters powered by electricity are purchased and installed. The diagram of this device is shown below.
One of the main parameters of this device is the maximum volume of heated water. Usually up to 200 liters of hot water is enough for a family. However, if you plan to grow a large farm or if a family will live with more than 4-5 people, then you need to purchase more spacious and powerful water heaters.
IMPORTANT. The water heater is always mounted on the wall under the ceiling. Therefore, before you begin installation, you need to be absolutely sure that the wall has sufficient strength to withstand a constant heavy load. It is also important to securely mount the device.
Well submersible pumps
The retail chain sells a wide range of special well electric pumps that do not function without cooling in an aquatic environment. Most of them operate on a centrifugal principle, that is, they draw water into the impeller and supply it through the central hole in the housing to the outlet pipe.
The design of centrifugal pumps allows them to be assembled from a number of pressure-increasing stages, each of which has its own impeller. As a result, an arbitrarily high water pressure is obtained at the output.
Most household centrifugal pumps for wells have a maximum pumping volume of about 5 m3/hour and can lift water up to 50 m.
Since the water surface often drops in wells due to low flow rates, all well units are equipped with a float switch to protect against burnout of the electric motor winding.
Usually the submersible pump is suspended in the middle of the shaft in order to leave free space for the float.
The disadvantages of well units include their much higher cost than vibratory pumps.
The advantage is the ability to implement large volumes of pumping, which allows you to provide water to a family of 3-4 people.
Also, centrifugal submersible electric pumps have a higher efficiency of about 60%, do not create harmful vibrations, and are much more reliable and durable in operation compared to low-quality vibration pumps.
It is worth noting that to connect and automate the operation of well electric pumps you will need a pressure and idle switch, a battery tank, and a pressure gauge. These devices are usually placed in the house and less often in a pit, an above-ground building, located near the source.
In the trade you can also find several models of screw pumps for wells (Unipump), which are distinguished by their unpretentiousness when operating in a polluted environment.
All manufacturers of electric pumping equipment from China, Russia and Europe are engaged in the production of deep-well electric pumps. The most famous brands: DAB, Gardena, Speroni, Belamos, Gileks Vodomet, Grundfos, Vodotok, Aquario. The cost of the cheapest models of Russian-Chinese pumps is about 9,000 rubles, for the most expensive DAB it reaches almost 50,000 rubles.
Rice. 8 External and internal structure of the pumping water intake station
Pumping stations
If to connect the submersible well electric pumps discussed above it was necessary to additionally mount a hydraulic relay, a battery tank and a pressure gauge, then in the pumping station the pump and the above-mentioned devices are combined in one block.
The pumping station is located on the surface, while the water surface in the well should not fall lower than 8 - 9 meters from its body.
If the distance is greater, the pressure hose will not be able to draw in water, and the station will remain inoperative.
Taking this into account, stations are often placed next to a well or in a house if the distance between the building and the source is short.
The volume-pressure characteristics of the vast majority of stations correspond to well submersible electric pumps. The maximum pumping volume does not exceed 5 m3/h, the liquid lifting height is no more than 50 m.
The advantages of installing a system with a pumping station include its simplicity. There is no need to lay pipelines and use fittings to connect the hydraulic tank, pressure switch, pressure gauge and electric pump together.
The stations are manufactured by a wide range of Russian, Chinese and European manufacturers, the most famous brands being Gardena, Belamos, Gilex, Denzel, Grundfos, Metabo, Elitech, Marina, Al-Ko, Quattro Elementi, Wilo, DAB.
The peculiarities of all stations are their relatively low price compared to the cost of separately purchased components; a good unit can be bought for 6,000 - 7,000 rubles.
Finding water for a well on the site
About a quarter of users complain that drilling did not lead to the desired result. That is, after the drill went deep to a depth of 30 meters, water suitable for consumption in terms of quality or quantity did not appear.
In order not to join the ranks of those who have thrown money away, you need to approach the search for water responsibly. After all, in order to reduce drilling costs, it is necessary that the aquifer lies as close to the surface as possible.
Ways to determine the presence of water:
Biological signs. Plants can show how deep the water lies. So, for example, cattail grows where water is no deeper than 1 m from the surface, wormwood - up to 7 m, yellow alfalfa up to 15 m;
dew. The closer the water is to the surface, the more dew will be on the plants in that area;
silica gel. It needs to be wrapped in cloth and buried to a depth of 1 m. After a day, see how much moisture it has absorbed. The more, the closer the water;
dowsing A frame made of vines and wire also gives very accurate results and is the most popular way among users to determine the depth of an aquifer;
test drilling. Gives 100% results, but requires high costs.
Drilling a water well
Types of drilling depend on the depth of the aquifer and budget:
Manual drilling
Allows you to drill a well up to 10 m deep. To perform work at shallow depths, you will need a drill and casing pipes. To reach greater depths, a drilling rig, winches and rods are used. The rods are connected to each other (usually using threads), and the latter must be equipped with an additional drill.
Manual drilling of a water well
Tip: when making a drill on the lower rod, you need to take into account that the cutting mechanism must cut into the soil clockwise.
If the drill works worse with increasing depth, you can soften the soil by supplying water.
Based on the condition of the soil being removed, the presence of water can be determined. However, we are not interested in wet soil indicating that an aquifer has been reached. You need to break down to the waterproof layer. It is he who is able to provide the need for sufficient water.
The manual drilling process is clearly shown in the video
Percussion-rope well drilling
Percussion-rope well drilling As the name suggests, drilling is performed using a driving nozzle.
Operating principle: the glass is lowered down on a cable, absorbing the rock; after filling it, you need to remove it and knock out the earth. Next, the glass is lowered into the well again.
This heavy tool can be lowered by hand on a rope. But the efforts are not commensurate with the possible savings. And to get to the water you need to work quite a long time.
Drilling rig for a well A more technologically advanced way would be to construct a derrick. A drilling derrick is essentially an ordinary tripod made of steel.
Many forum users advise not to move the pipe, but to use a wooden beam or log (even the trunks of young trees). The tripod is equipped with a winch, and more advanced users install a motor.
Tip: the height of the tower should be commensurate with the dimensions of the driving glass. The larger the glass, the greater the height required for its effective use. Ideally, the height of the tower should exceed the length of the glass by 1.5 m.
The mechanized method of driving a well is shown in the video
The Strong Hydro SBU 60 drilling rig is used.
Rotary percussion drilling of wells
Rotary impact drilling The only difference between this method and the previous one is that instead of a driving glass, a special tool is used. Allowing you to select a rock not by hitting it, but by screwing it into the soil.
Hydrodynamic well drilling
Hydrodynamic drilling of a well is carried out by combining a drill and a pump, so that water washes out the well. Users have different attitudes towards this method. But everyone agrees on one thing: drilling in this way is dirty, the desired shape of the well is difficult to maintain, and drilling is effective only in loose rocks. As a result, this method is used less frequently than others.
Material prepared for the website www.moydomik.net
Video of hydraulic drilling of a well
Performed using a homemade installation from a drill with a pump
Water well casing
After the well is drilled, and more often directly during the work, a casing pipe (plastic or metal) is lowered into the well. It adheres tightly to the surface of the soil and does not allow it to crumble.
Pumping the well after drilling
This is also a mandatory step. It involves pumping out a certain amount of cubic meters from a well. water (depending on the soil and the condition of the aquifer) using a pump. When clean water comes out of the well, the process can be considered complete.
Advice: before you start pumping, think about where the water pumped from the well will be drained.
External and internal water supply
To supply water from a well to a house, pipes are laid underground, and there is no alternative to pipelines made of low-density polyethylene (HDPE).
Black HDPE pipes for water supply are made from virgin polyethylene and have a blue stripe on the side shell. Their size is determined by the outer diameter, the most popular of which are 25 and 32 (by 1 and 1 1/4 inches).
HDPE pipeline connections are made using compression fittings made of the same polymer material. Modern fittings have a wide selection of adapter couplings, bends, and tees. They have standard pipe threads that fit perfectly with steel ones.
The fastest, most economical, reliable and durable option for laying internal water supply in a private home is the use of polypropylene pipes.
The main difficulty is their soldering, the high-quality implementation of which can be done by specialists with extensive experience. You can save significant financial resources by mastering this simple procedure yourself. A soldering iron at a price of 3,000 rubles will cover the cost of doing the work yourself and is quite suitable for small amounts of soldering.
Choosing other materials for laying the internal pipeline, for example, metals such as copper and stainless steel, will lead to a significant increase in cost and impracticality of the water supply system. These materials are used mainly for laying heating lines.
And other types of polymer pipes, mainly cross-linked and reinforced polyethylene (metal-plastic), are more expensive to install due to the high cost of compression fittings and the need to use special tools.
Related article:
Soldering iron for polypropylene pipes - types, features, prices. A separate article describes the types of soldering irons, methods of soldering pipes, and price categories.
Rice. 10 Use of vibration pumps in wells
Conclusions and useful video on the topic
The following video provides detailed tips on how to independently assemble and install a pumping station:
For comfortable and stable autonomous water supply, pumping stations are most often used. They are reliable and easy to maintain .
A storage tank system is a low-cost water supply option and is more suitable for temporary rather than permanent use.
Would you like to share your personal experience in installing water supply in a suburban area? Do you have any questions while reading the information we provide? Please leave comments.