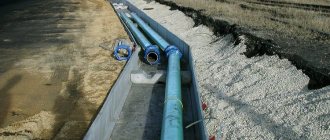
In the construction of an external sewer system, the simplest (but no less important) work is laying sewer pipes.
For those who decide to install an external sewer system on their own, you definitely need to know the features of laying pipes in the ground, as well as the principle of selecting building materials, so our article will be very helpful.
If you are interested in the placement of the pipeline in the house, you should read the article “Laying sewer pipes”.
Selection of materials
Through the internal sewerage system, wastewater is removed from buildings and transported through an external pipeline to treatment facilities - central or local (septic tanks).
In order for your sewer system to cope with its tasks effectively, you must know how to lay sewer pipes on your site.
For the construction of an external sewer system, it is advisable to use smooth orange polymer pipes:
- polyethylene (PE);
- polypropylene (PP);
- polyvinyl chloride (PVC).
If the laying depth is significant or the sewer pipes are expected to be subject to dynamic loads (in cases where sewerage passes under pedestrian and highway roads), it is better to prefer corrugated double-layer pipes made of PE or PP.
The connection of polymer pipes occurs through shaped products - adapters, couplings, bends, etc.
Most often, external sewer pipelines are constructed from orange polymer pipes with a diameter of 110 mm.
Painting pipes orange indicates their purpose - for external sewerage; they are more durable and strong than gray products used in the construction of internal pipelines.
Pipes laid underground for external sewerage are less susceptible to corrosion, destruction and, when laid with the correct slope, do not create blockages due to the smooth structure of the inner wall. The maximum permissible depth of such pipes in the ground is 3 m.
DIFFERENCE WELLS
4.25. Drop wells should be provided:
to reduce the depth of pipelines;
to avoid exceeding the maximum permissible speed of movement of wastewater or a sudden change in this speed;
when crossing with underground structures;
with flooded outlets in the last well before the reservoir.
Note. On pipelines with a diameter of up to 600 mm, differences in height up to 0.5 m can be carried out without installing a differential well - by draining into an inspection well.
4.26. Differences in height up to 3 m on pipelines with a diameter of 600 mm or more should be taken in the form of weirs of a practical profile.
Differences in height up to 6 m on pipelines with a diameter of up to 500 mm inclusive. should be carried out in wells in the form of a riser with a cross-section not less than the cross-section of the supply pipeline.
In wells above the riser it is necessary to provide a receiving funnel, under the riser - a water pit with a metal plate at the base.
For risers with a diameter of up to 300 mm, it is allowed to install a guide bend instead of a water trough.
4.27. On rainwater sewer collectors, with a drop height of up to 1 m, it is allowed to provide spillway type drop wells, with a drop height of 1-3 m - a water trench type with one grate of water trough beams (slabs), with a drop height of 3-4 m - with two water trough grates.
Pipe laying technology
Preparing the trench
Having decided on the material, familiarize yourself with how to properly lay sewer pipes. Installation of external sewerage begins with preparing a trench, which can be dug manually with a shovel or using an excavator.
The depth of the furrows depends on the depth of soil freezing in a particular area. According to SNiP P-G.3-62, the depth of laying sewer pipes is 0.5 m less than the soil freezing mark and is approximately:
- 3 ÷ 3.5 m – in the northern regions of the Russian Federation;
- 2.5 ÷ 3 – in the middle zone;
- 1.25 ÷ 2 – on the Black Sea coast.
The indicated figures are not categorical and may vary within certain limits depending on the terrain and groundwater level. However, laying sewer pipes in the ground must be done at least 0.5 m from the surface.
When using pipes of 110 mm diameter, depressions are dug in the soil 0.6 m wide and 0.05 m deep than the depth of the pipes.
The trench has its own characteristics:
- The bottom of the trench is leveled, the necessary slope is created, as a rule, 1-2 cm for each linear meter of the pipeline.
- After leveling the bottom, it is necessary to thoroughly compact the soil and arrange a cushion of gravel or sand 10-15 cm high.
- A sand or gravel bed must be compacted in an area located 2 m before the inspection well and at the junction of the pipeline with the inlet pipe.
- Where the sockets will be located in the sewer system, pits should be formed.
Pipeline installation
Next comes the actual installation of the pipeline. It is better to start laying from the foundation of the building.
The technology for laying sewer pipes looks like this:
- The pipes are laid with the socket down in prepared trenches.
- To connect two pipes to each other, the socket of one and the smooth end of the other are cleaned of dirt.
- The joints are lubricated with special compounds.
- The pipe is inserted all the way into the socket.
- All pipeline elements must be combined in a similar way.
Pro tip: When connecting parts of a pipeline, one pipe is inserted into the socket of the next one. In order for this connection to be reliable and of high quality, it is recommended to first measure the depth to which one pipe will enter the other and make a mark in the appropriate place.
If there is an outlet in the foundation of the house, the external sewer pipe is connected to it; if it is not provided, then a hole must be made. Diamond drills are ideal for this task.
For the turning device, bends are used - 15, 30, or 450. When the length of the sewer pipeline is more than 15 m, an inspection is installed in such sections.
Backfilling the trench
After laying the pipes, the slope angle is checked. If everything is done correctly, the trench can be backfilled. For backfilling, it is allowed to use the soil formed when digging furrows, but in this case it is necessary to remove large stones from it and break up dense blocks of soil.
Advice from a professional: When backfilling, large stones and blocks of soil larger than 30 cm in size are not allowed in the soil - such inclusions can easily damage sewer pipes.
The trench is gradually backfilled to a height of 0.3 m, in layers of 5 cm. Each layer is well compacted on the sides of the pipe; compacting the area above the pipe itself is prohibited.
Rules and limits for system depth
Some people mistakenly believe that the deeper the sewer is located, the more efficient it will work. However, it is not. This will not improve the performance of the system; the only thing that will increase is the cost of installing it.
In addition, maintenance of the sewer network will become more difficult. And the biggest disaster can happen if, as a result of heaving or erosion of the soil, the pipes cannot withstand its pressure and burst.
When laying sewer pipes, it is necessary to adhere to the norms and rules set out in SNIP 2.04.03-85. An important parameter that must be taken into account when installing a pipeline is its depth in the ground.
Despite the fact that the regulatory act does not provide clear parameters for the depth of pipes, the document indicates which criteria are decisive when laying a sewer line.
Typically, in central Russia, pipes are laid to a depth of 0.8-1.4 m, which is quite sufficient for the efficient functioning of the sewage system (+)
According to SNiP, it is necessary to be guided by the climatic conditions characteristic of the region, in particular the level of soil freezing, and the experience of operating sewer networks that has developed in the area.
If there is no information about the operation of the sewer system, then the minimum depth of the pipeline should be 30-50 cm above the freezing level.
In this case, there must be a distance of at least 70 cm from the surface of the earth to the top of the pipe. If the pipeline passes under a concrete platform or in places where vehicles move, the minimum recommended depth of the pipeline should be increased to 0.9-1 m.
In addition, when arranging an external network, it is necessary to take into account the material of the pipes and the composition of the soil, since the freezing depth of different types of soil is not the same.
Clay and loamy soils in the same area freeze less than fine sand and sandy loam. Coarse and gravelly sand have the highest level of freezing.
From the table below you can see how different the freezing depth of different types of soil in the same city is.
Pipeline insulation
Sometimes sewer pipes need to be insulated. The need for insulation of sewer pipes arises when the pipeline is laid above the freezing depth of the soil or at the exit from the building.
In this case, stenoflex or energyflex insulation is used. Thermal insulating material is wrapped around sewer pipes along the entire length of the pipeline and securely fastened. Upon completion of installation of the insulation, the slope is checked, and only then backfilling is carried out.
The best option would be to fill the pipe with sand in a layer of 10-15 cm, which is compacted along the edges. It is allowed to fill the soil left over after digging trenches on top of the sand.
When partial repairs of an already functioning sewer pipeline are required, it is more correct and reliable to dismantle the old sewer pipes completely, and then start laying new ones.
In reality, such a solution will take much less time than replacing individual sewer elements.
Source: kanalizaciya-prosto.ru
Factors that determine installation depth
When choosing the depth of pipe laying, it is necessary to take into account a number of factors that have a significant impact on this value and, accordingly, determine the cost of installation work.
- Purpose of the sewer network.
- Method of laying sewerage.
- Climatic conditions in the region.
- Possibility of additional load on the sewer pipe.
Let's look at these criteria in more detail.
Types of sewer networks
For most ordinary people, sewerage is associated only with the removal of sewage from residential premises, but in fact, the concept of sewerage is more extensive and includes various networks.
Storm drainage system
- A storm drainage device is designed to collect and drain atmospheric precipitation. The depth of the storm drainage system should not be less than the depth of soil freezing. When insulating the system, it is possible to reduce the depth to 0.7 meters.
- Cable ducting is designed to ensure the safety and possibility of replacing electrical lines. Laying electrical cables in special pipes greatly simplifies the installation process. The depth of the cable duct is determined mainly by the material of the pipes from which it is made. When using plastic pipes, it should be at least 0.4 m, and when using steel sewers - 0.2 meters.
The depth of laying a domestic sewer depends on a whole range of factors, which we will consider below.
How to lay sewer pipes in a private house: step-by-step instructions
A person feels good where there are comfortable living conditions. And in order to create them, you need to think about how to lay a sewer system in a private house. Firstly, you should familiarize yourself with the features of this process, and secondly, decide on the material used.
It is worth noting that now, plastic pipes, albeit slowly, are still replacing metal pipelines. As for cast iron, they are used very rarely due to their weight and high cost. In contrast, polymer products are much lighter in weight, easier to install and durable.
Rules for cutting pipes and sealing joints
To cut plastic products, you can use a hacksaw for metal, a hacksaw for cutting polymer products, or an electric pipe cutter.
Cutting steps:
- first mark the cut location so that it is even;
- cut strictly at an angle of 90°;
- The edges need to be cleaned with sandpaper.
The socket method of connecting parts ensures the necessary tightness. But still, for greater efficiency, materials such as silicone, glycerin-based lubricant or just a soap solution are used.
The main stages of laying sewerage in a private house
In order for the system to function properly and no unforeseen situations arise, before laying sewer pipes in a private house , you need to competently draw up a detailed project.
It is desirable that the design of engineering systems be carried out at the time of drawing up the house project, but this is only relevant if new construction is planned.
First of all, you need to take care of the compact arrangement of water intake points, which allows you to organize the reception of wastewater into a common riser. If the kitchen and bath are located at different ends of the house, then you will have to plan to build two risers and septic tanks, which entails additional costs.
Many experts recommend that at the stage of developing a scheme for laying external and internal pipelines, one should focus on some features of the movement of wastewater through pipes. The following rules must be followed:
- The toilet must be connected to the riser separately; in addition, other devices cannot be added to the connecting pipe;
- the connection of other devices should not be at a level lower than the toilet connection;
- all plumbing, except the toilet, may have a common connection to the riser;
- the diameter of the supply pipe must be no less than the size of the drain pipe.
Once the project has been drawn up, you can proceed to such stages of system installation as choosing a location for installing a treatment plant, arranging an internal sewer network, removing it from the house and installing an external sewer system.
If you are encountering this for the first time and do not know how to lay sewer pipes in a private house, but want to do it yourself, then it is advisable not only to read the installation instructions, but also to watch the video.
Professional secrets
Assembling a sewer system is not a difficult task, however, there are some nuances here:
- installation is carried out from the riser in the direction of plumbing fixtures;
- the pipe sockets should be directed from the riser to the plumbing fixtures - in this case, the likelihood of leakage will be minimal;
- turning the line 90 degrees is carried out using two 45-degree bends - this will reduce the risk of blockages;
- for each of the plumbing fixtures it is advisable to use a siphon with a water seal;
- connection to the pipeline of drain hoses and sections with a smaller diameter of pipes is made through rubber cuffs that ensure the tightness of the connection;
- when assembling a pipeline from several materials:
- When connecting a plastic line to a cast iron riser, it is necessary to use transition elements specially designed for this purpose.
It is necessary to provide revisions in the system to service problem areas of highways.
The dimensions of plumbing hatches for hidden installation must provide access to all connections of the system.
How to properly install sewer pipes with your own hands, watch in the video filmed while the plumbers were working.
Installation of the external part of the sewer system
Detailed instructions will help you figure out how to properly lay sewer pipes in a private house. Remember to always follow the established procedure.
It all starts with laying pipes in a trench; you need to dig it in advance. The optimal distance between the trench and the pipe should be between 200 mm and 20 cm, it all depends on the diameter. Next you need:
- Dig a hole for a septic tank or treatment well; the depth must be at least 80 cm, and most importantly, 20 cm below the freezing level of the soil.
- Taking into account local conditions, as well as the depth of installation of the sewage system, it is necessary to ensure the optimal degree of slope of the pipes.
- Compact the bottom of the trench, freeing it from large stones and solid inclusions in advance. After this, a sand cushion is created.
- Having understood how best to lay the pipeline through the foundation from where it exits from the house, the pipes are laid along their entire length.
- To connect structural elements you need to use sealant.
- For pipeline turns, a smooth bend is used.
- The external system is connected to the VOC chamber using rubber seals.
After completing all the stages, you can backfill the system; for this, not only soil is taken, but also sand. In order for the installation of external sewerage to proceed without problems, you need to take care of purchasing components (elbows, crosses, fittings, tees, transitions, plugs).
Why do you need a slope angle?
In order for wastewater in the sewer to take dense particles with it, pipes must be laid at a certain slope. The angle of inclination must be set according to fixed, established SNiP standards. To reduce installation time or with the work of unqualified craftsmen, many end up with a sewer system that operates with irregularities or does not cope with the task at all:
- not paying attention to the fixed norm for setting the slope or when maintaining the slope angle at a value below the minimum, the operation of the entire system is disrupted. With such errors, water flow will be at a reduced speed. This will quickly clog the drain. The drain will need to be cleaned frequently. For example, when installing a toilet, measures to set the pipe slope in the correct position were ignored, then the remains of human activity will not be washed away thoroughly. They will begin to accumulate and decompose. This will lead to the rapid spread of an unpleasant odor throughout the living space;
- if the slope is significantly exceeded, then blockage cannot be avoided. Wastewater passes through communications at high speed, washing solid elements without taking it with it. This will lead to the accumulation of a fetid odor and spread throughout the house;
- If the established angle of inclination of the pipes is not observed, siltation of the main system will occur. The entire sewer system will stop working. An unpleasant odor will arise, and there will be a reason for replacement and cleaning;
- in an apartment building, in the absence of standards for setting the slope, a leakage or breakdown of communications may occur. All residents will have problems with drainage until the problem is resolved;
- plastic pipes installed in the wrong position will suffer from silting and blockages. Cast iron communications are susceptible to corrosion, which leads to leakage - all waste will penetrate into the basement, spreading a stench throughout the entire entrance.
Video on the topic:
Sewage slopes and their setting methods:
and video
How to choose the correct sewer slope:
Also, if there are no problems with corrosion during unsloped installation of plastic, then holes may appear in the cast iron pipe. It will begin to leak water and sewage into the basement.
Previously, in multi-storey buildings, sewers were not installed with a slope, which is why there were so many cases of flooding in an apartment on the first floor or a breakthrough of the entire sewer system.
Stages of internal sewerage installation in a private house
You don’t know how to lay sewer pipes in a private house and where to start, but if you figure it out, everything is very simple. The installation starts from the plumbing fixtures and goes to the location of the external pipe. It is better to lay it under the floor. So let's get started:
- First you need to connect the S-shaped pipe or water seal to the plumbing fixtures.
- Then the first sewage pipeline is connected.
- The horizontal pipe structure is connected to the pipe through two elbows, the angle of which is at least 90 degrees.
- Do not forget about the importance of observing the slopes of the structure, for which you need to use clamps that are attached to the walls. Thanks to them, the structure is always in its normal position.
- The pipes coming from the toilet are connected to the main elements of the sewer system, connected by a perpendicular tee.
- To ensure the passage of the pipeline through the ceiling, you need to install a metal sleeve in the insulated pipe.
- And to go from a pipe with a diameter of 5 cm to 10 cm, you will need a special adapter.
- You can equalize the external and internal sewerage using an elbow.
It will be better if you observe the slopes of the pipes; with a diameter of 5 cm it should be 3 cm, and with a diameter of 10 cm - 2 cm. In order to seal the existing pipe joints, you need to use special hermetic mixtures.
Hidden way
There may be obstacles on the plot that interfere with excavation work: trees, buildings and other landscape objects. In this case, it will not be possible to lay the sewer using an open method, so you have to turn to specialists who can lay the pipeline without disturbing the integrity of the soil.
The hidden method of laying sewers is otherwise called the puncture method.
- A special drilling rig is used to dig a pilot well underground from the location of the well to the home sewer pipe.
- The well is expanded to a diameter 1.5 times greater than the cross-section of the pipeline.
- The end of the pipeline is attached to the nozzle at the end of the drill and pulled into the well.
Note! The disadvantage of the hidden method is the possible error in the geometric shape of the pipeline. Since the drill is controlled remotely, the slope or straightness of the pipeline may be affected.
Sewer outlet
Instructions on how to properly install a sewer system in a private house are not limited to a description of internal and external installation. She also describes how to properly remove pipes from your home.
You need to provide an outlet location in advance, and you also need to install several bends to connect the two parts of the pipeline.
Do not forget that you must install a metal sleeve to pass the pipes through the foundation, and insulate the space remaining between the walls of this device.
Source: kanalizaciyasam.ru
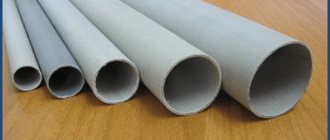
Bends for corrugated pipes Korsis
Korsis corrugated pipes are products made using the latest technologies; the design features a two-layer structure with smooth internal walls and a black outer corrugation that protects the surface from ultraviolet radiation. Thanks to this structure, the pipes have high ring rigidity, allowing them to be used at great depths. The material of the pipe inner walls is polypropylene - this allows the products to be used at temperatures of flowing liquids of about 65 C.
Rice. 8 Korsis pipes, socket with O-ring - design and appearance
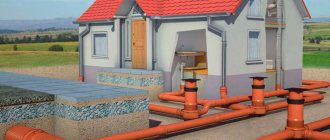
Laying sewer pipes in the ground: we equip and insulate external sewerage
Laying sewer systems in a private home does not require any complex skills, special tools or deep special knowledge. However, small errors during installation work can later lead to serious damage to the system.
The communications are subject to quite serious pressure from the soil layer; they are exposed to cold, moisture, etc. Therefore, it is necessary to ensure that the laying of sewer pipes in the ground is done correctly.
How to choose
When choosing, you need to pay attention to their color. Elements intended for the sewer system are gray in color. Dimensions indicate that each type performs a specific function.
When reconstructing an old sewer system, you need to compare the dimensions of the old pipe with the new one. Then there will be no installation errors.
Consider household appliances. For normal drainage of liquid from a dishwasher or washing machine, it is enough to select a pipe with a diameter of 2.5 centimeters. For shower, bath – 3.5 centimeters. Pipes with a diameter of no more than 5 centimeters are laid throughout the house. The riser will require an element with a diameter of 11 centimeters.
In order not to spend extra money or make a mistake, you need to measure the old pipes. Based on the data, purchase a sufficient number of items. Connecting structures are purchased in the same quantity as the old sewer system.
Types of sewer pipes and their features
The process of laying external sewerage looks quite simple. The pipes are laid in a dug trench, connected to the system located inside the house, as well as to the collector, and then covered with earth.
Before drawing up an external sewerage project, you need to decide on the type of pipes. The dimensions of the trench, slope, etc. depend on the diameter, cross-section and material of these elements.
Pipes that are used to create external sewage systems are distinguished by many parameters, such as diameter and cross-sectional configuration, as well as material. Today, sewer systems are made of:
- cast iron;
- ceramics;
- concrete;
- asbestos cement;
- plastic;
- fiberglass.
Cast iron pipes weigh quite a lot, their internal surface is not very smooth, and installation is very complicated, so this type of sewage system is used extremely rarely in private plots.
Ceramic elements are easier to install, but they can be easily damaged if handled carelessly. Concrete structures of large weight are also difficult to install, so they are rarely used for external sewerage in a private house.
Inexpensive and lightweight asbestos cement structures have been popular in the past, but they are somewhat fragile, and the smoothness of their internal surface leaves much to be desired.
The undisputed leader in the sewer systems market is plastic. Pipes made of PVC, PP, PVP have all the characteristics necessary for external sewerage:
- light weight;
- significant strength;
- resistance to chemicals;
- ease of installation;
- smooth inner surface;
- ability to withstand very low temperatures, etc.
Fiberglass, which is a composition of polyester resins reinforced with special fiberglass, is also very good for sewerage. However, such structures weigh significantly more and are much more expensive.
To create a sewer system on a personal plot, round plastic pipes are most often used, the diameter of which is usually 110 mm.
When laying pipes using the puncture method, for example, under the road surface, as well as in other places with high loads, it is recommended to use double-layer pipes with a corrugated outer surface.
Note! Pipes made of polyvinyl chloride (PVP) can withstand heating only up to 40 degrees, while polypropylene (PP) structures can withstand temperatures up to 80 degrees. High-strength polyethylene (HDP), which is used in the production of sewer pipes, occupies an average position in terms of heat resistance.
What pipes can be used
The material and profile are selected in accordance with the existing design of the wastewater system.
Cast iron products remain relevant due to their low price and durability.
They are resistant to loads and temperature changes, but are susceptible to corrosion. Modern technologies create anti-corrosion coatings that increase the service life of the product. Cast iron pipes are heavy, so trenchless installation of a sewer system will require special equipment and support personnel to create an engineering structure. When performing external sewerage, cast iron products must be provided with thermal insulation.
In recent decades, plumbing products made from PVP and PVC have appeared, which are not inferior in their properties to metal ones. They are much lighter, so installation with such products is easier. When installing an internal system in a bathroom or toilet, it is better to use polyvinyl chloride pipes. Polyethylene and polypropylene pipes are more suitable for outdoor systems. The advantage of plastic ones is that they practically do not accumulate deposits.
Asbestos pipes are resistant to aggressive environments. In an aquatic environment, asbestos only becomes stronger over time. In addition, under the influence of water flow, overgrowth does not occur on the inner surface of the pipes. Installing an asbestos system is not difficult, but it is sensitive to mechanical stress. You need to be careful when transporting and installing them. Protection must be provided to prevent subsidence and fractures. Asbestos products are not recommended for use in sandy soil as they have low resistance to sand.
Procedure for creating an external sewer system
The laying of sewerage pipes begins with the project. It is recommended to make a trench with a minimum number of bends; the optimal solution is a completely straight pipe without any turns.
If you can’t do without them, and the length of the system is more than 12 meters, inspection wells are installed in such places, since this is where blockages and breakdowns most often occur.
Note! Even ideally straight sewers must be equipped with inspection wells every 25 meters.
It is important to correctly determine the depth of the sewer pipe. When determining it, the depth of soil freezing and the level of the entrance of the sewer pipe into the septic tank or pipe of the centralized sewer system are taken into account.
In addition, the required sewerage slope should be ensured, which is 2 cm for each linear meter of the structure.
Often, creating a sufficiently deep trench turns out to be too labor-intensive, and sometimes impossible. In this case, it is necessary to carry out thermal insulation work to protect the drains from freezing in winter.
According to the rules for laying sewer pipes, the minimum trench width is defined as the diameter of the pipe plus 20 mm on each side for pipes.
If the pipe is wider than 200 mm, the free space should be increased, otherwise it will be difficult to correctly install the structure. Once the plan has been drawn up and all factors have been taken into account, the work begins.
To install external sewerage you should:
- Dig a trench of suitable size. Place a sand cushion approximately 50 mm thick on the bottom. Carefully compact the bottom of the trench.
- Lay and connect sewer pipes. Connect them to the internal sewerage system and to the septic tank.
- Check the operation of the system and make sure it is tight.
- Fill the space on the sides of the pipes with sand, compacting it layer by layer. Backfill the sewer from above.
Note! The layer of sand or soil laid on top of sewer pipes does not need to be compacted.
When figuring out how to properly lay sewer pipes, you should take into account the recommendations of experts:
the number of joints and turns should be minimal; all pipes must be directed towards the flow of waste; sockets and shaped elements cannot be shortened; The pipes should be secured to ensure the correct slope of the sewer.
To maintain the slope, use a marking cord that is pulled along the bottom of the trench.
Preparing for work
For installation you will need:
- plastic pipes with a cross-section of 5, 10 centimeters;
- connecting elements;
- cuffs to seal joints;
- glue for plastic;
- cement mortar;
- roulette;
- saw;
- level;
- marker.
When reconstructing an old sewer system, you need to study the features and layout plan in advance. Draw up an installation diagram. This action does not need to be performed if a new sewer system is being installed.
- A drawing should be displayed on paper, with fixed wiring locations and a bathroom. It is necessary to mark the riser and determine the distance.
- Check that the drawn diagram matches the existing one.
- Carry out calculations. Calculate the amount of material needed.
A few words about insulation
Insulation of sewer pipes is used quite often. For this purpose, special rolled or shaped insulation is used.
The first ones must be wound onto the pipe during the installation of the sewer system, the second ones are made for a pipe of a specific diameter and are simply put on it.
Since heat-insulating materials can lose a significant part of their useful properties when in contact with water, it is important to cover them with a reliable layer of waterproofing.
As an alternative or additional method of thermal insulation, a special heating cable is used, which is installed along the entire length of the pipe.
You can save time and effort if you buy pipes with a thermal insulation layer already installed. Elements are produced equipped not only with conventional insulation, but also with a heating cable.
When using such structures, it is necessary to carefully seal the joints so that moisture does not get on the insulation.
Source: aqua-rmnt.com
How to check the sewer system for leaks and get rid of them if found?
Testing of the assembled sewage system is carried out in the following ways:
Pour and check
- A bucket of water with a capacity of at least 10 liters is abruptly tipped into a washbasin or sink. For greater reliability of the results, such a test should be repeated several times in a row.
- Throughout the entire installed facility, all available plumbing fixtures are turned on, creating loads on the sewer system (all taps are opened, the toilet is flushed, it is advisable to apply a load even to the drain of the washing machine). Such a check allows you to effectively evaluate not only the tightness of the system, but also its throughput, which in itself is of great importance.
If no leaks were detected, then the system is ready for operation. What to do if defects are still discovered? There are two ways to fix the problem:
- Disassemble the “problematic” connection and reassemble it, paying maximum attention to the quality of the assembly (correct installation of the gasket, quality of pipe joining).
- If the first method does not help, then the leaking joint must be disassembled and carefully treated with sealant. As a rule, silicone is used as such.
After the drying time specified by the sealant manufacturer has passed, testing the system must be repeated. Manually assembling a sewer system in a private house is a rather labor-intensive process solely because there is a need to dig trenches for laying structural elements.
The assembly process itself does not require any special physical effort from the master; here it all comes down to the correct connection of individual parts and their synthesis into a finished structure.
Provided that all the necessary calculations were carried out correctly, the required slope was realized during the installation process, and the assembly process itself was carried out efficiently and responsibly, the operation of the assembled structure will not cause any difficulties, and the service life will be measured in tens of years.
Video on sewerage options
How to lay sewer pipes - a step-by-step guide with examples
Waste water and human waste are first transported to mains located outside the building, and then end up in storage tanks or septic tanks.
To do this, you can use pipe products made from different raw materials. More recently, cast iron pipelines were used to create an external sewer line in one's own home. Today, everything has changed, and the external laying of sewerage pipes is made from polymer pipe products.
The reason was the fragility of cast iron compared to plastic, and in addition, products made from this alloy are heavy and require special equipment for installation.
How to properly combine different materials
There are several methods for joining materials together:
- Bell method. This is the most common method, which is carried out with or without an O-ring, using glue or resistance welding.
- Sealing with cement. Pipes can be of different diameters and made of different materials. This method is used for cast iron pipes. The pipe elements are inserted into each other, the gap between them is sealed with a layer of flax or hemp, then filled with cement, asbestos, bitumen mastic or silicone sealant.
- Application of O-ring. Increases the reliability of socket joints of plastic pipes. The ring may have a plastic liner. When connecting, do not allow deformation of the sealing ring. The ring is lubricated with glycerin, soap or silicone.
To connect pipes made of different materials, adapters are used:
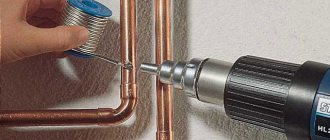
Connection using glue or contact welding.
Glue installation is quite simple, but you need to remember that glued connections cannot withstand lateral loads.
Resistance welding can be used for various materials: cast iron, steel, and plastic. It requires a special manual or mechanical welding machine, equipped with special devices for heating to a certain temperature.
Advantages of plastic pipes
The sewer plastic pipe has a number of advantages in addition to its low weight:
- withstands the influence of active chemical environments without problems;
- it is not subject to corrosive processes;
- has a smooth inner surface, so that deposits do not accumulate on it, which lead to a decrease in pipeline capacity.
When a sewer pipe is laid in the ground, all of the above positive characteristics are of great importance, since cleaning, repairing or replacing elements of the pipeline will require excavation work.
And this leads not only to additional time, but also financial costs.
Pipe products made from plastic have the following characteristics:
- affordable price;
- does not conduct electricity, which is very important today due to the presence of many household electrical appliances in the house;
- non-toxic;
- with its help you can mount highways of various configurations.
Despite all the advantages, you won’t be able to use them if you don’t know how to properly lay sewer pipes in the ground. Among the advantages of plastic products, it should also be noted that they do not lose their original appearance over time.
When arranging a sewer system indoors with your own hands, you need to use plastic products painted gray. When laying the outer part of the structure, polymer pipes of orange, red or brick shade are used to drain wastewater and sewage.
Selection of pipes for the device
Previously, when laying sewers, only metal pipes were used: cast iron or steel. Indeed, these materials are like no other suitable for laying in the ground. They are strong, durable, low cost, and easy to install.
However, along with advantages, metal structures also have significant disadvantages. The disadvantage of steel lines is the possibility of corrosion, and cast iron pipes are heavy.
In terms of strength and durability, cast iron pipes have no equal; this material can lie in the ground for decades without losing its qualities, but due to their heaviness, laying a water pipeline becomes much more difficult
A certain difficulty is present in sealing the joints of a cast iron pipe, as well as its internal surface, which, due to the characteristics of the material, will never be perfectly smooth. The latter characteristic affects the speed and quality of movement of waste inside it; over time, blockages can form in the pipe.
Asbestos-cement pipes can be used for sewer installation. They have a smooth surface, which eliminates the possibility of blockages, are simply connected using special couplings, and their weight is significantly less than that of metal structures.
But they also have a significant disadvantage - they are very fragile, which complicates their transportation and installation. Ceramic pipes have the same fragility.
Reinforced concrete structures have many advantages: they have exceptional strength, water resistance, and frost resistance. It is possible to make large-diameter pipes from reinforced concrete, which is impossible to do from other materials.
But laying such pipes is a big problem - due to their heavy weight, it is necessary to use special equipment, which is not always advisable in an individual household.
Today, when installing private sewer systems, polymer pipes are most often used, which, despite their strength, are lightweight, which allows them to be installed by one person. They are very simple and easy to connect, resulting in excellent tightness.
Orange polymer pipes are used for the installation of external sewerage. They have increased strength compared to gray pipes intended for internal piping, and also have the ability to withstand heavy loads
There are three types of polymer pipes - polypropylene, PVC or HDPE (low-density polyethylene). PVC structures, in addition to the above advantages, are also resistant to UV radiation and have slight changes in parameters due to temperature changes.
However, the PVC sewer pipeline does not withstand very low and very high temperatures, and can also be deformed under mechanical loads.
During its operation, the sewer system is subject to dynamic loads, which are best withstood by corrugated pipes. Even if it freezes, the integrity of the line will not be compromised, but deformation of its walls may occur.
The diameter of the pipes is selected based on the amount of plumbing equipment installed in the house. So, for a country cottage with two toilets, pipes with a cross-section of 110 mm will be sufficient.
If the house building has three or more bathrooms, it is necessary to use a pipeline with a diameter of 160 mm.
Image gallery
Photo from
Polymer pipes in the installation of an external branch
Polypropylene products in sewerage organization
Cold welding pipe connection
Range of fittings for plastic pipelines
Basic provisions of sanitary norms and rules
In 1985, Sanitary Standards and Rules were approved, according to which sewer systems must be installed.
The same document contains recommendations regarding the nuances of installation work. In particular, it contains information regarding the depth of the pipeline and other important points.
The rules for laying sewer pipes indicate that their laying depth must be at least 30–50 centimeters from the soil freezing mark in each region - the calculation is carried out from the lowest point of the pipeline.
When work is carried out in areas with increased load on the soil surface (for example, under the roadway), the products should be laid deeper, sometimes at around 9 meters.
The document regulates how sewer pipes should be installed in trenches:
- In the place where it is planned to lay a sewer drain from a private household, it is imperative to compact the ground. This will prevent erosion of the engineering structure by groundwater during heavy precipitation.
- The laying of an external pipeline is considered to be correctly completed if a pipeline slope is created, which should be from 1 to 2 centimeters per linear meter. This requirement must be observed because there is no pressure pressure in domestic sewer structures.
The technology for laying sewer pipes in a trench provides that in your own home, in a place where the pipeline bends sharply, you need to equip a special well.
This allows you to make repair work easier and to replace a section of the highway that has become unusable in the shortest possible time.
There is also a rule regarding the laying of pipes for sewer structures in the ground. It states that a layer of sand at least 15 centimeters thick must be poured onto the bottom of the trench, which will ensure the stability of the system and its convenient operation.
A similar layer should be placed on top of the sewer line. The use of backfill will simplify access to the pipeline if repairs are necessary.
Experts also recommend installing inspection wells in areas where there are significant differences in the depth of pipe laying. If the length of the network is large, several of them should be installed, maintaining a gap of about 25 meters.
Forming a slope for free flow
When laying the pipeline, it is necessary to provide a slope towards the septic tank. According to technological standards, the slope of a sewer pipe with a diameter of 110 mm should be 20 mm for each meter of pipeline. Pipes with a diameter of 160 mm must be laid with a slope of 8 mm per meter of laid line.
When laying pipes, the slope is calculated for one meter of pipeline. The figure shows how much the difference should be between the sides of pipes with different diameters
The presence of a slope is a determining parameter for the successful functioning of the system. The closer the pipeline performance is to the standard, the more efficient the sewage system will work.
A complete lack of slope, as well as excessive slope of the pipeline, will lead to siltation of the system. In the first case, waste will not be able to be transported through the pipes at the required speed, which will lead to the formation of blockages.
In the second, the liquid will move too quickly, which will ultimately reduce its transport capacity, and waste will remain in the pipe, which will also lead to blockages and further silting of the pipeline.
The slope of the pipeline should always be directed from the outlet of the residential building towards the septic tank. This condition is especially important when using non-pressure sewers, which are most often equipped in private households.
You can control the slope level of the entire trench using a special device - a level. If the device is not available on the farm, then the slope is checked using a building level.
Procedure:
- At the beginning and end of the pit, pins are driven in to which the cable is tied.
- A building level is applied to one end of the rope and adjustments are made to the horizon.
- The height of the trench is measured from both sides to the cable.
- Simple mathematical calculations are performed.
For example, the total length of the trench is 50 m, a pipe with a diameter of 110 mm is used. On the exit side of the house, the depth of the pit is half a meter. In this case, at the end point of the pit, its depth should be equal to one and a half meters.
Detailed technology for calculating sewer slope is described in this article.
If the site has a natural slope that exceeds the recommended standards, it is possible to lay a sewer system with several vertical transitions. In this case, on horizontal sections of the pipeline it is necessary to comply with regulatory indicators.
In areas with a large slope, the pipeline can be laid in a stepwise manner. If the slope angle slightly exceeds the standards, they are limited to one vertical transition (+)
Another option is to lay a vertical pipe at the exit from the house to a considerable depth, and then lay a pipeline from it with the required slope. In this case, the depth of the trench will be greater than when laying using the first method.
For the same purposes, you can use a drop well, into which wastewater flows smoothly to a lower level of the pipeline.
Sequence of actions when installing a sewer system
First of all, before laying the pipes, they dig a trench. The easiest way to do this is to use special equipment, such as an excavator, or manually.
According to generally accepted technology, laying sewer pipes involves the use of pipes with a diameter of 110 millimeters. In this case, the width of the ditch should be at least 60 centimeters.
Simultaneously with increasing the cross-section of the pipe being laid, it is also necessary to expand the trench. After selecting the material, the pipe is directly laid in the trench, which has its own nuances.
Those who are interested in how to lay sewer pipes in the ground correctly should keep in mind that work must begin from the foundation of the building. If there is no pipeline for drainage from the house, a hole is cut under the base of the building and the network is supplied under it.
When there is an outlet, a socket is put on the end of the pipe leaving the building. In this case, special attention is paid to the alignment of the joined elements.
As a rule, along the entire length of the sewage and wastewater drainage pipeline there are bends and turns - they are the ones that most often cause failure of the sewer network and cause serious trouble to the owners of private houses.
It is in places where the pipeline changes its direction that various deposits begin to accumulate. Over time, they completely block the path of movement of wastewater.
Experts know how to install a sewer pipeline in a private household to prevent such troubles.
Therefore, they do not include advice from professionals, which are as follows:
- The laying of sewer pipes must be carried out using bends that have different bending angles - from 15 to 90 degrees. To provide convenient access to places where blockages form, revisions are installed above each elbow.
- After completing the formation of the outlet from the house, the pipes are placed in the trench with the sockets down and then they begin to join the products. The joining process is as follows: the edges of the products are lubricated with a special compound and they are inserted into the socket until it stops.
To correctly connect the elements of engineering communications in a private household or apartment, a simple technique is used. It consists of marking the pipes before starting work to determine the depth of their insertion into the socket. Based on them, the connection is finally made.
Installing a new
- A rubber cuff is placed on the upper cut of the cast iron pipe. The connection is carefully coated with sealant.
- A plastic adapter is installed on top of the cuff.
- At the bottom, a second rubber adapter is inserted into the socket.
- The compensator is installed in the tee, each connection is carefully coated with sealant.
- The pipe is firmly fixed to the wall with clamps to avoid displacement.
Installation of a plastic riser
It is important to accurately calculate your strengths and capabilities when carrying out such work of increased complexity. Replacing a sewer riser is a job for an experienced team of plumbers.
In the event of a mistake and a sewer break, the cost of the error can be very high.
How to set the pipe angle
The easiest way is to use a bubble level with additional risks. If the flask with a bubble has three lines on each side, then this level is just right. Each line corresponds to a slope of 1 cm per meter.
The tool is fixed on top of the pipe, and then, using pads, the slope is set so that the bubble touches the desired mark.
The second method is to measure the distance from the horizontal plane of the ends of the section. The ratio of the length of the pipe and the lifting height of the upper side corresponds to the required slope coefficient.
The third method is to place two level markers along the edges of the route. A thread or twine is stretched between them, which is used to guide when drawing up the pipeline.
The most obvious way is to use a laser level and a laser level to construct the required plane. This will especially help when laying pipes in a groove and lining them in walls using a box.
Basic Rules:
These rules are formulated based on the operating principle of gravity (free-flow) sewerage , and if any of the provisions set out below are not clear enough, then you can refer to the specified article for clarification.
The fewer joints and turns you make when laying pipes, the more reliable the system will work.
Each joint or turn is a potential site for sewer leakage due to poor-quality joining and, in addition, additional resistance for liquid and especially solid waste.
The sockets of vertical pipes (risers) and horizontal pipes must be directed towards the movement of wastewater.
This is done in order to minimize the risk of sewer leakage. And it’s unlikely that you will be able to lay horizontal pipes differently. Sometimes, in the case of repairing a sewer pipe, it is allowed to install connecting (slide-on) couplings, in which one branch pipe (bell) is directed along the movement of wastewater, but in general it is advisable to avoid using couplings; if you cut the pipe incorrectly, it is better to buy a new one.
Cutting and shortening of shaped parts (sockets) is prohibited. The following are not allowed for installation:
- all pipes, pipes and fittings that have chips, cracks or cuts;
- shaped parts having an internal lining with sharp edges;
- rubber rings and cuffs that have ruptures, cavities and unremoved pressing, as well as rings that do not have plastic spacers provided by the design;
- metal fasteners, the elements of which have sharp edges and burrs at the points of connection with pipes and fittings.
Logical and without comment.
The diameter of the pipes depends on the number of connected sanitary fixtures and the slope.
Of course, there are formulas that allow you to calculate the diameter of the pipe depending on the slope, the number of joints and turns, taking into account the number of sanitary fixtures or, more simply, washbasins, bathtubs, sinks and toilets. But in practice, these formulas for indoor wiring are rarely used, and there is no great need for this. And besides, the exact calculation of the required pipe diameter is the topic of more than one scientific dissertation.
Pipes with a diameter of 100 or 150 mm are placed on the riser and on the area connecting the riser to the well, and if you had a cast iron pipe with a diameter of 200 mm (although this is very rare - pipes of this diameter are installed on risers only if the number of connected sanitary fixtures is more than 1200, I don’t think If this is your case, although anything is possible), then a new plastic pipe must be installed with the same diameter. The exception is their own homes. There, the sewerage system was laid not from the pipes required by technical specifications, but from those that were available.
For internal horizontal wiring, pipes with a diameter of 100 mm are usually installed when connecting the toilet to the riser, all other pipes with a diameter of 50 mm (sometimes 40 mm).
If you have some incredibly complex wiring, and you doubt that a diameter of 50 mm will be enough for normal sewer operation, then you need a hydraulic calculation of the pipelines. And to understand the intricacies of the movement of sewage and waste through a sewer pipe, sometimes a higher technical education is not enough. If you still want to try it yourself, then take a look at SNiP 2.04.01.85, or familiarize yourself with the basic provisions of the hydraulic calculation of sewer networks.
There you can also find out the water flow and the amount of waste from any sanitary fixture and, accordingly, the minimum diameter of the connected sewer, and determine whether the main conditions are met: flow speed of at least 0.7 m/s and pipe filling (ratio of water height to diameter) of at least 0.3; what to do if these conditions are not met, and many other interesting things that I am trying to briefly outline in this article.
Horizontal sewer pipes must be laid with a slope towards the riser.
Since the sewage system is non-pressure, and pressure losses occur due to air resistance and friction of the pipe walls, a certain slope of the pipes is necessary to maintain the flow rate. And to prevent the pipes from silting (self-cleaning of the sewage system), the flow speed must be at least 0.7 m/s - to ensure turbulent flow of liquid, and the filling of the pipes must be h ≥ 0.3d. Like the diameter, the slope of sewer pipes is determined by calculation. When the volume of wastewater is not sufficient to satisfy both conditions, flow turbulence comes first. When performing standard intra-apartment wiring or installing a sewer system for a small private house, the following requirements must be observed:
Minimum sewer pipe slope i=0.025 for pipes with a diameter of 50 mm, recommended slope i=0.035
Minimum sewer pipe slope i=0.015 for pipes with a diameter of 100 mm, recommended slope i=0.02
i is the ratio of the height difference between the center of the pipe diameter and the length of the pipe. Translated into normal human language, this means that if you have a sewer pipe 1 meter long, then if the bottom of one of its sections touches the floor, then the bottom of the second should be 2 cm above the floor level, of course, provided that your floor is horizontal and the increase in diameter at the socket for joining pipes is taken into account. In this case, the slope of the pipe is assumed to be equal to the hydraulic slope of the fluid flow, thus ensuring a constant flow speed.
Maximum slope for horizontal sewer pipes i=0.15
With large slopes, the speed increases significantly, which in turn increases the force of the hydraulic shock and can lead to clogging of the pipe in areas with high local resistance (changes in the trajectory of the fluid - turns of sewer pipes, the point of connection to the riser). Although this limitation is conditional - it is unlikely that you will be able to lay a 10-meter long pipe with such a slope (external work does not count). If the pipe length is less than 1.5 m, this limitation does not apply, since in such a relatively short section of the pipe the wastewater will not have time to develop a high speed.
Recommended sewer pipe slope i=0.04-0.07
The floors may not be horizontal and determining the slope of the sewer pipe based on the floor level may lead to an error; the foundations of houses may sag, which is why the slope of the pipes may not change for the better. To avoid problems with the operation of the sewer system, it is advisable to make a slope of 4-7 cm per meter (for pipes with a diameter of 50 mm). The more turns and joints there are on the sewer route (see point 1), the greater the slope must be to compensate for local resistance.
If pipes are laid without a slope or even with a counter-slope, then such pipes will clog quite often. The correct solution to the problem would be to eliminate counter-slopes or other causes that lead to clogging of the sewer, but this is not always possible; in such cases, a non-return shut-off valve will help.
For normal sewerage operation, pipes must be secured to the floor or wall.
Plastic pipes, unlike cast iron ones, are easily deformed and long loose sections can sag, which will lead to a change in slope. To prevent this from happening, the pipes must be secured to the wall or floor with special fasteners (sold in the same place where the pipes are) every 50-100 cm, depending on the diameter of the pipe. Fastening the riser pipes to the walls is also necessary to reduce the load of its own weight. In addition, it is recommended to fasten pipes in places of turns and connections to partially absorb the load from water hammer.
Availability of fan ventilation.
The ventilation pipe, which is installed on the roof of the building or in the attic, is designed to equalize the air pressure in the drain pipes, which can drop sharply if a large volume of water is discharged through the riser, for example from a toilet. A sharp decrease in air pressure in the riser sucks water out of the siphons of plumbing fixtures, thereby destroying the water seal. And this leads to free access to the apartment of sewer gases with extremely unpleasant odors.
In addition, these gases can cause dangerous diseases. As a rule, all houses with more than two floors, and often even two-story Stalin buildings, have fan ventilation. Moreover, if you, living on the top floor, want to remove the pipe leading to the roof during redevelopment (and changing the riser route is redevelopment), then no one will officially allow you to do this, but unofficially, options are possible.
For small volumes of wastewater, the use of an unventilated sewer riser is allowed. Those. The riser does not lead to the attic or roof. In this case, at the point where the horizontal wiring is connected to the riser (according to building codes), it is necessary to “clean out” and close it with a plug (so that wastewater does not leak out). And if, in addition to cleaning, you also make a vertical outlet for a non-return air valve that costs $4-10:
(of course, if you wish, you can buy a branded valve for $100), then in the future you will save time, money and nerves necessary for cleaning the sewer.
If for some reason you do not have the opportunity to place a check valve directly on the riser (this sometimes happens when repairing sewerage in your houses), then a check valve with a diameter of 50 mm can be placed on any section of a horizontal pipe, but it is desirable that the valve be located on height 30-50 cm from the axis of the sewer pipe. Installation options for a non-return air valve can be as follows:
Option A is the most correct. Option B is acceptable in your homes, for example, at the dacha I installed a check valve according to option B four years ago. Option C is also acceptable in your homes when it is not possible to install a check valve on the riser, for example, I installed a check valve with a diameter of 50 mm according to option C for my sister, who lives in her house 5 years ago, according to option C; I placed the outlet for the check valve under the bathtub (the fact is that other people did the drainage for my sister and did not provide for ventilation, and then it was easiest to insert an outlet for the air valve under the bathroom). The diagrams do not show outlets for cleaning.
The essence of the operation of a non-return air valve is that it allows air to pass in only one direction - into the sewer; when water is flushed in the toilet, the air pressure in the sewer pipe in the area up to the toilet and in the riser (if any) decreases and the valve opens. When the air pressure in the sewer pipe is the same as in the room and greater than in the room, the air valve is closed - this prevents gases from escaping from the sewer, so if installed correctly, there should be no odors in the room where the air valve is installed.
It makes no sense to install an air valve on the sewer pipes after the toilet; in this case, the valve will not work correctly. When the water in the toilet flushes, and the toilet is a plumbing fixture that creates the maximum flow of wastewater, then the air pressure in the sewer pipe after the toilet will be increased. The higher the non-return air valve is from the axis of the sewer pipe, the lower the risk of clogging the valve with wastewater when the sewer is clogged, so option A is the most correct.
It is necessary to install “cleaning” in places of turns, changes in angle of inclination and connection of a sanitary fixture to a sewer pipe.
A good rule, but it was observed a long time ago, when installing cast iron sewers. In old houses you can still see somewhere under the sink the appendix of a sewer pipe with a wooden chop sticking out of it for a good 20 cm. Nowadays, plumbers who install plastic sewers do not install “cleaning” (at least I have not seen them) for several reasons.
Firstly, sewer pipes are often sewn up for aesthetic reasons. Secondly, modern plastic sewerage, unlike cast iron, is quite easy to disassemble and, if necessary, you can always disconnect some sanitary appliance, for example, a washing machine or sink, and insert a cable through the resulting hole for cleaning.
The inspection (inspection hatch) should be installed no more than 15 m apart.
In five-story buildings, audits were installed on the first and last floors. If on your sewer riser at a height of about 1 m from the floor there is some kind of iron plate, screwed with powerful bolts and causing unpleasant associations with kingstons, then this is an inspection. The revision for plastic sewerage looks much more aesthetically pleasing:
If you are going to sew up the riser, then make an inspection hatch to access the revision.
Plastic sewer pipes can be joined to cast iron ones.
If you have a cast iron riser, it is not at all necessary to replace cast iron pipes with plastic ones if the riser is in good condition. In addition to significant physical effort, you will also need a lot of moral effort to convince your neighbors not to use the sewer for several hours and, as usual, someone will definitely forget. But even if you completely change the cast-iron riser to a plastic one only in your apartment, you will still have to join plastic and cast-iron pipes.
When transitioning the riser into a horizontal pipeline, it is prohibited to use a 90° bend.
It is recommended to make the transition with 2 bends at 45o, 3 at 30o or 4 at 22.5o.
A good rule, the observance of which allows you to reduce the force of water hammer, the turbulence of the flow of liquid waste and thereby avoid frequent sewer blockages. If the sewer system in your multi-storey building is often clogged, go down to the basement and check whether the builders violated this rule when installing the sewer system.
And if you have your own home and 5-6 sanitary fixtures are connected to the sewer, then you can ignore this rule.
It is allowed to lay plastic pipes in the ground in the absence of additional external loads.
Inspection wells are installed at a distance of no more than 50 m, as well as in places of turns, changes in the angle of inclination and height differences of the pipeline.
The first inspection well is installed at a distance of no more than 8 m from the axis of the riser - with an outlet diameter of 50 mm, 12 m - with an outlet diameter of 100 mm, 15 m - with an outlet diameter of 150 mm or more. In general, the last two rules are relevant for owners of private houses involved in sewer installation. Usually these people are smart and don’t need additional comments. But just in case, I will give a link to an article that briefly describes the design of sewer wells.
Calculation of the line filling level
Additional calculations of the filling level, along with the angle of inclination determined according to SNiP standards, ensure trouble-free movement of sewage through the pipeline.
Calculations are made according to the formula:
Y=H/d , where
- Y —fullness level;
- H is the liquid level in the pipe;
- d —diameter
A value of 1.0 means that the highway is completely filled with drains - this can only happen if the distribution elements are incorrectly, absolutely horizontal.
SNiP specifies the minimum and maximum permissible filling standards - 0.3 and 1.0, respectively. That is, if the diameter of the pipes is chosen correctly, the waste will move at the required speed without sticking to the internal walls (+)
In this regard, it is customary to take values in the range of 50-60%. In practical application, the filling rate is taken into account, which is more than 0.3 and less than 0.6. The optimal value is considered to be 0.5-0.6.
Let's try to calculate the speed of flow movement ourselves. According to standards, it should be 0.7 m/s or more. Only at such values does the liquid freely reach its final destination.
Let's assume that H is 60 mm and D is 110 mm, the pipes are made of plastic, that is, they have a smooth inner surface and a minimum degree of resistance. According to the formula, divide 60 by 110, we get 0.55 - this is the level of fullness (Y), it corresponds to the norm.
Additional recommendations:
Sometimes rubber seals (gaskets) are sold separately from pipes and may not ensure a tight connection of pipes during installation.
When purchasing pipes and gaskets, insert one gasket into the socket and try joining two plastic pipes. If one pipe fits quite easily into the socket of another, then it is advisable to immediately change the gaskets or look for another seller.
To facilitate the installation of plastic pipes, it is recommended to use lubricant.
Since a high-quality pipe must fit very tightly into the socket of another pipe, the use of shampoo or liquid soap (they are usually always on hand) greatly facilitates the joining process.
When joining pipes, one pipe enters the socket of the other by 47 and 36 mm with a diameter of pipes and fittings of 100 and 50 mm, respectively.
When installing plastic sewerage, pipes of standard length are used.
But the design of the apartment should not be changed because of the modular dimensions of the pipes, and the modular pitch is not very pleasing: 150 mm, 250 mm, 500 mm, 1000 mm, 2000 mm, 3000 mm. If you need a pipe of a different size, then you can always cut it evenly and accurately, as a result you will get a pipe cut that is sometimes better than the factory one.