Not every home owner can boast of perfectly smooth walls, and in order to carry out high-quality renovations in the house, you need to ideally prepare the surface. Of course, many people say that the best option is to use gypsum board, but this option is not suitable in all cases. This is primarily due to the fact that the material takes away precious centimeters along the entire perimeter of the room, based on this, only the owner of a spacious room can afford such an option. And an alternative is a painting mesh, which is used for further leveling the wall and wallpapering. But is this necessary, or can we do without it?
Necessity
Previously, shingles were used to ensure surface strength and long-lasting plaster. It was made from wooden slats nailed to the base. Now on the construction market there is mesh for plastering. They vary in color and material. They serve for better adhesion to the surface, there is no peeling of the applied layer from the rough base for a long time, there are no cracks after the solution dries. After applying the material under the plaster and drying the solution, decorative finishing is applied without fear that defects will appear underneath.
What happens: varieties
The construction market is full of a variety of cellular materials for plastering surfaces.
They are mainly made from: Each mesh is designed to perform a specific job. A brief description is presented in the table:
| Grid type | Cell size, mm | Short description |
| Painting | 5x5 | Made of plastic. Used for work inside buildings. Use gypsum-based mixtures |
| Universal 22x35 | Small mesh - mesh for plastering walls inside, large mesh for working with the facade of a building | |
| Fiberglass | 5x5 | Durable, resistant to moisture, cold and heat. |
| Plurima | 5x6 | Made from polypropylene. Can be used for both indoor and outdoor work |
For each type of work, different cell sizes are used.
Reinforcement under the facade: which one is needed
To work outdoors with building walls, many factors need to be taken into account:
- humidity;
- temperature changes;
- constant exposure to sunlight and so on.
To select a cellular material, the following indicators are taken into account:
- The density of the fabric used is 145-160g/m2. Cell size 5x5.
- Strength. Good quality mesh does not tear or deform.
- The fabric is not exposed to alkali or moisture.
Metal sheets are mainly used. However, they produce fiberglass mesh for facade work. It should not stretch or tear.
Metal for leveling
This is a universal canvas, used indoors and outdoors. Its functions include protecting the surface from mechanical influences and strengthening the created plane. The mesh prevents the solution from spreading (this applies to cement mixtures that have shrinkage).
Manufacturing is done using wire or metal rods. Depending on this, the material is divided into light, medium, heavy.
Features of metal sheets:
- Withstands loads. Therefore, they are used over a large area with a thick layer of solution applied.
- Metal is applicable on concrete, brick and other surfaces.
- The minimum thickness of the applied solution is 2 cm, the maximum is 5 cm.
- The cell holds a thick layer of plaster, thereby ensuring the strength of the surface.
- Easily cut with metal scissors or wire cutters.
The disadvantage is the weight. The canvas is attached only to solid rough foundations.
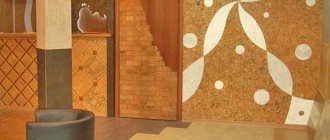
Plastic decorative
To cover an indoor surface with finishing material, paint, it must be perfectly smooth and durable.
There should be no cracks, chips, or voids. A paint mesh is used to level and create a solid base. The fabric is made from polymers or fiberglass. It is safe for health, durable, does not react to moisture and does not deform.
Used on various surfaces: concrete, brick, foam blocks when applying a solution with a thickness of 2 to 5 mm.
Before applying the solution, the canvas is attached to the rough base. It should not sag or be too tight.
The material has differences in cell sizes. This is important when using different solutions on areas from minimal to large.
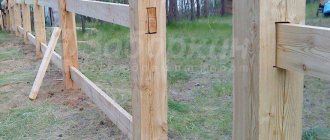
Fiberglass for wooden walls and more
The canvas, 2x2 cells, is durable and resistant to aggressive environments.
It is used for ceilings and walls indoors. The function is to prevent cracks from appearing on the created surface after drying.
Material Features:
- Weight. Due to its light weight, it is used on various rough substrates.
- Long warranty period. Fiberglass has a longer lifespan than metal.
- Thermal conductivity. The material conducts heat poorly, so it is used to reduce cold bridges.
- price – more expensive than metal sheet;
- cannot tolerate high temperatures;
- does not bend;
- brittle.
Despite the shortcomings of the material, it is used for a wooden base, which allows it to be leveled and made durable.
Kinds
For plastering, painting nets based on fiberglass or polymers are used because they weigh little.
They are used when the thickness of the plaster layer is 2-3 cm; if the thickness is less than 2 cm, then reinforcement is not necessary, since the layer can hold itself. For layers greater than 5 cm, painting nets are not suitable, but some experts apply several layers of reinforcing fabric. It is not enough to simply place the reinforcing material in the plaster layer; it must be fixed to the surface. For concrete walls, dowels are used, for wooden walls, nails or screws are used. This is done to ensure that the plaster does not come off the wall due to poor fastening. There are three types of painting mesh, which differ in mesh size:
- reinforcing putty network;
- serpyanka;
- cobweb mesh.
For reinforcing mesh, the main criteria are the cell size and fiberglass density. If the cells are small, then the mesh is soft. When choosing fiberglass, you need to focus on the type of surface. A mesh with thick threads is suitable for facade decoration, and with thin threads - for interior decoration. Fiberglass is resistant to mechanical stress, temperature changes, and high humidity. Also, the reinforcing mesh is lightweight and does not rust. If you ultimately just need to paint the walls, then this type of mesh is well suited. First, you need to completely reinforce the surface of the walls using a putty network. For this purpose, it is better to take a mesh with a cell size of approximately 5x5 mm, so that the plaster is better fixed. Cracks should not appear on a high-quality reinforced wall.
Serpyanka also consists of square-shaped cells of different sizes, but it most often contains an adhesive base. Supplied in rolls up to 20 meters and narrow in width. Ideal for fiberboard, chipboard, plasterboard, cement and other materials. With its help, defects and cracks are eliminated, the surface of ceilings is leveled, and walls become smooth. To reinforce wall joints, you can purchase a special corner made of mesh, which will simplify the task and help you putty everything well. Gossamer mesh (fiberglass) is perfect for large surfaces, as it comes in a wide roll. Fiberglass increases the adhesion of plaster because it is a non-woven fabric obtained by pressing. Cobwebs are mainly used to reinforce ceilings.
Which one is best to use for plastering?
Reinforcing mesh is produced for a specific type of work. To determine the choice, there are several rules:
- A 3 cm layer of applied mortar should be made of fiberglass.
- Metal gratings are used when applying a solution with a thickness of 3 cm or more. When carrying out external work. And also for plastering baths and swimming pools.
- The plastic cell is designed for coating with gypsum solutions.
- Serpyanka and other tapes are used to reinforce plasterboard joints and cracks.
- Chain-link and fiberglass are used to finish the stove and fireplace. The first option is for cement-clay mortar, the second is for thin plaster.
These rules will help in choosing cellular fabric for certain jobs.
For interior work
For interior work, several types of mesh are used.
- Polymer material. Used for plastering surfaces with gypsum-based mixtures. A 2x2 cell will withstand gypsum mortar and will not crack the surface.
- Fiberglass. Mounted on a rough foundation made of brick or concrete. Holds cement mortar perfectly. It shrinks less, and when dry, cracks do not appear on the surface.
Attention. Using cellular fabric, the work goes quickly and easily. The surface is durable and has a long service life.
For outdoor
To work with outdoor surfaces, you need to choose the right mesh. To do this, follow the rules:
- the choice depends on the plaster used;
- dimensions of the surface on which the work will be carried out;
- thickness of the mortar layer applied to the walls;
- humidity, temperature changes.
Fiberglass cloth. Working with small square meters of facade surface.
- The wall area is large;
- a wall made of aerated concrete or brick, as well as wood;
- if there is high humidity or sudden changes in temperature;
- if the mortar used is cement-based;
- if increased strength is needed for the walls of the building.
Reinforcing metal is available in the following options:
- Chainlink.
- Welded type.
- Expanded metal mesh PVA;
- Solid drawn PVA.
I use different types of meshes for different jobs.
How to do the leveling yourself before gluing?
Putty
The easiest way to level the walls is with putty. The greatest demand is for the dry mixture from which the solution is prepared. Usually this does not present any difficulties; all steps are described in the instructions. Ready-made solutions are also available for sale. They come in two types:
Starters are suitable for smoothing out deep cracks and uneven areas. Final leveling is done with finishing mixtures. They make the wall smoother.
The starting and finishing layers are usually placed perpendicular to each other, which makes it possible to make the wall surface as even as possible. For puttying you will need two spatulas. A short solution is taken from the container, then it is spread on a long spatula and applied to the wall.
Watch a video on how to level a wall using putty:
Read more about how to properly putty walls in this article.
Plaster
The result after plastering the walls will be better than after puttingty. However, you will have to spend more time on this option.
It should be noted that plaster is based on cement or gypsum.
Watch a video on how to putty walls under wallpaper using plaster:
Cement
Cement plaster lasts a long time, has a low cost, and is easy to apply. However, this material cracks easily, so it is applied in a layer no thicker than 2.5 cm or a reinforcing mesh is used. Drying cement plaster will take a lot of time.
Watch a video about plastering walls with cement mortar:
Gypsum based
Unlike cement plaster, gypsum plaster dries quickly, so work with it cannot be delayed.
- Before starting work, the wall is sprayed with water and the first layer of 3-5 mm is applied, which will fill all large depressions and irregularities. The solution for the initial layer is made in a ratio of mixture and water of 40% to 60%.
- The next layer is soil. Its thickness is 5-7 mm. The mixture for this layer is thicker: it contains only 35% water.
- The last layer is a finishing coating with a thickness of 2-4 mm. It is needed for final smoothing of the surface.
When applying plaster, you need to remember that each layer is applied only after the previous one is completely dry.
Watch a video on how to level walls using gypsum plaster:
Drywall
Good results in leveling walls can be achieved by using plasterboard sheets. An additional advantage of drywall is that it has good heat and sound insulation. In addition, this method will help to quickly solve the problem with crooked walls.
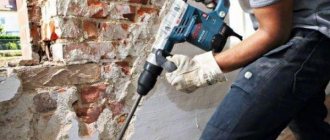
Do I need a mesh on plastered walls?
If you do not use a reinforced sheet, peeling of the plaster from the rough base may occur.
This will be affected by its own weight - the thicker the plaster layer, the heavier it is. Thanks to the mesh, after the solution dries, a monolith is obtained. By using a mesh, you don’t have to worry about the fact that cracks of various types will appear on the wall over time.
Even if the solution was made incorrectly (liquid or, on the contrary, thick), the drain will adhere to the surface and will not cause destruction, shedding, or running off.
Marking of sanding materials
The main characteristic of an abrasive is its grain size, which is designated by the letter “P” in GOST markings. The numbers after the letter indicate the density of abrasive grains per unit area. The higher the value, the smaller the grain size. Some manufacturers use the old markings:
- “H” – when the grain size is calculated in tens of microns;
- “M” – if the fraction size is indicated in microns.
In this case, a larger value of the digital component of the marking indicates the presence of abrasive particles corresponding to a larger number.
For finishing grinding work, it is recommended to use sandpaper or abrasive mesh with the following markings: P150, P180 8-N, 6-N.
Fastening the mesh using technology
Reinforced material used for plastering walls and ceilings must be correctly attached to the base. Each type of cellular fabric is attached using the specified technology.
Some types of mesh cannot be stretched too much or allowed to sag. This can lead to serious consequences.
How to attach reinforced
Technique for fastening metal cellular fabric:
- First of all, measure the required size of the canvas from bottom to top.
- First, the material is fixed at the top. To do this, dowel-nails are fixed at the top corners. The corners of the mesh are placed on them and pressed with self-tapping screws.
- After which the same work is carried out below.
- On the ceiling, the operation is performed in the same way - first the corners are attached, then in the middle.
- The material must be fixed in the middle so that it is adjacent to the rough base in all places. If there is sagging, then the work will be in vain.
How to attach a decorative plaster base
Decorative reinforcing fabric is attached using ordinary self-tapping screws.
They are not completely screwed into the rough base at equal intervals. A mesh is put on them and completely twisted into the base. Attention. The mesh should not be too tight, but there should not be any sagging.
There is an option for mounting on a mounting tape. However, there is a risk of the canvas tearing off the surface during plastering work.
Advice from the experts
- A lamp located below will help to detect wall defects so that the light glides across the surface.
- When cleaning walls from old wallpaper, they need to be moistened with hot water. This way the previous layers will move away from the surface faster.
- If there was mold on the wall, these areas should be treated with white before wallpapering.
- It's easy to check where old plaster is coming off the wall. To do this, you need to tap the entire surface with a hammer. Areas with a ringing sound indicate a problem.
- Before starting all work, the surface must be treated with a deep penetration primer to avoid shedding of the material. The primer can be applied with a roller or brush. As soon as the primer has dried, you need to start plastering. There is no point in pulling, because... A primed surface that becomes dusty over time has no advantages.
When leveling walls under wallpaper using plaster, you need to focus on the properties of the surface in each specific case and choose the most suitable material.
Source
Benefits of subsequent work
One of the main advantages is the application of the solution. And if the gypsum mixture fits well on the base, then it is difficult to work with cement material. It is the mesh with its cells that holds it on the surface until it hardens and does not shrink too much.
After the material has hardened, the plastered wall can be puttyed without fear. It can be painted and covered with decorative plaster. There is no threat that a crack will appear in the middle of the wall due to shrinkage of the house.
Laying tiles is also possible on a reinforced wall. The use of mesh provides surface rigidity for a long time.
Reinforced mesh should be used for plastering work. Each material – metal cells, polymer – has a specific application. By properly fixing the mesh and plastering the wall or ceiling, the surface will remain in its original form for up to 20 years.
How to use
The reinforcing capabilities of painting grids are maximized when they are placed inside the processing layer intended for leveling. The probability of crack formation decreases in proportion to the approach of the mesh to the outer layer of the surface. Technological process for reinforcing the putty layer:
- Prime the plastered wall.
- After the primer has hardened, apply the putty base.
- While the putty is wet, place a fiberglass mesh on the wall and press it into the solution with a tool (trowel).
- Cover the network with an additional layer of putty, leveling it with a wide spatula.
When the reinforced layer has hardened, it is time to process it with a sanding mesh or sandpaper. In order to achieve an ideal aesthetic effect, a finishing compound is applied to the second layer of putty, which, after hardening, is sanded with fine-grain emery cloth. A completely flat plastered wall is coated with a finishing primer, after which it has hardened, painting can begin.
The technology for using mesh with an adhesive layer on drywall is somewhat different:
- The joining boundaries are expanded, cleaned and primed.
- Serpyanka is glued to the frozen joint.
- Putty strokes are applied with force so that the mass squeezes through the mesh and fills the space between the sheets of drywall.
- Without interruption, apply the second layer of putty, gradually leveling it with a spatula.
After sanding the surface and making sure that the primer has completely polymerized, you can begin painting and wallpapering.
The web is also initially glued to the primed surface: the glue is spread with a roller, the strips of fiberglass are leveled and pressed with the same adhesive roller. The putty mixture is applied after the glue has completely hardened. The following steps are identical to previous finishing technologies: sanding and priming.
Note! The next mesh for puttying fiberglass walls should overlap the previous one by at least 5 cm
In order to reinforce the putty layer at the outer corners of the openings, you can use a specially designed corner with attached fiberglass
The corner forms an auxiliary barrier against careless chipping as a result of severe mechanical damage by a person carelessly leaning on these areas. Internal corners are often reinforced with a standard grille or fiberglass
The concept of “reinforced network” is defined, but among building materials there is also a grating for grouting the putty layer. The product is based on woven glass fiber in a large checkered pattern. An abrasive is attached to the mesh itself with glue (a common type is silicon carbide), which is why the type of mesh is called abrasive.
Advantages of the product over sandpaper:
- Efficiency . After the puttying is completed, it makes sense to sand the surface - an abrasive mesh will cover a larger area three times faster than sandpaper.
- Easy cleaning process. The emery quickly becomes clogged, and attempts to clean it are futile. Just hit the mesh a few times and the clog will fall out on its own.
As you can see, painting and fiberglass meshes for reinforcing the putty layer are useful building materials for finishing. Thanks to such products, you can securely fix the putty on the surface and get smooth walls.
Purpose of the painting mesh for putty
Painting mesh for putty is used to prepare walls for final finishing. Today, fiberglass-based wall mesh is used. They are made from molten glass by drawing. Such painting nets are strong, elastic and dense.
Fiberglass mesh helps:
- level the wall;
- prevent cracks from appearing;
- strengthen the mortar on the walls.
The painting mesh for the walls is placed in the inner layer of putty. This reduces the deformation of the putty layer during mechanical impact.
Why do we need reinforcing mesh? We use it for its intended purpose.
Reinforcing mesh is widely used by plasterers to strengthen a layer of putty or plaster. It allows you to eliminate the occurrence of cracks at the junction of heterogeneous materials, for example, at the junction of walls and window frames, door frames, partitions. When finishing surfaces, the mesh helps smooth out the joints between walls and ceilings, joints between walls, and also aligns corners.
Cracks can also form from shrinkage of finishing materials due to temperature changes.
To avoid the appearance of such defects, you can use special non-shrink mixtures, which include gypsum and polymer. The gradual shrinkage of the building can also be another cause of cracks. This can subsequently lead to damage to the finish. That is why mesh is used for puttying walls.
Of course, this is not a solution to all situations - even several reinforcing layers will not hide serious cracks, but cracks during normal shrinkage will not show themselves in the putty.
Today, reinforcing mesh (serpyanka) is made from polyester and fiberglass. The use of such modern materials ensures a long service life, since it is not afraid of moisture and does not rot. There are several ways to attach the serpyanka to the wall.
- Method one - the mesh is attached to the wall using a special adhesive composition, which is first applied to the surface. After this, the mesh should be pressed tightly and another layer of glue should be applied on the outside. When the serpyanka is fixed and well dried, proceed to the next stage - puttying. What should I use to glue the painting mesh onto the ceiling? But this method is not very practical, especially if the repair is done by an inexperienced person. The fact is that when using this method when applying putty, empty space may form in the mesh cells, which negatively affects the quality of the finish. Therefore, most often reinforcement is performed without applying glue.
- This method is performed using the following technology: after preliminary preparation of the base, a base layer of putty is applied, then a serpyanka is pressed into it and another layer of putty is immediately applied. For a person new to the construction business, the method may seem quite complicated to implement, but the good thing about it is that the formation of air cushions between the cells is completely eliminated.
As a rule, reinforcement is performed if the surface is prepared for painting. Small cracks will be hidden under the wallpaper, so reinforcement is usually not done.
How to make straight corners with your own hands?
If you need to straighten an external corner, i.e. the one that protrudes outward, it is better to use a perforated metal corner.
- To do this, apply a layer of putty or drywall adhesive to the walls on both sides of the corner.
- Then the metal corner is pressed into the adhesive.
- The excess mixture is removed, and the surface is then cleaned with sandpaper.
The inner corner is also leveled by applying putty:
- The correct joint is formed using a rule, performing movements first along one wall and then along the other.
- The applied layer of putty is sanded with sandpaper, and then a finishing layer is applied to eliminate minor flaws.
Ideally even corners are formed when using plasterboard panels.
How to choose a painting mesh
The best painting meshes for putty are considered to be fiberglass meshes with 2x2 mm cells. Such meshes are widely used by painters and plasterers to strengthen walls.
Using fiberglass mesh, problem walls can be easily leveled. If you seal the defects with a mesh, the wall turns out even and smooth.
Painting mesh made of fiberglass has the following useful properties:
- resists alkalis and rust;
- has a long service life;
- makes the putty layer stronger;
- has low weight;
- protects walls from cracks due to changes in temperature and humidity.
Grinding
After completing all the steps to reinforce the walls, it is necessary to carry out finishing putty and sand the surfaces. The final putty is carried out in the same way as the main one. The main thing is to wait until the layer with the painting mesh dries, otherwise the coating will not stick. The thickness of the finishing putty should be approximately 1-2 mm. After drying, you can proceed to sanding. Sanding is carried out to ensure that the walls are perfectly even and smooth, because the appearance of the room depends on this. In addition, paint or wallpaper does not hide defects, but emphasizes them. If the surface is uneven, the wallpaper may peel off or wrinkle. To achieve evenness of the walls, sanding is carried out several times in a well-lit place so that small defects are clearly visible.
After completing the putty, you cannot proceed to sanding earlier than a day later; you need to wait until the putty layer is completely dry. For sanding, use fine sandpaper or a sanding sponge. It is necessary to run it over the entire surface to remove all protrusions and irregularities. If there are large depressions, they must be filled with putty. When choosing sandpaper, you need to look at its grain size. At the very beginning of sanding it is better to use coarse-grained sandpaper, and at the end to give smoothness - fine-grained sandpaper.
Grinding is carried out in several stages, but the technology is the same - small areas of the surface are processed with rotational movements from top to bottom. During the process, the grit of the sandpaper changes. Typically, fine-grained sandpaper is used at the last stage. For hard-to-reach places, use a sanding sponge or you can try folding sandpaper several times. In addition to sandpaper, you can use an abrasive mesh. Its main difference from paper is its high wear resistance; it is less clogged with dust, but also higher in price. If you have a grinding machine, the grinding process will greatly speed up. Moreover, the quality of work will improve. Sandpaper is also attached to the machine and the surface is processed.
How to properly glue the painting mesh, see the video below.
Application of painting mesh
Putty on the mesh must be carried out correctly, then you can be sure that the result will last a long time and the material can reliably protect the surface. It is best to place the mesh material under the leveling solution, but also keep in mind that the best protection is achieved when it is installed as close to the finish as possible.
It is best to place the mesh material under the leveling solution.
Procedure for sticking serpyanka
If you choose a serpyanka with an adhesive layer, then its installation will differ slightly from the standard stages of working with painting meshes. In this case, you should perform the following list of actions:
- The joint areas are expanded, after which they are thoroughly cleaned of contaminants and a primer solution is applied.
- When the solution is completely dry, proceed to gluing the mesh.
- The putty solution should be applied to the surface with reinforcement, then it will be possible to apply it under the mesh base.
- Then they immediately proceed to applying the 2nd layer of solution, leveling the coating with a spatula.
After the surface is sanded, a primer is applied, and it is dried, you can proceed to finishing the surface.
The putty solution should be applied to the surface with reinforcement, then it will be possible to apply it under the mesh base.
Wide fiberglass mesh
The fiberglass painting mesh will be attached to the base according to a similar principle. All necessary actions must be performed in the order described below:
- The plaster layer is primed.
- When it is dry, apply a putty solution.
- Fiberglass is attached to the wet base of the solution; it should be pressed into the depth of the layer with a spatula.
- Apply the next layer of putty and level it with a spatula.
When the drying stage of the mixture has passed, they proceed to grinding the surface; you can use sandpaper or a sander. If you want to get the most even base possible, then apply finishing putty, which is also sanded. Before painting or wallpapering, apply priming.
If you want to get the most even base possible, then apply finishing putty, which is also sanded.
Fiberglass web
Cobweb mesh for putty is most often used before painting work due to its thinness. It can be laid between putty layers, or it can also be laid immediately before painting, as a finishing layer.
Before gluing the web, the walls or ceiling are primed and sanded. The gluing will be standard, as when working with wallpaper, but the strips are glued overlapping, then cutting off these lines with a knife. The surface of the fiberglass must be treated with a rubber roller so that all the air comes out from under it. If the installation takes place between putty layers, then the latter is sanded with fine-grained sandpaper.
When choosing a painting mesh as a finishing layer, surface imperfections may appear, and joint zones may appear through the paint.
Cobweb mesh for putty is most often used before painting work due to its thinness.
Puttying walls with a mesh can strengthen the base, protecting it from deformations and other negative effects of external factors. This is the answer to the question - why use a painting mesh. The process is simple, so you can do it yourself, saving on the services of professionals.
Putty mesh will help in the fight against cracks
1. Purpose of the reinforcing mesh
2.Types and features of painting nets
3.Use of mesh for putty
SNiP 3.04.01-87 “Insulating and finishing coatings” states that upon completion of plastering work, the depth of unevenness of the plastered surface when checked by the two-meter rule should not exceed: 5 mm for simple, 3 mm for improved and 2 mm for high-quality plaster.
Purpose of the reinforcing mesh
All uneven surfaces of the plaster are finally leveled with putty. Gypsum putty, unlike automotive putty, is not very durable and can crack over time. Cracks can also appear on polymer putties if the bases are movable: a new brick house that shrinks; joints and corners of gypsum plasterboard, gypsum board and gypsum board sheets; joints of reinforced concrete slabs of panel houses; wooden floors, etc.
To avoid the appearance and spread of cracks, a reinforcing mesh for putty (painting mesh) is used. It is made of fiberglass impregnated with polyacrylic dispersion. The grid is placed inside the leveling layer, but more on that later. Putty reinforcement reduces the impact of vibration and reduces the deformation of finishing layers under mechanical stress.
If, due to improper preparation of putty from a dry mixture or failure to follow the technology for finishing work, the putty begins to peel off, the reinforcing mesh will hold it in place.
Types and features of painting nets
For puttying work, a fiberglass mesh with a cell size of 2 mm by 2 mm is most often used. Fiberglass mesh is resistant to alkalis, does not rust, is durable, lightweight, and at the same time significantly improves the mechanical strength of the putty layer. The mesh takes on loads caused by sudden and repeated changes in temperature and humidity in the room.
Painting mesh in wide rolls (usually 1 m) is most often used for:
- performing reinforcement of the putty layer during finishing work;
- protecting the entire surface of walls and ceilings from cracks before painting and wallpapering;
- giving the wall surface impact-resistant properties, for example, in public places;
- reinforcement of the waterproofing layer.
Serpyanka is the same painting fiberglass mesh for putty with a square cell, only in the form of a narrow strip and often with an adhesive applied. It is produced in small rolls with a width from 45 mm to 250 mm and a length of up to 200 m. Serpyanka is most often used for:
- reinforcement of joints of sheets of gypsum plasterboard, fiberboard, chipboard, fiberboard and similar sheet materials;
- reinforcing putty on internal and external corners;
- strengthening door and window slopes;
- sealing cracks in walls and ceilings;
- local leveling of the surface of ceilings, plaster on walls.
Painting fiberglass or gossamer mesh is a non-woven material produced by pressing chaotically arranged thin glass fibers. The small thickness and loose structure of fiberglass allows for reinforcement where a relatively thick painting mesh is not applicable.
For example, when leveling ceilings with vapor-permeable gypsum putty, the adhesion of which to reinforced concrete slabs is rather weak. Fiberglass is glued to the surface of the slabs and increases the adhesion of gypsum putty due to its uneven surface. In addition, it is convenient for finishing large volumes, as it is supplied in wide-width rolls.
Application of mesh for putty
The reinforcing properties of the putty mesh are best demonstrated when placed inside the leveling layer. Moreover, the closer to the outer surface it is located, the less likely it is for cracks to appear. The putty reinforcement technology is as follows:
- the surface of the plaster is treated with a primer,
- after it has completely dried, the first layer of putty is applied,
- immediately a reinforcing fiberglass mesh is applied to the still wet first layer and pressed into it with a spatula,
- A second thin layer of putty is applied on top of the mesh and leveled with a wide spatula.
After the reinforced layer has completely dried, it is sanded with sandpaper or a sanding mesh. To perfectly level the surface of walls or ceilings, a final very thin layer of finishing putty is applied, which, after complete drying, is sanded with fine-grained sandpaper or mesh. After applying and completely drying the final primer, you can begin painting work.
How to use paint mesh
Procedure for working with the painting mesh:
- treat the wall surface with a primer;
- after it dries, apply the first layer of putty;
- Place a fiberglass mesh on the wet layer and press it in with a spatula;
- Apply a second, thin layer of putty to the mesh and level it with a wide spatula;
- when the wall is dry, sand the top layer with sandpaper;
- clean the wall from dust;
- Apply a thin layer of primer, which, after drying, is sanded with fine-grained sandpaper.
Now the wall is ready for finishing, for example, painting.
Procedure for sticking serpyanka
Applying a mesh of small width, and even with an adhesive layer, is much easier than working with canvases. In the process of preparing the base, the following is carried out:
- jointing;
- further cleaning of the treated areas from dust and dirt;
- primer.
A strip of serpyanka is glued onto a dry surface, which is covered with a layer of putty. The mixture should be applied with some force so that all cells of the painting mesh are completely filled with the plastic mixture. Leaving even the slightest voids is not allowed!
You can cover the mesh with a second layer of putty immediately. To ensure that corners and joints look perfect, the finishing composition should be leveled carefully, using, if necessary, corner or wide spatulas. After final drying, the leveling layer is adjusted using light sanding. Only after this procedure is it possible to proceed to the next stage of finishing work.
For a clearer and more reliable design of external corners, it is recommended to purchase metal or plastic corners with sickle tape glued to them. Additional elements can protect the protruding parts of enclosing structures from chipping in the event of accidental impacts. Internal corners do not need such protection.
How to putty walls with mesh under wallpaper?
So, you have decided to level the walls. When answering the question of how to properly putty walls under wallpaper, determine the type of wall design:
- Painting the walls.
- Wallpaper.
- Drywall for wallpaper.
And putty comes in different types. For example, according to the degree of readiness they distinguish:
- Ready-made, which can be used immediately after purchase. However, they have a limited shelf life.
- Dry, which must be diluted in certain proportions. But it can be stored for a long time.
The composition of the putty is:
- Plaster.
- Polymer.
- Cement.
The first is well suited for finishing walls indoors. However, when doing façade work, it should be abandoned. Polymer putty gives a perfectly smooth surface. Therefore, it is suitable for walls to be painted or covered with thin wallpaper. Cement treatment is moisture resistant, therefore it is an ideal option for kitchens and baths. But there is a minus: shrinkage after drying.
It is not always necessary to putty walls with a mesh under wallpaper, only in the case of a problematic wooden base. But if you decide, then place the reinforcing mesh overlapping. This way there will be no gaps. The mesh will hold the putty better. There are different types of mesh. The difference is in the size of the cells. For rougher finishes, larger cells are suitable.
It is necessary to putty plasterboard walls under wallpaper. Moreover, it is necessary to treat the entire surface, even despite its evenness. The fact is that if you glue the wallpaper directly onto the drywall, then nothing can tear it off. During the next renovation, you will either have to “tear off” everything with drywall, or glue it on top of the old wallpaper.
Why is this necessary?
Previously, no one leveled the walls before gluing wallpaper. The only thing that was done was to cover the walls with newspapers using PVA glue, which slightly masked surface imperfections. Another option is pasting over old wallpaper. Even now in apartments of old construction you can find such puff pastries from previous wallpapers.
However, this method will not be able to hide all the irregularities. Moreover, defects will be visible if you glue wallpaper directly onto plaster or concrete (read how to glue wallpaper on walls here). Even gluing to drywall requires preliminary work, regardless of what wallpaper is chosen. The following will stand out on the paper web:
- any depressions;
- small tubercles;
- differences in levels between layers of plaster.
If the paper is too thin, then they can not only be felt by running your hand, but also noticed visually. On thicker vinyl or non-woven fabric, small irregularities will not be emphasized as much as on paper. But there are pitfalls here. Pasting such wallpaper onto an unprepared surface will, over time, cause the material to begin to peel away under its own weight. First, voids will appear under the canvas, which will then only grow.
Painting fiberglass mesh BIRSMIX
Fiberglass painting mesh, mesh 2x2 mm, BIRSMIX is used for surface reinforcement when carrying out internal plastering and painting work in order to prevent the formation of cracks.
Advantages of the BIRSMIX painting mesh:
- does not decompose over time;
- resistant to alkalis;
- helps overcome internal stresses caused by sudden changes in temperature and air humidity;
- has high resistance to tearing and stretching;
- protects the surface from cracking;
- easy to handle and use.
Painting fiberglass mesh for putty BIRSMIX can be used with a large number of materials, such as drywall, concrete and others.
RUE "Belstroytsentr"
The article analyzes the causes of cracks in road surfaces. Research by scientists on the development of criteria for the crack resistance of road surfaces and corresponding indicators of the resistance of asphalt concrete to cracking is noted. The choice of the correct criterion determines the success of measures to ensure the crack resistance of the coating.
The reasons for the appearance of cracks in road pavements have been analyzed in the article. The studies of scientists on development of pavement crack resistance criteria and corresponding parameters of asphalt concrete stability to crack formation have been noted. A choice of the correct criterion predetermines progress in measures on preventing crack formation in road pavements.
INTRODUCTION
Damage to road surfaces during operation significantly reduces their service life. Thus, instead of the expected 15–20 years, the most common asphalt concrete pavements in the republic fail in 6–8 years. Due to the lack of sufficient funds, repair work has been postponed indefinitely. As a result, the damage area can reach up to 60%–80% of the total coating area [1].
The main types of destruction of asphalt concrete pavements, depending on the nature, location and size, include cracks, potholes, patches, rutting, spalling, peeling, and destruction of edges [2]. The most typical type of damage is cracks. The main reasons for their formation are the influence of weather and climatic factors, transport loads, and changes in the properties of materials over time (Fig. 1).
Road pavements cannot be absolutely crack-resistant. However, the use of effective methods to combat cracking would increase the service life of coatings and reduce the costs of their maintenance and repair by increasing the resistance of layers to emerging cracks.
CAUSES OF CRACKS
Many scientists, like in our country - V. A. Verenko, V. N. Yaromko, V. P. Kryukov; in Russia - A. M. Boguslavsky, L. B. Gezentsvey, N. V. Gorelyshev, V. D. Kazarnovsky, V. A. Kretov, A. R. Krasnoperov, V. N. Kononov, B. S. Radovsky , A. V. Rudensky, Yu. E. Nikolsky, and abroad - D. Sousa, P. Paris, D. Cox, R. Wu, K. Monosmith, F. Zou, R. Litton, V. Kogale, – conducted research to study crack formation processes. Much work has been done both to improve the composition of asphalt concrete and to develop structural and technological measures to reduce cracking.
The main causes of destruction of the coating in the form of cracks are: the impact of transport loads, temperature changes from positive to negative, low negative temperatures, cracks and seams in the underlying layers, differences in the thermophysical properties of the materials of layers of adjacent coatings, uneven compaction of the roadbed and layers of road pavement, the formation of heaves , accompanied by the appearance of a network of cracks in the road pavement.
Depending on the nature, cracking takes different forms:
– reflected cracks (Fig. 2a): arise as a result of stress concentration in asphalt concrete above the seams and cracks of the base during movements of slabs and base blocks;
– temperature cracks (Fig. 2b): formed due to the occurrence of temperature stresses during cooling of the coating, usually after several years due to the aging of bitumen, due to which asphalt concrete loses its deformability at negative temperatures;
– power cracks (Fig. 2c): formed due to the occurrence of stresses from the action of a transport load with insufficient bearing capacity of the base and (or) with insufficient bending strength of asphalt concrete;
– technological cracks (Fig. 2d): they arise as a result of incorrect selection of the composition of the asphalt concrete mixture, violation of the technology of laying layers and compaction of the mixture, as well as in places of longitudinal and transverse junctions of adjacent strips of asphalt concrete pavement;
– fatigue cracks: they appear mainly in the form of transverse cracks on the lower surface of the road surface due to the deflection of layers of road pavement, then within 6–12 years, depending on traffic intensity and climatic factors, they grow through the entire thickness of the road surface; may also develop from the surface of the coating downwards.
Rice. 1. Types of deformations of the underlying coating layer,
promoting reflected cracking
A)
b)
V)
G)
Rice.
2. Types of cracks in road surfaces In any case, the main influence on the operation of road surfaces and the process of crack formation on them is exerted by transport loads and the entire complex of weather and climatic conditions. Under the influence of transport load, the asphalt concrete pavement bends; maximum tensile stresses arise in the lower zone, and their magnitude depends on the thickness of the pavement, the ratio of the elastic moduli of the pavement and the base [3].
In the summer, partially autumn and winter seasons, when the soil of the roadbed has high rigidity, as well as in any period for structures with bases of increased rigidity, under the influence of transport at the bottom of the monolithic layer (z = 0) under the center of the wheel imprint, as in layer surface (z = h), compressive horizontal normal stresses (+sу) arise (y = 0; z = 0) (Fig. 3). In the spring, when the soil of the roadbed is waterlogged, tensile stresses (-sу) (y = 0; z = 0) arise in the lower part of the covering (on the base), and surface tensile stresses (-sу) (y > y0 (z = h); z = h), as a rule, much less. In this case, at a certain distance y0 (z = 0), compressive horizontal normal stresses (+sу) will appear (y > y0 (z = 0); z = 0). At the same time, surface horizontal normal tensile stresses (-sу) (y > y0 (z = h); z = h) always arise on the coating surface at a distance y > y0 (z = h) [4].
As a result, single power cracks with branches and curvatures may form, located at different angles to the axis of the roadway. In addition, the action of a transport load can cause the appearance of reflected cracks in the upper layer of the pavement due to the vertical displacement of the lower asphalt concrete layer or cement concrete slabs that occurs when the wheel passes from one edge of the crack to the other (it is assumed that vertical displacements disrupt the continuity in the underlying layers) (Fig. 4) [5].
Rice. 3. Diagram of deflection of the coating under the action of loads from the wheel
Rice. 4. Mechanism of reflected cracking
under transport load
Important weather and climatic factors that influence the performance of road pavements include air temperature and humidity, solar radiation, and average precipitation. The impact of the above factors can cause in asphalt concrete pavements stretching from non-free compression during cooling, deformation from changes in the humidity of asphalt concrete with frequent temperature transitions through 0? coating with a temperature difference at the top and bottom of the coating.
Considering asphalt concrete layers on a cement concrete base, we note that daily temperature fluctuations cause not only horizontal movement in the cement concrete layer, they also cause bending and warping of the slab itself, which creates shear and tensile stresses in the lower part of the asphalt concrete layer above the seam or crack (Fig. 5) [6].
Rice. 5. Stresses in the asphalt concrete coating layer on a cement concrete base caused by daily temperature fluctuations
In addition to air temperature, solar radiation has a significant impact on the surface of the coating. The equivalent heating temperature of the coating by solar radiation, taking into account the dust content of the air, is determined by the formula
(1)
where r is the absorption coefficient;
I – intensity of solar radiation;
an – heat transfer coefficient;
Кз – dust coefficient.
As a result of daily temperature fluctuations, the phenomenon of thermal expansion-contraction, and the impact of solar radiation on the road surface, temperature and reflected cracks appear in the pavement. Temperature cracks form across the entire width of the pavement (transverse) with a clearly defined step of 2–25 m. Their appearance is caused by tensile stresses, which arise mainly due to sudden changes in air temperature: asphalt concrete becomes brittle, uneven cooling of the structural layers of the road pavement occurs and unfree contraction occurs. cooling coatings.
Some authors in their works cite the main reason for the appearance of reflected cracks as the effect of temperature fluctuations, which cause a concentration of thermal stresses in the upper layer of the coating or reinforcement, resulting in a breakdown of adhesion between the layers, or the crack is reflected into the overlying layer. Some studies suggest that thermal stresses are initiated by rapid cooling of the top layer, which leads to the emergence of critical tensile stresses that cause crack development. In addition, there are opinions that the most important effect is the opening of cracks as a result of bending of the road pavement structure (Fig. 6) [6, 7].
Rice. 6. Mechanisms of reflected cracking under the influence of temperature
The presence of traffic load has an adverse effect on the road surface mainly in the spring; cooling factors of the coating - especially strong when the temperature drops sharply, as a rule, at the beginning of winter and early spring. Consequently, the effect of these factors coincides with the time of year. However, maximum tensile stresses from movement occur in the lower zone of the coating, and from natural factors - in the upper zone, which allows us to make the assumption that crack resistance under traffic conditions does not depend on crack resistance under the influence of natural factors.
As for natural factors, the main one can be called the stretching of asphalt concrete due to unfree compression during cooling. In this case, crack resistance, according to B.I. Ladygin, is ensured only by adjusting the properties of asphalt concrete in accordance with the requirements for the appropriate climatic conditions.
JUSTIFICATION OF CRITERIA FOR CRACK RESISTANCE OF ROAD PAVEMENTS
Criteria for temperature crack resistance, both empirical and experimental-theoretical, were proposed by A. M. Boguslavsky, B. I. Ladygin, V. V. Mozgov, B. S. Radovsky. Much attention is paid to this issue in the works of V. A. Verenko.
Scientists all over the world attach importance to various factors that influence the intensity of cracking. In European countries, considerable attention is paid to research into the rheological properties of road bitumen and polymer-bitumen binders. In Japan, great importance is attached to the analysis of the results of field observations of the formation of cracks during the operation of asphalt concrete pavements: it has been established that the number of transverse cracks depends not only on climatic, transport and material science factors, but also on the design of the road pavement, including the coefficient of friction of asphalt concrete along underlying layer. Similar approaches to assessing crack resistance can be found in numerous publications by Russian scientists [8].
During the analysis of scientific publications, it can be noted that an integrated approach should prevail when assessing the crack resistance of asphalt concrete pavements. It is necessary to simultaneously take into account the design features of the road pavement, the properties of materials, temperature distribution gradients, external loads and many other factors. Therefore, the task of developing crack resistance criteria is not simple.
It has been proven that the crack resistance of asphalt concrete pavements depends on the rheological and strength properties of asphalt concrete, the design of the road pavement, and operating conditions. In turn, the strength of asphalt concrete is characterized by a pronounced time dependence, and the intensity of relaxation processes during the deformation and destruction of bitumen materials largely depends on temperature and the level of operating stresses [9].
In general, the resistance of a material to the appearance of cracks of various types is determined by its following properties: thermophysical (coefficient of linear thermal expansion), deformation (relaxation modulus at design low temperature), strength (ultimate structural strength) and fatigue (level of damage to the coating material) [10] .
Thermal expansion is the most important consideration when assessing the resistance of a material to thermal cracking. Most often, when assessing temperature crack resistance, the coefficient of linear expansion a, deg-1 is used
(2)
where l0 is the initial length of the sample, m;
Dl – elongation of the sample during heating (cooling), m, by temperature DT, oC.
Coefficient a is the most important when assessing the stress state of a coating material: the higher its values, the greater the unrealized thermal deformation and the higher the stress. If the linear expansion coefficient a is zero, the problem of temperature cracks does not arise.
According to studies conducted back in the 60s of the last century, A. M. Boguslavsky established numerical values of the coefficient of linear expansion depending on the type of asphalt concrete mixture and brand of binder (Table 1). In all cases, the coefficient of linear expansion of the base is assumed to be 0.00001, the cooling gradient (t1 - t2) = 10 degrees, the cooling time is 3600 s [11].
Table 1. Linear expansion coefficient values
| Mixture name | Linear expansion coefficient a |
| Warm fine grain | 0,00005 |
| Hot: | |
| sandy | 0,000068 |
| fine-grained | 0,00007 |
| fine-grained | 0,00007 |
| Cold | 0,00003 |
According to DMD 02191.9.005 [12], when determining the structural resistance of asphalt concrete to cracking after testing samples, the value of the linear expansion coefficient is calculated using formula (2), then the temperature stress of asphalt concrete when cooled to a temperature of minus 20 °C is determined using the formula
(3)
where at is the coefficient of linear expansion of asphalt concrete;
m – coefficient of transverse expansion of asphalt concrete (assumed equal to 0.1);
E – elastic modulus of asphalt concrete;
Kr – relaxation coefficient, depending on the type of binder and its viscosity; accepted: for bitumen BND 60/90 – 1.15; for bitumen BND 90/130 – 1.00; for bitumen BMA 100/130 – 0.70.
The choice of the correct criterion for the crack resistance of asphalt concrete is one of the conditions that predetermines the success of measures to ensure the crack resistance of asphalt concrete pavements. According to B.I. Ladygin, focusing on a criterion that does not characterize the actual operating conditions of asphalt concrete, its actual stress state, or the climatic features of the road construction area will not allow purposefully and effectively improving the quality of asphalt concrete.
The empirical crack resistance criteria adopted in the 60s of the last century are not a conclusion from theoretical considerations regarding the structural and mechanical properties of asphalt concrete and its stress state in road surfaces. Here are some of these “old” criteria: the compressive strength of asphalt concrete at a temperature of 0 °C should not exceed 120 kg/cm2 (GOST 9128-67); the deflection of the beam at a temperature of 0 °C must be at least 30 mm, at a temperature of minus 15 °C - at least 9 mm, and the tensile strength at a temperature of minus 15 °C must exceed the strength at a temperature of 0 °C (S. O. Gordeev). More justified criteria for assessing crack resistance are based on comparing the deformations or stresses occurring in the coating, calculated from various dependencies, with similar limit values for asphalt concrete [13].
Am. :
(4)
where a1, a2 – coefficient of thermal expansion at temperature q2 of asphalt concrete and base, respectively (0.00001);
q2, q1 – final and initial cooling temperatures;
E – elastic modulus;
u1 – cooling rate from q1 to q2;
u0 = 0.4 deg/h – equilibrium cooling rate at which internal stresses have time to relax;
m – Poisson’s ratio, depends on the viscosity of bitumen.
According to N.N. Ivanov, with sudden cooling, the limiting temperature deformation in terms of crack resistance will be equal to:
(5)
where a1 is the coefficient of thermal expansion of the coating;
(q1 - q2) – temperature drop during the time during which stress relaxation does not have time to occur (for example, 10 hours).
The temperature deformation calculated from various dependencies is compared with the maximum permissible residual deformation of asphalt concrete.
V. A. Verenko proposed a material science criterion for crack resistance (crack resistance index IT), reflecting the ability of the road surface material to resist the appearance of temperature cracks:
(6)
where R0 is the splitting strength at a temperature of 0? C and a strain rate of 3 mm/min;
RC – ultimate maximum structural strength.
It is now generally accepted that temperature crack resistance is ensured if the tensile stresses sT arising during cooling of the coating, taking into account the relaxation ability, do not exceed the long-term strength limit RDL:
(7)
The stresses arising in the asphalt concrete pavement during cooling were initially determined from the dependencies for the temperature stresses of elastic bodies:
(8)
where a is the coefficient of linear thermal expansion;
(q1 - q2) – temperature range in which asphalt concrete works during the cold season;
m – Poisson’s ratio (not always taken into account).
After discovering the rheological properties of asphalt concrete, N. N. Ivanov modified the expression
(9)
where q is the maximum possible temperature drop in 1 hour.
N.V. Gorelyshev obtained a new dependence that indirectly takes into account the phenomena of relaxation:
(10)
where en is the creep of asphalt concrete;
m – proportionality coefficient.
The long-term strength of asphalt concrete is consistent with the hypothesis of the irreversibility of the destruction process, expressed in the principle of linear summation of damage. Thus, the Bailey failure criterion makes it possible to calculate the service time of an asphalt concrete pavement before the formation of a crack using the finite element method (Fig. 7).
Rice. 7. Flowchart for calculating the time until a crack forms
on asphalt concrete pavement
In accordance with the Bailey criterion, to assess the crack resistance of asphalt concrete, it is necessary to know the totality of the values of tensile stresses in the pavement and the time of their action. It is accepted that tensile stresses in an asphalt concrete pavement arise as a result of transport loads, from a decrease in the temperature of asphalt concrete, from temperature contraction of adjacent slabs of a more rigid block base, from warping of base slabs due to a temperature gradient across their thickness and from uneven subsidence and swelling of the base.
The approach of B.I. Ladygin is also known, who received an expression for determining the durability (service life) of asphalt concrete by crack resistance T in years, taking into account the fact that at the moment of crack formation, the viscosity of asphalt concrete reaches the peak of the permissible viscosity according to crack resistance conditions:
(11)
where [h] is the limiting value of the viscosity of crack-resistant asphalt concrete at the design low temperature;
hn – initial viscosity of asphalt concrete at the same temperature (viscosity at the time of laying);
nc is the aging coefficient of asphalt concrete, expresses the annual growth rate of the logarithm of viscosity;
1.1 – coefficient of reduction of the initial viscosity to the conditionally initial one, corresponding to a linear change in the logarithm of viscosity over time.
An analysis of a large number of scientific publications and regulatory literature allows us to conclude that there are many approaches to assessing the crack resistance of road surfaces. However, the influence of transport loads, temperature fluctuations, and design features of the road pavement are to one degree or another taken into account in the crack resistance indicator, or the influence of several factors is taken into account simultaneously.
For a comprehensive assessment of crack resistance, it is necessary to determine by laboratory methods the temperature-time dependencies of tensile strength (long-term strength), temperature deformation, elastic modulus and thermal shrinkage coefficient of asphalt concrete. These data make it possible to estimate the operating time of asphalt concrete until the first crack appears in the road surface.
CONCLUSION
1 Damage that occurs in road surfaces during operation significantly reduces their service life. In this case, cracks make up 60% of the total number of coating failures. This indicates the relevance of the problem of cracking in road construction and the need to find effective solutions to increase the crack resistance of coatings and eliminate existing cracks.
2 Much work has been done by scientists both to improve the composition of asphalt concrete and to develop structural and technological measures to reduce cracking. The materials science approach is effective in preventing the occurrence of temperature cracks. Constructive solutions are aimed at combating reflected cracking, however, these measures are a temporary measure that can slow down the development of reflected cracks for up to 3–4 years. There is currently no effective comprehensive solution to the problem of crack formation on road surfaces, combining both a materials science approach and a structural and technological one.
3 In order to increase the service life of road pavements, the authors consider it advisable to include pavement crack resistance as one of the main criteria in the calculation of road pavements. The criterion for the crack resistance of asphalt concrete should characterize the actual operating conditions of the material, its actual stress state, and the climatic features of the area where the highway passes, which will make it possible to purposefully and effectively improve the quality and resistance of asphalt concrete to cracking. In addition, it is important to take into account the design features of the road pavement in this indicator.
BIBLIOGRAPHY
1. Nosov, V.P. Increasing the service life of road pavements is a strategic task of road science / V.P. Nosov // Automobile roads. – 2006. – No. 12. – P. 81–86.
2. Leonovich, I. I. Diagnostics and quality management of highways: textbook. allowance / I. I. Leonovich, S. V. Bogdanovich, I. V. Nesterovich. – Minsk: New knowledge, 2011. – 350 p.
3. Strength and durability of asphalt concrete / ed. B.I. Ladygina. – Minsk: Science and Technology, 1972. – 187 p.
4. The influence of surface horizontal tensile stresses on the crack resistance of asphalt concrete layers of road pavement, taking into account the distribution of wheel passages along the width of the roadway: tr. Odessa State Academy of Construction and Architecture, vol. 37; N. G. Chausov, M. N. Bondar, A. N. Besarab, V. N. Paratsa. – Odessa, 2010.
5. Mukhtar, M. Interlayer Stress Absorbing Composite (ISAC) for Mitigating Reflection Cracking in Asphalt Concrete Overlays, Project IHR-533, Report No. UILU-ENG-96-2006, Illinois Cooperative Highway Research Program, Illinois Department of Transportation / M. Mukhtar, B. Dempsey. – 1996.
6. Nunn, M. An investigation of reflection cracking in composite pavements in the United Kingdom, Proceedings of the 1st International RILEM Conference on Reflective Cracking in Pavements, Assessment and Control, Liege University, Belgium, Edited by J. M. Rigo et al., March 1989 .
7. Lytton, R. L. Use of Geotextiles for Reinforcement and Strain Relief in Asphaltic Concrete. Geotextiles and Geomembranes / R. L. Lytton. – 1989. – Vol. 8. – R. 217–237.
8. Design of asphalt concrete composition and methods of testing. Roads and bridges: overview information "SoyuzdorNII", vol. 6. – M., 2005.
9. Volkov, M. I. Road construction materials / M. I. Volkov, I. M. Borshch, I. M. Grushko, I. V. Korolev. – M.: Transport, 1975. – 527 p.
10. Verenko, V. A. Deformation and destruction of road surfaces: causes and solutions / V. A. Verenko. – Minsk: Belarusian Encyclopedia named after P. Brouki, 2008. – 304 p.
11. Boguslavsky, A. M. Fundamentals of the rheology of asphalt concrete / A. M. Boguslavsky, L. A. Boguslavsky. – M.: Higher School, 1972. – 199 p.
12. Recommendations for ensuring the structural stability of asphalt concrete under modern traffic loads: DMD 02191.9.005-2008. – Enter. 02/01/2009. – Minsk: Ministry of Transport, 2009. – 12 p.
13. Method for quantitative assessment of the temperature crack resistance of asphalt concrete pavements laid on foundations with seams and cracks: Tr. State Enterprise "RosdorNII", issue. 10; A. Kretov, V. D. Kazarnovsky, A. R. Krasnoperov. – M., 2000.
Ceiling plaster on mesh
As we can see, plastering ceilings is not the easiest part of the renovation. To perform this task efficiently, you must have special knowledge and skills. Before you start plastering, the ceiling must be carefully prepared. However, even a thoroughly prepared surface cannot serve as a 100% guarantee of the strength and solidity of the plaster layer. During the plastering process, various errors in work are possible, for example, violations of proportions, exceeding the permissible thickness, non-compliance with temperature conditions, sudden temperature changes. These factors can contribute to the deterioration of the plaster. The solution to this problem is the use of special plaster nets.
Types of plaster mesh and selection criteria
The main criterion when choosing a plaster mesh is the thickness of the plaster layer. Plastering the ceiling without using a mesh is possible only if the base is sufficiently smooth, without rust, and the thickness of the plaster layer is less than 2 cm. If the unevenness on the ceiling is more than 5 cm, then experts generally do not recommend leveling the ceiling with plaster. In this case, it is better to use suspended or suspended ceiling structures.
To level ceilings with plaster, two types of plaster mesh are used: fiberglass and metal reinforcing mesh. The first option is used for ceilings with rustications and a plaster layer thickness of up to 3 cm. A fiberglass reinforcing mesh protects the surface from cracking. If the thickness of the plaster layer exceeds 3 cm, then there is a risk of it collapsing under its own weight. To avoid this, a reinforcing metal mesh is used.