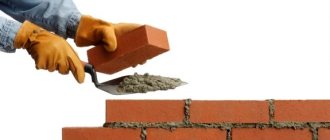
How is the jointing of brickwork done?
Experienced builders know what jointing is. Those who are working with bricks on their own for the first time need to become familiar with this procedure. We are talking about the final stage of sealing the space between the rows of masonry. Thanks to it, the seams and the walls themselves acquire an aesthetic appearance, and a reliable artificial obstacle is created in the path of atmospheric moisture. For load-bearing structures such treatment is not necessary, but it is always performed on the facade of the house and brick fences.
Seam jointing - types
There are several options for processing walls, where the seams are given a certain shape:
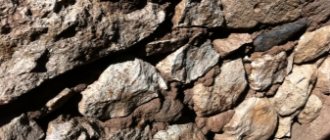
1. Semicircular concave - used to disguise bricks of different sizes in the overall masonry, as well as to decorate walls made of rubble or flat stone.
It is done quite simply, even if you don’t have the right tool at hand. Here you can use a curved steel rod (diameter no less than 10 mm). To make the seam neat, the brick wall is first smoothed vertically, and only after that the bed lines are unstitched. Finally, the “steps” formed at the joints are removed.
2. Pustoshovka (recessed rectangular) - suitable only for ideal masonry made of high-quality bricks with minimal deviations in linear dimensions and geometry.
To form a seam you will need a thin scraper. It is not sold in the store, but you can make it yourself by driving a nail with a round head into a small wooden block. They are used to fill the gaps between the blocks by simply removing part of the mortar to a depth of 7-10 mm. In this case, the brickwork looks more prominent due to the cast shadows. And so that the seams themselves become moisture resistant, they are additionally smoothed and compacted.
However, the use of this technology outside buildings is not recommended, as the waste area does not provide sufficient protection from atmospheric influences. More often, a similar scheme is used for interior cladding work, as well as for finishing natural stone.
3. Undercutting is the simplest flat jointing that turns the masonry into a continuous surface.
This is done with a wooden spatula or the edge of a trowel, when the solution has set a little, but has not yet crumbled under the tool. This treatment is only suitable for decorating internal seams or directly during the construction of load-bearing walls. Masons consider it to be obsolete, but for beginners this method is the easiest.
4. Single-cut or beveled - this type of jointing is considered the best scheme for working on a facade, since it allows the masonry to successfully withstand any atmospheric influences.
The hardened mortar, cut at an angle, effectively removes rain and melt water, preventing it from accumulating and penetrating into the pores of the brick. However, it is important here that the vertical jointing of the seams is carried out correctly: each line should move to the side by about 3-4 mm. You will have to smooth the mixture several times until you get flat slopes and grooves that drain water.
There are other technologies according to which stone or brickwork is decorated with relief, double-cut or super-convex decorative seams. However, without experience in such work, you should not take on it, since it is easy to spoil the appearance of the wall.
- Tools
- Grouting brickwork joints
- Mixtures
How to grout masonry joints
Brick jointing is required when restoring old walls. The technology may be associated with the execution of jointing in one color. Very often the mixture differs in color in different areas.
First, the surface of the dry mortar is cut to a depth of 1-1.5 cm using a hammer and chisel. After this, all its remains are removed. Cleaning should be done not only at the seams, but throughout the entire masonry. In order for the treated surface to look beautiful, the wall should be cleaned of dirt before grouting.
You can simplify the task if you blow out the cracks using a compressor unit. This will remove even the smallest crumbs and particles so that the fresh joint has the best adhesion. To prepare for the procedure, you will need a sharp, reliable instrument. This is the only way to remove excess mortar from the surface so as not to destroy the brickwork.
Next, all seams should be moistened with water and the jointing procedure should begin. There is no need to moisten the entire surface at once, since you can limit yourself to a small area that will need to be addressed in the next 1.5-2 hours.
In the store you can buy ready-made grout or dry grout, to which pigments or plasticizing additives have been added. When choosing a solution for jointing, you need to pay attention to its base. The seam can be processed using the following types of materials:
- cement;
- epoxy resin.
If you prepare the mixture yourself, then such a composition will be inexpensive. The simplest material used for grouting joints is a solution prepared from 2 parts of lime and cement, taken equally. You will also need fine sand in the amount of 10 parts. You should not mix too much of the composition, since its pot life is about 90-120 minutes.
For another recipe, recommended by experts, you will need to prepare ground volcanic traces and 5 parts of sand, which will serve as a filler. This composition is suitable for treating walls that have efflorescence and whitish stains from the seams. The prepared solution must be stirred until it has the consistency of liquid sour cream. It is important that it does not spread, but stays in a lump on the inverted trowel.
Why is jointing needed?
Additional processing, i.e. jointing or grouting the seams of brick masonry is done to protect the seams and the masonry itself from atmospheric moisture and premature deformation. This increases the stability of the walls and the entire structure, seals and waterproofs the masonry, and improves the thermal insulation of the house.
Figured filling of brickwork joints is becoming an important element of the aesthetic design of facades. The seams acquire a uniform color and shape. At the same time, minor errors and unevenness of the masonry are eliminated.
Jointing the seams gives additional decorative properties to the brick wall.
In addition, the jointing is used as an element of interior wall decoration. With its help you can add a special charm to the interior. A wall on which decorative jointing has been carefully applied will become an excellent backdrop for the decor as a whole.
Grouting of brickwork joints is also used for the restoration of brick buildings built many years ago. The walls of such houses usually have an unattractive appearance and lose strength due to partially deformed seams. New brick jointing for an old house will extend its life and give it an attractive appearance.
Method 3. Cords and tapes for seams and crack repairs
To solve the problem in more critical areas - in the bowl of a pool or reservoir, in the walls of the underground part of the foundation or the external walls of a house - serious measures and special means will be needed. Such repairs, although expensive compared to the “good old” methods described above, are many times superior to them in terms of functions, reliability and scope of application.
- Variety of products - there is a special material for each task.
- Tightness, durability, wide range of applications.
- For outdoor use and harsh conditions. Installation in winter is possible.
Disadvantage: high cost of material.
- The first 3 list items of the previous method.
- Tape or cord for “stone” cracks (selected depending on requirements).
- Polyurethane sealant for concrete, gun.
- Chisel, brushes, brushes, foam rubber.
Operating procedure
See points 1, 2, 3 described above.
4. At this stage, you should measure the depth and width of the space to be filled in order to correctly select the self-expanding cord.
5. Install the cord (tape) into the cut. With a depth of 60 mm, 18x23 mm tape is ideal. It should stay in the gap without tension, naturally. There should be 20–30 mm left for expansion to the bottom and top of the crack.
Attention! No type of self-expanding cord is subject to caulking or any other type of reinforced installation. It will fill all the space itself during the expansion process.
6. Fill the outer part with polyurethane sealant and smooth the surface with a spatula. We remove the remaining damp sealant with foam rubber. As a rule, the names of preferred brands are placed on the packaging of materials that require careful selection. Follow the manufacturer's recommendations.
In case of application in relatively dry rooms (basement, basement), where waterproofing measures are of an insurance nature, finishing sealing with cement mortar or cement repair mixture is allowed.
| Sealant | Release form | Unit price, rub. | Price kg, rub. |
| ELASTOSIL PU 20, Russia | Tube 600 ml, 500 g | 250 | 500 |
| 3M PU 575, Russia | Tube 600 ml, 500 g | 275 | 550 |
| Rubberflex Pro PU-15, France | Tube 600 ml, 500 g | 300 | 600 |
Crack repair cords are of particular interest, and we will talk about them in more detail.
Materials for concrete repair work include a huge range of products, different in price and purpose, that have appeared over the past 15 years. These are the results of scientific progress in the service of the national economy. These materials are mainly binders and are available in the form of cord, tape or continuous mat. The main components are modified clay, polymer resins and bentonite material (or an analogue). The purpose of their use is to connect two surfaces or seal them.
According to the form of release they are:
- Cord. For filling developed cracks of small depth (30–50 mm).
- Ribbon. For cracks, cracks and technological joints with a width of 20–50 mm and a depth of 50–150 mm.
- Mats. For connecting layers of cement (concrete) screed together when laying a new one on an old one.
- Water-reactive sealant paste. For filling small cracks.
Cords and tapes are called hydrophilic and have the special property of filling the space in which they are installed without creating excessive force (without crushing the seam). This happens in contact with water. That is, a dry cord laid in a crack remains dry until water appears. In contact with it, it swells and delays it, becoming a “cork”. When the water is removed, it returns to its original state. Such cords and tapes can increase in volume up to 8 times within 48 hours.
Binding mats are bentonite sheets impregnated with resins. Resins are activated in contact with liquid concrete (mortar).
The paste has properties similar to the cord, but is available in tubes. Especially for hard to reach places.
Hydrophilic crack fillers:
| Name, manufacturer | Release form | Withstands pressure, atm | Expansion coefficient, times | Price 1 linear m |
| "PLOUG", Russia | Tape, cord | 5,5 | 2,5 | 190 |
| G-Flex GX-7615, Alchimica, Ukraine | Tape 18x23 mm | 6 | 2,5 | 200 |
| Waterstop 1520, Greece | Cord Tape 18x23 mm, | 7 | 3,5 | 245 |
| FUMAX, China | Tape 18x23 mm | 6 | 2,5 | 320 |
| Hydrotite CJ-0720-2K, Japan | Tape 18x23 mm | 8 | 4 | 360 |
Process technology
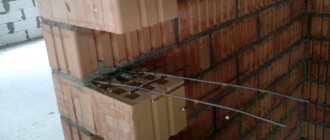
Fresh brickwork can be embroidered after building several rows. How many rows can be laid depends on the quality of the solution and the weather. So, it is better not to touch the liquid solution: it can be squeezed out of the seam and stain the wall. In dry weather, you should not postpone this work, especially if the brick absorbs water strongly.
When constructing the cladding using rods that normalize the seams, they should be carefully pulled out so that the mortar does not fall into the voids.
It is better to cut off the excess solution with a trowel so as not to interfere with it in the future..
- First of all, vertical jointing is performed. The pressure on the tool should not be too strong, otherwise you may squeeze out the solution when it needs to be compacted. It is better to press rectangular recessed seams, and not to run a tool along them.
- Then you can start sewing horizontal seams. This procedure is somewhat simpler.
- After these procedures, you should carefully inspect the masonry - it is necessary to eliminate all defects: holes, unintended holes (for example, from a nail on which a mooring cord was attached), differences in the depth of the seams. The easiest way at this stage is to use a semi-dry solution, which can be used to fill voids using the same jointing. If the masonry was made from facing hollow brick, it is important to ensure that the voids are not visible.
Advantages and disadvantages
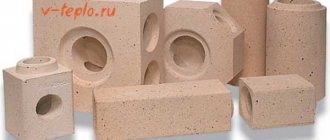
Ceramic brick is a traditional building material.
Like any material, brick has its pros and cons.
Among the advantages:
- Strength. The house will be durable, and its roof will definitely not collapse over time. No corrosion, no cracks - live at least a hundred years.
- Durability. The house can stand without repair for 100-150 years, which is a good indicator. Having built a country house, you can expect that your grandchildren will also use it.
- Environmental friendliness. Brick consists of sand, water and clay - it is difficult to imagine more natural components. It does not pollute the environment, easily allows air and moisture to pass through (in sufficient volume to provide the conditions necessary for a person, and not enough to cause a flood), and also does not rot or mold, which compares favorably with wood.
- Frost resistance. In the cold, nothing will be done to a brick house, which is an extremely useful property in the harsh Russian winters.
- Versatility of use. You can build a house of any shape (even round!), which designers and architects never tire of using. This is a very flexible material from which you can create any whim.
- Fire safety. Does not burn. If lightning suddenly strikes the house, or the owner falls asleep with a cigarette in his mouth, the furnishings may burn out - furniture, curtains - but the house itself will remain standing and the fire will not spread along the walls.
- Noise insulation. No noisy neighbors, passing cars and the inability to play drums at three in the morning. It filters out excess noise well, so a garage made from it is an excellent place for a rock band to rehearse.
However, there are also disadvantages:
- Small size. Construction using it is a troublesome and time-consuming task precisely because you need to manually place each brick in its proper place, coat the row with mortar and continue. No simple construction kits, like with 2 by 3 meter concrete blocks.
- Cement. When working with brickwork, you will have to supply water to the area and mix the mortar. In winter it is difficult to do this - at low temperatures the solution will simply freeze.
- Heavy weight. Brick, despite its size, weighs quite a lot and requires significant effort during transportation.
- High price. You will have to fork out money (and for KAMAZ, which will deliver the material to the house).
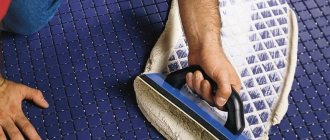
Cleaning masonry
Before repairing the masonry, after removing the old bricks, they begin to get rid of efflorescence, fungal infections, and graffiti. The repair estimate depends significantly on the chosen method of performing this procedure.
1. Mechanical. The most labor-intensive method, it is carried out using hard brushes, wooden scrapers or an angle grinder (grinder) with cleaning discs. When cleaning with a brush, due to the use of manual labor, the cost of performing the work increases; the process itself is time-consuming and does not guarantee a good result.
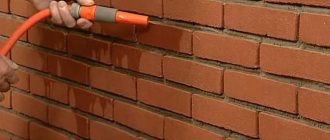
2. Washing. Water with added detergent removes minor stains. When carrying out the procedure, it is necessary to ensure that moisture does not get deep into the seams and does not corrode them.
3. Hydrojet. Occurs due to the impact on contaminants of a powerful jet of water from a hydro-jet apparatus with a high-pressure pump.
4. Chemical. To more effectively clean bricks from efflorescence and other contaminants, various special products are used - liquid or paste. The disadvantage is that it significantly increases the cost of restoration. Stains of tar, oils, and bitumen are removed using conventional organic solvents: white spirit, kerosene, turpentine.
5. Sandblasting. The compressor delivers a special type of sand to the wall with a strong stream of compressed air. There are four methods: classic, wet - for very dirty surfaces, with ice - to remove dirt from even the smallest cracks, fire - to clean walls heavily overgrown with moss or mold. Disadvantages - the surface is often damaged, chipping may occur; visibility during work is very poor; personal protective equipment against dust clouds is required; high consumption of sand.
6. Soft blasting. This is a type of abrasive blasting technology, which also includes sandblasting, but soft materials are used instead of sand. The main advantages are that visibility is not reduced, which allows you to control the process; the surface is not damaged due to the use of low-abrasive compounds; safety for humans and the environment.
7. Dust-free blasting with water. It is characterized by a complete absence of dust; after completion there is no dirt or waste left.
Restoration work also includes artificial aging of bricks. It is performed using soft blasting or without dust with water. Rates per square meter are the same as for cleaning. The surface of the masonry is made uneven, visually increasing its age. This effect is used to create a fashionable loft style in the interior and facade design of a house. Including such processing in the estimate does not significantly affect the final cost of repairs.
The choice of method depends on the type of prevailing contaminants. For example:
- stains from oils and soot, remnants of masonry mortar, old paint, mold - sandblasting;
- graffiti, paint, rust - soft blasting, sandblasting;
- plaster - before restoring a plastered wall, the old coating is removed mechanically with a chisel and hammer, then wiped with a stiff brush and the remaining dirt is washed off with a wet rag;
- efflorescence - metal brush and water;
- moss - any mechanical or abrasive blasting method.
Precautionary measures
When performing jointing work, you must follow the safety rules:
- use personal protective equipment: helmet, safety glasses or face shield, gloves, thick clothing, shoes with steel toe caps and thick soles, respirator;
- follow the rules for working at height;
- do not hang on the wall or lean on fresh masonry;
- do not work from random supports, use only scaffolding, stepladders and scaffolding;
- do not leave tools and materials on scaffolding unattended;
- Before using electrical appliances, make sure they are in good working order and that their insulation is intact.
To unstitch the seams, you will need personal protective equipment.
Compliance with these requirements will save your health and life.
What to buy for work?
You can select joints yourself. Before you begin the process, you need to purchase a number of tools:
- wire brush;
- a brush with hard bristles;
A set of tools for building a wall, as well as aligning seams
- soft brush or roller;
- special tool for jointing;
- wooden slats measuring 1 meter.
This listing is suitable for work during construction. In order to carry out the restoration of an old building, you need to supplement it with the following tools:
- perforator;
- blade made of wood;
- construction mixer;
- mixing container;
- trowel or trowel.
You also need to buy cement, lime and sand. You will also need plain cold water.
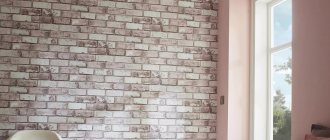
Kitchen with high ceilings, decorated in loft style
Cozy living room with large windows
Useful tips
To avoid mistakes, when working on jointing yourself, you need to take into account some nuances and advice from professionals. Here are some of them:
- It is necessary to sift the sand on a fine sieve so that there are no unnecessary elements in the finished mixture;
- The fresh solution must be given time to brew, at least twenty minutes;
- When forming a seam, you need to do the work carefully so as not to stain the vertical surface of the masonry;
- The concave type of seam allows filling vertical and horizontal lines at the same time;
- Excess mixture from bricks must be removed immediately, before the mortar hardens, as well as unevenness;
- It is better to carry out decorating work on dry days, when the air humidity level is normal;
- As the main tool, you can use an old knife or a metal plate.
It is also necessary to take into account the climatic conditions; on warm summer days the mixture will dry out faster, which will disrupt the work process. Therefore, it is recommended to mix the solution in small quantities with a special construction mixer or a hammer drill with an attachment. In all types of seams, except concave, it is necessary to follow a clear sequence of actions. It is necessary to control the evenness and clarity of the layer at the construction stage, since it will not be possible to correct errors with grout.
Sequence of the jointing procedure
Before preparing the grout, you must read the product instructions on its packaging. After this, you can begin making vertical seams. The composition must have the following properties:
- softness;
- plastic;
- density.
If the grouting solution is made liquid, it may flow through the masonry. Having made all the preparations, you can begin to carry out the work. To do this, you need to perform a series of basic steps:
- Use a trowel to apply a layer of grout so that it is larger than required to fill the joint. To prevent the bottom row of bricks from getting dirty, you can use a plasterer and place it in the right place.
- Remove excess mixture with a rib, smoothing the surface with the most suitable hand tool.
- Press down each seam firmly so that the space between the grout and the old mortar does not have any voids.
- Process horizontal rows using a strip, under which you will need to draw a straight line, like under a ruler.
- After completing the jointing of the brickwork, its front side will need to be cleaned of traces of mortar using a stiff brush.
- While the mixture is gaining strength, care must be taken to ensure that it does not dry out or get wet in the rain.
The special jointing used after the solution has set can be replaced with a piece of hose. Each seam should be smoothed and compacted slightly, pressing the compound 2 cm deep if necessary.
After summing up all the results, it is necessary to take into account some additional points, without which the jointing will not be of high quality:
- carry out the procedure in cloudy weather when there is no precipitation;
- start jointing with vertical rows.
The main advantage of jointing is considered to be an increase in the heat and sound insulation parameters of the wall. The jointing procedure allows for a high level of protection of the masonry joint from the influence of moisture on the wall surface. Brick laying under jointing is not only easy to use, but also durable when compared with a plastered surface.
What tools will you need?
Joining the joints of brick masonry can be done not only with the help of a ready-made tool. Some master masons have to make various types of hand tools themselves, without purchasing ready-made tools in the store. To obtain seams of a non-standard shape, only joints will not be enough. Tools with different configurations are required. Their set is determined depending on the condition of the brick wall:
- chisel;
- hammer;
- drill;
- concrete mixer;
- triangular trowel;
- hard brush and brush;
- soft brush or roller.
You can remove old mortar from the masonry using a sharp chisel and hammer. A hammer drill is ideal for this purpose. To prepare the grout, you need a drill with a mixer attachment, which allows you to easily mix the masonry mortar. For large volumes of work, a concrete mixer is usually used.
Apply the mixture carefully and then use a triangular trowel to remove any excess. You can clean the surface of brick walls using a stiff brush and brush. This type of work is performed after finishing the grouting and jointing.
You can use a soft flute brush to wet the strips. A wooden strip with a length of about 1 m allows you to comfortably support the tool for jointing brickwork horizontally. We should not forget that preparing grout requires a special container. It can be deep, but not too wide, otherwise the solution in it will begin to set faster.