Hygiene has always been a part of human life.
In ancient times, our ancestors carried out water procedures in mostly wooden barrel-shaped vessels. Scientific and technological progress has led to the fact that the materials used in the manufacture of plumbing fixtures have become more diverse. Today, the most commonly used materials are cast iron, steel, acrylic, and so on.
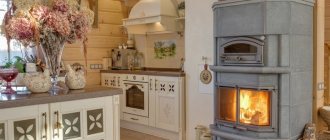
But despite scientific and technical progress and the emergence of various manufacturing materials, wooden bathtubs continue to be in demand. Now this is not only a functional plumbing item, but also a unique decorative item.
The popularity of wooden plumbing is explained by the fact that people today are increasingly striving for naturalization and greening, including in the interior. In addition, in appearance, such plumbing fixtures, made of wood, look very original, presentable and exclusive.
pros
Contrary to popular belief that wood is incompatible with water, wooden baths go very well with water treatments.
Some wood is even specially soaked before being used to make any item. Thanks to this method, the material becomes stronger and more reliable, but its price increases significantly. In a wooden bath you can relax with special chic, since the natural fumes emanating from wood have a positive and healing effect on the human body.
Plumbing fixtures made from wood are more environmentally friendly and will last for many years. It is important to properly care for it, otherwise its longevity can be significantly reduced. For example, it is worth soaking it from time to time so that the wood does not dry out.
A fairly important factor when choosing your sanitary ware is the external aesthetics of the wood species used in its manufacture, as this pleases the eye and increases the relaxing effect.
Interesting ideas
If the style you have in mind is quite calm, choose a matte finish. So, water leaks will be invisible, and the overall background will be more restrained.
- When choosing bright design solutions, give preference to a glossy surface, as well as tiles with decor.
- Cladding that imitates old wood, as well as with a relief surface, will give the design a special grace.
Remember that light colors increase space, while dark colors, on the contrary, reduce it.
Gallery: wooden bathtub in the interior (25 photos)
Cast floor waterproofing
Waterproofing mixtures for self-leveling floors can be laid hot or cold. With the hot method, the floor is poured with a mixture based on bitumen or asphalt concrete heated to +50...+120°C.
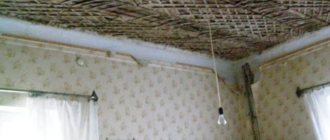
In wooden houses, the cold method is more applicable, meeting fire safety requirements. It consists of filling the floor with an epoxy mixture, liquid glass or polymer material. The first 2 types of compositions are laid under linoleum or laminate. Polymer self-leveling flooring is characterized by high strength and decorative properties, so it can be used as an independent coating without additional finishing.
Before starting work, the surface is cleaned, and the joints and seams are treated with sealant. Filling is carried out in layers. The final thickness of the coating should be 2-2.5 cm. To distribute the mixture evenly, use a notched trowel, and remove air bubbles with a needle roller.
Minuses
The disadvantages of plumbing fixtures made from wood include:
- high cost (natural ingredients are always more expensive than artificial ones);
- requirement for careful care. It is not recommended to wash pets or wash clothes in a wooden bath, because wood actively absorbs the smallest particles and detergents, which can subsequently negatively affect human health;
- Another disadvantage is that it is not recommended to wash too thoroughly in such plumbing fixtures, since human body fats are absorbed into the wood, which can damage its surface.
Types of Insulation Materials
There are various types of insulating materials available on sale. According to the method of application, they are divided into impregnating, sticking and painting.
Impregnating
Impregnated insulating materials are represented by mixtures of waterproof cement, crushed sand and various additives. These compounds impregnate the wood, making it impervious to moisture. This type of waterproofing is not used in residential premises, because... under the influence of high temperatures, the mixtures used release toxic substances.
Stick-on
This type of waterproofing is represented by roll and film materials made from bitumen or polymers. They are glued to the insulated surfaces using mastic. There are also self-adhesive materials with an adhesive composition already applied to them, covered with a protective film that must be removed during operation. To prevent water from leaking through the seams, the canvases are laid overlapping. They are covered with finishing materials on top.
Painting
This group includes mastics and emulsions, the main components of which are polymers or bitumen. After drying, they form a durable waterproof film on the surface. These mixtures are applied in layers.
Manufacturing technology
Plumbing fixtures made of wood are made in completely different sizes and shapes, and the quality can also be very different.
For the production of wooden bathtubs, special moisture-resistant tree species are used. Russian manufacturers most often use:
- oak;
- pine or cedar;
- nuts.
Foreign manufacturers use equally high-quality wood species , for example, wenge or zebrawood, which have a high level of moisture resistance and a low level of wear, making it durable. That is why earlier, and sometimes even now, these rocks were used for shipbuilding.
Today, before starting to make a bath, the wood is abundantly impregnated with antifungal solutions and, therefore, bathing in it is completely safe for health. In addition, various antiseptics and strengthening solutions increase the protective characteristics of the material, which allows it to maintain its original appearance for a longer period.
Assembling the plumbing begins with attaching small wooden boards to each other, which makes it possible to experiment with the shapes of the future bath. After this, the surface is polished and a layer of harmless varnish is applied to it, which performs protective functions.
Every year, manufacturing technology improves, new processing methods and means appear, which allows you to improve the quality and time of use of your plumbing fixtures.
How to make it yourself from natural wood?
If you know how to use carpentry tools and want to make a wooden bathtub with your own hands, this instruction is especially for you.
The most suitable option would be a model made of bars of different shapes and sizes fastened together.
First, let's decide on the necessary tool:
- marker or pencil;
- construction corner;
- electric jigsaw;
- plane;
- miter saw;
- Sander;
- roulette;
- angle grinder (grinder);
- varnish brush.
Step 1. First, you need to take measurements so that the bowl fits its owner perfectly. This can be done quite simply. Attach a wooden board to the wall at such an angle that it would be comfortable for you to lean on it while sitting on the floor.
Measure the distance from the point where the board meets the floor to the tips of your toes. Add 5-10 centimeters - this will be the length of the bottom that is comfortable for you. Finding out the width is also not difficult - measure the width of your hips while sitting and add 10 cm (5 on each side). This value will be a convenient width.
Making a bathtub from wood is not the easiest task. Without proper experience, you can simply ruin the material. Therefore, to begin with, it would be better to take not too expensive wood: pine or walnut.
Step 2. The next stage is making the bottom according to the dimensions obtained above. You will need perfectly straight boards (not twisted with a screw). It is desirable that their thickness be 6-10 cm.
The boards are cut to equal lengths. Holes are made at the ends for dowels (wooden pins designed to improve the adhesion of surfaces). Three holes will be enough.
Then the ends are carefully lubricated with epoxy resin, dowels are driven in, and the bottom elements are inserted into each other. Next, the entire structure is tightened using a carpenter's vice and left to dry in this position for 24 hours.
Step 3. After you are sure that everything has dried well, you can cut the bottom to shape. Draw an elongated oval with a pencil and cut out the outline using a jigsaw. Don't forget to drill a hole for the drain . This can be done on a milling machine, or using special crowns for wood. All that remains is to sand it well.
Step 4. In order to prevent contamination of the bottom with epoxy resin and other by-products, it must be sealed with strips of ordinary transparent tape. It is important to leave a strip along the edge as thick as the width of the bars. We will lay out the sides along this contour.
Step 5. Now you should cut the boards at an angle of 75 degrees as shown in the picture. This will allow us to form the main slope of the sides of the font.
Step 6. Next, they need to be cut into bars 15-20 cm long. The sides will be built from these unique “bricks”.
Step 7. The next stage is laying out the first tier of blocks. The bars should be thoroughly coated in the areas of adhesion with epoxy resin and careful attention should be paid to ensure that cracks and irregularities are completely absent.
After the row is completed, you need to walk along the top of the bars with a plane to level the surface.
Step 8. The following tiers are laid out using the same principle. For better grip, it is better to use additional weight, such as dumbbell plates.
Step 9. Once you have reached the desired depth (the optimal depth is 50-60 cm), you need to turn the bathtub on its side and start sanding. An angle grinder (grinder) with a large abrasive attachment is suitable for this. Carefully go over all the irregularities, you need to smooth out all the protrusions both on the outside and on the inside.
When doing this type of work,
be sure to use personal protective equipment : a respirator and headphones.
Wood dust can settle in your lungs, leading to respiratory problems. Step 10. Using a pencil, draw a curve line for the side of the bathtub.
Step 11: Trim off the excess. An electric jigsaw will help you with this.
Step 12. Go over all the sides with a plane to remove any unevenness. You also need to chamfer sharp corners.
Step 13. Next, you need to carry out finishing treatment with a grinding machine.
Step 14. Since the tree is afraid of water, it will need to be very well prepared for contact with it. How to cover the font? It is better to use a special yacht varnish that is used to cover the decks of wooden ships. It must be applied in 3-4 layers, covering all hard-to-reach places with a brush.
The wooden bath is ready.
Price
First of all, the cost is affected by the material from which it is made.
A quality product made from good quality wood will cost much more than cast iron or acrylic. This also depends on the uniqueness and elitism of this type of plumbing fixtures, since they are assembled almost by hand. There is no conveyor production, so each of them is actually exclusive. Before choosing the product you need, you need to find out its moisture resistance.
The best tree species are:
- wenge;
- teak;
- mahogany;
- larch.
It’s not just that our ancestors have been making sea vessels from this wood since ancient times. The cost of such baths, of course, varies greatly, but can easily exceed 10,000 . However, there are also more budget options, for example, walnut or birch, which will cost an order of magnitude less.
Ideal combinations
Wallpaper, plastic and metal elements, as well as natural stone, marble, brick or concrete will go well with wood-look tiles.
The combination with marble finishing looks especially luxurious; this option is a win-win.
You can combine designer tiles with ordinary ones - then the style will become more restrained, aimed at relaxation. Using one type of tile on all walls can now even be considered an anti-trend. Take the opportunity to create a unique design.
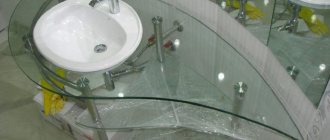
Wooden baths as an interior element
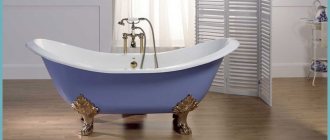
There is a wide variety of shapes and design features of wooden bathtubs.
There are both rectangular and more traditional oval or almost round ones. Sometimes there are quite extravagant shapes, reminiscent, for example, of a ship, a heart or a shell. This plumbing wonder will look great in almost any interior. Often it takes on the role of the compositional center of a bathroom design. Such interior sophistication looks very aesthetically pleasing and exclusive.
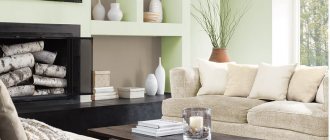
A wooden bathtub will fit very well into a minimalist interior or one made in oriental colors.
The bathroom should be decorated in natural colors, which should be as close to natural as possible. An ideal option would be a combination of a wooden font and a sink made of the same material.
As a design feature, you can install it on a special pedestal or dais. This will give her a special charm and draw attention to her even more.
Many designers love to work with wooden bathtubs, as this is a kind of interior design feature.
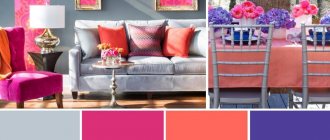
Color solutions
The most popular solutions are shades of brown and beige colors. You will add more exoticism to the design by using imitation of expensive tree species. These include mahogany, wenge, and, interestingly, rosewood designs.
White and gray colors make the interior elegant and expressive. By thinking through the color scheme, you will create a neat environment and unique style in the bathroom.
Types and forms
Wooden bathtubs can have a very diverse shape; one of the most popular are rectangular bathtubs with a built-in bed.
This is due to their very original and presentable appearance. Although the appearance of such an exclusive is somewhat rough, the bed present in it allows you to relax and feel real relaxation from water procedures. The varied designs of wooden bathtubs include various trays, sinks, shower stalls and much more. A bathroom decorated with wood creates the impression of nature surrounding a person, which has a very beneficial effect on a person’s emotional state.
Bathing devices in the form of barrels are very widespread . Such barrels have a large number of types and shapes, from oval to rectangular, etc.
Tile patterns
Even here you can show your imagination. After all, there are so many options for laying the slab. You can arrange the elements in a herringbone pattern; to do this, take narrow tile models.
Combine different textures and colors to create a pattern - it will be even more stylish. The diagonal arrangement increases space.
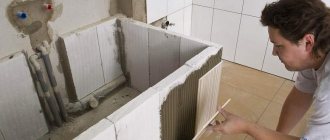
Benefits of bathroom design with wood tiles
- Ceramic tiles convey the unique texture and depth of color of natural wood.
- It is durable, moisture-resistant, heat-resistant.
- Condensation that settles on the surface can be easily removed with a soft sponge.
- Ceramics are not afraid of detergents and cleaning compounds.
- It has good waterproofing properties.